The Battle For Lion's Arch
The Battle For Lion's Arch
14![]()

Map of The Battle For Lion's Arch

Loading screen
| Image(s) |
|
The Battle for Lion's Arch |

“Storm the city of Lion's Arch to drive out Scarlet's invading armies. Split up to retake each front, and face the final challenge of the assault knights!
Contains story from Season 1 of Living World.— In-game description
The Battle For Lion's Arch is a public instance zone in Kryta. It represents the destroyed and hostile captured Lion's Arch during the The Battle for Lion's Arch story step in Living World Season 1, and it's based on the zone Lion's Arch (Enemy Controlled) from the original Season 1 releases. Although this instance is used for a story step, it is a Public Instance and can also be entered while not on the related story step.
Getting there[edit]
- Speak to Lionguard Peltgnaw just outside the gates of Lion’s Arch in Gendarran Fields or talk to Mist Stranger at the Eye of the North to enter.
Event schedule[edit]
Locations[edit]
| Area | Area objectives |
|---|---|
| Western Ward |
|
| White Crane Terrace |
|
| Canal Ward |
|
| Grand Piazza |
|
| Eastern Ward |
|
| Postern Ward |
|
| Priory Foothold |
|
| Inner Harbor | — |
| Farshore Ward |
|
| Bloodcoast Ward |
|
| Fort Marriner |
|
| Lion's Gate |
|
| The Breachmaker | — |
| Sharkmaw Caverns | — |
Interactive map[edit]
Events[edit]
- Retake the Pact bases to establish a foothold in Lion's Arch.
- Neutralize Scarlet's armies in key areas!
Sectors recaptured: x/12
 [Group Event] Stop the Aetherblade miasma deployment (80)
 [Group Event] Defeat the Elite Aetherblades (80)
- [Group Event] Defeat the Champion Aetherblade Admiral (80)
- [Group Event] Defeat the Champion Aetherblade Cannoneer (80)
- [Group Event] Stop the Molten miasma deployment (80)
- [Group Event] Defeat the Champion Molten Munitions Specialist (80)
- [Group Event] Defeat the Champion Molten Berserker (80)
- [Group Event] Defeat the Champion Molten Fire Shaman (80)
- [Group Event] Stop the Toxic miasma deployment (80)
- [Group Event] Defeat the Champion Toxic Spider Queen (80)
- [Group Event] Defeat the Champion Toxic Warlock (80)
- [Group Event] Defeat the Champion Toxic Wurm Queen (80)
- Scarlet has unleashed her assault knights to stop the Lionguard.
Assault knights attack in 1:00
 [Group Event] Eliminate the blue Dynamic Assault Knight (80)
 [Group Event] Eliminate the green Synergetic Assault Knight (80)
 [Group Event] Eliminate the red Static Assault Knight (80)
- Defeat all three assault knights within six minutes after the event starts (80) (hidden)
Assault knights flee in 15:00
Assault knights defeated: x/3
Assault knights rally in: 1:00
- If all assault knights are defeated
- The assault knights have been defeated! Return to the lion fountain to claim your reward.
- If the assault knights flee
- The assault knights have fled. The Breachmaker remains inaccessible.
Rewards[edit]
- Lion Champion's Chest (once per day per account)
- Chance of a Lion's Champion weapon
Walkthrough[edit]
The map begins under complete control of Scarlet's armies, with all except three Pact Emergency Waypoints contested. The uncontested waypoints are located in:
- Canal Ward (north) — associated with unlocking waypoints and events in Grand Piazza, Western Ward, and White Crane Terrace
- Bloodcoast Ward (south) — associated with unlocking waypoints and events in Bloodcoast Ward, Farshore Ward, and Lion's Gate
- Priory Foothold (east) — associated with unlocking waypoints and events in Eastern Ward, Inner Harbor, and Postern Ward
The map indicates area under allied control with blue borders as seen in Drizzlewood Coast and World vs World.
Areas can be captured by completing events. Each event involves clearing out normal enemies, followed by a champion in a subsequent event.
Capturing the three staging areas listed above allows capture of the remaining nine areas; further waypoints become available for use at this point.
Once all twelve identified areas are under allied control, three legendary Assault Knights appear:
- Blue (central) - Dynamic - Prototype Indigo
- Green (northwest) - Synergetic - Prototype Arsenite
- Red (south) - Static - Prototype Vermilion
Similar to the Octovine meta event in Auric Basin, all three Knights must be killed within one minute of each other to complete the event successfully. If they are not, they will resume with 33% of their health left. Players should therefore organise themselves to split up between the three Knights and redistribute during the fight by using the waypoints dependent on the progress of each event.
- Boss Mechanics
- Each boss uses an attack where it gains a defiance bar and places a large AoE on the field. Breaking the defiance bar causes the AoE to swap its position to whatever surrounding area it wasn't occupying. Being struck by the AoE will instantly down a player.
- Near each boss three colored circles can spawn on the ground. These will appear when the respective prototypes defiance bar's broken. Stepping into a circle grants a player the associated buff—Red Attunement, Green Attunement, or Blue Attunement—and collecting all three attunements causes them to be removed and replaced with Prime Light Attunement. Each active attunement that is a different color than the boss you are facing provides a damage bonus, while the one of the same color provides a decrease of incoming damage, so the best strategy to maximize outgoing damage and minimize incoming damage is to collect any and all of the colors whenever they're available.
Achievements[edit]
Refer to The Battle for Lion's Arch (achievements) and Escape from Lion's Arch (achievements).
| Commanding Heights | The Battle for Lion's Arch | 5 |
|---|---|---|
| Meet up with Lionguard Turma at Diverse Ledges.Mission: The Battle for Lion's Arch | Rendezvoused with Turma | 5 |
- From the Pact Emergency Waypoint in the southwest corner of the map, climb the cliffs to the southeast. Deputy Turma can be found next to a glowing contraption projecting purple light into the sky. This used to be a backdoor teleporter into the Breachmaker in the original release, if your character was wearing a set of Spinal Blades.
NPCs[edit]
Allies[edit]
- Various
Services[edit]
Foes[edit]
- Elite Aetherblade Boarder (During related events only)
- Elite Aetherblade Technician (During related events only)
- Charr (Aetherblades)
- Champion Aetherblade Admiral (During related events only)
- Aetherblade Grenadier
- Aetherblade Thug
- Elite Aetherblade Mechanic (During related events only)
- Veteran Aetherblade Grenadier
- Charr (Molten Alliance)
- Champion Molten Berserker (During related events only)
- Champion Molten Fire Shaman (During related events only)
- Champion Molten Munitions Specialist (During related events only)
- Molten Blademaster
- Molten Fire Shaman
- Molten Shadowblade
- Molten Smoke Shaman
- Molten Stalker
- Veteran Molten Axe Fiend
- Veteran Molten Bladestorm
- Veteran Molten Gunner
- Veteran Molten Igniter
- Veteran Molten Lava Shaman
- Veteran Molten Stalker
- Dredge (Molten Alliance)
- Molten Disaggregator
- Molten Excavator
- Molten Mining Suit
- Molten Oscillator
- Molten Ratnik
- Molten Resonator
- Veteran Molten Disaggregator
- Veteran Molten Mining Suit
- Veteran Molten Protector
- Veteran Molten Reverberant
- Humans (Aetherblades)
- Aetherblade Swashbuckler
- Aetherblade Taskmaster
- Elite Aetherblade Sharpshooter (During related events only)
- Veteran Aetherblade Swashbuckler
- Champion Toxic Warlock (During related events only)
- Toxic Damoss
- Toxic Hypnoss
- Toxic Nimross
- Veteran Toxic Damoss
- Veteran Toxic Hypnoss
- Veteran Toxic Nimross
- Norn (Aetherblades)
- Champion Aetherblade Cannoneer (During related events only)
- Aetherblade Striker
- Aetherblade Thumper
- Veteran Aetherblade Striker
- Veteran Aetherblade Thumper
- Spiders (Toxic Alliance)
- Champion Toxic Spider Queen (During related events only)
- Sylvari (Toxic Alliance)
- Toxic Assassin
- Toxic Bulwark
- Toxic Knight
- Veteran Toxic Assassin
- Veteran Toxic Bulwark
- Veteran Toxic Knight
- Prototype Arsenite
- Prototype Indigo
- Prototype Vermilion
- Twisted Horror
- Twisted Mender
- Twisted Reaver
- Veteran Twisted Horror
- Wurms (Toxic Alliance)
- Champion Toxic Wurm Queen (During related events only)
Objects[edit]
Dialogue[edit]
- One of the following when approaching certain Lionguard, if completed Scarlet's End:
- Lionguard: Legendary hunt there, killing Scarlet like you did.
- Lionguard: Look sharp. There's Scarlet's killer!
- Lionguard: Fantastic work killing Scarlet!
- Lionguard points at <Character name>.
- At Postern Ward
- One of the following when approaching Kasmeer:
- Kasmeer Meade: I'm so glad you're here.
- Kasmeer Meade: I'll watch your back.
- Kasmeer Meade: Oh no you don't!
- One of the following when approaching Marjory:
- Marjory Delaqua: In case I don't get the chance later, let me just say...I'm happy you're here.
- Marjory Delaqua: We'll get this done together, pal.
- Marjory Delaqua: No fight like the present, hm my friend? (chuckle)
- Kasmeer Meade: Tell me about your family. What are your mother and sisters like?
- Marjory Delaqua: Not much to tell. My mother sews dresses for a living. Two of my sisters are married, and the other is a Seraph.
- Kasmeer Meade: Do you think I could meet them someday?
- Marjory Delaqua: I don't know, Kas. Maybe.
- Kasmeer Meade: But...
- Marjory Delaqua: Let's talk about it later, when the world isn't crashing down around our heads.
- (Pause)
- Kasmeer Meade: So many dead. Have you ever seen anything so terrible?
- Marjory Delaqua: No. Never. Destruction on this scale will make the history books.
- Kasmeer Meade: The legacy of a lunatic.
- Marjory Delaqua: Calling her crazy diffuses the blame. This isn't madness; this is evil. Straight black. Blacker than a moonless night.
- (Pause)
- Kasmeer Meade: Get those survivors clear! This area isn't safe. Move them to the order camps outside the gate!
- Kasmeer Meade: Go on. Go with... the Lionguard. Why are you staring at me, Jory?
- Marjory Delaqua: I'm just admiring you.
- Kasmeer Meade: Is this really the time?
- Marjory Delaqua: Not like that. I'm admiring how strong you've become since you showed up, looking for work. You're amazing.
- Kasmeer Meade: You're a good influence.
- Marjory Delaqua: (chuckle) You aren't nearly as commanding when you blush.
- (Pause)
- Kasmeer Meade: After this is over, I think we should take a vacation. Somewhere warm, where nothing wants to kill us.
- Marjory Delaqua: I'd say we've earned it. Where do you want to go? The Grove? Rata Sum? Back to Southsun?
- Kasmeer Meade: Not Southsun! I said somewhere things don't want to kill us. I still have nightmares about karka.
- At Trader's Forum
- One of the following when approaching Marjory:
- Braham Eirsson: I'll follow your lead.
- Braham Eirsson: We got this, you and me.
- Braham Eirsson: Hey, friend. I've got your back.
- Rox: I'm ready when you are, mate. (upon approach)
- Braham Eirsson: I don't even like cities, but I'm not letting her have this one.
- Rox: As usual, we're thinking the same thing, my hairless friend.
- Braham Eirsson: Hairless friend? Seriously?
- Rox: What?
- (Pause)
- Braham Eirsson: This has got to be the worst scrap you've ever been in, right, Rox?
- Rox: Hard to imagine a worse one than this.
- Braham Eirsson: I can imagine one. Scarlet would be riding a clockwork dragon and...
- Rox: Have you eaten recently? You're getting loopy.
- Braham Eirsson: Now that you mention it, I am kinda hungry.
- (Pause)
- Rox: We need to talk about me going into the warband, you know?
- Braham Eirsson: What's there to talk about? You'll go, and the rest of us will make a guild without you. No big deal.
- Rox: Without me?
- Braham Eirsson: Well, you can't be in the warband and in our guild. You chose the warband, so...I'll miss you, but...
- Rox: Okay. I guess that's how it's got to be.
- Braham Eirsson: I guess so.
- (Pause)
- Rox: Hmmph!
- Braham Eirsson: Hmmmpf!
- Rox: You don't have to sound so...okay with it.
- Braham Eirsson: What am I supposed to do? Tie you up and force you to stay?
- Rox: No. Just sound like you mean it when you say you'll miss me.
- Braham Eirsson: If you can't hear it, then you're not listening.
- (Pause)
- Rox: Look, having a warband makes me respectable in the eyes of my fellow soldiers. Did you know that some charr spit on gladium?
- Braham Eirsson: What? Why?
- Rox: Not everyone, but some soldiers believe that a warband's sole survivor must have lost her nerve and let the warband down.
- Braham Eirsson: So, they'd rather you died along with everyone else?
- Rox: Yes, that would have been the honorable outcome.
- Braham Eirsson: Oh. And...have you been spit on?
- Rox: In more ways than one.
- Braham Eirsson: Well, if I ever see anyone do that to you, I'll-
- Rox: (laugh) Thank you, Braham. For being my friend.
- When the Assault Knights arrive
- Kasmeer Meade: This city has friends, you dummies! You can't have it.
- When fight against the Assault Knights begins
- Marjory Delaqua: Three of them? Scarlet never does anything small.
- Rox: Assault knight ahead. Don't leave a single one standing!
- When the Assault Knights have been defeated
- Kasmeer Meade: Another failure for Scarlet. Oopsie.
- When the Assault Knights retreat after event failure
- Marjory Delaqua: This isn't working. Run, Kas! Run!
Gallery[edit]
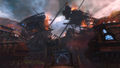
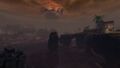
Gendarran Fields entrance to Lion's Arch in flames.
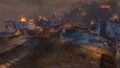
Destroyed Trader's Forum and Canal Ward.
Destroyed Postern Ward.
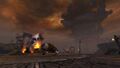
Fort Marriner in flames.
Destroyed Inner Harbor.

Destroyed Bloodcoast Ward.

Scarlet watches the Breachmaker at Sanctum Harbor.
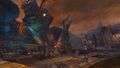
Destroyed Grand Piazza with the Breachmaker in the background.
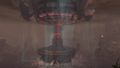
The Breachmaker after striking the ley line hub under Sanctum Harbor.
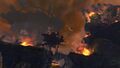
Western Ward in flames.

Destroyed White Crane Terrace.

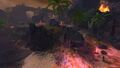
Priory Foothold.


.jpg)
.jpg)
.jpg)


.jpg)


.jpg)

See also[edit]
- Lion's Arch
- Lion's Arch (Under Attack!) (Original version from the 2014 Escape from Lion's Arch release)
- Lion's Arch (Enemy Controlled) (Original version from the 2014 Battle for Lion's Arch release)
- Memory of Old Lion's Arch