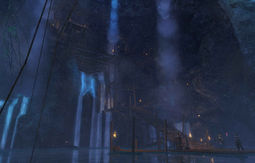
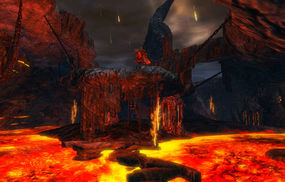
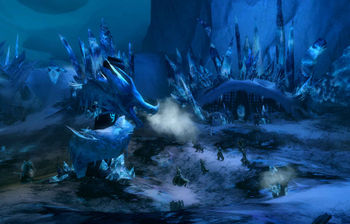
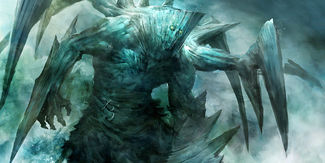
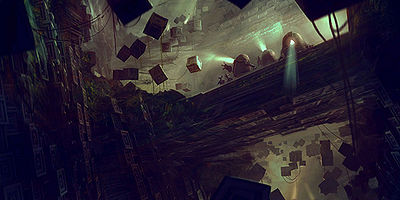
User:Lon-ami/First expansion theorycrafting: Jormag, Tengu and Far Shiverpeaks
This article is a personal Guild Wars 2 first expansion theorycrafting by Lon-ami, with focus on Jormag, Tengu and Far Shiverpeaks. It's entirely based on personal speculation, without connections to datamining or leaks of any kind.
Introduction[edit]
Another typical night at Hoelbrak. Snow was falling under the moonlight, warriors and hunters boasting in the Great Lodge between the fires and the moots. Rumors spoke of tengu venturing outside their walled city, and children were scared with tales of crystal dragon minions, disguised as normal folks, ambushing travelers across Ascalon. And then, they walked in. Sons of Svanir, probably. A small group. "Why are you here?" asked one of the Wolfborn guards, his partners hands ready to unsheathe their weapons.
Those pesky youngsters walked in often, drunk and seeking trouble. A good beating later, they would be off back to their hole. But these ones weren't drunk. They looked menacing, but they weren't looking for a fight. One of them, their leader, stepped forward, gazing up at the Wolfborn. "I'm here to break Jormag's tooth".
Slowly, silence took over the hall. Whispers. Then, like a storm, laughter reverberated across the entire lodge. Untroubled, the warrior kept walking towards the tooth, hung up in the center of the hall. The guard stepped in. "Don't try any tricks with us, boy. Where's your weapon?" With a flick of his fingers, the warrior sent a shockwave against the guard's chest, flying him off to crash against a table.
And then, there was the weapon. A huge greataxe, its blade buzzing with sealed power. Before any of the Wolfborn could raise a hand, the warrior charged and leaped at the tooth, the greataxe striking it from its side, clashing like thunder against a mountain. Sparks flew from the blade, and the tooth screamed. Once both were back on the ground, everyone saw the impossible. The warrior and his weapon had managed to do what no one could ever before: To dent the Fang of the Serpent. And not only that. A crunching sound followed the blow, the tooth splitting in two.
The lower half crashed against the floor, shattering the wooden pedestal and burying into the ground. Silence took over again, but nothing followed it this time. Then he spoke again, this time facing the entire hall. "We're ready. This day our hunt leads us north, our prey a dragon. Join us, and be remembered for all of eternity!". Behind him, another figure from his group stepped in, removing his hood to reveal the face of a woman. Flaming swords in her hands, she struck the tooth, halving it from side to side once more. Then she roared, and the entire hall roared with her.
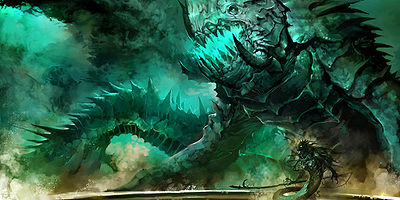
Guild Wars 2's first expansion takes the Champions of Orr north, to face the Elder Dragon Jormag and his minions, the Icebrood. The Pact will divide its troops into three different invasion forces, planning to surround Jormag's armies from the front and both flanks. The player will join one of these offensives at a time, and help the allied troops clean a way to the heart of his kingdom. There they'll join the rest of the Pact and lead a final assault into Jormag's Lair, finishing his reign for good.
However, the journey north will be riddled with many other threats. The players will have to cross the homelands of both Modniir centaurs and Flame Legion charr, as well as face new until now hidden enemies. The original playable races and professions won't be alone in this adventure, either. The Tengu will join them as the 6th playable race, together with a new 9th profession, the Watcher, a soldier using disciplined combat techniques.
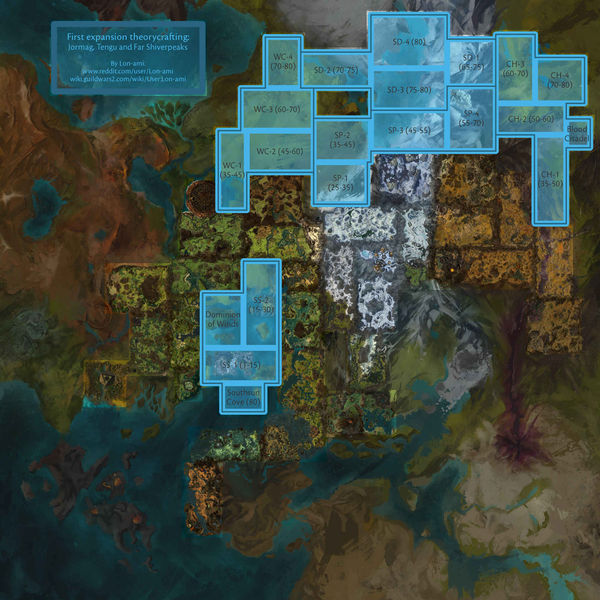
New continent: Far Shiverpeaks - 5 new regions, 18 new zones, 2 new capital cities[edit]
The Far Shiverpeaks have remained isolated from the rest of Tyria since long ago, surrounded by multiple conflicts as well as dragon corruption. The Pact's campaign against Jormag spearheads a new age of discovery and adventures into dangerous lands never explored before. Whether you are a fully geared veteran or a brand new player, you will be able to jump into the new zones from the very beginning. The classic dynamic level adjustment and the new Region Ranks systems will make sure you have a new and fresh experience you'll never forget.
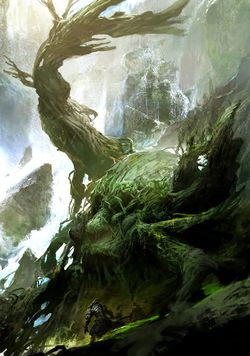
WC: Woodland Cascades (4 zones, 1 dungeon, 35-80)[edit]
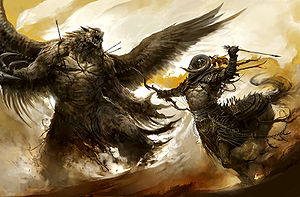
Homeland of the centaurs, ruled by the Modniir tribe, under siege from the east by Jormag's minions, and with a centaur civil war brewing up in the west. The Order of Whispers leads the western Pact offensive in the region, and they'll need to take control of the situation before the region becomes a warzone. For that, they'll need to manipulate the rebel tribes to the Pact's cause, and then overthrow the Modniir from a secure position that doesn't give any advantage to Jormag. However, the Modniir aren't alone. Helped by shadows from Kryta, they would rather see their lands fall to Jormag than losing their throne to the Pact.
- WC-1 (35-45) - Divinity's Reach (0), Queensdale (1-15), Harathi Highlands (35-45), WC-2 (45-60)
- WC-2 (45-60) - WC-1 (35-45), Harathi Highlands (35-45), SP-2 (35-45), WC-3 (60-70)
- WC-3 (60-70) - WC-2 (45-60), SD-2 (70-75), WC-4 (70-80), D-3 (70/75)
- WC-4 (70-80) - WC-3 (60-70), SD-2 (70-75)
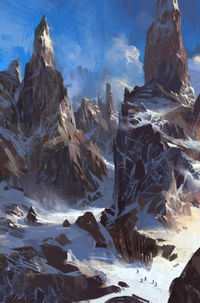
SP: Shatterpeaks (4 zones, 1 dungeon, 25-70)[edit]
When Jormag rose 200 years ago, the northern Shiverpeak Mountains crumbled and cracked beneath his shadow, giving the region its new name. The norn fled south, and only a few of them remained behind, nowadays still stubborn to give up their homelands. The Durmand Priory leads the main Pact force across the shattered mountains. Supported by the kodan and other races, they'll knock on Jormag's front door to give their allies time to arrive. In their journey, they'll uncover ruins of ancient times, and answers to questions not yet asked. Dangerous answers, soon in hands of dark forces.
- SP-1 (25-35) - Snowden Drifts (15-25), SP-2 (35-45)
- SP-2 (35-45) - SP-1 (25-35), WC-2 (45-60), SP-3 (45-55)
- SP-3 (45-55) - SP-2 (35-45), SP-4 (55-70), Frostgorge Sound (70-80), SD-3 (75-80)
- SP-4 (55-70) - SP-3 (45-55), Fireheart Rise (60-70), CH-3 (60-70), SD-1 (65-75) - D-5 (80/80)
CH: Charr Homelands (4 zones, 1 capital city, 2 dungeons, 35-80)[edit]
The original territories of the charr, north of Ascalon, remain savage and untamed even after centuries of civilization. The Blood Legion rules the eastern side of the region from their citadel, and the Flame Legion, leaderless and weakened by internal struggles, holds onto the land to the west. The eastern Pact offensive, led by the Vigil, has reached an agreement with the distrusting Blood imperator for safe passage and cooperation. However, things are never what they seem. Even now, the imperators of the High Legions fight for power against each other. Whoever controls the squabbling factions of the Flame Legion will be a step ahead in the road to becoming the next Khan-Ur.
- Blood Citadel (0) - Black Citadel (0) - CH-1 (35-50), CH-2 (50-60)
- CH-1 (35-50) - Blood Citadel (0) - Blazeridge Steppes (40-50), Iron Marches (50-60), CH-2 (50-60) - D-2 (50/55)
- CH-2 (50-60) - Blood Citadel (0) - CH-1 (35-50), CH-3 (60-70), CH-4 (70-80)
- CH-3 (60-70) - CH-2 (50-60), SP-4 (55-70), SD-1 (65-75), CH-4 (70-80)
- CH-4 (70-80) - CH-2 (50-60), CH-3 (60-70) - D-4 (80/80)
SD: Sea of Desperation (4 zones, 1 dungeon, 65-80)[edit]
Beyond the Shatterpeaks, the mountains are no more, breaking and sinking into the sea created by Jormag's rise. The frozen rocks form floating isles, the ruins of ancient cities buried within them, dead forests preserved in the ice. Jormag's minions infest the region, standing between the Pact and the dragon's lair far in the north beyond the sea. The three offensives of the Pact meet here, surrounding Jormag's kingdom from all sides. All their efforts reduce to a single attempt at breaching a way across the sea into Jormag's lair, to put an end to his reign for good.
- SD-1 (65-75) - SP-4 (55-70), CH-3 (60-70), SD-3 (75-80), SD-4 (80)
- SD-2 (70-75) - WC-3 (60-70), WC-4 (70-80), SD-3 (75-80), SD-4 (80)
- SD-3 (75-80) - SP-3 (45-55), SD-1 (65-75), SD-2 (70-75), SD-4 (80)
- SD-4 (80) - SD-1 (65-75), SD-2 (70-75), SD-3 (75-80) - D-6 (80/80)
SS: Sea of Sorrows (2 zones, 1 capital city, 1 dungeon, 1-30)[edit]
The body of water in central Tyria, 100 years ago Zhaitan's rising of Orr devastated the human towns across its coasts, including the Krytan capital of Lion's Arch. In due time, the surviving sailors and pirates rebuilt Lion's Arch as a free city, and managed to banish Zhaitan's minions and recover control over the sea. While the humans rebuilt, tengu from all around the world saw the disaster as a signal, and travelled back to Tyria, settling in the western coast where they built their new home, the Dominion of Winds. Wary of the other races because of past conflicts, they built a wall surrounding their new lands, staying isolated and neutral to the world outside. However, Zhaitan's minions infest the waters once again, and the influence of the other dragons spreads more and more with each passing day. Some tengu believe they can't ignore the world outside anymore, and so they'll fight, even if it that makes them enemies to their own people.
- Dominion of Winds (0) - Lion's Arch (0) - Caledon Forest (1-15), SS-1 (1-15), Kessex Hills (15-25), SS-2 (15-30)
- SS-1 (1-15) - The Grove (0), Dominion of Winds (0) - SS-2 (15-30), Sparkfly Swamp (55-65), Southsun Cove (80)
- SS-2 (15-30) - Lion's Arch (0), Dominion of Winds (0) - SS-1 (1-15), Gendarran Fields (25-35), Bloodtide Coast (45-55) - D-1 (30/35)
New dungeons - 6 new dungeons, 6 new story modes, 18 new explorable paths[edit]
The best treasure is always buried deep within the most dangerous dungeons, and the Far Shiverpeaks are no exception. However, this time difficulty will never be the same. With the introduction of the expansion, all dungeons, new and old, will be upgraded to include a new difficulty level selection system, similar to the one already used at Fractals of the Mists. Progress through 10 levels of difficulty, and choose the one that fits your group and equipment the best. Too hard for you? Try a lower level, and learn the basics in a friendly environment. Want a bigger challenge? Aim for the highest levels, and show the world how legends are born. Rewards are adjusted to the difficulty level, too, guaranteeing fair rewards for everyone. There's no better time to delve and bring light into the darkest dungeons than now.
D-1 (30/35) Largos Coliseum (Sea of Sorrows)[edit]
What was a small hidden largos town is now a nest of witchcraft, where largos, tengu and krait alike join forces to enslave and torture. A largos traitor and his followers make the old underwater town their home. With him he carries an old dragon-corrupted artifact that gives him control over water. A Sisterhood of tengu witches seeks the power of the artifact, and helped by manipulated krait they're supplying the largos with slaves and beasts for their coliseum. Largos and krait, sworn enemies since ages, will need to put their differences aside to stop this madness before the Sisterhood unleashes the power of the orb and taints the waters of the Sea of Sorrows forever.
D-2 (50/55) Ruins of Surmia (Charr Homelands)[edit]
One of the first Ascalonian cities to fall to the charr 250 years ago, the ruins soon became the key to controlling the supply lines between Ascalon and the Charr Homelands. Charr, humans, ghosts and ogres fought for it across the years, until Kralkatorrik awoke. In his flight south, the dragon corrupted the land, transforming it in what would be known as the Dragonbrand. The Ruins of Surmia were swallowed whole by the corruption, the dragon's minions infesting the long contested city. Now the Brand is starting to grow east, and the Sentinels can't fight it back. New dragon minions wielding mesmer powers disguise themselves between the troops and wreak havoc behind the lines. Some witnesses even claim having seeing none other than Snaff between the enemy. Whoever is behind, all signals point to the branded Ruins of Surmia.
D-3 (70/75) Modniir Bastion (Woodland Cascades)[edit]
Deep in the heart of the Woodland Cascades, this fortress is the seat of power from where the Modniir shamans rule centaur society with an iron fist. The rebel tribes siege the bastion from the west, but Jormag's minions pour from the east, too, the shamans and their magic the last barrier holding them back. The Order of Whispers faces one of their biggest trials to date: Infiltrate the fortress and kill the shamans, without letting the magical defenses fall, while Jormag's minions wait for any sign of weakness in the barrier to attack, and all before the rebels break in and mindlessly doom themselves. A madman's plan.
D-4 (80/80) Flame Legion Stronghold (Charr Homelands)[edit]
After Gaheron Baelfire's death, three factions rose in the struggle for Flame Legion leadership: The Molten Alliance, forged in the shadows long ago, and came to fruition when Baelfire was killed and his opposition to it gone. The Free Legion, a group of shamans refusing to follow any god, who accept women back into society. And last, the Destroyer Caste, an old group of shamans who worship Primordus and its minions, and have managed to somehow control their power. The Molten Alliance and the Free Legion fight each other. The first has the weapons, but the second has the numbers. The Destroyer Caste plays both sides, pulling the strings, but the Blood Legion has joined the match, too, supporting the Free Legion. The outcome of the battle will affect the war against Jormag directly, and so the Vigil will need to make a move and play the game too, even if they're left alone.
D-5 (80/80) Old Alliance Fortress (Shatterpeaks)[edit]
Beneath the Shatterpeaks lies an ancient fortress, built by the allied races that fought the dragons the last time they rose. The secrets within could prove valuable for the Pact's efforts, and so the Durmand Priory seeks to prospect the dig site once the region is secure. However, someone else found it first, an enemy lurking in the shadows, that shows its face now. An alliance of sinister forces: Inquest, Nightmare Court, White Mantle, Molten Alliance and Sisterhood. Inside the halls of the ancient ruins, the Pact will face its darkest hours.
D-6 (80/80) Jormag's Lair (Sea of Desperation)[edit]
North of the Sea of Desperation, far into the frozen oceans beyond Tyria lies the lair of the Elder Dragon Jormag. A towering fortress of black ice, floating in a sea full of ice floes, swarming with dragon minions. The Pact has pushed Jormag's forces out of the Sea of Desperation, and their forces now sail north across the waves. Icebreakers and airships alike breach across the waters and lay siege to the lair. Everything is ready for Jormag to fall, his reign brought to an end.
Personal Story season 2: The Elder Dragon Jormag - 10 new episodes[edit]
The flames of chaos rage once again. In the far north, the Elder Dragon Jormag calls his bloodthirsty legions of icebrood to gather and ready for war. West, the tyrannical Modniir leaders of the centaurs start to lose their grip on the other tribes, as their people starts to run out of food while the war against Kryta sees no end. East, the Flame Legion is locked in a civil war, which will inevitably extend to the other three High Legions.
But this time, the Pact is ready. Letting Jormag move first and take advantage of all of this chaos would be a fatal mistake, one they won't make. The Pact will assault the Far Shiverpeaks from three fronts: West, South, and East, securing the adjacent regions and surrounding Jormag's armies before they march south.
There, in the far north, the Pact will shatter the Elder Dragon's armies and put an end to his 150-years reign for good.
The skaalds of the norn will sing about the heroes of this war for generations. Stand up to this challenge, break the dragon's icy grip, and take your place among the heroes of Tyria. The time is now to write the second chapter of your legend.
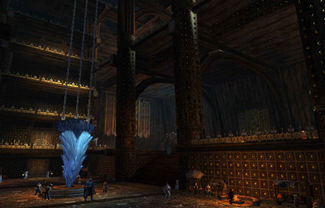
Personal Story season 2: The Elder Dragon Jormag is the expansion's new Personal story season. The Champions of Orr will travel north to face the Elder Dragon Jormag and his icebrood armies. The Pact will divide its forces in three offensives, covering a different region and flank each. One of the pivotal moments of the story will come when players decide which one of these offensives they'll join, which will shape a different story for the middle arch of the season.
The season has a total of 10 different episodes, of which only 6 will be playable by a single character, the other 4 remaining exclusive for additional characters joining the other two offensives. Both dungeons and open world interaction will play an essential role on the progression of the storyline, blending the Personal Story perfectly with the other elements of the expansion.
Episode I: The Fangbreaker[edit]
The Pact is gathering at Hoelbrak to discuss Jormag's growing influence over the northern regions. Representatives of multiple races meet with marshal Trahearne and various commanders of the Pact, and discuss the latests reports from the scouting squads in icebrood territory. There's signs pointing at Jormag's warlords, his most powerful corrupted norn champions, gathering their troops and returning north. Some of the attendants fear an attack is nigh, and urge the Pact to make a move before anyone suffers another Battle of Claw Island. Others argue Jormag has never moved outside his territory, and that the only problems coming south are the Sons of Svanir zealots wielding his power. The warlords are terribly dangerous but they've always been busy fighting each other for the glory of their dragon god.
The summit lasts three days, two of talks and research, and a third for weapon tests over the Fang of the Serpent. You have been asked to attend as a commander emeritus and one of the Champions of Orr. The famous heroes Eir Stegalkin and Zojja are present, too, as well as the tengu mentor, representing the tengu insurgents now working with the Pact. However, things never transpire as expected, and the fang may be no more before the second night is over.
- 1-1: The Pact has brought various icebrood test subjects to the summit's research lectures. Their research and development team, led by the Durmand Priory, has made astounding progresses on fighting the unnatural abilities of Jormag's minions, specially their characteristic aura of dark cold, which has proven more deadly and powerful the further Pact troops travel north. You preside one of these lectures, where you help Pact researches subdue different icebrood creatures in front of the audience, using new weapon prototypes. The session closes without incidents as dusk falls, but the dinner moot is interrupted by some strangers. They overtake the Wolfborn and manage to dent and break the Fang of the Serpent, the very thing the Pact has been trying to do for months.
- 1-2: The Fangbreaker and his comrades put up no resistance, and are imprisoned until the Wolfborn deem they are not a threat to Hoelbrak. Whatever they did to break the fang, it has enraged the test subjects, which have gone berserk, savagely breaking free by injuring themselves, to the point of death in some cases. As you're fighting the icebrood, the dead corpses of some of them merge and form a new hideous tall skeletal creature, which screams horribly paralyzing the crowd. Both Eir and Zojja recognize the creature as one of the Voices of Jormag. They fought one like it long ago, and they are the only ones to have survived a close encounter against its kind. They react quickly, and manage to neutralize the effects on themselves and yourself to be able to stand up and fight it. However, your blows do nothing, and the creature ignores you, searching for something instead. Could it be those who broke the fang? Zojja distracts the creature while you and Eir go back to the prison where the Fangbreaker and his comrades are confined, and free them. Using their infused weapons, they manage to break the magical shield of the creature, and you defeat it for good. There's no time for neither explanations nor celebrations. Mesmers start to get messages of multiple outbursts of similar characteristics going on across as far as Kryta and Ascalon, involving destroyers, branded and icebrood alike. The confused leaders try to organize an unified response before the enraged minions get close to populated areas, but the tengu mentor interrupts them. A huge destroyer champion has emerged in southern Kessex Hills, and it's assaulting the capital of his people, the Dominion of Winds.
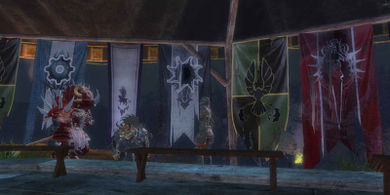
- 1-3: The northern wall of Dominion of Winds has collapsed on itself, and destroyers are pouring inside the city. The tengu were managing to hold the line just fine, but then a huge dragon champion emerged from the ground, breathing liquid flame on the northern houses, and menacing to burn the entire city to the ground. After Zhaitan's defeat, and the participation of some tengu on it, the emperor of the tengu agreed to establish diplomatic negotiations with the Pact and the other races, as to fight together against the Elder Dragons. The tengu are a race of honor, and months of negotiations could go to waste if the Pact doesn't keep their word. A timely help could wrap up the alliance for good, too. For the good of everyone, the destroyers must be stopped before they go any further. Once the situation is secure, the tengu mentor asks the emperor to join forces with the other races. Bound by honor, the emperor swears to pay the debt, no matter the cost, and declares Dominion of Winds open to everyone willing to fight against the dragons. Many lives have been lost today, but this new alliance might save many more in the future. New reports come in, the outbursts of enraged dragon minions seem to be dissipating. Everything seems to be back to normal... Except there's no answer from the peace delegations near Ebonhawke.
- 1-4: The human-charr peace delegations are located in Warrior's Crown, in central Fields of Ruin. A prudent distance away from the Dragonbrand, and with good enough defenses to resist any attack. Once you arrive, the camp looks fine. The outburst of enraged branded has affected other settlements in the zone, but it seems it didn't reach the delegations. However, once you talk with the leaders of the coalition, you discover a few mesmers were mysteriously murdered last night. The leaders have kept it secret, but they won't be able to hide it for long. They have checked and double-checked the forces on both sides, and found no potential spies, only veterans serving the delegations since months ago. If the murders are an insider work, mistrust would extend across the camp, risking the peace treaty talks. You help the tengu mentor and Zojja research the situation, and you discover some of the soldiers are lying. Eir's wolf companion, Garm, acts nervous, too. It wouldn't be the first time enemy mesmers infiltrate allied forces, but the other mesmers at the camp haven't detected anything. Luckily for you, the tengu mentor is a master of mesmer arts. You surround the suspicious soldiers, and he waves a hands and dispels their disguise, revealing them as crystalline branded minions. They try to run away, but the coalition forces have been warned, and you smash them to the ground before they can flee away. Right after it, the ground trembles and enraged branded minions attack the camp. Hadn't you arrived, the ambassadors would have been murdered, and the blame artificially placed on one of the sides, ruining the peace talks in the worst of manners. The threat has been eliminated, but this was far too intelligent for dragon minions. There's more than meets the eye. Are the dragons learning, and making a move? Is someone else directing these attacks? What's the role of the Fangbreaker on all of this? At least, there's no more reports of attacks, for now.
As the remaining branded are finished off, a laughter calls the attention of the group of heroes. There's a small cloaked figure standing atop the central tent. Zojja demands him to reveal himself, to which he answers she always was a disappointment of an apprentice, revealing the face of Snaff under the hood. A last laughter, and he's gone. As you turn around, one of the crystalline mesmer minions, reformed in the confusion, reaches and stabs Trahearne in the back, twice, before collapsing again. His breath stopped, silence falls in the camp, and only a distant laughter remains.
Episode II: Rallying the Pact[edit]
Trahearne will survive. He has escaped death by a narrow margin, in part thanks to sylvari biology. The best menders of the Grove will look after him until he has recovered, but before that, the Pact must move forward. Lying down on his bed, surrounded by order representatives and commanders of the Pact, a course of action is decided. The Pact will go to war against Jormag. The Elder Dragon's domain is heavily fortified, so straight attacks won't work easily. Instead, the Pact forces, reinforced by the orders and the major races of Tyria, will form three offensives, each one covering a front around the Far Shiverpeaks: West, South, and East. The current goal is to gather the troops, and secure the starting positions for each of the offensives.
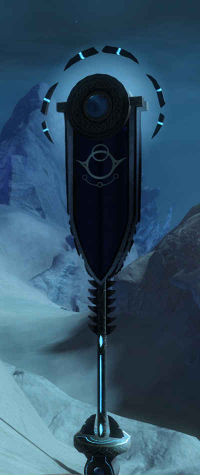
In other news, researchers have examined the greataxe of the Fangbreaker, as well as the other infused weapons of his comrades. The Fangbreaker claims to have obtained them from an ancient dwarf tomb far in the north, thanks to a vision from the Spirits of the Wild, though the designs don't look purely dwarven. His greataxe in particular is different from the rest. It seems to somehow cleanse dragon corruption, by absorbing and storing its energy for its own use. The blow to the Fang of the Serpent drained the tooth of any energy remaining on it, and it also produced an ultrasonic scream that riled up dragon minions as far as Kryta and Ascalon. There's no denying the weapon could be useful, and even prove vital for Jormag's defeat, but that doesn't exempt it from danger. So far, norn pack their gear and get ready to follow him by the hundreds. The norn wait for no one, and the Pact can't miss the opportunity of joining such a combined force, unseen since Asgeir Dragonrender's times. Keeping and eye on this new "hero" of the norn is mandatory, too.
The disrupting scream doesn't explain the sudden conduct of specific groups of dragon minions, either. They have shown intelligence in the past, but never at this level, with different types of minions coordinately attacking strategic points beyond their area of influence. An external agent could be influencing them for some dark purpose, and it's clear they tried to weaken the Pact's position as much as possible. Everyone must remain vigilant. Additionally, Snaff's incident will be looked into, but common consensus is it was some kind of illusion, aimed at confusing and distracting the allied forces, much to Zojja's dismay.
- 2-1: The first step is to rally the Pact, from expeditionary forces to out of service veterans. The Pact needs every able soldier if it's to succeed against Jormag. This mission changes depending on your previous choices during Personal story season 1, based on your order and who you recruited for the retaking of Claw Island. Durmand Priory members will meet again with researchers Barron and Fero, experts on dredge technology, or the Pale Reavers, an elite scouting squad of sylvari lead by Carys. Order of Whispers members will meet again with Benn Tenstrikes and Eilye Jeyne, together with their veteran mercenaries, or Professor Gorr, expert on dragon energies. Vigil members will meet again with Galina Edgecrusher and Snarl Backdraft, followed by their two warbands, or Fibharr Ygosson, joined by his norn comrades. Find and contact your old friends, help them with whatever matters they have at hand, and ask them to join the rest of the Pact for the campaign against Jormag, meeting them again in some of the following missions. Destiny's Edge decides to divide their forces to help each of the offensives, too. Logan Thackeray will lead the Seraph at the western offensive, together with the tengu mentor and his insurgents. Eir Stegalkin will watch over his people in the southern offensive, while Zojja spearheads the research teams of the Pact. Rytlock Brimstone will gather his Stone Warband to help in the eastern offensive, followed by Caithe and a few warden valiants. Great heroes of the norn like Jhavi Jorasdottir and Gaerta Whitebear will follow through too. Even Knut Whitebear will join his people on the march north, leaving his sons Skarti and Sigfast in charge of Hoelbrak.
- 2-2: The war between humans and centaurs reached a stalemate months ago, but the threat still persists. If the Pact is to attack the Far Shiverpeaks from the west, they have to negotiate with the centaurs. Unfortunately, the stalemate has made their leaders much more aggressive, and they aren't prone to listening, even if they have Jormag at the doors. Fortunately, the Order of Whispers always has an ace up the sleeve. The Modniir tribe rules the centaurs with an iron fist, with the other two tribes, the Harathi and the Tamini, following along. Nowadays things have changed, the war is draining way too many resources, and there's many dissenting voices against the Modniir. A civil war is in the brewing. The order has a contact, but he needs safe passage, and that includes bypassing a Modniir garrison. The Order of Whispers suggests infiltrating the garrison to create a distraction, and the Vigil suggests disguising as bandits and attacking a nearby supply camp. Once the contact is safe, the Pact arranges a meeting between him and Queen Jennah. It's long been suspected Krytan traitors had supported the centaurs in secret, and the contact brings proofs that all but confirm it. The civil war is now official, and the humans will support the centaurs and help them regain their lost northern territories in exchange of peace and their retreat from Kryta. If they succeed, the human-centaur war will be over. A change of leadership among the centaurs will make passage safe for the Pact, and Jormag won't be able to invade centaur lands. The centaur contact has paid the Pact for the help with old maps detailing the geography of the Far Shiverpeaks after Jormag's rise. These maps will prove valuable for the southern offensive.
- 2-3: The Blood Legion supports the Pact's eastern offensive, and will offer safe passage across the Charr Homelands, at least for half of the journey. The Flame Legion controls the northwest of the region, but they're weak and leaderless. They won't stand a chance against the combined forces of the Pact and the High Legions. Meanwhile, there's another problem south. The main route between Ascalon and the Charr Homelands has seen a worrying increase of branded activity, and in some sections, the brand has started to grow east. The Sentinels are in charge of the zone, but they can't turn the tide back by themselves. The Vigil has identified a series of branded devourer nests, and they suggest a straight attack to reduce the production of new minions. The Durmand Priory suggests contacting with the Ascalonian ghosts nearby, and making them clash with the branded. Once the threat is under control, the supply lines to the north are safe, at least for now. Some sentinels have seen what could only be the fake Snaff from Summit Peak, together with some minions, moving inside the Ruins of Surmia, a lost Ascalonian city in the middle of the Dragonbrand.
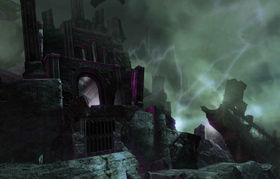
- 2-4: The southern offensive is the most important of the three. Thanks to the centaur maps, the Pact can now trace a clear route through the mountains north of Snowden Drifts, and avoid the main route from Frostgorge Sound, harder to transit. The first step is to establish a camp before the first icebrood defenses, and lead the initial siege from there. The icebrood won't make it easy, but with the norn and the Fangbreaker at their side, the Pact should be able to stand their ground against the onslaught. However, the dredge presence in the zone may be a problem. They fear the presence of the Pact will bring doom to their home, and they have established an outpost outside their mine, where they will fight tooth and nail even if they're clearly outnumbered and stand no chance. The Durmand Priory suggests using some ancient cursed dwarf artifacts to scare them away, and the Order of Whispers suggests sabotaging their water supply to force them to retreat. Once the dredge retreat, the camp can be established safely. However, some plans found in their abandoned outpost raise some questions. It seems there's dredge operations far into Jormag's territory, for what purpose, no one knows yet.
- 2-5 / Ruins of Surmia (story mode): Zojja has tracked and located the fake Snaff inside the Ruins of Surmia. Destiny's Edge has reunited again, together with the tengu mentor as a new member, and they plan to raid the dungeon and find the truth about the fake Snaff and the coordinated attacks. The ruined city is full of branded humans, ogres, and charr, who once fought for the city's control. Ascalonian ghosts plague its halls, and branded devourers build their nests in every corner. Illusions and hallucinations confuse the group, and branded mesmer minions guard the inner gates. And there, at the depths of the dungeon, Snaff stands. After an arduous battle, the heroes defeat him. And yet, there's no facade falling to reveal one of the mesmer minions. Using one of the infused blades from the Fangbreaker's gang, Zojja tries to cleanse and liberate the fake Snaff. Regaining control of himself, Snaff speaks. When he got caught inside of Kralkatorrik's mind, the Elder Dragon "saved" a copy of him, which he then put inside one of his minions, who is in soul all that Snaff once was. He has learned a lot about dragon energy on his slavery as a dragon minion, and this isn't Kralkatorrik's last trick, so they'd better remember this incident in the future. He's proud of Zojja and the rest, and is glad to be free, even if it's on his deathbed. Being a dragon minion in body, the cleansing will soon be his undoing. Before passing away, a last warning. There's someone trying to control dragon minions for their own use. He has no proof, but he felt it on Summit Peak. He's had lapses of free will since then, which he has used to research on the subject, as well as note his experiences, hoping someone would eventually find them. Killing their own former friend was a hard blow for Destiny's Edge, but now they will be able to move forward with new strength.
- 2-6: The three offensives start to move forward. The western offensive will land troops behind the enemy lines, and liberate human and centaur prisoners alike from the Modniir slave camps. Useless slaves have been disappearing, transferred to the Modniir Bastion, the capital of the centaurs, for some dark purpose. The eastern offensive is planning to expel the Flame Legion from the southern Charr Homelands, and secure a safe supply line. Little they know about the scope of the Flame Legion's internal struggles, and how the secret alliances of the Blood Legion could grow to destabilize both the region and the entire charr society. Finally, the southern offensive is getting ready to lay siege to one of Jormag's great dark ice walls, blocking passage into the heart of the Shatterpeaks. These lands have remained closed and abandoned since Jormag's rise, but someone else might have found a way in long before the Pact. The mission you choose will determine the offensive you join, shaping the next two episodes.
The journey will be full of hardships, but failure is not an option.
Episode III (Western Offensive): Whispers of Revolution[edit]
Cloaked amongst the clouds of a summer storm, the airships of the Western Offensive, led by the Order of Whispers, have landed the troops in a secluded valley in the middle of the centaur territory, beyond the main garrisons defending the borders. The garrisons are weaker from this side, and with the surprise factor in their hands, taking them down shouldn't be too hard. Help from the rebels is mandatory, not only for their numbers, but for their knowledge of the terrain and the enemy fortifications, too.
The first step is to ensure the valley's security, and then establish the headquarters for the region. Backup will be provided straight from Divinity's Reach, if necessary. Slavery is a somewhat recent tradition of the Modniir, born to the war's needs. For the Pact's forces, it's a double-edged sword to be aimed at the Modniir. By targeting key resource nodes, the offensive not only deprives the enemy of said resources, but also releases slaves that will join the allied forces. The Modniir must not suspect of the coming invasion, so stealth is mandatory. The longer they believe this is the work of some centaur rebels, the harder they will take the coming blow.
Once chaos spreads across the region, the rebellion must move a step forward. You need to convince the Harathi and the Tamini to join your side, or at least provide you with a safe route north. Both tribes dislike each other deeply, for the Woodland Cascades were Tamini territory, and the Harathi ravaged part of the region to build their siege weapons for the war effort. When the moment comes, you might have to prioritize one tribe over another, so choose carefully and keep balance, or the civil war might start amongst your own ranks.
With them at your side, the final step is to capture the garrisons at the borders, opening a safe route from Kryta to the woodlands. You've won but a battle, but the war has just begun. The Modniir are all but defeated, and they will surely answer to this civil war with all their might and fury. The moment of truth draws closer.
Episode IV (Western Offensive): Twilight of the Modniir[edit]
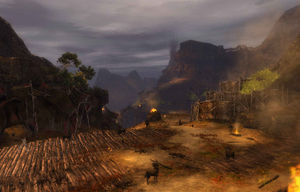
The Modniir don't take revolts lightly. Even if the Pact has the Seraph, the Harathi, and the Tamini at their side, the enemy far outnumbers them. Many centaur soldiers stayed loyal to the War King, High Sage of the Modniir, Ulgoth the Mighty, even if their own tribes stepped back. The leadership of the war king is far too strong, even after he had to retreat from Harathi Highlands after a disgraceful defeat. Without him, the centaur race would have fallen to their enemies long ago, be them humans, norn, dredge, or icebrood. He's a brilliant strategist, and if it wasn't for the peace treaty between charr and humans, Kryta would have long since fallen under his iron fist. The Modniir shamans under his command are responsible for holding the shields preventing the advance of the icebrood armies, too.
But one of his greater feats, if not the greatest, is recruiting the giant tribes of the north to his side. Giants that will now charge against the Pact's forces with all their might. The few of them that made it into Kryta proved to be terribly dangerous, and now they gather by the dozens, in lands where their mobility leaves no escape for their enemies. Not even the giant sequoias of the woodlands are safe. Fighting them head-on in their own territory would be suicidal, but the Order of Whispers knows better than to fight in the light. The giant leaders supporting the centaurs must be removed from power, and the mystery-shrouded oath that unites both races must be broken. If Jormag is what the giants fear, the Pact will give them shelter, and welcome any of them willing to fight against the Elder Dragon.
The final goal is the Modniir Bastion, the fortress of the war king, and seat of power of the Modniir shamans shielding the woodlands from Jormag. While this fortress stands, the Modniir will rule unopposed, being able to resupply easily after each battle. But, should it fall, the icebrood would swarm the entire region, slaughtering countless lives while growing their own ranks. The Pact must kill the shamans without letting the magical defenses fall, and quickly, before the rebels grow too impatient and decide to attack too soon.
In the depths of the bastion lies the truth behind the magic protecting the woodlands from the icebrood, and the war king's greatest and most secret ally: The White Mantle. A tyrannical sect of humans who worship the mursaat and only seek to seize Kryta's throne, removing the royal family and whoever else opposes them. The shields that protect the centaur lands are their creation and gift to the Modniir for their combined efforts against Kryta, an abomination powered by one of the lost ancient bloodstones, in turn fueled by constant sacrifices of slaves. The blood of the war king will be the last to be spilled over the dark altar, and once it's totally drained, the shields will fall. And when Jormag's armies come, you will do what must be done: Stand your ground against the darkness.
With the war king dead, and the icebrood invasion stopped, the centaurs can rebuild their home safely. The Western Offensive has successfully secured the western supply route, and recruited new unlikely allies between the centaurs and the giants. Now, the road to the next and final target lies ahead of them. Jormag itself.
Episode III (Southern Offensive): Preys of the Great Serpent[edit]
The Southern Offensive marches north, crossing the mountains to what once were the easternmost forests of the Woodland Cascades, now frozen and dead after centuries of endless cold and darkness. Even though these lands were once both centaur and tengu territory, they were abandoned long ago, and only a few scattered centaur camps remain, watching over the icebrood advance into their still intact lands to the west. These abandoned positions could prove good grounds for the outposts of the offensive. The centaurs keep their distance and shouldn't be a menace, but you should be ready for anything, specially if the norn procession decides to pick a fight with them.
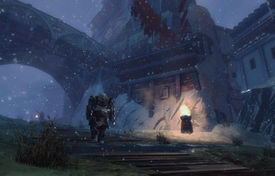
To the east of the frozen woodlands lies one of the great dark ice walls, blocking passage further into the Shatterpeaks. Surrounded by towers and walls of dark corrupted ice, like a wicked fortress of its own, taking it down won't be an easy task. The Durmand Priory leads this offensive, and their knowledge on dragon magic, together with the strength of the makeshift norn army, the skills of the Fangbreaker, and the firepower of the Pact, should be enough to bring it down.
Beyond the wall the southern waters of the Sea of Desperation clash against the last standing mountains of the Far Shiverpeaks. Some races still manage to survive in this harsh environment, among them many kodan who were trapped between the icebrood fortresses and couldn't continue their flight south to Frostgorge Sound. A few of these kodan have rejected their peoples' teachings, embracing the rage as the only way to balance. All but tattooed barbarians now, they consecrate their lives to fighting the icebrood day after day. Although far too distant from their more stable brothers, these barbarians could prove an invaluable asset for the Pact and the campaign against Jormag.
The main reason the kodan couldn't continue their journey south is a second wall, now at the rearguard of the offensive. The other side, the northern area of Frostgorge Sound known as Drakkar Spurs, is heavily surrounded by water, making assault far too complicated. But now that the offensive is at the northern side after taking the detour from Snowden Drifts, it can be brought down easily, letting the refugees get to safety, and opening a supporting supply route. Escorting the refugees across the breach could be a great way to seal the loyalty of the kodan barbarians to the Pact's cause, too.
However, the Pact is not alone. It's not the first time the kodan see airships near their homes. There's another force operating here in the far north aside from Jormag and his icebrood servants, an alliance of sinister forces: Inquest, Nightmare Court, White Mantle, Molten Alliance, and Sisterhood. This Sinister Alliance, which the kodan fear as much as Jormag's warlords, claims ownership of the lands east, and won't let anyone cross the mountains without a fight. There, in the mountains, they dig day and night. What for, the kodan don't know, but it can't be anything good. So far, they have managed to avoid conflict by sticking to the hills close to the water, but now they are plagued by the icebrood, and by land, the only safe way south is through their territory. The symbols of the airhsips described by the kodan sound like those of the Aetherblades. If Scarlet's Alliance is related to this new force in any way, the danger they pose might be bigger than even Jormag himself. The Fangbreaker could be an easy target, too, his greataxe raising interest in the enemy.
Conflict is inevitable, but you can't leave your original mission aside. After the kodan are safe, there's a third wall-fortress before breaching into the Sea of Desperation. Once that wall is down, you need to set up the headquarters for the campaign, from where the combined forces of the three offensives will launch the final assault against Jormag. The other two offensives depend on your success, so the wall must fall at any cost. The Sinister Alliance's presence is terribly dangerous and can't be left unchecked, but you'll deal with them once the headquarters are ready. You can't lower your guard, either. They might come for you first.
Episode IV (Southern Offensive): Scrying into the Darkness[edit]
Fort Dragonrender, named after the great norn hero Asgeir Dragonrender, first to injure Jormag before the Fangbreaker, overlooks the Sea of Desperation from its southern coast. The main defenses are ready and working, but the shipyards where the naval fleet will be assembled will still take some time. These ships are vital for the Pact's advance north, providing ground support at open sea and protecting the aerial fleet from the menaces coming from below the water. The offensive can't continue until they are ready, but that doesn't mean the Pact can afford any respite.
The initial deployment of siege weapons will hold the icebrood back for a while, until they notice what's going on and send their full army against the Pact. The concerns come from another menace, which may turn out to be more dangerous than even the dragon minions themselves. The Sinister Alliance, an evolution of Scarlet's Alliance, or maybe the original force behind all of it. They're here, north, digging around the area of an old fortress known as the Eye of the North, which was lost after Jormag's rise.
The Pact can't afford such a menace in their own backyard. This threat must be neutralized, immediately. However, the Sinister Alliance holds no better opinion of the Pact, and they won't let them neither strike first nor discover their plans. They came at dusk, and fire rained upon Fort Dragonrender. Many lives were lost, but in the end, not even this filthy alliance could stand before the might of the Pact, even with two third of the allied forces busy at the other sides of the mountains.
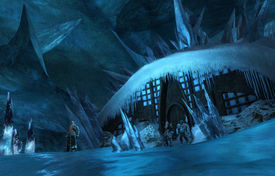
But as night fell, the real intentions of the Sinister Alliance were made clear. Their flagship aimed some kind of sonic cannon north, beyond the fight below, and fired. An unnatural scream knocked everyone off their feet. Disturbed by it, the icebrood beyond the walls frenzied and charged against the fort, dying by the dozens under the defenses' fire. Their mind lost to the rage induced by the scream, they kept coming endlessly, forfeiting their own lives to the bloodthirst. The sinisters retreated, leaving behind a few of their own comrades, who were slaughtered. The dead icebrood reformed into a monstrosity like the one from the day the Fang of the Serpent was broken, but the siege engines took it down before it could finish its transformation. The icebrood had been stopped for now, but the damage to the fort's defenses had been far too high. All able soldier would be needed to repair the defenses in time, and leaving the fort unprotected against another attack by the Sinister Alliance could jeopardize the entire campaign, so any kind of direct assault against the Sinister Alliance would be far too dangerous without reinforcements.
As the sun rose over the battlefield, the amount of problems grew even further. Some of the defenses had been sabotaged from inside during the battle, and the Fangbreaker and a few of his companions were missing. It's clear someone had betrayed them, explaining the precision and promptness of the Sinister Alliance's attack.
A small party of elite soldiers must infiltrate enemy territory in secret and as soon as possible. The sinisters can't be allowed to exploit the Fanbgreaker's greataxe for their evil plans, so it must be recovered. Rescuing the Fangbreaker himself is important, too, or once the news spread the entire norn army could cry out for revenge and go after him, leaving the Pact alone. Finally, that sonic cannon is far too dangerous. It must be destroyed, together with any other weapon like it in sinister hands.
All paths lead to the same single place: The giant dig site around the ancient Eye of the North. Here lies an ancient fortress, built by the old alliance of races that fought the Elder Dragons the last time they rose: Dwarves, Forgotten, Jotun, Mursaat, and Seers, seemingly on top of a ley line hub. The secrets within could prove valuable against Jormag's forces, but now the fortress is in the wrong hands. You must break into the main complex, and find a way to open a breach for the Pact forces. There you'll discover the truth behind the Fangbreaker's greataxe and the Sinister Alliance's sonic cannon. Deep inside the old ruins the sinisters found another of Jormag's fangs, together with an attached experimental device to inflict pain in icebrood dragon minions. The device is unstable and dangerous, powered by ley line energies, but they improved the design and created a new weapon, linked to the sonic cannons. This new version inflicts madness instead of pain, weaponizing dragon minions at their will with the correct stimuli. The greataxe of the Fangbreaker seems to work with the basics of the same technology, but the sinisters didn't know about its existence. The greataxe is perfect, the ultimate weapon of dragon energy control. With it's technology they could even get to control Jormag itself!
Leading the operations stands the betrayer, none other than the Fangbreaker's right hand, the female norn elementalist that has stood by his side for all this time. She has gone mad with power, and seeks to absorb Jormag's power and bend it to her will. With her sinister allies on the run and the Pact breaching inside their facilities, she flees down into the dark depths of the ruins. Defeated and surrounded, she unleashes the greataxe's power and lets dragon corruption run through her veins, losing control and transforming into an abomination. She's killed by the Pact forces while the fortress crumbles and the dragon minion test subjects on the labs above break free and go berserker.
Once things have settled down, the Durmand Priory will secure the old fortress, recover the plundered relics, and organize new digs for the still intact sections of the ruins. The Fangbreaker is safe, and the core of the sonic cannons has been destroyed. However, the greataxe holds far too much power. It can't fall into the wrong hands again. Once Jormag has been defeated, the Fangbreaker himself will destroy it.
There's so much to do now. The other two offensives will arrive at the rally point soon. Once the naval fleet is ready, the first phase of the final assault will begin. And this time, Jormag will be ready.
Episode III (Eastern Offensive): Flames of the East[edit]
The Vigil leads the Eastern Offensive across the Charr Homelands. Half of this region has been Flame Legion territory since centuries ago, but now that they're weak and leaderless after imperator Gaheron Baelfire's death, the Pact and the High Legions have an unrepeatable opportunity to subjugate the Flame Legion and secure the north. The Pact's help on taking down one of the great enemies of the charr would also seal the commitment for charr cooperation with the other races, and guarantee another step forward for the peace negotiations with the humans, specially with the Blood Legion and its imperator Bangar Ruinbringer, wary of the treaty, but stalwart supporter of the Pact's campaign against Jormag.
The Flame Legion is divided by internal struggles, but they keep it to themselves. The Dragonbrand, created after Kralkatorrik's rise, traced a new border across the Plains of Golghein, and signaled the beginning of an unwritten truce between the Flame and Blood Legions a few years ago, which has been respected since then. The prospect of a common enemy might reunite them once again, so there's no going back once the first tank crosses the border. They must be subjugated, and not allowed to reunite at any cost. In absence of an imperator, a conclave of shamans rules the main body of the Flame Legion, but their influence is minimal. The Godforged have lost their authority, and the centurions don't answer to their tribunes, going rogue and taking control of their assigned outposts, or deflecting to one of the three main factions fighting for power.
The first and most dangerous of these factions is the Molten Alliance, forged years ago in the shadows without Baelfire's approval. After the imperator's death, its leaders were free to do as they pleased. Allied with the dredge, they built terrible war machines surpassing the firepower of even the Iron Legion. Small groups of them caused havoc across Ascalon and the Shiverpeak Mountains, and months later they joined other factions in the Battle for Lion's Arch. They will sacrifice anything to destroy their enemies and subjugate the other legions. Their only weakness is their limited numbers, but they grow by the day with charr and dredge alike.
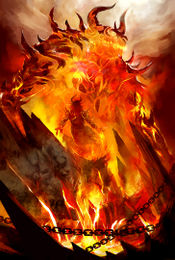
The second of these factions is the Destroyer Caste, an ancient sect founded 250 years ago, during the awakening of the Great Destroyer. Back then charr society was ruled by the shaman caste, who worshiped the titans as their own gods against the Six of the humans. The fulfillment of the Flameseeker Prophecies marked the downfall of the titans, and that of the shamans as well. A small group found the destroyers years later, and embraced them as new gods. They failed to control them, and three of the High Legions revolted against them, rejecting any gods. Only the Flame Legion remained loyal to the shamans, but even they refused to follow any god, working to ascend into godhood by themselves with their own magic. The Destroyer Caste remained in the shadows, knowing there was an even greater power behind the Great Destroyer, the Elder Dragon Primordus, that would one day raise and burn the world. With the death of Baelfire, they have stepped out from the shadows. They've made a lot of progress since Primordus awakened, and somehow, they can now control small groups of destroyers, as well as wield their magic. Their numbers and powers can't match those of the other groups, but they shine as a guiding light for a pious society who has lost its faith.
Finally, the third faction was born from disgruntled soldiers and peasants, and call themselves the Free Legion. They blame the shamans and their selfish traditions for the disgraces they have suffered, and clamour for a new society free of superstitions, where the shamans and their magic serve the charr, and not the other way around. Magic should cease to be a privilege, and every soldier should be able to wield it against his enemies. Their power is limited, but their numbers are the highest, quickly drawing the lower classes of society to their side. They could have been easily slaughtered long ago, but their leaders stay away from the light, and excessive suspect hunts could rile the population, making them stronger.
Soon, the conclave will be forced to relinquish to one of these three factions, which already rule de facto over most of the homelands, and promote their designated Khan-Ur descendant candidate to imperator. But this is just scratching the surface. The most dangerous weapon of the shamans is not fire, but lies and deceit. The real scope of the struggle for power is larger than what it looks like, for the members of the conclave all have their own agendas, and it's feasible to suspect each of the three factions has received support by some at them at some point. Some rumors speak about the Molten Alliance and the Destroyer Caste working together since the beginning, deceiving and dividing the Flame Legion to take advantage of the situation. Others distrust the modus operandi of the Free Legion, reminiscent of the dredge revolts.
After a series of battles against the various factions of the Flame Legion, the supply route is safe. Far too easy, almost as if someone cleaned the way. The first consequence of the invasion arrives soon thereafter. The conclave has summoned the leaders of each faction to a sacred hill sanctuary deep into their territory, where each candidate to imperator will have to prove himself worthy before the shamans. The chosen one will introduce his hand into a well of fire, and only if he's a true descendant will he survive to grab the keys to the inner sanctum of the imperators, where he will be able to ascend into godhood. The imperators of the other three legions have been invited too, as per Bangar's request. Weapons are banned at the sacred sanctuary, and the shamans wouldn't dare defile it, so the Ash and Iron imperators Malice and Smodur agree to attend with him and a small escort. There may still be room for peace between the High Legions.
Or there may only be blood. The candidate of the Free Legion reveals herself as a female, who raises her claws and casts flames upon the conclave. The female servants at the sanctuary unsheathe their hidden weapons and join her, too. They are part of the Free Legion too, which had been training women in secret since months ago, and not only in weapons, but in shaman magic too, a terrible heresy, directly supported by the Blood Legion. For Bangar Ruinbringer was part of the game, too, and there's nothing sacred for the charr. The conclave is slaughtered in their own sanctuary, moaning about their pitiful superstitions. A few of the shamans reveal themselves at the side of the Free Legion, and open the well for her. Daughter to one of the shamans, and a direct descendant of the Khan-Ur risen in secret since she was a cub, she extracts the keys without a scratch.
The shamans open two portals, one at each side of the sanctuary. One for the Free and Blood forces, that will take them north to their destiny. Another for the Ash, Iron, and Pact forces, that will take them back to the Blood Citadel. Bangar tells them not to interfere, and Smodur swears he won't get away with this, but it's too late. Their portal has closed, and Bangar's plan to reunite the Flame Legion once again reaches its finale.
Episode IV (Eastern Offensive): Daughters of the Khan-Ur[edit]
Whatever Blood imperator Bangar Ruinbringer is planning to achieve by working together with one of the Flame Legion factions, his scheming behind both Ash and Iron Legions, his allies, is completely unacceptable. The agreed plan was to subjugate the Flame Legion, requisition their weapon caches, and watch over them so they wouldn't cause trouble for the other legions anymore.
But now Bangar has been working with one of the splinter factions, supplying them with weapons, training, and more, since who knows when. The conscription of female charr, second-class citizens excluded from the military in Flame Legion society, is an admirable achievement. It's not known if male Free Legion charr welcome the abolishment of the rule against the females, but odds are high they support and took part on it. History repeats itself once again, with a charr conflict turning upside down with the burst of an army of civilians trained in secret for war. Still, even leaving their old tyrannical traditions aside, the Flame Legion, any Flame Legion, and specially one with double the soldiers from yesterday to today, is a terrible danger that the Ash and Iron Legions as well as the Pact can't allow in any way.
If the intentions of spreading the use of magic across the entire legion are true, then the situation is even worse. A strengthened Flame Legion with hundreds of spellcasters, and militarized like one of the other High Legions, united and without corrupted leaders, would pose a formidable army. With the Blood Legion nowhere to be found, now probably at their side, the gravity of the threat multiplies. Bangar has always dreamed of becoming the next Khan-Ur, and with Blood and Flame under his command, no charr could oppose him.
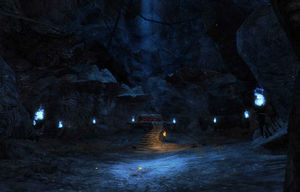
The girl must not be allowed to become imperator, and even less to tap into the power that would let her ascend to "godhood". If she did that, the rest of the neutral Flame Legion forces would rally under her banner instantly, no matter her being a female. The allied forces must push deep into the Charr Homelands, cleaning any Molten or Destroyer filth in their way, and lay siege to the ancestral Flame Legion Stronghold, an ancient charr city at the northern reaches of the homelands. Surrender, or annihilation.
Seems the Eastern Offensive isn't the only one frightened by the Free Legion. The Molten Alliance and the Destroyer Caste, now openly showing their alliance with the excuse of uniting against a common threat, have come in full force to lay siege to the city too. And they are not alone. A fleet of Aetherblades and a detachment of tengu witches marches with them. The Sinister Alliance. Even worse, they carry one of the sonic cannons, described to have been used against the Southern Offensive with dire consequences. These cannons can control dragon minions, which could explain where the Destroyer Caste got part of their powers from.
The four High Legions will need to unite against this common enemy if they want to survive. If the Flame Legion falls into their hands, the rest will follow suit. A situation worse than the one before couldn't be expected in any way, but charr know no fear. They've killed gods before, and no rains of fire, no swords of lightning, and not even great destroyers pouring from the ground will make them falter.
The battle at the gates is long and bloody, but the real deal lies inside the city, burning and infested with fleabags, smokelickers, and enraged destroyers. Hell broken loose, the likes not seen since the Battle for Lion's Arch. The only chance for victory is to unleash the power of the Flame Legion, and only a new imperator could do that. It wasn't easy, but after all, the girl was born for it. Wielding the ancient power of the Flame Legion itself, the new imperator, the first female in centuries, slaughtered every sinister on sight, bringing down the enemy flagship and its sonic cannon, and opening a way for retreat and regrouping.
The Sinister Alliance won't leave the city easily, but for now they can't push back. The only thing they can do is make a fuss and boil over with rage as the rest of the Flame Legion gathers around their new imperator. Bangar's intentions remain unclear. Now a hero for anticipating the Sinister Alliance's desire of enslaving the Flame Legion, keeping his support to the Free Legion in secret as to make sure the plan didn't leak out through spies, we may never know. The new Flame imperator offers peace as long as his people is left alone, tolerating envoys to watch over her promise if necessary, as long as they don't interfere. She also refuses to acknowledge herself as any kind of goddess, she's all she needs to be: A charr. Bangar shows his willingness to support the peace treaty with the humans further after the help of the Pact, too.
Smodur can't let charr society spiral into a civil war, not now, not ever. For a moment, both him and Malice felt it was inevitable. As always with charr, enemies make stronger bonds. He won't wait for another chance to test Bagnar's intentions. The Claw of the Khan-Ur has been brought from its secret chamber at the Black Citadel. It will be broken in four, one piece for each imperator. They haven't needed a Khan-Ur in centuries, they won't need it ever again.
Now there's other matters at hand. They say some norn see Jormag as some sort of deity. You already know what the charr think about gods. The final battle against Jormag awaits.
Episode V: Gates of Desperation[edit]
The Pact naval fleet is ready and waiting. The troops of the Southern Offensive reinforce the walls, as they await for the reinforcements of the other two offensives to breach from east and west. And Jormag's armies are already on the move. The fires of war have finally reached the Sea of Desperation, and the outcome of this conflict will mark the ending of an era. Of peace, or extinction.
Fort Fangbreaker is under siege. Dragons are held back by the airship fleet, but the troops below stand alone against the onslaught. These aren't mindless dragon minions who they are facing. These are Jormag's warlords, veteran norn warriors who have joined Dragon willingly, blessed by his powers in exchange of their servitude. Warlords with will of their own, that will not falter under any circumstance. They lead legions of elite warriors like them, organized like a disciplined army, and they command their own hordes of icebrood minions. For decades they have fought each other for Jormag's pleasure, and now they unite under a single banner. Jormag himself has blessed one of these champions, and the hordes will follow him and conquer all of Tyria. You've faced some of these warlords before, but now they're all here, at your doorsteps.
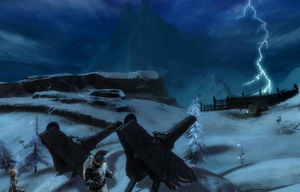
The Pact was ready for the assault, and the reinforcements from east and west successfully broke the siege. This was but a test, the first of many battles to come, and the blow was harder than expected. Back when Jormag first rose, the Spirits of the Wild were the only ones able to face him and survive. Their most ancient sanctuaries are here, buried under the ice. Their help could be the only way to turn the tide before it destroys everything in front of it.
The Sea of Desperation was formed when the devastating earthquakes of Jormag's awakening ravaged the sections of the Depths of Tyria right below the Far Shiverpeaks. The mountains crumbled, forming the hollow that got flooded by the northern sea. The dig sites at the Sinister Alliance grounds proved that some sections had survived, sealed by the ice from the sea above. Some of the old tunnels and mines of the dwarves could still be there, and with them, some of the ancient underground sanctuaries. Those originally located at the surface should be at the bottom of the sea, or encased inside the frozen pieces of debris forming the floating islands dotting the landscape. Others at further or higher mountains may still remain safe. The warlords might have salvaged and defiled them, too, which would require assaulting their dark ice fortresses before they find out about the Pact's intentions. The major Spirits of the Wild are Bear, Raven, Snow Leopard, and Wolf. Four sanctuaries. Well, there was a fifth, Owl, but she sacrificed and lost her life at Jormag's claws. However, there may still be a chance to receive her blessing. The five fought together against Jormag, and nearly lost. Now that he's much more powerful, four couldn't be enough. Jhavi Jorasdottir is a powerful necromancer with deep understanding of the spirit world and the Mists. She also carries the blood of Jora in her veins, the first norn to defeat one of Jormag's champions, his own corrupted brother Svanir. Knut Whitebear has taken care of his people since long ago, winning the title of leader amongst the norn. He also carries the blood of Asgeir Dragonrender, the first norn to injure Jormag. Both will seek these blessings together, whatever it takes.
The Fangbreaker has continued to build his legend, distant and cold after the events at the Sinister Alliance dig site and his partner's betrayal. He's still determined to fulfill his promise, and bring an end to Jormag's reign. It was here, this far north, where he found his greataxe, together with the other weapons, that are linked to it. He has guided some Durmand Priory scholars to the cave where he found them, which is now being examined. The original description of the cave seems to match the site, but there's some details that don't make too much sense... Might he be lying?
The scholars got no opportunity to interrogate him. The Fangbreaker was severely injured in a duel against one of the most powerful warlords. He managed to kill him, but the wounds left him unconscious. The morning after it, he was gone, and the weapons of his comrades turned against them, corrupted by their very energy they had fought against so well in the past.
Episode VI: Voyage to the World's End[edit]
The last of the great dark ice walls is the only remaining obstacle between the Pact and the northern sea, where Jormag's Lair breaks the waves and pierces the clouds. The firepower of the Pact has driven away the warlords and their hordes, but now they regroup and sharpen their claws. Surrounded in the northernmost corner of the Sea of Desperation, their demise would be a matter of time, but this enemy never sleeps and only knows the hunger of blood. The longer they stay safe behind their walls, the faster their armies of icebrood will grow back. And every hunter knows the most dangerous animal is the one surrounded and with no escape.
The Fangbreaker has been seen crossing the mountains north, deep into enemy territory, with deep signs of ice corruption in his body. He stole a few of the magical artifacts the Durmand Priory seized from the Sinister Alliance's dig sites before departing, particularly a few with the ability to consume dragon energy, in a similar fashion to his greataxe's, a few of them charged with high and dangerous quantities of it. The Pact has to assume he's fallen into the hands of the enemy, corrupted by his very greataxe, so helpful in this campaign, specially against the Voices of Jormag. It's too dangerous to go after him, and the Pact needs every able soldier at the front lines.
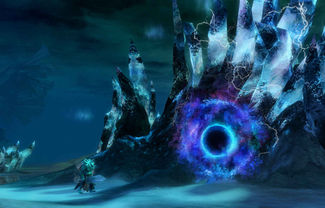
Jormag's most powerful minions guard the wall north. The warlords man their terrible siege weapons, the voices scream and raise new icebrood minions by the hundreds, and dragons infest the sky, between them two of Jormag's ancient dragon champions, doubling the normal ones in size and power.
Jhavi Jorasdottir and Knut Whitebear have returned from their final ritual after gathering each sanctuary's relics. Using an ancient jotun scroll thought lost after the Battle of Ice Crest, the ritual was successful, but the result unsatisfying. The Spirits of the Wild will come when hope is lost and shadows loom. Whatever the cryptic message means, their help can't be taken for granted. Their influence here, so close to Jormag, might not be enough to cast their blessings. The Pact is alone.
The ships of the Pact fire over the wall, opening the breach for the troops, who break in lead by Eir Stegalkin and the rest of Destiny's Edge. The allied races of Tyria clash against the corrupted minions of black ice and blow them to pieces. The airships fire at the dragons and keep them at bay. This is Jormag's last day on this world. Victory is at hand. And then the champion warlord of Jormag broke in, smashing anyone before him with his gigantic hammer. Grabbing Eir by the neck, he removes his helm to show the dead face of his father, Einar Cliffstrider, killed by the icebrood long ago, his grave defiled and his corpse risen to serve them. Her son Braham tries to save her, but his grandfather slaps him to a side with his helm. As her neck starts to break, she pulls out one of her carving chisels, and stabs it deep into the high warlord's chest, breaking his spine and rendering him useless.
As the warlord and her daughter crumble to the ground to finally rest in peace, the remaining forces of the enemy flee in panic. Or do they? A dark storm clashes against the remains of the fortress. Jormag himself has summoned a giant tidal wave against the Pact. The day turns into night, and the strength of the spell sweeps the sky itself, leaving only the darkness and the stars above the clouds. The Pact is trapped, with nowhere to flee, and even the airships will be doomed once they lose the ground support.
Then a light shines south. An army of yellow glowing spirits, from animals to fallen soldiers, charges straight from the Mists across what remains of the wall, shattering it to pieces, and blow up against the wave, breaking it and dissipating its force. The dragons above roar in rage, and retreat back to their master's lair. The spirits engage the remaining icebrood, and clean the way for the Pact ships to cross north. Braham wakes at her ghostly mother's hand, offering assistance to stand up. His father Borje and grandfather Einar fight at her side, too. Even the Spirits of the Wild themselves, towering animal forms of ancient power, walk among the Pact crushing their long sworn enemy. Even Owl.
The army of the Mists will take care of the remaining icebrood, and hold them back enough for the Pact to charge north across the sea. The icebreaker flagship crushes the floating chunks of ice in its path, as icebrood and sea monsters alike fight to stop its advance. The soldiers of the Pact fight with reinvigorated strength at the sight of their fallen friends and comrades, and the icebreaker crashes against Jormag's Lair, opening a hole to its depths.
The corridors of the Elder Dragon's Lair are full of enemies, crazed and frenzied at the Pact's transgression. The heroes reach the center of the lair, where Jormag itself sits looking straight at them, his gigantic figure tripling the size of the largest airships of the Pact. From beneath his shadow the Fangbreaker charges against his former allies, while the will of Jormag invades their minds with promises of power and threats of despair. The Fangbreaker wields the power of Jormag himself, but the heroes are strong, and the fight starts to tilt the scales in their favour. But then Jormag infuses his champion with even more power, healing his wounds. This fight is one the heroes can't win. However, something shines on one of his hands. One of the artifacts he stole, those who absorbed dragon corruption. Turning away from the fight, he raises his greataxe and throws it against Jormag. It crashes against the left side of his torso, breaking in pieces, but damaging a section of the Elder Dragon's impenetrable skin. Ignoring the ants at his feet, Jormag spread his wings and leaps out of his lair, breaking parts of the ceiling which collapse over the arena. The Fangbreaker, laying on the ground, points at an exit, and bids farewell before the magic holding his body dissipates and his dead corpse collapses.
The final battle and Jormag's doom draw closer. Boarding an airship, the heroes join the rest of the fleet, firing all the artillery against Jormag, who answers by crushing everything at his reach, and submerging and emerging using the water as an advantage. Wounded by the attacks, but still resisting thanks to his skin, a shot close to the Fangbreaker's wound destabilizes him, and he crashes right into his lair's spikes. Badly injured but still alive, unable to move the cannons finish him easily. The Great Serpent is dead. Jormag's reign is over.
The fleet returns south, to Fort Fangbreaker. The army of spirits was nowhere to be seen after the battle. The dead count by the thousands, but the Pact has done it again. Tyria has done it again. Two Elder Dragons lay dead at their feet, and soon the number will go up to six. Tyria is safe for now, and the soldiers have earned their well deserved rest.
Some Durmand Priory explorers have found a hidden cave close to where the two seas meet, and what looks like an ancient tomb inside of it. The description matches the original depiction by the Fangbreaker perfectly. Someone was here, not long ago, and he built a makeshift altar to the Spirits of the Wild. The ancient runes, similar to those found below the Eye of the North, talk about a dangerous weapon and a curse. About how anyone who wielded it would acquire incredible powers and defeat all of his enemies, but eventually fall into the maws of madness and reclaim the place of their dead foes as a worse terrible monster. We might never know who guided the Fangbreaker to this cave. Jormag, the Spirits of the Wild, or someone else?
It does not matter. Today the skaalds will sing about the saga of the Fangbreaker, and give him his well-earned place amongst the legends of the norn, together with all the heroes who put an end to Jormag's reign.
New PvE progression system - Region Ranks[edit]
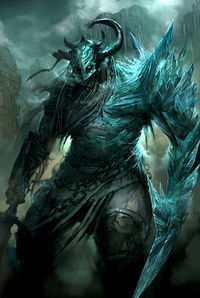
The deeper you venture into the north, the more you feel it. It begins as a whisper in your ear. With each step, it turns louder and louder, until it becomes a scream inside your own head. Jormag's influence is in the air, stronger the closer you are to him and the heralds of his will, the Voices of Jormag, towering humanoid monsters made of frozen pieces from beasts and warriors alike. It doesn't matter who you are, young recruit or strong veteran, no one can rush deep north without falling to the dragon's wicked promises of power.
To face Jormag, you must first face his minions, one by one, until the whispers are no more. Only then will you be safe to venture into Jormag's realm, your will only yours, not an easy prey to join the ranks of the dragon.
Region Ranks are a new PvE progression system across both the new Far Shiverpeaks and classic regions, functioning similarly to the World vs World Ranks system. If you venture north to the most dangerous zones without experience, you will become weaker and have a harder time. To preserve your strength, you must first face Jormag's champions across the first zones of the expansion. Level 80 characters will feel they progress even if they can't level up any further, and new characters deciding to level up in the new regions will gain resistance to Jormag as they level up normally.
Each region has its own account bound Region Ranks. Each time you gain classic experience, you get an equal amount of Region Experience for the region of the zone you're in. As you rank up, you get Region Ability Points, which can be spent on various new upgrades. These include passive bonuses of classic attributes like Magic Find, resistance against specific enemies and new utility skills. All the bonuses unlocked in all regions are available permanently no matter where you are. Unlike World vs World, each region has a rank cap, where you cease to gain Region Ability Points, and unlock all the upgrades.
The goal behind this new progression system is to reward world completion even further, preserving level 80 as the classic experience and item level cap, focusing on horizontal progression by adding new abilities and upgrades, instead of vertical progression by increasing level caps of the existing core systems.
New playable race - Tengu[edit]
The Tengu are an isolationist race of avian humanoids. For centuries, conflicts with other races took a heavy toll on their numbers, shrinking the extent of their lands and driving them close to extinction. It was then, in their darkest hours, when the Great Tsunami devastated the coasts across the Sea of Sorrows. The tengu saw this as a signal, and amidst the desolation, the clans united against Zhaitan's armies and built the walled city of Dominion of Winds. For decades thereafter, they have remained neutral to the conflicts outside their fortress, but the threat of the Elder Dragons grows further each passing day. Soon the races of Tyria will march to war again, and the tengu won't be able to weather the storm alone.
Long ago, the tengu clans were widespread throughout the world, weakening and divided from each other. The Great Tsunami of Orr's rising heralded the journey home, to the Dominion of Winds. To fight the armies of Zhaitan, they had to cooperate with one another, and thus the tengu clans unified becoming the four houses - North, South, East, and West, like the winds - allowing them to preserve their unique cultures while unifying as a whole. Each house has a different culture, but all uphold the tengu ideals: Honor, Family, and Tradition.
For a hundred of years since then, the Dominion of Winds has been the home of the tengu. Ruled by their emperor, the dominion remains the only completely tengu-controlled location in the world, last remnant of their fallen empire and last link to their old traditions. Wary of the other races and protective of their own culture, they do not allow anyone but tengu inside the city, and few of them ever leave it. No one bothers them in their dominion, and they do not bother others. Only in times of necessity or for trade do they venture beyond the walls.
However, the path to serenity is fraught with peril, specially in these days. If they don't stand together, even the strong will perish when the dragons make their move. Even the tengu, safe inside their walls. As an old Angchu proverb says, Idle wings attract evil claws. The tengu will need to make their move soon, too.
When you create your tengu character, you will choose which one of the four houses you belong to. The North house gathers the clans from along the Shiverpeak Mountains, stalwart and strong warriors forged in freezing gales atop the highest peaks. West is formed by the clans from the Maguuma Jungle, renown explorers across torrential rains deep into the wilderness. The East house assembles the mystic clans from the faraway Elonian sandstorms, gifted listeners to the secrets whispered by the wind. Finally, South gathers the intrepid sailors of Cantha, riding sea storms across the waves of the Unending Ocean.
As your character increases in level, you will gain access to a range of special racial skills that let you summon the winds to help you in battle. You'll blind your enemies with the fury of the desert sands, freeze them with the cold winds of the north, and strike them with thunder from the heart of the most savage stormclouds.
Your story begins in SS-1, a wild archipelago full of dangers, south of your people's home at Dominion of Winds. Here, at the southernmost border of the Sea of Sorrows, you will answer the call to arms against the undead, and reclaim a place of honor for your people in the world and the coming battle against the Elder Dragons. May your ancestors guide your path.
New tengu storyline: The Tengu Ideals - 3 new episodes for Personal Story season 1[edit]
It's been some years since you joined the Imperial Guard, the proudest day of your life. The order gifted you with ancient weapons and armor, worn by great heroes through the ages before you were even born.
Never would you imagine all those years of sacrifice would fall apart so easily. When the krait attacked, you broke your vows, disobeyed your superiors, and freed a band of insurgents. When the krait witch rose atop her leviathan, you did what was necessary to save your brethren. You sacrificed your honor, and all the ideals that made you a tengu.
Now you are in front of the emperor, stripped of your armor and your name. You've lost everything, but there's a glimmer of hope. An opportunity to redeem yourself, signed by everyone you saved. Honor, Family and Tradition. Clean your hands, and recover your name.
The Tengu Ideals is a new storyline exclusive for tengu characters. It's part of Personal Story season 1: The Elder Dragon Zhaitan, and is chronologically placed to happen parallel to the exclusive storylines of the other five playable races. Once tengu players finish this storyline, they join an order and continue with Personal Story season 1's storyline, eventually liberating Claw Island, forming the Pact, and defeating Zhaitan.
Tutorial[edit]
In the tutorial instance, you fight against a large number of krait attacking a tengu village next to the southern wall of the Dominion of Winds, in SS-1. You receive direct orders to fall back and hold the line, but some villagers are left behind, and you decide to go back for them. You join a mysterious mesmer, and together you free some insurgent prisoners so they help you fight the krait and rescue the villagers. After succeeding, you return with the rest of the guards to find the leader of the enemy, a krait witch riding a leviathan, fighting against your brothers in arms.
Insurgents and guards together manage to injure the beast, and make the krait retreat back to the depths. Heavily bleeding, you fall to the ground as the crowd cheers the combatants for the victory. When you awaken, you find yourself in a prison, accused of treason.
You're lead in front of the emperor himself, where you're told you've been stripped of your armor and your name. However, the villagers you saved vouched for you, and you will be given an opportunity to redeem yourself. Clean your hands by proving yourself in the three virtues of the tengu: Honor, Family and Tradition, and recover your name.
Episode I: The Burden of Honor (6 missions)[edit]
To get the Imperial Pardon, you'll have to prove yourself by completing three quests related to the three virtues of the tengu, starting with honor. Every tengu has its own ideal of honor, and yours is determined by your first biography option during character creation. There's three options, and each one determines the storyline of the first episode, where the emperor himself will test if you're willing to uphold your own ideals of honor. The options are as follows:
- Respect the Dead: A tengu heroine who died fighting against the risen has been brought back to life as a mindless servant, and now fights against those she once vowed to protect. Find her, and put her to rest before she becomes a threat for the Dominion.
- Preserve History: An ancient tengu relic has been stolen and torn to pieces by pirates. Recover the pieces and bring them back to the greatsmith Izu Steelshrike, so it can be restored to its former glory.
- Bring Justice: One of the krait generals behind the attack to the Dominion is back, strengthening positions dangerously near of the wall. He will be first but not last of his kind to answer for his crimes before the Imperial Justice.
In the three versions, the mysterious mesmer, now the tengu mentor, helps you in your quest, no matter your reluctance at working with him again for the problems it may bring. He's part of the insurgents, an underground group of tengu heavily against the isolationist politics. They seek to prove the tengu can rely on other races, and that only together will they be able to face the Elder Dragons.
Additionally, you start to shed light on hints of a bigger picture. Someone, potentially tengu, is working against the Dominion from the shadows. They're baiting the risen closer to the wall, and they've sold vital information to pirates and krait alike. Whatever the tengu mentor knows, he keeps his secrets to himself, at least for now.
Episode II: Standing for your Blood (4 missions)[edit]
Once you've uphold the tengu ideal of honor, the emperor gives you the second quest, to uphold the ideal of family. Bloodlines are very important for the tengu, and as every member of a family reaps the fruits of the heroic deeds of their fellows, they suffer the consequences of their wrongdoings as well. Your family is no exception, and now you must clean their image and regain their trust. The origins of your family are determined by the second biography option. Like the first episode, there's three options, each one determining the storyline of the second episode. They are as follows:
- Fishermen: Your family has lived off seafaring since centuries ago, even before the Dominion of Winds was built. Now their fellow fishermen look down upon them, and the merchants hesitate buying their fish. To make things worse, a monstrous fish has been terrorizing the fishermen along the northern waters. Some tengu blame your family for it, their sins having brought that disgrace upon them. These rumors, albeit stupid and unfounded, are hurting your family's reputation even further. Your mission is to find and capture the creature, and if there's any krait behind all of this, make sure they're next in line for terrorizing.
- Soldiers: There can't be peace without soldiers willing to fighting for it. Your family has a long history of successful military careers, dating back to ancient conflicts. Dishonored by your actions, they are now tasked with rookie duty, all but abandoned to the most menial tasks, far off the Dominion in a garrison near the Krytan border. By the fire, soldiers gossip about a mysterious warrior who roams the road at night, searching for a worthy adversary. By the sounds of it, this warrior must be a largos, a dangerous race of assassins from the depths of the sea. Find him, fight a duel and win. Easy enough, right?
- Merchants: Your family has always looked beyond the borders of tengu lands, far into foreign cultures and products. They are traders and travelers at heart, always striving to bring tengu goods wherever they can make a profit, to return with new exotic good to keep trade flowing. Since your incident, they've been having problems to find guards for their caravan, eventually being forced to hire foreigners from Lion's Arch full-time. Now they're accused of being on the side of the outsiders, all while bandits prey upon tengu caravans more and more each passing day. Give those bandits a lesson, and make trade flow back.
The tengu mentor keeps appearing out of nowhere to help you, and the conspirators against the Dominion show their face for the first time, spreading false rumors about your family to discredit you after you got involved in their businesses in the previous episode. They're a sisterhood of tengu witches, obsessed with dark prophecies, and they seek to make the clans fight each other, for what purpose, you don't know yet. Whatever they were planning, you manage to dismantle their operations, and they won't be a problem for a while. And most importantly, you successfully uphold the tengu ideal of family.
Episode III: Sails of the Dead Ships (5 missions)[edit]
The risen activity in the Sea of Sorrows is dangerously growing. Their raids have become more frequent and constant. Without an unified response, chaos could quickly spread its shadow across the Sea of Sorrows, blocking the trade routes between Lion's Arch and the settlements of the Tarnished Coast, and forcing fishermen of all races and nations to drop anchors and stay home.
The three orders of Tyria, Durmand Priory, Vigil, and Order of Whispers, suspect the risen have established a base beyond the Orrian coasts, a hideout from where they organize their attacks. Lion's Arch has its hands full with refugees fleeing from both the risen south and the centaurs north, and they can't risk sacrificing scouts with the risen so close to Claw Island, the last line of defense for Lion's Arch.
That's where the tengu come in. Ambassadors of the three orders meet with the emperor and his counselors, seeking aid. The council doesn't trust the orders, influenced by interests of outsider races, and they request more proof of this new threat before investing any resources on dealing with it, as well as proof that they can be trusted. Meanwhile, they offer the help of some outcasts, fallen in disgrace and out of official service, like you. Stay loyal to the tengu traditions while you work with the outsiders, and your redemption will be complete. You witness all of this in the first mission, a short story-only introduction, and then you're back in action:
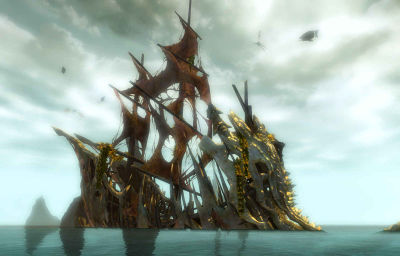
♪ Fair or foul the weather, O ♪
♪ The cap'n swears we'll make our part ♪
♪ Through the sun's burned to an ember ♪
♪ If the Dead Ships come and the darkness falls ♪
♪ Then we'll all go down together, O. ♪
♪ She's a restless sloop with a six-armed maid ♪
♪ A-dancing on her prow, O ♪
♪ Her brassy cannons crease the sea ♪
♪ But the weather's chased her down ♪
♪ Her compass spins, and her captain screams ♪
♪ And the crew's all dead and drown'd, O ♪
-"Weather the Storm"
- 3-2: The northern wall of the Dominion has been suffering from destroyer problems since some years ago. In the second mission, the orders need to gain the confidence of the Dominion by helping eradicate the latest plague of destroyers. The Durmand Priory has brought an experimental freezer weapon, and the Vigil has prepared a classic military intervention with ground forces and explosives to bury their burrows. Not long after your victory, a messenger arrives informing they've found one of the Dead Ships.
- 3-3: The orders have found a small risen hideout, with a Dead Ship anchored inside. The Vigil suggests ambushing the ship in open sea, once they're vulnerable and can't retreat back to their hideout. The Order of Whispers suggests placing mines near the entrance, and ambush the ship as soon as they get out. Once the ship is down and the hideout is yours, you discover the risen left a shipment of magical artifacts, prepared to be collected by another ship. This base was too small for such a growing threat, and the shipment could be a good lead to the real hideout.
- 3-4: The second ship is coming for their cargo, as predicted. Chances are high the destination of this cargo is none other than the theorized hideout beyond Orr, maybe to be converted into weapons for a large assault. The Durmand Priory has prepared a ritual to capture the risen captain and interrogate him, and the Order of Whispers has brought disguises to infiltrate the risen crew and examine their navigation charts. The results of the interrogation are dire. Some years ago, volcanic activity raised a new isle at the southernmost border of the Sea of Sorrows, now known by the name of Southsun Cove. From the first moment, the place was deemed unnavigable, the volcanic activity creating a permanent fog around the dangerous reefs. Seems like the volcanic activity ended years ago, and the current fog is a magical cloak for a huge risen base in the making.
With each mission, you report back to the emperor and inform him of your progress, and the magnitude of the threat. The first two times, your claims are dismissed by the emperor's counselors, as well as the leader of the Imperial Guard, and your loyalty to the tengu traditions is questioned, jeopardizing your quest for redemption. However, the third time, you can't tolerate the sheer stupidity of the counselors anymore, and you lay waste to everything you achieved so far.
Turns out this third time, the emperor had no counselors besides him, the tengu mentor taking their place instead and all of them being mere illusions. Then the emperor asks something of you: To break your vows once more, and to sacrifice yourself for the Dominion. Your redemption will be no more, and you'll officially become an outcast. The insurgents, secretly supported by him, will "steal" anything the orders need and help you complete the true goal behind your third and final quest.
- 3-5: The fifth and final mission of this episode takes place at a pre-karka version of Southsun Cove. The risen have an entire fleet anchored at the northern shoals of the isle, and your goal is to strike at them before they can react and lead their ships offshore for a counterattack. The Durmand Priory has developed an improved version of the freezer weapon, which is pretty effective in water-high environments. The Vigil wants an old good troop assault, flanking the risen forces and sinking their ships. The Order of Whispers prefers to sneak in and fill the ships with explosives, and then let the risen destroy themselves once they try to lift anchors. At the end of this mission, you'll join the order whose plan you chose.
As the entire risen fleet lies in shambles, an entire army in hibernation rises from the ground, overwhelming your troops. Just as the end draws near, the tengu fleet, lured by the insurgents, arrives and fires upon the risen army, slaughtering them all and putting an end to the risen menace to the Sea of Sorrows, at least for now. As the fogs clears to a bright summer sun, the leader of the Imperial Guard admits his mistake, and vows to pay this debt to the orders and to Tyria some day. Additionally, he offers to vouch for you and give back your place among the guards, even if you didn't stay true to tengu tradition and went too far with your involvement with the outsiders.
However, you refuse. You have a bigger goal now, with the orders and with Tyria, and a new name in the making. Southsun Cove will recover from the risen taint soon, but it stills remains a dangerous place so close to Orr. The tengu mentor will be leaving soon, busy chasing after the tengu sisterhood and their true goals. He has a friend, named Caithe, a famous hero of a legendary guild called Destiny's Edge. They disbanded after a painful defeat, but she will try to reunite them back, and he wants you to meet them.
From this point onwards, the story of the tengu players follows up with the original storyline of Personal Story season 1: The Elder Dragon Zhaitan. You will join one of the three orders of Tyria, help a minor race, liberate Claw Island, unite the Pact, become one of its commanders, and then defeat Zhaitan himself.
You lost your name, and everything you held dear. But now, you have a new name, and a new future.
New racial sympathy storyline: Dredge Revolution - 1 new episode for Personal Story season 1[edit]
The dredge are a mole-like race of industrially advanced humanoids. Slaves to the Stone Summit dwarves in the past, they gained freedom after the Transformation of the Dwarves and their assumed following extinction, inheriting their lands and technology in the process.
However, the freedom they cherish so much is slowly beginning to fade away. Their ruling caste, the Moletariate, has become a corrupt dictatorship that enforces slavery on their own people, and make dubious alliances with all kind of criminals. It's only a matter of time before the dredge start to revolt and take back their lost rights, an opportunity the orders could surely take advantage of to recruit more forces against the Elder Dragons.
Dredge Revolution is a new storyline exclusive for asura, charr, norn and tengu characters. It's part of the racial sympathy options of Personal Story season 1: The Elder Dragon Zhaitan, Episode V: Helping Hands. Once players finish this storyline, they continue to Episode VI: The Battle of Claw Island normally.
Episode V: Helping Hands (Dredge version)[edit]
Your order has been contacted by the sentinels. They have captured a rogue dredge, who refuses talking to anyone except a representative of one of the orders. Once you arrive, the prisoner is freed and left in your charge.
Once there's no ears around, he decides to talk. He comes from Moleyarsk, an isolated commune mining branded ore in the Blazeridge Steppes, to be used in dangerous experimental weapons. The commissar in charge is cruel and greedy, and he won't stop until he achieves crafting the ultimate weapon. He has gone so far as to turn his own comrades into slaves, and sacrifice them on weapon tests when they stop being productive.
The weapon is nearly complete. If he's not stopped, it will be surely used against the enemies of the dredge, which includes both your order and your people. This is the deal: You help him rescue his comrades, and he will entrust you all of the research materials for you to destroy them first-hand. You won't tell of this to anyone, specially the charr, or they could attack the facility and trigger the deadly weapons inside in their recklessness. You don't trust the selfish dredge too much, but if that weapon really exists, you must do everything in your hands to destroy it.
- 5-1: Against this oppression by the military in charge, revolution is the only answer. The guards walk outside periodically to get wood for the furnaces. Ambush them, steal their suits and infiltrate the facility. Once inside, breach the armory, and distribute the weapons among the rebel sympathizers. With the workers suited for battle, the rebel leader will reveal himself, making the guards abandon their positions of advantage to chase and capture him. The workers and you will then take advantage of the situation, and attack the guards in the vulnerability of the mine's grounds. Then you'll ram the commissar's headquarters, kill him and acquire the dangerous research materials. The plan carries out perfectly, the rebels having prepared the operation for months, but there's a last-minute setback. As you're ramming at the commissar's headquarters' door, you discover there's dredge prisoners locked inside the test chamber, together with dragon minions the commissar set free. It's either their lives, or the commissar. The rebel leader doubts, but ultimately decides to liberate his comrades, and you kill the branded before they reach the prisoners. Unfortunately, the commissar has escaped in a transport with a working prototype, as well as some blueprints.
- 5-2: The commissar and the surviving guards can't be too far. After you destroy the research materials the commissar left behind, the rebel wants you to examine the test chamber, where you confirm his fears. There's asura technology there, pointing at an alliance between the commissar and the Inquest, who have a base nearby, InGenium Research Facility. The commissar will surely try to contact them, so you must make haste. You arrive late, and witness a gathering of both forces. The Inquest representative is angry because they were never supposed to meet. The commissar acts arrogantly, and menaces them with the weapon. The Inquest give the commissar the final component for the weapon, and the commissar gives them the blueprints. He will finish building the weapon, and fire it at the rebels, killing them together with any proof of this operation. You can't let the Inquest have the information, so you have to intercept them before they reach their base. You defeat them, and discover how the weapon works. It's a similar prototype to the Mark III Sonic Vaporizer, another deadly dredge weapon using icebrood dragon magic. The new branded version is even more unstable and dangerous. One of the surviving Inquest laughs. The weapon is a failure, and not even their component can't fix it. It will overheat and explode, killing everyone around it, commissar and rebels alike, and leaving no proof of this alliance. The rebel leader screams at him on how can he dare manipulate his people like this, and he answers that not the Inquest, but the dredge's own leaders, the Moletariate, is behind all of this.
- 5-3: Many dredge rebels are injured, and you won't be able to evacuate Moleyarsk in time. Your only option is to prepare defenses and face the commissar. Members of your order come in to reinforce you, as well as a group of sentinels, for the surprise of the rebel leader. Your order mentor warned them against the dredge's orders. This is a fight the dredge can't win alone, and the sentinels are experts in fighting branded. He accepts the help, and the charr promise they will let them leave peacefully once this is over. The commissar arrives, and branded summoned by the weapon attack the gates, breaking in. After a few waves, you're forced to step back into the reinforced headquarters. The commissar steps inside the mine with the weapon, offering a quick death if the rebels give the research materials back. The rebel leader answers the materials are no more, and that they will never surrender. The commissar enrages, and overheats the weapon to summon a huge branded minion. The weapon loses control, and the branded monster slaughters the commissar and his lackeys. Then it knocks over the door to the headquarters. You manage to defeat the branded and the monster, but the weapon's crystal bar is broken and useless. Without nowhere to channel the energy, the Inquest's component, an energy core, is overheating. The survivors run outside just in time to witness Moleyarsk blow up.
The remains of the broken and useless weapon were volatilized in the explosion, and the dredge rebels are safe, but have lost their only home. It doesn't matter, it wasn't safe anymore. Now both the Moletariate and the Inquest will believe they are all dead, and they will be free to start a new life in hiding. Before leaving, they give you their word. When the moment comes, they will pay their debt with your order and help you fight the Elder Dragons. Your order will keep an eye on both the Moletariate and the Inquest, and make sure to be ready if they ever ally again.
New racial sympathy options[edit]
As of now, each playable race can choose between three different minor races to help. With the introduction of dredge, this number will rise to four per race. The new options are as follow:
| Minor race | Asura | Charr | Human | Norn | Sylvari | Tengu |
|---|---|---|---|---|---|---|
| Grawl | 1 |
1 |
0 |
1 |
0 |
1 |
| Hylek | 1 |
0 |
1 |
1 |
1 |
0 |
| Ogre | 0 |
1 |
1 |
1 |
1 |
0 |
| Quaggan | 1 |
0 |
1 |
0 |
1 |
1 |
| Skritt | 0 |
1 |
1 |
0 |
1 |
1 |
| Dredge | 1 |
1 |
0 |
1 |
0 |
1 |
As before, characters of any playable race can unlock minor races normally not available to them by playing with friends of other races. If these friends have chosen the desired unavailable minor race, players can accept credit for their mission progress, effectively unlocking their friend's chosen minor race, no matter the restrictions above.
New profession - Watcher[edit]
Watchers are disciplined martial fighters who don't waste any single blow, calculating each movement to find the best way to deal with their enemies. What they lack in brute strength and magic, they make up in reflexes and dexterity. A skilled watcher faces his enemies head-on, and knocks them down with a single blow. Patience, cold blood and control make them fearsome soldiers, who excel at fighting with short bows and swords.
Brute force is for untamed beasts, sorcery for the weak and treacherous. Only those in peace with themselves can walk the path of the Watcher and become true masters of combat.
The art of the watchers was born from a mix of different slow-paced combat styles, but its basics are a combination of martial arts and armored combat. Much like guardians were born from Elonian influences, watchers took their share from Canthan arts. Where guardians lean towards protective magic training, watchers polish their physical skills until they become one with their weapons.
Legend says its first practitioners were two groups of norn and tengu, that got trapped together with a kodan sage in the western Shatterpeaks after Jormag's rise. Surrounded by the icebrood and with nowhere to flee, the tengu monks couldn't pierce their thick frozen skins, while the norn warriors cut limb after limb without besting the monsters. The monks took the weapons of the fallen, and managed to cripple some of the beasts, but they were too vulnerable in their light armor.
The kodan noticed that, alone, they were weak, but joining forces, they could be strong. Both groups set their differences apart and joined together, sharing their knowledge. To face these new enemies outnumbered, they needed armored defense and well-calculated offense. And thus, the Watchers were born.
Eventually, the first waves of Jormag's minions were over, and both groups had survived. Unfortunately, the kodan sage didn't survive his wounds, but his lessons on balance and unity lived on. The combination of tengu meditation techniques and the norn links to nature and the beasts of the wild grew into different styles of combat, each based upon different wild animals. As more refugees of different races gathered around their fire, the arts were improved even further. And thus, these new soldiers watched over the shattered valleys, slaying the icebrood before they came too close to their settlement.
Half a century later, all the tengu clans would be called to fight Zhaitan and establish a new homeland, unified together. The other refugees had left long ago, and with the tengu being called south, only the norn remained behind, too stubborn to give up their homelands. The northern tengu brought the unique combat techniques south, proving their effectiveness against Zhaitan's mightiest minions. The other tengu clans embraced the discipline, improving it even further and adding new animals as inspiration for the combat styles. Nowadays, watchers form the bulk of their armies.
Aside from the tengu, the profession remained mostly undervalued, with only small groups of humans, norn and charr embracing similar self-developed disciplines. Some kodan use similar techniques as well, but only the Order of Whispers refined and adapted the profession to its needs long ago. Now that the tengu are abandoning their long isolationism, the different techniques merge into each other, and the way of the Watcher extends to the furthest corners of Tyria as an example of cooperation and union against the Elder Dragons.
As soldiers, watchers use heavy armor. Like most of the other professions, they use two swappable sets of weapons. They prefer agile weapons, like swords, daggers, axes and bows of any size, and leave aside slow or noisy weapons like hammers, pistols or rifles.
Unique mechanic - Foresight[edit]
To defeat your enemies, you must know them first. Pay attention to their moves, discover their weak points, and then vanquish them without mercy. Watchers build up Foresight by using specific weapon skills, dodging enemy attacks, or suffering critical hits. While your enemies waste their energy slashing at you, you'll watch their movements, and then strike at their weak points before they can get their breath back.
By roaming the world, watchers gain knowledge to meditate and develop special combat techniques based upon different animals and spirits. These techniques are the secret weapon of the watchers, and they only unleash them fueled by their foresight, leaving their enemies no chance to react. Watchers can store up to six foresight points, which they can spend on Martial Blades mechanic skills. Watchers use their own special blades to perform these skills, each one themed around a different animal. Raise one blade on each hand to strike like a mantis, or hold three blades in a hand to rend like a bear.
The mechanic bar of the watcher consists of six hexagonal resource charges, together with three mechanic skill buttons. These three skill buttons use the by default F1, F2, and F3 keys, and can be customized with the different martial blades mechanic skills obtained from each animal. Each of these animal-based combat movements requires its own amount of foresight charges, and all of them are free of recharge.
Special skill types[edit]
In addition to using foresight and martial blades mechanic skills, watchers have a range of special skill types at their disposal, such as Dual Chains and Counteraction.
- Dual Chains: Watchers excel at martial arts, applying its benefits to armed combat as well. While other professions have the ability to use a sequence of skills from a single movement, in what is known as chain abilities, watchers are able to replicate the same formula across two different movements. A classic chain ability is limited to the first skill slot, but in the watcher's case, chain abilities fill two different skill slots. The sequence in which skills change applies to both chain abilities, and not just the one you're using. Attacking with two different dual chain abilities yields a completely different result depending on which one you use first. Additionally, watchers don't arrange weapon skills like the other professions. In the classic model, the main hand weapon determines the skills at slots 1, 2, and 3, while the off hand weapon determines slots 4 and 5. In the case of watchers, the main hand weapon determines the skills at slots 1, 3, and 4, while the off hand weapon determines slots 2 and 5. Dual chains are located at slots 1 and 2, allowing combination of chain abilities from different weapons.
- Counteraction: By patient observation, watchers know how to react to enemy moves in every moment of the fight. Similar to signets, counteraction utility skills grant passive effects while they aren't activated or in recharge. On activation, counteraction skills give the watcher a temporary effect, which activates only if the enemy deals a specific type of damage, reflecting a stronger version of said damage to the enemy and reducing the damage to the watcher. A watcher affected by burning would counteract by making the attacker burn harder than him, or by transforming the incoming condition into a boon. Likewise, a watcher targeted by a knockback attack would reflect the control effect to the attacker, or dodge it and restore his endurance. When you fight a watcher, your arrogance is your worst enemy.
New skills[edit]
Improved profession mechanics[edit]
Each profession has its own unique profession mechanic, consisting of exclusive skills and effects, that give each profession its own play-style, and make it feel different from each other. In most cases, profession mechanic skills and effects can't be customized directly by any means. You can improve them using traits, but you can neither change their basic functionality nor choose any alternatives.
Those limitations are part of the past now, for the expansion will completely change how players customize their profession's unique mechanic, from both a gameplay and a cosmetic standpoint. These new upgrades will be acquired through completing profession-specific content across the world. Skills themselves will be mildly accessible, but the cosmetic-only upgrades will be hard to obtain, requiring long scavenger hunts and high doses of skill and dedication. The new mechanic skills will let players customize their characters even further, and the cosmetic upgrades, new skill-independent animations triggering when the mechanic skills are used, will provide a new layer of horizontal progression and prestige.
 Elementalist - Attunement: Each attunement-switch mechanic skill can now be customized with an additional functionality. These functionalities include different boon effects, or simple area of effect skills, with combo opportunities. Attuning to a different element will never be the same now. Cosmetic upgrades include different animations on the attunement-switching effect, like elemental snakes dancing around you or a pillar of energy (with additional effects depending on the element you are switching to), as well as different animations for the cosmetic hand aura representing the current element you are attuned to.
 Mesmer - Shatter: The mesmer's four fixed shattering skills can now be rearranged and replaced by new shatter skills, including new condition effects on shatter like burning, crippled or torment. Cosmetic upgrades include different animations for the cosmetic aura of the illusions and the shattering effects, like a swarm of butterflies, a flock of ravens or dancing musical notes.
 Necromancer - Death Shroud: The necromancer can now switch between different Death Shroud mechanic skill variants. Each variant, themed around one of the Seven Reapers of Grenth and a specific condition, provides five different fixed Death Shroud form skills. Choose a scythe-wielding melee cleave form, a Dhuumfire burning-heavy form, or a ghostly minion form. The Death Shroud variant form you choose will help you define your play-style even further. Cosmetic upgrades include different animations for Death Shroud form activation, like lost souls rising around you or black roses blooming at your feet, as well as different animations for the cosmetic aura of the Death Shroud effect.
 Engineer - Tool belt: Each of the engineer's tool belt skills depends on the corresponding utility skills you have currently equipped. Now utility skills of turret, device kit, and weapon kit skill types have tool belt skill variants you can choose from. Customize your Net Turret's tool belt skill to poison your target or trap multiple enemies at once, or customize your Bomb Kit's tool belt skill to make the explosion freeze enemies where they stand or create a flash black hole to gravitationally pull them. The utility skills of elixir and gadget skill types get no skill variants. Cosmetic upgrades include different models and animations for turrets, device kits, and weapon kits. Race-based designs, enemy gear like the Flame Legion flamethrower weapon kit, and more. Each engineer will be able to visually customize his engineer-only gear now.
 Ranger - Pet: Prior to this update, rangers were the only profession who could customize their mechanic skill. By changing their slotted pet, they could customize the F3 special user-controlled skill of the pet. This system won't change, but now, every pet is able to select any of the special skills from their species (For example, a Brown Bear can use the special skill of the Polar Bear), further reinforcing the cosmetic side of pets, and preparing the ground for the new cosmetic-only pets. Another important change will be the removal of the classic pet-acquiring method, to be replaced by a skill-based system to leave the ranger on equal footing with the other professions (You wouldn't hunt easy-to-find juvenile pets anymore, instead acquiring pets by completing specific objectives, like defeating special trainers, completing scavenger hunts, or taming them from hard-to-reach places). Aside from new cosmetic-only pets, other cosmetic upgrades include different animations for pet swapping and common pet skills. And of course, don't forget about new pet special skills, as well as new pet species like griffons or raptors.
 Thief - Steal: The thief has now two steal slots instead of one, each one storing its own stolen skill. Additionally, the steal skill can now be replaced by new steal skill variants, each one themed around what you're trying to steal, or just the different pockets you want to steal from. The range of stolen skills is now much more larger, but it's also less random and tied to specific steal skill variants. Each steal skill variant will have its own limited range of stolen skills, so thief players can predict what they will be stealing much more easier, and plan their builds ahead with this factor in mind. Cosmetic upgrades include different animations on steal activation, like a shadowy rodent jumping at your enemy to pickpocket them or a mechanical extensible hand reaching to the enemy's pockets, as well as different animations for the cosmetic aura of the stealth effect.
 Guardian - Virtue: The effects of the guardian's three fixed virtues can now be customized with variants of the original virtues. Justice, Resolve and Courage stay intact, but now each one has its own alternatives, respecting the original role of each virtue. Change Justice to apply blind instead of burning, or change Resolve to cleanse conditions instead of healing. Cosmetic upgrades include different animations on virtue activation, like angelical wings or a pillar of light (with additional effects depending on the activated virtue), as well as different aegis shield animations.
 Warrior - Burst: The warrior's single burst skill depends on the currently equipped main-hand weapon. Now there's two burst slots instead of one, each one connected to each hand's weapon, and there's a range of different burst skills for each weapon to choose from. Using one burst skill still consumes all of the built-up adrenaline, forcing you to choose which one of the two previously selected burst skills you will use at each situation. Cosmetic upgrades include different animations on burst activation, like cosmetic auras of flames or storm, as well as different models and animations for the banner utilities.
 Watcher - Martial Blades: The watcher can customize his martial blades skills freely, switching and rearranging them at will. Cosmetic upgrades include different martial blades models, like long curved blades or brass knuckles, as well as different animations on martial blades activation, like animal spirits imbuing your strikes.
With these upgrades, profession customization is successfully taken a step further, in both gameplay and cosmetics aspects, while staying loyal to the game's original horizontal progression designs.
New weapon skills[edit]
New challenges require new weapons. The classic professions will now be able to use weapons they couldn't before, unlocking new weapon skills with their own unique roles and play-styles, as well as use their aquatic weapons on land. Additionally, the number of weapons will increase from 19 to 20 with the introduction of the greataxe, a new two-handed weapon conceived for the most savage of melee combats.
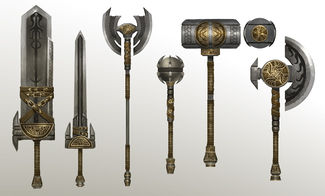
| Weapon | Elementalist |
Mesmer |
Necromancer |
Engineer |
Ranger |
Thief |
Guardian |
Warrior |
Watcher | |
|---|---|---|---|---|---|---|---|---|---|---|
| One-handed | Axe | 0 |
0 |
1 |
0 |
1 |
1 |
1 |
1 |
1 |
| Dagger | 1 |
0 |
1 |
0 |
0 |
1 |
0 |
0 |
0 | |
| Mace | 0 |
0 |
1 |
1 |
0 |
1 |
1 |
1 |
1 | |
| Pistol | 0 |
1 |
0 |
1 |
0 |
1 |
0 |
0 |
0 | |
| Scepter | 1 |
1 |
1 |
0 |
1 |
0 |
1 |
0 |
0 | |
| Sword | 1 |
1 |
0 |
1 |
1 |
1 |
1 |
1 |
1 | |
| Off-hand only | Focus | 1 |
1 |
1 |
0 |
1 |
0 |
1 |
0 |
0 |
| Shield | 0 |
1 |
0 |
1 |
0 |
0 |
1 |
1 |
1 | |
| Torch | 0 |
1 |
1 |
0 |
1 |
0 |
1 |
0 |
1 | |
| Warhorn | 0 |
1 |
1 |
0 |
1 |
0 |
1 |
1 |
1 | |
| Two-handed | Greataxe | 0 |
0 |
1 |
0 |
1 |
0 |
1 |
1 |
1 |
| Greatsword | 0 |
1 |
0 |
0 |
1 |
0 |
1 |
1 |
1 | |
| Hammer | 0 |
0 |
1 |
1 |
0 |
0 |
1 |
1 |
0 | |
| Longbow | 0 |
1 |
0 |
0 |
1 |
1 |
1 |
1 |
1 | |
| Rifle | 0 |
0 |
0 |
1 |
0 |
1 |
0 |
1 |
0 | |
| Shortbow | 0 |
1 |
0 |
0 |
1 |
1 |
0 |
1 |
1 | |
| Staff | 1 |
1 |
1 |
0 |
1 |
0 |
1 |
0 |
0 | |
| Aquatic | Harpoon gun | 0 |
0 |
0 |
1 |
1 |
1 |
0 |
1 |
1 |
| Spear | 0 |
1 |
1 |
0 |
1 |
1 |
1 |
1 |
1 | |
| Trident | 1 |
1 |
1 |
0 |
0 |
0 |
1 |
0 |
0 | |
Trivia[edit]
- The Fangbreaker and his norn companions are not Sons of Svanir, though some of them were once related to them. Like the Sons of Svanir, they revere Jormag as the greatest predator. However, they refuse to embrace his "blessings", a gift for the weaklings that can't fight by themselves, and welcome women with open arms, revering Jora as a strong warrior for killing Svanir, her weak and corrupted brother. They believe the greatest way to revere Jormag is to hunt his physical form in this world, and nothing will stop them in their great hunt.
- The Voices of Jormag are the same minion type as the Dragonspawn from the Edge of Destiny novel, with similar powers. The kodan gave them their name, mirroring the titles and roles of their leaders: Claw and Voice of Koda. Through the controlled dragon corruption of his greataxe, the Fangbreaker is able to resist to them, and helps the Pact clean the way.
- The Seraph army gets an upgrade, including new distinct units to add more variety. The centaur troops don't change too much, but they get reinforced with giants, convinced to fight by the Modniir. This upgrade affects the troops outside the expansion, too.
- The White Mantle is helping the Modniir centaur tribe. They helped raise the barriers protecting the Woodland Cascades, securing the position of the Modniir over the other centaur tribes. In exchange, the centaurs would invade Kryta, and help the White Mantle dethrone Queen Jennah. The centaurs did invade, supported by bandit groups, but even then, the peace treaty with the charr turned the tide of the war, foiling the aspirations of the White Mantle. Nonetheless, they are not known for giving up easily.
- Scarlet Briar was a champion of the Sinister Alliance, but she wasn't the leader. Each of the five factions has a leader: High Councillor Flax, Legate Minister Caudecus Beetlestone, Grand Duchess Faolain and two not yet established new characters, a charr shaman and a tengu witch. The five of them would answer to their real master: The mursaat. The mursaat's real goal is to enslave the dragons and take their power to rule above all.
- The Eye of the North is part of the Old Alliance Fortress. Deep inside the fortress, at a ley line hub, the seers created the original bloodstones, removing most of the magic from the world, and putting the dragons to rest. This explains why three of the Elder Dragons, Jormag, Kralkatorrik, and Primordus, were gathered so close to each other in the surrounding regions. The fortress was sealed, and there's still powerful artifacts inside, sought by the Sinister Alliance. Some of them are dangerous experimental weapons built using dragon energy.
- The norn marched against Jormag once, long ago. They claimed victory against the icebrood at the Battle of Ice Crest, but too many warriors were lost, and they were ultimately forced to retreat. Part of Asgeir Dragonrender's mystic jotun scroll was lost in this battle, together with many legendary heroes, amongst them Eir Stegalkin's father, Einar Cliffstrider. The heroes will need to relieve this battle to find the missing parts, and complete the ancient scroll, containing the secrets of the Spirits of the Wild.
- At the final battle, the heroes meet many of their lost comrades, including their order mentors Magister Sieran, Lightbringer Tybalt Leftpaw, and Warmaster Forgal Kernsson, who help them get to their feet to keep fighting.
- During the tutorial, the tengu players wear their race's tier 3 cultural armor, and wield tier 3 cultural weapons as well, as to illustrate their rank and reputation amongst the Imperial Guard. You lose them after the tutorial, once you are accused of treason, but can recover them later by buying them from their respective cultural armorsmiths and weaponsmiths.
- Southsun Cove is relocated to the south, leaving space for the new tengu zones. This relocation respects the cartography of the original maps of the Sea of Sorrows, before Southsun Cove was introduced. During the last missions of the tengu story arc, tengu players visit an instanced version of the zone, prior to the events of The Lost Shores, and defeat a risen army in the making.
- Claw Island effectively becomes part of the open world with the introduction of SS-2, the second zone of the Sea of Sorrows, of levels 15-30. The Renown Hearts and dynamic events taking part on it are chronologically placed to happen before the events of the Battle of Claw Island. The Marriner Plaque close to the Claw Island Portage Waypoint at Fort Marriner, marking the resting place of the Pride and the Maw, has now been moved to its correct location, next to Claw Island's Maw and Pride Point of Interest.
External links[edit]
- Community discussion:
- Reddit, 3.0 version: http://www.reddit.com/r/Guildwars2/comments/2r03jf/first_expansion_theorycrafting_jormag_tengu_and/
- Reddit, 2.0 version: http://www.reddit.com/r/Guildwars2/comments/1u5kwx/first_expansion_theorycrafting_jormag_tengu_and/
- Reddit, 1.0 version: http://www.reddit.com/r/Guildwars2/comments/12obx5/first_expansion_theorycrafting_jormag_tengu_and/
- Official Forums: https://forum-en.gw2archive.eu/forum/game/lore/First-expansion-theorycrafting-Jormag-tengu-and-Far-Shiverpeaks/first#post3443695
- Guild Wars 2 Guru: http://www.guildwars2guru.com/topic/74402-first-expansion-theorycrafting-jormag-tengu-and-far-shiverpeaks/page__st__30#entry2276570
- Further reading:
- A Historical Guide to Tyria: http://thatshaman.blogspot.com/p/historical-guide.html (By that_shaman)
