Story Journal/Living World Season 4

The Story Journal entries for Living World Season 4 serve as an effective story summary from the point of view of the Pact Commander, and are transcribed here.
 Daybreak
- 1330
Eye of the Brandstorm
Soon after Balthazar's defeat at the Kodash Bazaar, Rytlock Brimstone, Canach, and Taimi procured a dolyak ranch outside the Free City of Amnoon where they could make necessary repairs to Taimi's golem before resuming our search for Aurene. Taimi contacted me with a progress report.
Cavalier Captain Rahim generously allowed Taimi, Canach and Rytlock to have use of the dolyak ranch as a base camp from which to search for Aurene, track Kralkatorrik's activities, and figure out what to do next. The location provides easy access to Amnoon's bustling marketplace while allowing us to keep a low profile.
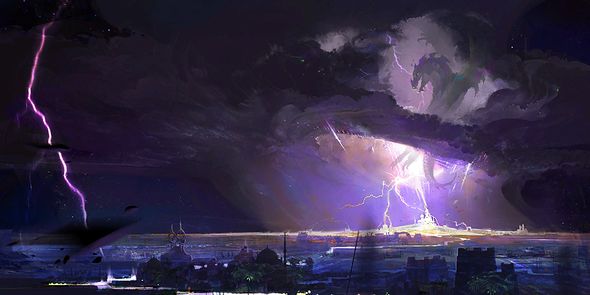
When I arrived at the ranch, Taimi updated me on her progress outfitting Scruffy, her mobile lab/golem. She also relayed a message from Marjory Delaqua and Kasmeer Meade regarding Kralkatorrik's current location and activity. Their update was interrupted by a Brandstorm that appeared without warning and engulfed Amnoon. We put our search for Aurene on hold to investigate.
Rytlock Brimstone, Canach and I fought waves of Branded laying siege to the Free City of Amnoon and rescued as many Elonians as possible. The Brandstorm concealed a Branded wyvern: Kralkatorrik was clearly experimenting with new powers acquired after the deaths of Balthazar and the two Elder Dragons.
We also found our search for Aurene rendered unexpectedly moot, as she was already in Amnoon protecting its citizens. She appeared to be substantially larger and more powerful than when we last saw at the Kodash Bazaar, and her temperament seemed erratic. My concern about the effect of Aurene's proximity to Balthazar at his death has only increased after this encounter.
Under the Stars
Aurene sent us a vision of widespread chaos and destruction, and a ruined city that Agent Kito identified as Fahranur. Agent Kito and I are proceeding to Istan to contact the Sunspears, who may know of a way into Fahranur. Rytlock, Canach, and Taimi will remain in Amnoon to clean up after the attack by Kralkatorrik's minions.
At Agent Kito's direction, I was able to arrange for passage to Istan by stowing away abroad a small fishing vessel.
In Istan, I proceeded to the Astralarium, where Agent Kito suggested I might be able to contact the Sunspears. This remarkable conservatory was teeming with scholars dedicated to the study of astronomy and the history of Istan, but the academic fervor was somewhat dimmed by the presence of Mordant Crescent agents pushing the scholars to limit the history they teach and record to Joko's propaganda.
I made contact with the head archivist, Rhadha, who was fearful that my presence might draw undue attention and requested that I disguise myself as a visiting scholar. This was the only way I could gain access to the archives where the entrance to the Sunspear base was located without arousing the suspicion of the many pro-Joko researchers or the Mordant Crescent patrols who monitored the facility.
After posing as a scholar to deflect the suspicions of the Mordant Crescent guards and pro-Joko reseachers at the Astralarium, I sought out Head Archivist Rhadha, who told me the key to locating the secret Sunspear base was contained in a book called "Nightfall," located in the main archives. Rhadha advised me to contact Archivist Salwa, who controlled access to these archives.
Archivist Salwa was understandably hesitant to allow me to enter the sanctum until I could prove to her that I supported those seeking to end the vicious rule of the lich king, Palawa Joko.
I made my way to the bottom floor of the Astralarium libray. Using the key given to me by Archivist Rhadha, I deduced the incantation required in order to gain access to the archives. Saying "Joko is false" while standing in front of the door transported me into a secret Sunspear base, where I was greeted by Agent Kito and First Spear Hakima. Hakima informed me that only Spearmarshal Zaeim, the leader of the Istani Sunspears, knows the way in to Fahranur, and I should seek him out in Champion's Dawn.
Champion's Dawn
I am aiding Sunspear recruitment efforts in the town of Champion's Dawn, which is being ravaged by Mordant Crescent agents and Joko's living loyalists in retribution for supporting the Sunspears. First Spear Hakima indicated I should seek out Priest Sazeer, who might be able to help me locate Spearmarshal Zaeim. I've made contact with Priest Sazeer and his father, who informed me that Zaeim was captured by a corsair named Sayida.
Generations ago, Sayida's ancestor lost a coin to a now-Awakened Sunspear. If I can reobtain this family heirloom, it may give me the leverage I need to get the corsairs to release Zaeim. Defeating the Awakened Sunspear, however, may prove to be something of a challenge.
Koss is something of a local legend, having imprisoned himself in a cave to avoid giving in to the Awakened compulsion to obey Joko's orders. I managed to defeat him in combat, and the Awakened Sunspear has given me the coin. Now I only need to convince Sayida the Sly and her corsair crew to trade me Zaeim for the coin.
Convincing the Corsair
I proposed a trade to Sayida the Sly, who informed me that while she felt honor bound to aid me in exchange for her coin, she had already turned Zaeim in to the Mordant Crescent for the bounty. We came up with an alternate plan. She'll turn me in for the bounty on my head, and I'll break Zaeim out from inside the prison at the Mordant Crescent Great Hall. Kito will summon Sunspear forces to help from the outside, and Sayida will ply the Awakened with corsair grog, which is apparently strong enough to leave even the undead incapacitated. I obtained the ingredients for this legendary brew, a quest that proved challenging since they're distributed among feuding corsair crews.
I've obtained the ingredients for the corsair grog. All the pieces are in place. Now I just need to let Sayida turn me in to the Mordant Crescent.
The Hero of Istan
I met with Sayida and her crew just outside the entrance to the Mordant Crescent Great Hall. She clapped me in irons and escorted me inside.
Sayida handed me over to Warden Amala, and with scores of Awakened looking on, she sweet-talked the warden into a toast to Joko, slyly handing over the spiked grog. All was going smoothly until Taimi called me over my communicator, raising the warden's suspicions. Amala cracked me over the head, and everything went black.
I came to in a dungeon cell next to Zaeim, the Hero of Istan. After the jailer outside toppled over from the spiked grog, Zaeim and I escaped and reached the stairwell leading out of the dungeons.
I must still make it past Warden Amala, and time is of the essence: Joko is back from the Domain of the Lost. And he has Taimi.
Amala put up a difficult fight: a dervish who had once dedicated her life to opposing Joko, she'd been executed and Awakened by the lich. Even under his control, she was still able to channel the power of the gods, but with the help of Sayida and her corsairs, Zaeim and I brought her down at last.
The skirmish outside the prison is still something of a haze: the Sunspears burst through the Great Hall's main gate with Rytlock and Canach to reunite with their Spearmarshal, while Aurene strafed the overwhelmed Mordant Crescent from above.
But it's hard to enjoy our triumph when Joko has Taimi. Zaeim has offered to guide us into Fahranur and has directed us to meet him at a cave on Issnur Bay. There's no time to waste.
The First City
With the help of Zaeim, I was able to find the entrance to Fahranur in an old underground tunnel system. Next up: rescue Taimi.
Zaeim, Rytlock, Canach, and I survived the foes and traps within Fahranur to make it deep in the heart of the First City, only to confront a bone wall guarded by an awakened abomination. Canach's explosives brought down the bone wall, along with the ceiling of the chamber. We would have been smashed if Braham and Rox hadn't appeared and saved us.
I can only hope Braham is ready to cooperate with us now.
With Braham and Rox's help, we made it through waves of Awakened and discovered that Palawa Joko forced Taimi to open the gates to Tyria so he could invade. We found Taimi just in time to see an Awakened army pass through the gates into a range of locations in Tyria.
We were greeted by a chorus of Awakened asura, who delivered a vengeful message from Joko and revealed that Taimi was trapped inside her golem, Scruffy, which had been rigged to suffocate her. Our only choice now is to take down Scruffy and get Taimi out of there before it's too late.
We survived Scruffy's meltdown, took out the asura gates that were being used to invade locations across Tyria, and saved Taimi, She's clearly weakened and frightened from the experience, but she insists she will be okay.
We asked Taimi what she learned while she was with Joko, and it sounds like he's researching bugs of some kind. We'll need to figure out where he is so we can stop him for good.
 A Bug in the System
- 1331
Tracking the Scientist
I received a message from Agent Kito suggesting we meet. He informed me that Joko gained control of another asura gate hub, allowing him to continue his invasion of Tyria.
I reached out to Taimi for an update on her investigation at the Inquest base at Fahranur. She sounded subdued, which wasn't surprising given her traumatic abduction by Joko. Still, she'd made two important discoveries.
First: One of the destroyed gates at Fahranur led to a big Inquest base, which was likely the location of Joko's new gate hub. Unfortunately, there was no way to know where that base was located.
Second: An old friend of Taimi's, a scientist named Blish, was working at the base.
Our path forward seemed clear: find the scientist, and we'd find Joko's gate hub.
Kito tipped me off to the location of a convert Inquest transport facility. Braham, Rox, and I disguised ourselves as a live specimen delivery convoy to get inside, and I managed to access the facility's resource database. Taimi's scientist was assigned to the Inquest's Elonian HQ, Rata Primus.
We attempted to travel to Rata Primus through the facility's asura gate, but a malfunction on the other end forced us to travel to the nearest alternative lab.
The Test Subject
We found ourselves in an Inquest lab full of signs of disease research on live subjects, including members of a local tribe of charr. We helped liberate one of these charr before Inquest researchers infected her with a mysterious and deadly disease.
The charr's escape triggered a self-destruct sequence. As we hurried to find our way out in time, we battled security forces and discovered a garbled distress message from Blish's brother, Gorrik. The message confirmed that Joko's Awakened were wreaking havoc in the Rata Primus main complex.
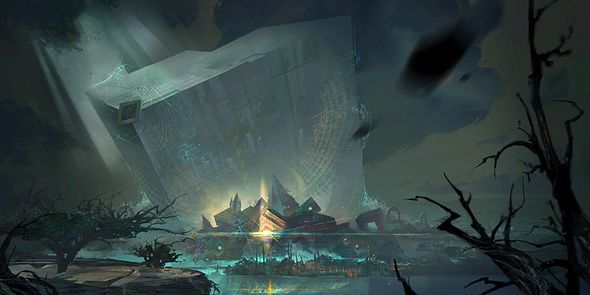
As we reached the roof to make our escape, we got our first glimpse of Rata Primus in the distance—a massive floating cube. We jumped from the lab's roof to avoid the lab's self-destruction, but it was clear we'd have to storm that cube if we had any hope of stopping Joko's invasion of Tyria.
A Kindness Repaid
Boticca agreed that the Inquest and the Awakened are threats to her tribe, the Olmakhan. She suggested that we speak to the tribal elders and propose a collaboration that will benefit all of us.
Boticca introduced us to the Olmakhan Elders, and we spoke to them about the pressing dangers of the Inquest and the Awakened. While some agreed the time had come to fight, others believed the better course would be to move the tribe and find a safer home.
While the elders continued their discussions in private, Braham and Rox explored the village. Rox seemed particularly taken with the Olmakhan and their way of life. Meanwhile, I attempted to comfort a few of the cubs who had lost family to the Inquest's brutal experiments.
A sudden attack on the village by the Inquest's automated quarantine forces took us all by surprise. Braham and I escorted the cubs to safety and—with Aurene's help—fought to defend the villagers. The real test came with the deployment of the Inquest's colossal exterminator golem. We managed to defeat it, but sadly one of the elders didn't survive.
The village mourned their loss, and decided to avenge the elder's death by joining forces with us to take on Rata Primus.
The Road to Rata Primus
With the Olmakhan commited to helping, we were ready to assault Rata Primus. Unfortunately, we knew very little about the massive base, and it was clearly well defended. When I said as much to Aurene, she flew around the area and shared her sight with me, revealing a protective shield around the cube, a growing number of Joko's Awakened in the area, and a communications tower used to coordinate the Inquest's ground-based facilities and forces.
Braham and Rox stayed with the Olmakhan to help defend them in case of another attack. I infiltrated the Inquest communications facility and sabotaged the tower. Inside, I also discovered an uncorrupted version of Gorrik's distress message confirming that he and Blish were trapped by Joko's forces in Rata Primus. I promised Taimi I would do what I could to help them.
Sayida agreed to aid our assault on Rata Primus with her airship and guided me in tracking down and disabling the three generators powering the shield. As I neutralized the last generator, Sayida's airship arrived. Braham and I boarded and prepared to invade Rata Primus.
The Charge
While Rox led the Olmakhan in a ground assault, Braham and I infiltrated Rata Primus from above with the help of Sayida and her airship. Inside, Joko's Awakened were locked in battle with the Inquest forces. We tracked down the gate hub, defeated a massive force of Awakened, and disabled the gates, finally putting a stop to Joko's invasion of Tyria.
We reached the lab where Gorrik and Blish had holed up, and we were shocked to learn that Blish's consciousness had been transferred into a golem body. Before we could fully process this, the containment-vault alarm began to blare, and Gorrik revealed some disturbing news—the Inquest had recovered samples of the ancient and deadly Scarab Plague in Fahranur, and now Joko was trying to seize it.
We raced to the containment vault, but we were too late. Joko damaged the remaining asura gate and set Mordant Crescent Commander Lonai on us while he fled with the plague. The damaged gate sucked us in, and Braham and I braced ourselves for the battle to come.
Braham and I battled Lonai while being shifted to increasingly remote and strange locations. When we finally defeated her, Blish and Gorrik managed to transport us back to Sayida's airship just as Rata Primus's self-destruct protocol detonated.
Despite my concern about Taimi's reaction to Blish's golem state, she was delighted at the reunion. The three of them planned to work together as we all prepare to deal with whatever terrible plans Joko has for the Scarab Plague.
 Long Live the Lich
- 1331
Seized
Taimi informed me of the Amnoon City Council's overeager imprisonment of Gorrik on the grounds of public health. I attended the trial and successfully argued for Gorrik's freedom. He's investigating countermeasures to the Scarab Plague.
I met Taimi and Gorrik at the docks where their research material was impounded. We dealt with the escape of Gorrik's marshmallow mites, then found Blish and powered him back on. Lord Faren helped a little, too.
Lord Faren and I waited for the Krytan ship at the docks. Councilor Mayameen went ahead to meet them, only to discover that all aboard had been infected with the Scarab Plague. She succumbed, but with Aurene's help, I managed to contain the Plague.
Joko sent an Awakened battalion to attack Amnoon and spread the Plague, but I stopped them at the docks. After I defeated his champion, Joko challenged me to meet him in Gandara. Despite the risk of infection, Faren declared he would join me in this fight.
Forearmed Is Forewarned
Taimi, Gorrik, Blish, and I determined that an army could only reach Gandara in time by using Blish's stolen portal tech. I sent Blish and Taimi to set up the portal in the desert. Meanwhile, I went to ask the Primeval Dynasty for help.
I traveled to the Tomb of the Primeval Kings and convinced Queen Dahlah and Queen Nahlah that Joko's threats were real. They promised me command of a ghost army to fight Joko and the Scarab Plague.
I met Blish and Taimi at the site of Blish's unstable portal. As Blish set it up, a malfunction sent his arm to the other side.
I found Blish's arm and also several Awakened. With its built-in stealth, stun, and triboelectrocution capabilities, I finished off the Awakened and identified a likely site for our camp.
Blish's arm proved highly useful as I cleared the nearby outpost of Awakened. It'll make an excellent staging point for our army's assault on Joko's fortress.
Canach and I planted bramble walls, bombed siege engines, and destroyed barricades to weaken the Moon Fortress's defenses ahead of our army's arrival.
I defended the portal area as Blish sent battalions of allies through. Once the whole army had assembled at our new camp, I addressed them, assigning roles in the upcoming battle.
Tactical Triage
I assisted old allies and acquired new ones in advance of our assault on Joko's fortress.
I'm Brave, You Know
Faren was injured trying to bring critically needed explosives to Rytlock. I commended him on his bravery and told Rytlock to hold the line.
Be My Guest
We fought our way across the bridge and blasted open the fortress gates, only to find it swarming with the Scarab Plague. The Primeval army stayed to fight while Braham and I looked for another way in.
Braham and I found a signet ring that dispels illusions in one of Joko's torture chambers.
We fought our way through the Moon Fortress, disarming traps and battling minions, until we reached the ossuary.
I unlocked the entrance to the Contaminarium, defeated Joko's Beastmarshal, and walked straight into a trap. Braham saved me and was trapped instead.
I battled Joko until he fell, releasing Braham from his trap. Although Joko appeared to be dead at first, he had a surprise up his sleeve. Fortunately, Aurene was nearby. At a critical moment, she flew in for a snack. Together, we contained the Scarab Plague, ended Joko's tyrannous reign, and provided Gorrik with scientific samples.
 A Star to Guide Us
- 1331
A Shattered Nation
According to Taimi and Braham, Aurene interrupted a political summit in Jahai, and tensions are running high. Braham helped me enter the city discreetly in order to remove Aurene and get the summit back on track.
Zaeim and I managed to calm the delegates and get the summit moving again - despite Archon Iberu's best attempts to derail it. But just as the delegates began to work together, we were hit by a surprise attack by Kralkatorrik's lieutenant - the Death-Branded Shatterer!
We managed to escape the Shatterer's attacks, but Aurene is gone - and the Shatterer chased after her, disappearing through some sort of hole in reality. Even worse, more anomalies are appearing throughout Jahai. Taimi and I have formed a plan to investigate the disturbances.
Chaos Theory
After encountering a displaced chunk of Maguuma, a strip of land from another world, an echo of ancient Orr ripped out of time, and an active rift in the Mists, we reached a chilling conclusion: Kralkatorrik is inside the Mists. Luckily, we also discovered Kralkatorrik can't Brand deep underground, and Koss remembered a safe location from his Sunspear days. We agreed to meet up at the old Sunspear Sanctuary to discuss our options and stay safe from the Brand.
Legacy
I arrived to Braham, Koss and Kossan waiting for me at the abandoned Sunspear sanctuary. Together we worked to clear the sanctuary of its current inhabitants: A horde of spiders led by a terrifying broodmother. After defeating the spiders, we relit Kormir's protections fire inside the Chamber of the Sun - which will protect the inner chamber from Kralkatorrik's attacks - and gave our reclaimed sanctuary a new name: Sun's Refuge.
We regrouped with Taimi, Zaeim, and the others to discuss the anomalies we saw, but we were interrupted by a shocking appearance - the ghosts of Eir Stegalkin and Snaff! And they came with a message for Aurene from Glint herself: the time has come for Aurene to defeat Kralkatorrik and replace it as an Elder Dragon.
Backed into a corner, Aurene revealed a vision to us showing multiple scenarios of our attempts to defeat Kralkatorrik. The battles were horrific - in every outcome, Aurene dies. Terrified, Aurene fled, leaving us reeling without her. Just then, Blish piped up with a sudden idea to enter the Mists and attach a tracker to Kralkatorrik, using it to evacuate villages before he appears. Blish has tasked me with step one: track down Balthazar's sword to use as bait. It's rumored to be somewhere in Vabbi.
From the Ashes
We reached the site of our battle with Balthazar, and a Priory member named Nereth calculated where she thought his famed sword may have landed. According to her, the Priory should've already recovered it.
We found the projected landing zone for the sword - only to discover the Priory had been attacked by a mysterious sniper who stole the sword and fled. The Priory suspects this sniper was headed for Argon Garrison.
After and emotional showdown, I defeated Zafirah, a grieving priestess of Balthazar with a personal vendetta. It was then that I finally recognized her - she was present in Aurene's vision of the future! Confident in our future alliance, I invited her to help us take down Kralkatorrik. I don't know if she'll accept, but she did turn over Balthazar's sword.
All that remains is to re-ignite the sword using magic from Rytlock's sword, Sohothin. Then it's time to enter the Mists and use the sword as magical bait to attach Blish's tracker to Kralkatorrik. Easy, right?
Storm Tracking
In order to attach the tracking device to Kralkatorrik, Blish requires a strong source of magic to use as bait - Balthazar's sword. Using Sohothin, Rytlock and I reignited the sword, activating its magic and pushing our plan into action. Now it's time to enter the Mists and attract Kralkatorrik using the sword - ultimately tricking him into swallowing the tracker.
After finding a safe place for Blish to attach the tracker to Balthazar's sword, I defended him from an onslaught of Branded while Kralkatorrik closed in on us. When his storm drew close, Balthazar's sword lashed out and broke the tracker's power source. In order to ensure the tracker maintained power indefinitely, Blish shut down his higher functions and attached his golem body to the tracker and sword, sacrificing himself for the sake of our mission.
I outran Kralkatorrik as Blish spoke his final words. Our mission ended successfully - but at the cost of Blish's life.
With the tracker properly attached, I made my way back to Sun's Refuge to inform Gorrik of his brother's sacrifice. On hearing the news of Blish's final message, Taimi revealed the progression of her terminal illness, and Caithe finally revealed that she was watching us from the shadows for some time - and she may know how to find Aurene.
 All or Nothing
- 1332
Scion & Champion
I reached out to Caithe over comms to see if she'd heard from Aurene. She hadn't, but she was following up on a suspicion she had mentioned in our conversation at Sun's Refuge-she was convinced that the dwarves were involved in Glint's legacy. Unfortunately, her plan to talk directly to Ogden about this suspicion hit a snag. The Priory were apparently resistant to the idea of a known thief wandering their halls and had refused her entry. I offered to meet her at the Priory and act as her "chaperone" so we could speak with Ogden together.
I met up with Caithe at Durmand Priory. She was worried about Aurene, given the dangers ahead, and asked to be included in the preparations for our confrontation with Kralkatorrik. I told her I'd be grateful for the help, and together we went in to speak with Ogden.
Ogden revealed that Glint had partnered with the dwarves at Thunderhead Keep to develop the Dragonsblood Forge, where the original Dragonsblood Spear was created. To prepare for the ultimate downfall of Kralkatorrik, Glint had intended that we meet our allies there and arm them for the battle. But before that could happen, Aurene and I would have to prove our readiness by facing a series of trials Glint created in an extension of her lair in the Mists.
With Ogden promising to arrange for the Pact and our allies to meet us at Thunderhead Keep, Caithe and I stepped through the portal created by Glint's hourglass. We found Aurene curled up around Glint's crystalline remains, forlorn. Caithe and I did our best to reassure her that she wouldn't be alone on the difficult road ahead. Then, Aurene and I — scion and champion — entered Glint's trials.
Glint's voice guided us through her trials. The first trial challenged us to facilitate Aurene's absoprtion of powerful magics.
In the second trial, we learned to channel Aurene's magic into shaping and molding Kralkatorrik's Brand crystals.
In the third and final trial, we face our greatest fears. For me, it was the prospect of failing Aurene and the world. For Aurene, it was a Branded version of herself — the manifestation of failing against Kralkatorrik.
In the end we passed Glint's trials by proving our partnership and trust for one another.
Glint then revealed Kralkatorrik's greatest secret: in a vision, he had foreseen a world without him, a world at peace. And it had terrified him. Glint expressed her trust in us and our ability to realize that prophecy by working together. With that, we rejoined Caithe and entered Glint's portal to Thunderhead Keep, ready to use the Dragonsblood Forge to arm our allies for the battle of our lives.
Dragonsblood
We arrived at Thunderhead Keep to find the Pact and our other allies already gathered there. The Keep was an impressive place, built long ago by the dwarves and maintained by the Exalted and Zephyrites since the days of Glint. Ogden directed us to Forge Master Hilina, the Exalted blacksmith who instructed us on how to start the process of forging new Dragonsblood weapons. We would begin by retrieving quenching oil from a dredge extraction operation to the south.
I sought out the dredge community on the ice floe to the south. They had an extensive oil extraction operation, but conflict with the Branded had cost them many lives and damaged their equipment. Still grieving from their losses and left with barely enough oil to get through the winter, their leader, Varya, was in no mood to share what little they had left. By channeling Aurene's magic I was able to clear the Brand crystals from their equipment, freeing up their oil reserves and earning Varya's cooperation.
Taimi reached out over comms to report thtat the original mold used in the forging process had cracked and we would need to track down a replacement. Ogden suggested we try the tomb of Frodak Steelstar, a long-dead dwarven weaponsmith who had apparently worked with Glint in forging the original Dragonsblood Spear. While searching for his tomb, I came across the ghost of Frodak himself and learned that a vicious graveling had displaced him from his tomb. By ridding his tomb of the graveling, I was able to secure a replacement mold for our new Dragonsblood weapons.
With the forge master's guidance, Aurene and I put the Dragonsblood Forge to use. Though the original Dragonsblood Spear was forged using a shard from Kralkatorrik's body, the forge master explained that we would have to make do with Brand crystals from Kralkatorrik's minions. Nevertheless, the spears we turned out looked like fine weapons, worthy of Glint's forge. All we needed now was to test their effectiveness on the Branded.
While Forge Master Hilina pressed on with forging more of the new Dragonsblood weapons, I tracked down a number of Branded enemies to test our initial batch. Though the weapons were clearly not as powerful as the original Dragonsblood Spear, they were still quite effective and would surely give us an advantage if we could make enough for all of our allies. I reached out to Taimi and Gorrik to report my findings, and Gorrik began calculating how much time we would need.
The Crystal Blooms
As I headed back to speak with the others about our plan for Kralkatorrik, a messenger from Glint's ghost army appeared from the Mists with dire news: Glint's army had been overrun, and Kralkatorrik had entered the Domain of the Lost, where he was scattering and devouring the dead.
Before we could come up with a plan to deal with this urgent situation, a Mist rift opened. Aurene channeled her power through the forge's resonance crystal to defeat Kralkatorrik's minions, then shocked everyone by Branding over the residual Brandstorm. As the others argued about this troubling new power, Aurene grew frustrated by her inability to speak and defend herself. Caithe finally offered herself to Aurene as a vessel to speak through and stepped into Aurene's Brand. The result was astounding: teal crystalline flowers blossomed over her as a deep mental and emotional bond joined them — an experience far different from the violent subjugation of Kralkatorrik's Branding. Speaking through Caithe, Aurene uttered her first words: "I am not him."
Aurene's gesture reassured the others, and together we came up with an improvised plan to lure Kralkatorrik into the forge and use the resonance crystals to help destroy him. To make the plan work, however, we would need to seek out and harness dredge technology to boost the resonance crystals.
Resonance
I explained to the forge master that we intend to lure Kralkatorrik into the forge and attack him with the resonance crystals boosted with dredge technology. Though she was worried about the threat to the forge itself, she agreed to help with the plan.
Though Varya had been cooperative with our efforts to this point, she balked at the idea of sending her people into the forge to face down Kralkatorrik. She did, however, explain that the tanks they had lost to the Branded were equipped with the sonic amplifying technology we were looking for. I tracked down the tanks and retrieved three equipment samples for Taimi to reverse engineer.
Sayida contacted me to report that a Brandstorm had brought down the airship carrying Canach's detonators. Canach had formulated an audacious plan to blow up a mountain to drop the rubble onto Kralkatorrik when he arrived. Suddenly, it looked like the plan was in jeopardy. I was able to fight through the Branded that had overrun the wreckage and retrieve the detonators. With Canach's plan viable again, Sayida agreed to fly his team into position and then lead the rest of the fleet in a barrage of cannon fire against Kralkatorrik when he arrived.
When I returned to the forge, Hilina told me that Taimi and Gorrik had already finished analyzing the dredge parts. She would make the necessary modifications to the resonance crystals in the amphitheater. With everything in a place, it was time to put our bold plan into action.
The Crystal Dragon
I went over the plan of attack and did what I could to reassure our gathered forces that we had Kralkatorrik's own prophecy — his vision of a world without him — on our side. The forge master, meanwhile, informed me that the modifications to the resonance crystals were complete. With everything ready and everyone in place, I joined Aurene and Caithe near the first resonance crystal.
I told Aurene it was time to put our plan in motion. She took off and entered the Mists. Moments later, she came charging back with the Kralkatorrik right behind her. As he pushed his massive head and neck into the forge, Sayida's fleet blasted him with cannon fire, and Canach hammered him with a crushing landslide. These attacks had already stunned Kralkatorrik when Aurene and I struck the next massive blow by activating the first resonance crystal. The blow revealed a weak point where we focused our attack. Taimi's tracker readings confirmed that our plan was working — we were really hurting him.
We fought our way through Kralkatorrik's minion toward the second resonance crystal. Zafirah made a timely entrance with a fierce group of Zaishen she had evidently rounded up to support our efforts. With their help we fought our way to the second resonance crystal and struck another massive blow against Kralkatorrik.
We ran into trouble on our way to the third resonance crystal, only to have unexpected allies appear and lend a hand: Varya and her dredge burst in on a tank they had liberated from the Branded. With their help, we made our way to the third resonance crystal and activated it.
The blow from the final resonance crystal sent Kralkatorrik crashing to the ground. But he wasn't finished yet. As Aurene and I approached, he reared up and fired a deadly blast directly at me. Aurene darted in front of it and fired a blast of her own, causing a massive explosion that knocked me unconscious. Flashes of a wounded Kralkatorrik slinking away filled me with dread. But it wasn't until I regained consciousness and found my way back to the others that I saw the tragic result in full. Aurene was dead, impaled on Kralkatorrik's Brand crystals. As we struggled with shock and grief, Braham wondered out loud what we could possibly do now. I had to tell him the truth — I didn't know.
 War Eternal
- 1332
The End
Caithe reached out to me over the comms, asking where I was, what I was doing. I'll admit I didn't have a good answer. She asked me to return to Thunderhead Keep, where the others waited with Aurene. It was time to say good-bye.
Much to everyone's surprise, Aurene was able to resurrect herself with Joko's magic. But there was little time to celebrate, since Kralkatorrik remained in the Mists. Aurene and I opened a portal and followed him in.
We found Kralkatorrik flying through the Mists.
We chased him through different parts of the Realms of the Gods.
We fought him as best we could, whenever we had the chance.
Aurene opened portals to bring him back to Tyria, but Kralkatorrik dodged each one. So we launched a powerful blast that severed his wing. Out of control, he fell through the next portal Aurene opened for him, out of the Mists back into Tyria.
We met our allies on the new island formed by Kralkatorrik's fall from the Mists. Thanks to the tracker, they were able to follow us.
Landfall
I surveyed the new island from a high point and spotted Kralkatorrik's wing. While Taimi sent a chopper to collect blood from it, I went looking for her research assistant to pick up Gorrik's seismic instruments.
I placed three seismic taps around the island to collect data for Gorrik, who hopes to map the interior. At the last location I found wild ley energy — magic that Kralkatorrik can eat to heal! Taimi also reported that the chopper went down due to signal interference from the wing. Then Caithe chimed in: Aurene had found something.
Glory of Dragons
Aurene called for us to come to the south of the island. She had discovered a new species of lesser dragon.
The newborn skyscales could fly — that meant we could use them to reach Kralkatorrik's severed wing. And the blood. I taught them to trust me by feeding them magic.
I rode a skyscale up to Kralkatorrik's wing. There, I broke through the crystal scab over Kralkatorrik's wound, which was stopping the flow of blood and jamming all signals. Then I collected a small amount of blood.
Bleed
I met Zafirah in the field. She had brought her Dragonsblood Spear and two Zephyrites. With their help, I reforged the spear, this time using Kralkatorrik's blood.
It was time to test the spear on Kralkatorrik. I found a vulnerable place and sank the spear deep. He roared with pain.
Despite our efforts, Kralkatorrik continued to heal. Taimi suggested he was feeding from underground ley lines. Gorrik confirmed the existence of a network of caves beneath Kralkatorrik. We headed in.
Descent
I met up with Rytlock, Caithe, and Zafirah an ventured into the cave system underneath Kralkatorrik in order to cap the ley lines healing him.
Discovering there were three ley line nodes feeding Kralkatorrik, I joined with my allies and fought off swarms of Branded to allow Aurene to cap all three.
With Kralkatorrik no longer healing, I ordered the allied armies to attack, but the Elder Dragon did not die, a source of power remaining deep within. Aurene and I realized we would need to fly into Kralkatorrik in order to destroy his heart once and for all.
Aurene came to understand that the magic Kralkatorrik absorbed had driven him insane with pain. To end his suffering, I defeated the manifestations of the foreign magics and vanquished the enraged aspects of Kralkatorrik. Aurene shared a moment with her weary grandfather, but she knew what needed to be done in the End. I drove the forged Dragonsblood Spear into his heart, ending his life.
With Kralkatorrik finally dispatched, I shared a toast to Aurene with my allies aboard Sayida's airship.
