The Charge
The Charge
- Year
- 1331 AE
- Storyline
- Living World Season 4
- Chapter
- A Bug in the System
- Location
- Rata Primus
(Sandswept Isles)
Divinity's Reach
(Kryta)
Mount Maelstrom
(Maguuma Jungle)
Frostgorge Sound
(Shiverpeak Mountains) - Level
- 80
- Preceded by
- The Road to Rata Primus
- Followed by
- Seized
- API
- 513
|
Initial loading screen 
Intermediate loading screens |
The Charge is the fifth and last part of A Bug in the System.
Objectives[edit]
- Assault Rata Primus to stop Joko.
- Board Sayida's airship.
- Infiltrate Rata Primus.
- Look for a way into the main complex.
- Search the southwest lab.
- Search the north lab.
- Search the southeast lab.
- Search the Dragon Fusion Lab.
- Search Holographic Dynamics.
- Search Consumer Gate Research.
- Open the door to the lower levels.
- Search the lower levels for the gate hub.
- Destroy the inbound gate controllers
destroyed: x/3 [sic] - Reach Gorrik's Lab.
- (Stop the assault on the basement lab.)
- Stop the assault on Gorrik's lab.


- Enter the basement lab.
- Talk to Gorrik.
- Enter the containment vault.
- Get to the gate hub.
- (Defeat Commander Lonai.)
- Commander Lonai
- Defeat Commander Lonai and find a way back to Rata Primus.
- Defeat Commander Lonai.
- Destroy the dying stars to protect the citizens: x/3
- (Defeat Commander Lonai.)
- Commander Lonai
- Send an energy signal to Blish.

- Wait for the end.
- Reunite Blish and Gorrik with Taimi.
- Follow Blish.
Rewards[edit]
 Pile of Bloodstone Dust (5)
 Gilded Strongbox (3)
 Bag of Loot (5)
 Pamphlet of Wisdom (2)
 Volatile Magic (consumed automatically for 50 Volatile Magic)
Walkthrough[edit]
The airship is attacked by Inquest turrets as it cruises towards the top level of Rata Primus. Clear the golems as they land on the airship. Once clear, jump off the airship down into the city. (Attempting to fly off the airship with your mount may result in death, which will teleport you to the checkpoint in the city.)
There are four Confidential Documents on the top level where you arrive. Two at the southeastern side (one by the document shredding golem, one behind a group of aggressive golems), one at the northern side and one at the western side. (First four charges of Inquest.Info.)
On the first level below the top level are three labs, indicated on your map with green stars. Open each lab and clear out the foes. Interact with the object at the far end of each lab and play the holographic messages - essentially Gorrik has disabled the portals to prevent more Awakened from arriving, and has barricaded himself and Blish into a lab on the bottom level of the city. If you also choose the password options at each console, you can gain abilities later on in the mission.
If you want, you can choose to do a bonus achievement at this point. From the pit in the center of the city, drop down and head for the northwest corner. At the bottom beyond the poison gas is an Escape Hatch and an Escaped Test Subject. Ignore the Escape Hatch, and volunteer to carry the Skritt to the airship on your mount. Blue signboards indicate the directions to jump back out of the basement on your Springer. Only the bottom level is poisoned - consider using the mastery skill Bond of Life to avoid death. Carry the skritt all the way back up to the deck of the airship to acquire the "Saving Skritt" achievement.
Opening the door to the lower levels will reveal a small group of Awakened, dispatch them and continue down the corridor. A gated lab with Awakened lies before you. If you acquired the stealth password earlier you can interact with the Stealth Console to give your team Stealth for 30 seconds. Interacting with the console again will reapply Stealth, but it does not stack in duration. Attacking will not cause loss of Stealth here. While stealthed, interact with the Turret Console which will then proceed to kill all the Awakened in the lab - you can retreat to the Stealth Console and reapply as appropriate. Once they are dead, destroy the three Inbound Gate Controller objects.
Down the next corridor are some tar pools and minor Awakened Inquest foes. A Veteran Awakened Abomination will also drop down from the ceiling. Interacting with the difficult to see Golem Console at the bottom of the ramp to the left will wake the dormant allied golems and cause them to attack the Awakened for you.
Use the second Stealth Console to reach the Bomb Console at the far end of the next room. This will cause Veteran Inquest Golems to swarm and destroy a Veteran Awakened Canid.
A Confidential Document is located on the right in the room with the Veteran Awakened Canid. (Fifth charge of Inquest.Info.)
Interacting with the Intercom will cause some Malfunctioning Golems to attack the group. Clearing them out opens the basement door to Gorrik and Blish. The door will seal behind you and what several illusionary insects and bugs will appear, and then disappear as you declare your presense to the room. Gorrik reveals that the Inquest have samples of the Scarab Plague in their containment vault. An announcement declares the city will self destruct - make your way back up the ramp with your allies to a side room which is unfortunately open, with the Scarab Plague samples gone.
A third Confidential Document is located slightly to the right of the center of the room. (Sixth and final charge of Inquest.Info.)
Interact with the Stealth Console and rush past yet more Awakened to encounter Lonai and Joko.
Commander Lonai[edit]
The fight begins as several Awakened Inquests are summoned. After a short delay, Commander Lonai will enter the fray. Regardless of the status of the Awakened Inquest enemies, the fight will proceed to the next phase when Lonai's health has been reduced to 90%.
The portal leads to Salma District which is now under attack. Lonai will gain ![]() Sun Blocker and be immune to all incoming damage. At the same time, she will summon three Dying Stars. Players will need to destroy all three Dying Stars to continue the encounter. When destroyed, Dying Stars leave behind Solar Cores that, when picked up, will give the player character access to the Touch of the Sun special action skill and give the player
Sun Blocker and be immune to all incoming damage. At the same time, she will summon three Dying Stars. Players will need to destroy all three Dying Stars to continue the encounter. When destroyed, Dying Stars leave behind Solar Cores that, when picked up, will give the player character access to the Touch of the Sun special action skill and give the player ![]() Solar Energy while holding it. Throughout this phase of the fight, Lonai will constantly summon Dying Stars up to a maximum of three, and alternate her attacks between the Commander and nearby civilians. At random points, she will cease attacks and attempt to Awaken nearby dead civilians; players can interrupt this process by breaking her Defiance Bar, either with regular control skills, or using the Touch of the Sun. At 70% health, Lonai will teleport on to the nearby stage and summon her Shade, granting herself
Solar Energy while holding it. Throughout this phase of the fight, Lonai will constantly summon Dying Stars up to a maximum of three, and alternate her attacks between the Commander and nearby civilians. At random points, she will cease attacks and attempt to Awaken nearby dead civilians; players can interrupt this process by breaking her Defiance Bar, either with regular control skills, or using the Touch of the Sun. At 70% health, Lonai will teleport on to the nearby stage and summon her Shade, granting herself ![]() Shade's Protection. The Commander needs to throw a Touch of the Sun into the Shade's red circle to disperse it. Doing so triggers the next phase, as the Commander, Braham, and Lonai are sucked into another portal.
Shade's Protection. The Commander needs to throw a Touch of the Sun into the Shade's red circle to disperse it. Doing so triggers the next phase, as the Commander, Braham, and Lonai are sucked into another portal.
This portal will deposit the group inside Mount Maelstrom, right next to the Megadestroyer. While Lonai does nothing new here, the Megadestroyer will harass the player character with Fireballs that deal heavy damage, as well as two other AOE attacks that apply ![]() Burning to victims caught in the wake. Lonai will create a Shade at 60%, 50%, and 40% of her health, before the next portal appears.
Burning to victims caught in the wake. Lonai will create a Shade at 60%, 50%, and 40% of her health, before the next portal appears.
The third portal exits into Frostgorge Sound, on the cliff where players would normally experience the second phase of the Claw of Jormag world boss fight. Incidentally, the Claw of Jormag is indeed right there to make the fight more interesting. As before, Lonai does nothing new. The Claw of Jormag does two main attacks. The first is Mist Wave, an attack in the form of small waves of icicle shards that moves diagonally across the arena; the attack does under 500 damage per hit, but briefly knocks the character back. The second is a breath attack that covers most of the arena, except for a small square behind a low ice wall in the middle of the arena and applies Frigid Breath; players have a short delay to take cover before the Claw does a breath attack that will instantly Down player characters. Sometimes the players will also receive ![]() Icy Grave. Lonai summons her Shade every 10% of her health for the remainder of the fight, including her final 1%. The Claw will retreat when Lonai reaches 1%. Breaking the final shade will cause the party to be sucked into yet another portal.
Icy Grave. Lonai summons her Shade every 10% of her health for the remainder of the fight, including her final 1%. The Claw will retreat when Lonai reaches 1%. Breaking the final shade will cause the party to be sucked into yet another portal.
This time, the portal dumps the Commander and Braham on an island floating in space, in an area not unlike the Mistlock Observatory. Lonai will appear shortly after with 1% health, asking for final peace. The Commander can choose to grant her wish, or after a short delay, Braham will do so anyway. After a short, quiet chat between the Commander and Braham, Gorrik succeeds in locating the group and opening the final portal back to the Sandswept Isles.
Achievements[edit]

| Awake End | A Bug in the System | 2 |
|---|---|---|
| Stop Commander Lonai from killing and Awakening any of the citizens of Divinity's Reach.Story Instance: The Charge | Prevented Krytan Awakening | 2 |
- Prevent Lonai from awakening any townspeople during the Divinity's Reach phase of her fight. There are two things you need to watch out for: Dying Star boulders, which leave fiery AoEs and occasionally spit out projectiles and should be destroyed on sight; and Lonai's channelled attack, during which her break bar becomes vulnerable.
- The Solar Cores dropped by Dying Stars can be used to quickly break Lonai's break bar.
- Achievement qualification may be tracked via the
 Awake End effect.


| Inquest.Info | A Bug in the System | 1 |
|---|---|---|
| Found all the classified Inquest data in Rata Primus.Story Instance: The Charge | Discovered Inquest Secrets | 1 |
- There are a total of six Confidential Documents. Four are scattered in the upper-level labs, while another one is on the path while saving Gorrik and Blish. The last one is inside the containment vault (accessible when you escort Gorrik and Blish there).
- Achievement qualification may be tracked via the Inquest.Info effect. Reading each one of the 6 documents grants a "charge" of the effect on top of the initial charge, totaling 7 charges. The effect disappears upon finding all documents.
| Return to A Bug in the System | 0 | |
|---|---|---|
Complete the story mission The Charge in Living World Season 4 Episode 2.
|
Completed The Charge | 0 |
- Complete the instance.
| Saving Skritt | A Bug in the System | 1 |
|---|---|---|
| Find Subject S in the poisonous corridor and evacuate him to the airship.Story Instance: The Charge | Freed the Lab Rat | 1 |
- In the northwest corner of the lab, on the lowest level, a series of pipes is leading down a poisoned corridor. The skritt waits at the bottom where it is clear. To achieve this, the Bond of Life mastery is highly recommended, but is not required.
- The achievement can be completed at the beginning of the instance, before setting off to find Gorrik and Blish.
- Achievement qualification may be tracked via the Saving Skritt effect.
| A Bug in the System | 0 | |
|---|---|---|
Stop Joko's invasion and rescue Taimi's friends.Journal: The Charge
|
Completed the Charge | 0 |

- Complete the instance.
NPCs[edit]
Allies[edit]
- Boticca
- Olmakhan Stormcaller
- Rox (voice only)
- Escaped Test Subject (Turns into Unconscious Skritt bundle once picked up)
Foes[edit]
- Awakened Archer
- Awakened Inquest
- Awakened Inquest Bomber
- Awakened Inquest Technician
- Awakened Mummy
- Awakened Occultist
- Awakened Soldier
- Commander Lonai
- Palawa Joko
- Veteran Awakened Abomination
- Veteran Awakened Canid
- Golems (Inquest)
- Assault Cube
- Detonation Cube
- Enhanced Mark I Legionnaire Golem
- Enhanced Mark I Phalanx Golem
- Enhanced Mark II Ballista Golem
- Malfunctioning Golem
- Mark I Golem
- Security Supervision Golem
- Warehouse Defense Golem
Objects[edit]
- Antiaircraft Gun
- Confidential Documents
- Door Controls
- Escape Hatch
- Golem Bomb Console
- Golem Console
- Inbound Gate Controller
- Inquest Turret
- Intercom
- Paper Stack
- Security Console
- Stealth Console
- Unconscious Skritt (on picking up Escaped Test Subject)
Dialogue[edit]
Upon boarding the airship:
- Rox: The Olmakhan are making headway, Commander.
- Rox: Inquest and Awakened are so tied up with each other, they don't see us coming. We're cutting right through 'em.
- <Character name>: Nice work. Keep after them. I'll check in as I get the chance.
- Taimi: Hey, Commander.
- <Character name>: Taimi—you got your ride, I see.
- Taimi: Yeah, Cap'n Sly's the best.
- Taimi: Listen, I know the priority is shutting down Joko's gate hub. But please don't forget about Gorrik and Blish, okay?
- Taimi: They need help—but they also know the place, so maybe they can help us, too.
- <Character name>: I'll do my best. Brings up a good point, though...
- <Character name>: We know Joko's been causing trouble inside, but we don't really know where things stand. Any way to find out?
- Taimi: The Inquest's always big on keeping records. Probably a good idea to check what's been logged on their consoles.
- Sayida the Sly: Air defenses! Damn it—this ship's not fast enough to avoid those turrets!
- Boticca: We can help!
- Sayida the Sly: That's their idea of help? A storm? Sure, that'll make steering easier. Piece of cake...
- Braham Eirsson: The lightning's taking out the turrets, so it SHOULD be a piece of cake!
Upon reaching Rata Primus:
- Sayida the Sly: Close as we can get, Commander. You'll have to jump.
- Braham Eirsson: This place is huge. Where do we start?
- Taimi: Check the labs for security consoles.
- PA Announcer: Attention: Lockdown protocols in effect. No ingress or egress permitted.
- Braham Eirsson: Not gonna make it any easier to get inside.
- Taimi: Every lab I've seen has emergency passcodes that'll get you in, even during a lockdown. See if you can find them.
- Braham Eirsson: No asura, just golems. And the ones that aren't already smashed are acting...weird.
- Taimi: That's not creepy at all.
Approaching various golems:
- Golem (1): Shredding—protocols: proprietary—data—and—evidence—of—questionable—practices. Massive—task—volume—expected.
- Golem (2): Recommend—catastrophic—failure—procedures. Evade—or—evacuate. Repeat: evade—or—evacuate.
- Golem (3): Go—away, go—away, go—away.
Talking to Escaped Test Subject:
- Escaped Test Subject: Oh! Help! Been trapped down here, want out bad! You help me get out safe, yes?
 What happened?
- Had me locked in a cage in a lab up top. Fighting started, I ran. Stuck down here ever since.
- I can carry you out on my mount. I've got an airship waiting.
- Thank you! I'm ready! Let's go, go, go!
 Pick up the skritt. (dialogue closes and Escaped Test Subject becomes a bundle)
 On second thought...
- Why don't you just go out through that hatch over there?
- Tried! Twice! Almost squashed by golems both times. I need out safe!
- I can carry you out on my mount. I've got an airship waiting. (same as above)
- I'm sure you'll figure something out.
- Wish I could help...
- Sorry, can't get involved.
Interacting with the Escape Hatch
- If carrying the Escaped Test Subject:
- Escape Hatch: It's only big enough for one person at a time.
- I'll come back.
- Otherwise:
- This seems to lead back up to the top.
- Climb into the hatch. (teleports player to upper level)
- Find another way out.
Interacting with a Paper Stack on the upper level:
- Paper Stack: It's too shredded to read.
- Back away.
Upon entering Holographic Dynamics:
- <Character name>: Hard to tell who's got the upper hand here: Inquest or Awakened.
- Awakened Mummy: I smell fresh blood!
Interacting with the security console for Turret Control (in Holographic Dynamics):
- Security Console: Major power surge detected. Access authorizations compromised. Please notify Tech Ops immediately.
- (Note: Unauthorized access to security systems is prohibited and will result in punitive action.)
 Access turret control console authorizations.
- Access authorization for the following emergency security measures is available at this terminal:
- Turret Control Consoles
- Take password for the turret control console.
- Play security holograms.
- Log off.
Playing the security hologram:
- PA Announcer: Gate malfunction logged. Traceback: catastrophic incompetence by user Gorrik.
- Taimi: Gorrik's odd, but he's not incompetent. Probably doing it on purpose to stop Joko's Awakened from going through.
- Braham Eirsson: Not just worried about his own skin, then. Maybe this is one Inquest-er we can work with.
- Taimi: But the console didn't say anything about Blish. I wonder where he is. Oh, I hope he's okay...
Interacting with the security console for Golem Control (in Consumer Gate Research):
- Security Console: Major power surge detected. Access authorizations compromised. Please notify Tech Ops immediately.
- (Note: Unauthorized access to security systems is prohibited and will result in punitive action.)
- Access golem control console authorizations.
- Access authorization for the following emergency security measures is available at this terminal:
- Golem Control Consoles (standard and volatile subtypes)
- Take password for the golem control console.
- Play security holograms.
- Log off.
Playing the security hologram:
- <Character name>: Gorrik again. Barricading a door—probably digging in somewhere deep inside the facility.
- <Character name>: Rox, we're making headway. You still cutting through?
- Rox: Absolutely, Commander. The Olmakhan are even better fighters than I thought they'd be!
Interacting with the security console for Stealth Control (in Dragon Fusion Lab):
- Security Console: Major power surge detected. Access authorizations compromised. Please notify Tech Ops immediately.
- (Note: Unauthorized access to security systems is prohibited and will result in punitive action.)
- Access stealth control console authorizations.
- Access authorization for the following emergency security measures is available at this terminal:
- Stealth Control Consoles
- Take password for the stealth control console.
- Play security holograms.
- Log off.
Playing the security hologram:
- PA Announcer: Intercom malfunction registered. Last incoming communication attempt by: Gorrik. Would you like to return the call?
- <Character name>: Uh, yes... Is someone there? Gorrik?
- Gorrik: Hello? Who... (static) ...this?
- Taimi: Gorrik! It's me!
- <Character name>: That's Taimi, and I'm a friend. We're here to help.
- Blish: TAIMI? How?
- Taimi: Is that Blish? Are you okay? I've been so worried!
- Gorrik: We're trapped... (static) ...bottom level lab.
- <Character name>: We'll come get you. But we also need to shut down the gates to stop Joko's army.
- Gorrik: The gate hub's on the way. But the bigger danger is... (static) if Joko gets hands on it— (static)
- PA Announcer: Transmission failed.
- Taimi: Oh boy.
- <Character name>: Yeah. First things first: we shut down that gate hub. Rox, tell the Olmakhan to dig in; this may take a while.
Upon reaching the gate hub:
- <Character name>: There's the gate hub.
- Braham Eirsson: Uh, that is a LOT of Awakened in there. Charging right in might not be the best plan.
- Taimi: The Inquest probably have protective measures all over. If you took any of those security passwords, maybe they'd help?
- Taimi: That exit gate may be programmable. That's how Joko's sending his forces all over Tyria!
- <Character name>: And the smaller gates are how they're getting in HERE.
- Taimi: Don't bother trying to hack the gate controllers. Just smash 'em—that'll shut 'em down.
Interacting with the Stealth Console:
- Stealth Console: Stealth Control Console
- Please enter password to activate...
- I don't have one. (if password not taken at security console)
- Input password and activate stealth. (if password taken at security console)
- I don't need this.
Interacting with the Door Control:
- Door Control: Door Control Access Panel
- Open door.
- Exit.
Upon entering the gate hub chamber:
- Braham Eirsson: There's too many of them! Try the turret controls!
Interacting with the Turret Console:
- Turret Console: Turret Control Console
- Please enter password to activate.
- I don't have one. (if password not taken at security console)
- Input password and activate turrets.(if password taken at security console)
- I don't need this.
Upon shutting down the gates
- <Character name>: Okay, inbound gates are shut down. That should stop the invasion for now.
- Taimi: Until an Awakened asura comes along and fixes the controls. Maybe Gorrik and Blish can think of a permanent fix.
- <Character name>: In the meantime... Rox, we took out the controls for inbound Awakened. Which may mean more of them stuck on your end.
- Rox: Understood. OLMAKHAN! Their escape gates are blocked! Get ready for a reverse stampede!
Interacting with the Golem Console:
- Golem Console: Golem Control Console
- Please enter password to activate...
- I don't have one. (if password not taken at security console)
- Input password and activate golems. (if password taken at security console)
- I don't need this.
Interacting with the Golem Bomb Console:
- Golem Control Console, 2.0
- (Caution: Volatile subtype)
- Please enter password to activate...
- I don't have one. (if password not taken at security console)
- Input password and activate golem bombs. (if password taken at security console)
- I don't need this.
Advancing deeper into the facility:
- Braham Eirsson: All those turrets. The Inquest definitely doesn't want anyone getting in there.
- <Character name>: All these bodies... Joko's goons have been trying pretty hard.
- Braham Eirsson: Must be something good inside.
- Gorrik: Ha! Access denied, you unnatural fools!
- Braham Eirsson: That's gotta be them.
Upon reaching the lab:
- <Character name>: Blish? Gorrik?
- Gorrik: Oh, thank the Alchemy! I wasn't sure how long we could keep those fiends out!
- Malfunctioning Golem: Foreign—substance—detected. Internal—systems—compromised.
- <Character name>: Hold that thought.
After battle:
- <Character name>: All clear.
- Gorrik: Unlocking the door now.
Upon entering the basement:
- If attacked the insects:
- Gorrik: No, my specimens! Don't hurt them!
- Braham Eirsson: Sor-RY.
- Small Golem: See, it's them. I told you it wasn't a trick.
- Otherwise:
- <Character name>: Hello? Gorrik? Blish?
- Small Golem: See, I told you it wasn't a trick. I'm de-cloaking.
- <Character name>: Gorrik? Where's your brother?
- Small Golem: Here! Hello, I am Blish.
- Braham Eirsson: Uh...
- Gorrik: Is there a problem?
- Taimi: Wow, Gorrik—you're welcome. Blish, why does your voice sound weird?
- <Character name>: One second, Taimi...
- <Character name>: She was so excited about seeing Blish again. I'd hate for her to find out about this...golem situation over a comm.
- Braham: Agreed. This is the sort of thing she should learn about in person.
- Gorrik: If you're finished whispering...
- <Character name>: Okay, Gorrik. What's the big threat?
- Gorrik: It's urgent. Something we uncovered in Fahranur...
- PA Announcer: Alert. Containment vault breach in progress. Alert.
- Gorrik: No! It's Joko—he'll get the samples!
- <Character name>: Explain. Now.
- Gorrik: The vault contains samples of the ancient Scarab Plague. The deadliest pestilence in history—it decimated Elona.
- Gorrik: Imagine Joko unleashing it throughout Tyria. Nothing would survive.
- PA Announcer: Activating radical decontamination protocol level two. Self-destruct initiated.
- Braham Eirsson: What is it with Inquest self-destructing labs?
- Gorrik: It's the automated fail-safe. We have to get to the vault! Hurry!
On the way to containment vault:
- <Character name>: How did this happen?
- Gorrik: The Inquest recovered the Scarab Plague in Fahranur. We've been experimenting with it, and—
- Braham Eirsson: Wait a— Those horrible plague tests on the Olmakhan? That was YOU?
- Gorrik: No! I study insects—the scarabs themselves. I was against the testing. Although the results have been fascinating.
- Gorrik: Also, it's technically not a plague; it's a pestilence. That's something of a misnomer among—
- Taimi: Gorrik!
- Taimi: What about the self-destruct?
- Blish: Once the decontamination protocol starts, it can't be turned off.
- <Character name>: Damn it... Rox! Rata Primus is going to self-destruct! Get the Olmakhan as far back as you can.
Upon reaching the containment vault:
- Gorrik: Oh no... the door's wide open.
- PA Announcer: Warning: contagions in this vault may cause tissue destruction, parasitic infection, or death.
- <Character name>: Too late—they're gone.
- Taimi: Try the gate hub!
On the way to the gate hub:
- <Character name>: More Awakened—we don't have time for this!
Upon reaching the gate hub:
- <Character name>: Joko! You twisted— Stop and face me!
- Palawa Joko: Before unleashing the Scarab Plague on your beloved Tyria? Don't you wish.
- Palawa Joko: The old me would've drawn this out long enough for you to hear the death screams of Tyrian victims.
- Palawa Joko: The new me, on the other hand... Better to be sure. Commander Lonai?
- Commander Lonai: Yes, Great One.
- Palawa Joko: Kill them.
- Commander Lonai: As you command.
- <Character name>: No!
- Palawa Joko: A small parting gift.
While battling Lonai:
- PA Announcer: Error. Error. Targeting matrix unstable. Polarity unstable.
- Braham Eirsson: It's sucking us in!
- Commander Lonai: Don't fret, norn. Wherever we land, you'll still face me.
- PA Announcer: Radical decontamination level two: buffering.
Upon emerging from the portal:
- Braham Eirsson: Divinity's Reach!
- <Character name>: Everyone, clear out!
- Braham Eirsson: Those burning rocks she summoned—they're killing the townfolk!
- <Character name>: Blish, Gorrik—can you hear me?
- Blish: Yes, we're reading you on our instruments. It appears Joko damaged the gate.
- Gorrik: Can you fix it?
- Blish: I will try. But we won't know if it's working until the commander and Braham go through it.
- Braham Eirsson: Spirits! You're filled with fire!
- Blish: Either way, I'll need a way to cut through the interference.
- Taimi: Work fast, Blish! The self-destruct countdown!
- Commander Lonai: Tyrians. These fools don't know what they have: Freedom to do as they please. No master to control them.
- <Character name>: Your master left you to die.
- Commander Lonai: You assume you'll defeat me. You're wrong.
- Braham Eirsson: She's Awakening townspeople. Everybody run! Get out of here!
- Blish: I believe I can use Lonai's energy signature to direct a portal to your location. But the flare I'm reading is too weak.
- <Character name>: He's probably picking up the shade.
- Braham Eirsson: Is there any way to make it burn brighter?
- Braham Eirsson: The fire you took from those burning rocks... Blasting the shade might make a bright enough flare for Blish to see.
Upon sending the signal:
- Blish: Signal strength is sufficient. Opening a portal now.
- Braham Eirsson: Less talking, more opening!
- Braham Eirsson: Here goes nothing...
Upon emerging from the second portal:
- Braham Eirsson: Mount Maelstrom?
- Blish: The gate failed to work properly.
- <Character name>: We can see that, Blish! What's going on?
- Blish: I'm processing as quickly as I can!
- Gorrik: Hurry! The countdown!
- Commander Lonai: I admit, this is a challenge I didn't expect.
- <Character name>: Then yield. Tell us Joko's plans for the plague. Then we all walk away.
- Commander Lonai: You assume Joko's control can simply be discarded. Here again, you're wrong.
- <Character name>: Koss managed it.
- Blish: You'll have to boost the signal even more. Something's weakening it—distance, or perhaps interference.
Upon sending the signal:
- Blish: Fixing your location...
- PA Announcer: Radical decontamination protocol: final calibration.
- Braham Eirsson: It better work this time!
Upon emerging from the third portal:
- Braham Eirsson: Nope. Frostwalk Tundra.
- <Character name>: Keep after her! She can't hold out forever!
- Commander Lonai: Death is coming for one of us. I don't intend it to be me. But if it is...
- <Character name>: Tell me.
- Commander Lonai: Don't leave my remains where Joko can Awaken me again. Please...
Upon sending the signal:
- <Character name>: Okay, you two! Tell me there's good news.
- Gorrik: Commander, (static) ...losing your signal! (static) Working on it, but the self-destruct protocol—
Upon emerging from the fourth portal:
- Braham Eirsson: What the— Where the frozen hell are we?
- <Character name>: No idea. Gorrik? Taimi? Do you read? Can anybody hear me?
- Braham Eirsson: You think...the countdown...ended?
- <Character name>: Doesn't look good.
- Commander Lonai: Give me...peace.
After Lonai's death:
- Braham Eirsson: Worse places for your time to run out, I guess. Kind of...beautiful.
- Braham Eirsson: Plus, not likely Joko can Awaken Lonai here. So I guess she got her wish.
- <Character name>: Braham...the letter. The one you sent Taimi.
- Braham Eirsson: She told you.
- <Character name>: She did. I'm glad she did.
- Braham Eirsson: So I guess we should talk about tha—
- Gorrik: (static) Hello? Can you hear me?
- Braham Eirsson: Gorrik!
- If asura:
- <Character name>: Thank the Eternal Alchemy
- If charr:
- <Character name>: Burn me, what a relief...
- If human:
- <Character name>: Oh, thank the gods...
- If norn:
- <Character name>: Gorrik? Oh, thank the Spirits.
- If sylvari:
- <Character name>: Oh, thank the Pale Mother...
- Gorrik: Where ARE you? These coordinates from that last energy signature make no sense.
- Braham Eirsson: Then they're probably right.
- <Character name>: Can you get us out of here or not?
- Blish: Opening a gate now. I suggest you hurry—auto-destruct is imminent.
Upon returning to Rata Primus:
- Gorrik: Brace yourselves—it's gonna blow!
- Sayida the Sly: Subtle. I like your style.
- Rox: Commander, the Olmakhan force is clear. The last of the Awakened and Inquest are breaking and running. We did it!
- Boticca: Well done!
- <Character name>: Great work, Rox. Give our congratulations to the elders.
- Sayida the Sly: You know...your little friend has been worried. Went inside to "bite her nails in private," she said.
- Braham Eirsson: There's no more avoiding this.
- <Character name>: Yeah. Blish, Gorrik—come with me?
- Blish: Of course.
Upon reaching Taimi:
- <Character name>: Could you give us a few minutes?
- Olmakhan Stormcaller: Of course, outlander. Take your time.
- Taimi: Commander, Gorrik! And...Blish?
- Blish: Hello, Taimi.
- <Character name>: I'm sorry, Taimi. I wish there was an easier way to tell you.
- Taimi: Oh my... You're...
- Gorrik: Here we go again. What'll it be: Disgust? Horror? Don't keep us in suspense.
- Taimi: Amazing... Beautiful.
- Blish: That is...unexpected.
- Blish: And likely inaccurate. Life as a machine is incomprehensible to living beings.
- Taimi: But you're safe. From life's...frailties.
- Gorrik: (grunt) Safe. We just lost our funding, our lab, our data...
- Blish: Also inaccurate. I was able to save substantial data to my local storage.
- Gorrik: My scarab archives?
- Blish: Yes. Also the research on Kralkatorrik.
- Taimi: Then it's settled! You're both working with me now.
- Gorrik: Well...we'll have to discuss authorship hierarchy for any published research.
- Gorrik: And of course we'll stipulate that you don't have supervisory authority. But I suppose that's agreeable.
- Blish: Very agreeable.
- <Character name>: Good. Because we might've stopped Joko's invasion today, but we know he has plans for the Scarab Plague.
- <Character name>: Safe to assume they're horrific.
- <Character name>: If we expect to figure out what he's up to and stop him, we're gonna need all the help we can get.
- Blish: We've got a lot of data to process, so let's get going.
Speaking with Blish:
- <Character name>: I was pretty relieved by Taimi's reaction.
- Blish: As was I. To be welcomed...to be really SEEN, especially by someone so brilliant... It is appreciated.
- Blish: I did not realize how much I missed her mind.
Speaking with Gorrik:
- <Character name>: Got to be tough to lose your lab like that. Glad you'll be working with Taimi for a while, though.
- <Character name>: With Joko stealing the plague, we need all the brainpower we can get. Wish I knew how he plans to unleash it.
- Gorrik: Yes. And yes, I think that's fairly obvious. Fortunately for you, I'm the foremost expert on scarabs.
- Gorrik: Rest assured, you've got expertise and a fair dose of brilliance on your side.
Speaking with Taimi:
- <Character name>: How you're doing, Taimi? I can't imagine how you must feel right now.
- Taimi: It's complicated. (sigh) Everyone keeps checking on me—and I appreciate it—but I'm fine. Mostly I... It's fine.
- Taimi: I'm excited to work with Blish and Gorrik. I think we can make some real progress. On...everything.
Speaking with Sayida the Sly:
- <Character name>: Well, Captain, looks like I owe you again. Hope this wasn't more than you bargained for.
- Sayida the Sly: Are you kidding? First captain to breach Rata Primus? With storm-calling charr and a dragon to boot?
- Sayida the Sly: Every time we cross paths, my reputation just gets better and better. You can call me anytime you want, Commander.
Speaking with Boticca:
- <Character name>: I don't think the Olmakhan need to worry about the Inquest anymore.
- Boticca: Yes. Seems we're safe for now. No more experiments, no more golem attacks.
- Boticca: With Narn's death, we have a sad election ahead. But we've faced tragedy before. We'll get through it.
Speaking with Braham:
- <Character name>: This was a tough one, Braham. You had my back. I appreciate it.
- Braham Eirsson: Well...you had mine. Only fair.
- Braham Eirsson: Barely heard from Rox since we left the village. And when we were there it was Olmakhan this, Olmakhan that. Hmph.
My story[edit]

|
|
Gallery[edit]
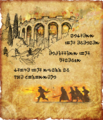
The poster advertising the colosseum, see Trivia.

Notes[edit]
- Although the Megadestroyer and Claw of Jormag appear during this instance (noticeably larger than they do in open world), neither one is interactable and merely offer environmental hazards.
Trivia[edit]
- Braham and the Commander standing near a lone, withered tree in the middle of nowhere waiting for someone whose name starts with G is a reference to the play Waiting for Godot.[1]
- There is a poster on the wall with "Impress your enemies, embarrass your friends, prove your worth in the colosseum" written on it. There is a small Joko poster next to it. [verification requested]
References[edit]
- ^ Comment by Tom Abernathy, Reddit.com