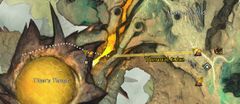
- Entrance
- From
 Heathen's Hold Waypoint — take the northwest thermal tube across. Once landed, hop across the lava and travel up the ledge on the right side until you pass the diving goggles. Heathen's Hold Waypoint — take the northwest thermal tube across. Once landed, hop across the lava and travel up the ledge on the right side until you pass the diving goggles.
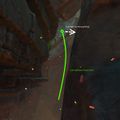
- Grab the Oakheart Essence at the start. Be aware that wasting a single charge unnecessarily will mean you won't be able to reach the first checkpoint. Jump around the first corner (to avoid slipping off the edge), and up onto the plateau. (Image 1)
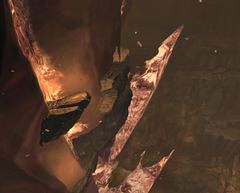
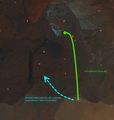
- Jump from the high point (at the right) to the low part of the next plateau (on the left). At the edge of the next platform are some rocks jutting out from the rock face. Climb to the high point of this ledge. (Image 2)
- Turn around to look to the north, and glide over to the platform above the next platform. Jump up the jutting out rocks and progress around the corner. (Image 3)
- Glide over to the jutting out rocks on the next platform and carefully jump up the slope (this is tricky and may take a few attempts). (Image 4)
- Walk to the end of the next platform and look up. (Image 5A) You need to use Oakheart's Reach (#1) on as high as possible above you, then glide to the right beneath the arch. Almost immediately after rounding the corner you will have to use Oakheart's Reach (#2) to reach the edge of the shiny volcano ledge on the right. (Image 5B).
- Walk up the left edge to the highest point (Image 6A), and then use Oakheart's Reach (#3) on the cliff face opposite, with the aim of gliding into the planted area on the far side. (Image 6B)
- On the right in front of you is the first Refreshing Spring (the first checkpoint) - interacting with this grants you the special action skill Return to Checkpoint.
- First checkpoint
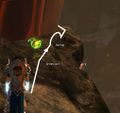
- Bathe in the first Refreshing Spring. If you look above it, you'll notice an Oakheart's Essence which you need to get to but cannot currently reach. Turn around and walk north until you come across a skeleton with a hand pointing over the edge. (Image 7)
- Alternatively, the Essence can be reached by gliding onto a small green rock on the side of the cliff under the Essence, which brings you close enough to jump and pick it up automatically. If this shortcut is used, skip to step 4.
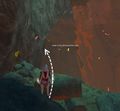
- Glide forwards (you'll need to lean) and follow the wall on your right until you can see a gray ramp leading up to some greenery. (Images 8A and 8B). Land and walk up the greenery. At the top of the ramp in an alcove you will find a second Oakheart's Essence.
- Backtract to the top of the ramp, look up and use Oakheart's Reach (#1) to the ledge above (Image 9). Then glide back left around the corner to the first checkpoint. Use Oakheart's Reach (#2) if you can't reach the ledge (Image 10)
- Use Oakheart's Reach (#2 or #3) to reach the Oakheart's Essence above the checkpoint. Interact with it and make sure you have three charges remaining. On this plateau, proceed past the shrubbery through an opening and drop down. (Image 11)
- Above and slightly to your left is a ramp on the opposite side of the chasm. Cross over the chasm to the top left of the slope using Oakheart's Reach (#1). (Image 12)
- Walk or glide down the slope (opposite where you came from) until you reach more shrubbery and an opening on the right, and then go through it. (Images 13A and 13B)
- Walk up the corridor and stay left to emerge at another opening (images 14A and 14B).
- Glide from the highest slope forwards and left, passing another skeleton corpse, under the rocky overhangs, into a ramp that you can walk on. Get to the top of the ramp and jump to the ledge behind, beside the wall. Alternatively use Oakheart's Reach (#2) if you fall. (Image 15)
- Walk to the furthest point on the ledge. Glide forward and left around the wall and land on the ramp. Go to the top of the ramp and glide to the second ramp on your right (Image 16A and 16B). Use Oakheart's Reach (#2 or #3) to the wall on top of you then glide toward the iridescent mushroom area. (Image 17)
- You can land a bit low and climb up the ledge or use Oakheart's Reach (#3) to get to higher. (Image 18). # The second checkpoint is beneath a large mushroom to the left. (Image 19)
- Second checkpoint
- Climb the plateau once you've triggered the checkpoint to obtain another Oakheart's Essence. Return to the pool and jump through the bushes behind the large mushroom.
- Continue through the bushes and proceed over to the edge. You will be gliding for the next several steps, so read carefully! Your goal is to reach checkpoint #3 by gliding and using your Oakheart's Reach's to keep yourself high enough.
- Jump off the edge and glide around the wall to your left (Image 3), and continue past the rocky cliffs. Glide left around the next wall (Image 4).
- Continue forward and use Oakheart's Reach (#1) to regain your elevation (Image 5). Continue gliding to the right towards a hanging cliff face (Image 6).
- After passing the outcropping, look to the left and up to find the area with blue glowing plants (Image 7). From here you have two options:
- Use Oakheart's Reach (#2) to latch near the upper hole, or
- Continue gliding under the glowing cliff face, potentially using Oakheart's Reach (#2) to regain elevation.
- Following either route, you can use your final Oakheart's Reach (#3) to pull you into the mossy outcropping (Image 8), and from there into checkpoint #3.
- Alternate Path (easier)
- Proceed thru the opening behind the large mushroom and head to the left
- Walk toward the ledge facing Titan's Throat. You will see another skeleton corpse pointing in the next direction.
- Glide off toward the left again, pass another bit of shrubbery.
- Use Oakheart's Reach (#1) on the right rock face, as high as you can, to gain altitude
- Continue gliding toward the large shiny rock shard and land
- Run up to the tip of shard and view the next destination on the left, where more greenery and iridescence lie.
- Glide toward the next checkpoint, use Oakheart's Reach (#2 or #3) as needed.
- Third checkpoint
- Collect the Oakheart's Essence located southwest of the checkpoint spring; then glide back onto the checkpoint's platform and head through a passage with bushes north-northeast of the checkpoint. (Image 20)
- Once on the other side of the passage, glide down onto the platform to the north. From there head to the northeast through a short passage. (Image 21)
- From there stay close to the wall after the bush until around the corner. From there jump to a small ledge before a stone, then either jump over or walk closely around the stone. Head up a low elevation and then glide around the wall to the northeast. (Image 22)
- Once on the other side of the wall; jump then glide onto a tiny platform, starting from the nook in the stonewall close to the ground. From there jump/walk up the rest of the angle and go ahead into a small cave. (Image 23)
- When arriving at the entrance of the cave turn right, follow the wall and look for a passage through the bushes through which red-ish crystals should be visible. (Image 24)
- Once through the opening drop down a little and then follow the path to get to close to the cliff. There turn left and walk between the wall to your left and the cliff to your right. On the other side of the wall jump up a furrow to the higher level, then go on ahead through the area with blue plants on the ceiling. (Image 25)
- Turn right once more to find a low elevation to climb. Once on top of it go on ahead again until you encounter an opening in the bottom next to the southeastern wall through which a skeleton and sometimes an energy flash can be seen. (Image 26)
- Drop down to the skeleton and wait for the lightning strike to flash beneath you, then glide down the opening back in the direction you arrived from. (Image 27)
- From the lower edge of the opening glide further to another lower edge of a lower layer of rock and from there onto a outlooking platform; then follow it to a way up. (Image 28)
- Head up the way up and then glide into a circular opening in the wall. (Image 29)
- From the circular opening head west downwards to a ledge; then follow the ledge close to the end of it. Jump down backwards a bit then glide towards the wall below the ledge to glide through a passage in the wall with blue plants in it located bellow the wall of the ledge. Don't worry about falling or ending up gliding to low here as you can walk back onto the ledge again if you end up to low to make it through the opening. (Image 30)
- In the next room once through the opening, glide form the slope to southwest and then, when close to the wall ahead of you, to the right around the wall to your right. Here again, you can get back up to the slope in case you end up gliding to low if you follow the (non slippery parts of the) terrain back up. (Image 31)
- Note: It is possible, using lean-gliding and swiftness, to jump and glide from the highest rock in the room directly to the cliff with bushes and blue plants on it, thus saving 1 charge of Oakheart's Reach. This may be desirable if a charge of Oakheart's Reach was expended earlier to save a missed glide, such as in step #9.
- Once on the platform in the wall use the first charge of Oakheart's Reach to get up on the cliff with the bushes and blue plants on it, targeting the highest possible point on the lower end of the cliff. From there jump your way through a V shaped path. (Image 32)
- On the other side of the V glide to or jump down and make your way to bellow an opening at the top of the wall that is marked by bushes in the southeast of the chamber. From the stones bellow it use the second charge of Oakheart's Reach and target the ceiling directly above, a short distance from the upper entrance, with it; then glide into the opening once propelled to the ceiling and then head through another V shaped path. (Image 33)
- Then on the other side of this V make sure to glide at least a bit to the southeast, away from the exit of the V as while it is possible to get back up on track from there it might not be the most intuitive to do. From there head further up the slope to the southeast. (Image 34)
- Once close to the wall with the entrance with the bushes above use the third charge of Oakheart's Reach and target above the entrance with it, from there then glide into the opening. (Image 35)
- Then once through the opening and greeted by stone pillar looking things, ignore those and jump or glide down the side of them. Here too it is possible to get back up from if to low. Then head further south to the start of a furrow. (Image 36)
- Walk up the furrow to the highest point then jump up to the rock and walk up a bit further. From there then glide to the platform, turn right on it and head over a pathway with bushes after which lies the end of the puzzle and the chest. (Image 37)
|
 Flashpoint: Searing Ascent — Complete the Searing Ascent. (10
 )
) Return to Flashpoint: Reconquering the Searing Ascent — Complete the Searing Ascent. (0
 )
) Draconis Mons Master: Searing Ascender — Complete the Searing Ascent in Draconis Mons.