Strike Mission: Shiverpeaks Pass
Strike Mission: Shiverpeaks Pass
- Levels
- 80
- Type
- Strike Mission
- Zone
- Grothmar Valley
(Ascalon) - API
- 1331, 1332
| Image(s) |
|
Click to enlarge. |
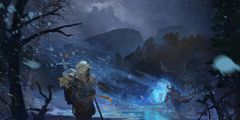
“Recent reports say Shiverpeaks Pass has become more dangerous since the icebrood construct caused an avalanche that severed the path farther north. Crecia and the Blood Legion are looking for volunteers to trek into the pass to check whether conditions are safe to begin rebuilding the way through.
— In-game description
Strike Mission: Shiverpeaks Pass is the first Strike Mission introduced into the game.
Getting there[edit]
Players must own the Path of Fire expansion to join.
Players can select to join either a Public (only available when it is a Daily Strike Mission) or Squad (private) version of the instance. The Public version cannot start with less than 5 players and prevents new players from joining once the boss is engaged. The Squad version does not have the same restrictions but requires a raid-mode (10 player) squad to join.
- Public and squad versions
- Interact with the portal at the Shiver Gate — in Grothmar Valley (south-west of Blood Keep Waypoint — ).
- Interact with the portal in Eye of the North ( Eye of the North Waypoint — ).
- Squad version only
- Enter or be within Eye of the North when the strike mission instance is opened.
Objectives[edit]
- Speak to the Blood Legion captain to begin the Strike Mission.
- Players in Strike Mission: x (if public)
- Brave the elements and reach the top of Shiverpeaks Pass.
- Engage the icebrood construct.
- Icebrood Construct

- Time remaining: 12:00
- Defeat the boss quickly to obtain more reward chests.
- Daily Chests Awarded: x
- Bonus chest 1 disappears in: 7:00
- Bonus chest 2 disappears in: 4:00
- Strike Mission complete!
- Daily Chests Awarded: x/3
- Mission closes in: 2:00
Rewards[edit]
- Every clear:
- Three large Grothmar Valley Chests.
- 88

- Once per day, up to three bouncy bonus chests (depending on the clear time), each containing:
- The first reward slot contains a random item of the following:
- Hatched Chili (3)
- Piece of Unidentified Gear (3)
- Volatile Magic (100)
- 25

- 1,000
 (Karma Rewards are affected by consumable boosters.)
- All of the chests also have a chance to contain an additional, rare item, of the following:
Walkthrough[edit]
This strike mission acts as a good entry point for players tackling instanced content for the first time. Players will be introduced to the concept of 10-player content in a low-pressure environment and can then advance to the Voice of the Fallen and Claw of the Fallen and Fraenir of Jormag strike missions, which are of similar difficulty. Due to their relative ease of difficulty, these three strike missions are collectively referred to by the community as the "IBS EZ3" strike missions.
Jumping puzzle[edit]
Interact with the Blood Legion Captain to open the cave entrance nearby. Large snowballs will roll down the cave path and periodically Launch all players caught in their path. These hazards can be ignored by either hiding in the cave pockets on the side, using teleport skills, or mitigating the launch with the Stability boon.
After passing the cave and climbing on top of the rocks, players must navigate to the end of the jumping puzzle area, which contains a total of five Grothmar Valley Chests along the path. Players can also glide and apply the Swiftness boon to speed up the process.
The first person that reaches the end platform will unlock a teleport beacon. All players can then interact with the icon on either the map and minimap to instantly teleport to the final boss.
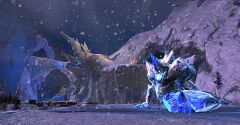
Legendary Icebrood Construct[edit]
- Health: 11,698,890
- Enrage Timer: 12 minutes
- Enrage Effect: Defeats all players
- Fixation Mechanic: None
The damage and healing pressure for this encounter is low. Healing and boons are proximity and priority-based, so it is important to stay near the group be in range of receiving them. Swiftness is one of the few boons not removed when engaging a boss in instanced content and can thus be applied to the group beforehand.
100% – 85%[edit]
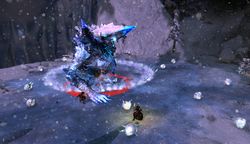
The encounter begins once players attack the construct, which possesses the following skills:
| Skill | Notes |
|---|---|
| Frostbite Aura | Pulsing damage every 3 seconds. |
| Ice Shock Wave | Slams its left arm down and unleashes a shockwave. Several orange AoEs also spawn, each inflicting Chilled. |
| Spinning Ice | Slams its left arm down, unleashing a shockwave and spinning ice chunks that inflict Chilled. |
Players can dodge or jump over the shock waves to avoid damage. Staying near the boss will also prevent the ice chunks from hitting players.
This phase follows a fixed, repeating pattern: Ice Shock Wave (left) → rotates 90° counter-clockwise → Ice Shock Wave (left) → rotates 90° counter-clockwise → Ice Shock Wave (behind) → rotates 90° clockwise → Spinning Ice.
85% – 75%[edit]
The construct adds a new skill upon reaching 85% health:
| Skill | Notes |
|---|---|
| Ice Arm Swing | Sweeps its right arm across half the arena, dealing medium damage and knocking back then spinning players around it. |
Players can apply Stability or use stunbreaks to negate the knockback from this attack. This phase follows a fixed, repeating pattern: Ice Shock Wave (left) → rotates 90° counter-clockwise → Ice Shock Wave (left) → rotates 90° counter-clockwise → Ice Shock Wave (behind) → rotates 90° clockwise → Spinning Ice → Ice Arm Swing.
75% – 50%[edit]
Two additional skills are added for this phase:
| Skill | Notes |
|---|---|
| Ice Crystal | Summons an ice crystal that falls onto a random target's position, inflicting low damage and Chilled. |
| Shatter Arm | At 50% health, the construct shatters its left arm, falls forward, then inflicts low damage and Knockback. |
Ice Crystals periodically fall for the rest of the encounter. This phase follows the same, repeating pattern as before: Ice Shock Wave (left) → rotates 90° counter-clockwise → Ice Shock Wave (left) → rotates 90° counter-clockwise → Ice Shock Wave (behind) → rotates 90° clockwise → Spinning Ice → Ice Arm Swing.
50% – 0%[edit]
Upon reaching 50% health, the construct becomes untargetable and changes its skill rotation:
| Skill | Notes |
|---|---|
| Deadly Ice Shock Wave | Slams its right arm and shatters all ice wall platforms, creating an unavoidable shock wave that inflicts heavy damage and Launch. |
| Ice Flail | Sweeps its right arm across half the arena, inflicting medium damage and Knockback. |
| Ice Shatter → Frostbite | Creates two ice platforms that continuously fire chunks of ice, which inflict Chilled. Players standing on the platform will take low pulsing damage until the chunks of ice stop firing. |
The attacks during this phase deal more damage and can disable players. The shock wave cannot be mitigated with blocks, evades, normal jumps, or invulnerability. Players must stand on top of an ice platform to gain enough height to jump over the shock wave. Alternatively, players can apply Protection and Stability, tank the hit, then quickly heal up afterwards.
This phase follows a fixed, repeating pattern: Ice Shatter → Ice Flail → rotates 90° counter-clockwise → Ice Flail → rotates 180° → Deadly Ice Shock Wave.
NPCs[edit]
Allies[edit]
- Blood Legion Captain
- Blood Legion Captain
- Crecia Stoneglow (voice only)
- Rytlock Brimstone (voice only)
Foes[edit]
Objects[edit]
Dialogue[edit]
Crecia Stoneglow Strike Mission: Shiverpeaks Pass Thank you for your help during the All-Legion Rally. Blood Legion must start rebuilding the bridge to the Shiverpeaks that Bangar's troops destroyed. I'm looking for volunteers to head back up the mountain pass to see if conditions have improved enough to do so. After seeing in person what you're capable of, I figured I'd reach out to you. If you're interested, speak to my captain near Shiver Gate. Both Rytlock and I will try to stay in touch if you decide to head back up there. Best Regards, |
- At the Shiver Gate
- Blood Legion Captain: Commander! We're looking for volunteers to scout the pass. See if it's safe to go on. Want to help?
Shiverpeaks Pass[edit]
- Speaking to the female captain
- Blood Legion Captain: Do you want to return to Grothmar Valley?
- Yes.
- I want to return to the Eye of the North.
- Not right now.
- Speaking to the male captain
- Blood Legion Captain:Thanks for the assistance, Commander. Is your squad ready to go?
- (If public)
- (Advancing will lock your party and prevent any other players from joining the Strike Mission.)
- Let's do this.
- We're still waiting for more people to show up.
- If fewer than 10 players in public
- Sure there's enough of you?
- (You currently have fewer players than recommended for this Strike Mission. Choose to go forward anyway, or wait for more help.)
- Yup. We're ready.
- Your party has been locked.
- No new players will be able to join the Strike Mission. Work with your party to complete the goal!
- We'll wait for more help.
- If fewer than 5 players in public
- You'll need more help. Report back with reinforcements.
- (At least five players must be in the map to proceed. Wait for more players to join, or enter the squad version from outside.)
- I'll check back when help arrives.
- Exploring the pass
- Rytlock Brimstone: Commander. Heard you're headed back into the pass. I'll be right there—
- Crecia Stoneglow: Give me that! YOU stay put.
- Rytlock Brimstone: HEY!
- Crecia Stoneglow: Be careful up there. Conditions have gotten worse since Bangar left. You'll have to find another way up.
- Crecia Stoneglow: The storm isn't normal. Blocking us from following Bangar...
- Crecia Stoneglow: Makes you wonder if it's intentional. And who's pulling the strings.
- Rytlock Brimstone: Watch yourself out there, Commander.
- Arriving at the platform
- Teleport Beacon Lit.
- <Character name> has braved the weather and reached Bitter Horn. An imbued Norn Beacon has been lit, allowing you to teleport to it if you choose to. While you're outside of Bitter Horn, an interactive icon for the Beacon will appear on your minimap.
- Rytlock Brimstone: Commander! You heard it too, Cre. I should be there!
- Crecia Stoneglow: You're being a distraction!
- Upon defeating the Legendary Icebrood Construct
- Rytlock Brimstone: Sounds like that worked out okay.
- Crecia Stoneglow: But no change to the storm. If someone's responsible, it wasn't that thing. I'll send more scouts later.
Related achievements[edit]
 Prologue: Bound by Blood: Ice Breaker — Defeat the final boss of the Shiverpeaks Pass Strike Mission without dying. (3)
 Prologue: Bound by Blood: Smooth as Ice — Defeat the final boss of the Shiverpeaks Pass Strike Mission within the time limit. (3)
 Prologue: Bound by Blood: Stay Frosty — Complete the Shiverpeaks Pass Strike Mission. (3)
 Return to Bound by Blood: (Bonus) Strike Back: Shiverpeaks Pass — Complete the Shiverpeaks Pass Strike Mission. (0
 )
)
Gallery[edit]
Version history[edit]
| Patch | Changes |
|---|---|
| February 27, 2024 |
|
| February 28, 2022 | End of Dragons release:
|
| April 27, 2021 |
|
| March 17, 2020 |
|
| October 01, 2019 |
|
| September 17, 2019 |
|
Trivia[edit]
- Prior to the February 28, 2022 game update, the strike mission rewarded shards depending on the weekly Emissary:
- Blue Prophet Shard (1-3)
- Green Prophet Shard (1-3)
- Red Prophet Shard (1-3)


