Bastion of the Penitent
Bastion of the Penitent

Map of Bastion of the Penitent
- Levels
- 80
- Type
- Raid
- Region
- Heart of Maguuma
- API
- 1188

Loading screen
“The cataclysmic explosion at Bloodstone Fen opened a mysterious portal, and Priory Scholar Glenna has gone to to investigate. Follow her through to explore a forsaken place...and hope that your chances of escaping it are better than those of its former inhabitants.
“The bloodstone explosion unearthed a portal to a place where few have been—and none have escaped. Deconstruct the mysteries and learn the true story of one of history's most misunderstood figures.
— In-game description
Bastion of the Penitent is a raid consisting of one single wing of the same name, it is the fourth raid wing added to the game and is commonly referred to as W4.
Scholar Glenna has found a portal in the wake of the explosion of Bloodstone Fen. Finding themselves in a mysterious area far north of central Tyria, players will have to brave this forsaken place to learn the secrets it hides, and uncover the truth.
Getting there[edit]
Players must own the Heart of Thorns expansion and be in a raid-mode (10 player) squad to join. The raid completion state is based on the player that loads into the instance first (not always the first player who generates the raid pop-up).
- Enter the
 portal in Bloodstone Fen (
 Depths of the Maw Waypoint — ).
 - Enter the respective portal in Lion's Arch Aerodrome ( Aerodrome Waypoint — ).
- Enter or be within Lion's Arch Aerodrome when the raid instance is opened.
History[edit]
The Bastion of the Penitent was originally built by the Wizard's Court a long time ago. However, sometime after it was built, the mursaat moved in and turned it into a correctional facility for the mursaat's political prisoners.[1][2] A journal found within the facility implies that the bastion was built by some early prisoners although it is unclear if this happened during the wizards' or the mursaat's reign.[3]
Locations[edit]
|
|
Scholar Glenna I found something! <Character Name>, I've been poking around that smoking crater (formerly known as the Maguuma Bloodstone) and gathering data. Strange creatures and pockets of unbound magic have transformed the landscape into a destructive mess. But I've made an interesting discovery among the rubble that I want to discuss with you. Meet me at the designated location at your earliest inconvenience. (No, that's not a typo.) Don't be long! |
| Area | Area objectives |
|---|---|
| The Yard | |
| The Holding | |
| The Lockdown |
Interactive map[edit]
Objectives[edit]
- Speak With Glenna.
- Follow Glenna.
- Defeat Cairn the Indomitable
- Cairn the Indomitable


- Time remaining: 8:00
- Follow Glenna inside.
- Find a way past the barricade.
- Defeat Mursaat Overseer
- Mursaat Overseer
- Time remaining: 6:00
- Defeat Samarog
- Samarog
- Time remaining: 11:00
- Free the prisoner from his bonds
- Shackled Prisoner

- Destroy the demonic chains binding the prisoner.
- Demonic chains destroyed: x/4
- Saul D'Alessio
- Deimos
- Time remaining: 12:00
Walkthrough[edit]
Cairn the Indomitable[edit]
At the start of the raid, players will pass through a waterfall and be granted the special action skill Celestial Dash. This mobility skill has a very similar speed and animation to the ranger staff skill Ancestral Grace. Shortly afterwards, glide over to a circular platform where Cairn the Indomitable awaits. Cairn the Indomitable will only spawn on the platform after a player has talked to Glenna by the entrance of the raid.
- Health: 19,999,998 (unchanged if the Challenge Mode is active)
- Enrage Timer: 8 minutes
- Enrage Effect:
 Enraged — Players cannot cleanse Unseen Burden.
 - Fixation Mechanics: Furthest player
Core Mechanics[edit]
 Unseen Burden: Players gain one stack of Unseen Burden every second. Unseen Burden slows player movement by 1% for each stack, up to 99 stacks. You can reduce the number of stacks by successfully navigating the green circle mechanics. (see below) As the fight progresses, normal movement will become almost completely ineffective if these stacks are not removed. However dodges, mobility skills and the Celestial Dash special skill are unhindered; use these to keep out of danger during the fight.
- Spatial Manipulation: Cairn will periodically charge up and release a devastating Spatial Manipulation attack, damaging and lifting players up into the air while adding 25 stacks of Unseen Burden. To avoid this, green circles will form around the arena which can protect players inside from the attack. Successfully using a green circle will also help players by instead removing 25 stacks of Unseen Burden. Your character will gain
 Gaze Avoidance if you have fulfilled the green circle's requirements. There are 3 general patterns of green circles:
- Numbered in Set Positions - Each green circle is in a fixed position and has a number of stars above it (1, 1, 2, 2, 4). The number of stars corresponds to the minimum number of players required to be in the circle such that its protection takes effect. Certain circles will stop spawning depending on which 25% of its health the boss is at. Generally, the majority of players should head for the biggest circle while anyone cursed with Shared Agony can take a small circle for themselves.
- Energy Surge - Cairn teleports to 5 different, set locations based on the percentage of its health. Standing between his teleport points, which can be detected by seeing a rift of disturbed air or by a directional arrow at his feet, will cause a moderate amount of damage and a long range
 Knockback. Above 50%, Cairn will also spawn a guaranteed circle when he lands at the center.
 - Sword - Green circles will spawn around the arena after Cairn completes its Orbital Sweep attack; there is no minimum on the number of players in a given circle.
- Here are some helpful images to indicate the patterns of green circles:[4]
 |
 |
 |
 Shared Agony: Starting at 7:37 and every 20 seconds after that, the furthest player that does not already have it will gain the Shared Agony debuff, taking 10% of their maximum HP as damage to themselves per tick (~every 3 seconds) and creating a red AoE effect around themselves which deals damage to nearby allies. The debuff lasts for one minute.
- There can be at most 3 players with the debuff, and once a 4th player gains the debuff, the person who has the debuff the longest loses theirs.
- Downed players don't receive damage from Shared Agony and if the agonized player himself is downed, no one in the circle suffers damage.
- Every three seconds, the game checks if there are other players in the red circle. The player closest to the agonized player will receive 25% of their max HP as damage. The closest person to Target 1 will then suffer 50% max HP. And the closest person to Target 2 will suffer 75% max HP. All aforementioned players would need to be within the red circle and not already be counted previously for taking damage from that circle. Any other person inside the red circle will suffer no damage at all from Shared Agony.[5]
- Players can take damage from multiple Shared Agony circles at once (e.g. 10% of the maximum health from their own circle, and another 50% from being part of a damage chain in another player's circle).
Overview[edit]
A massive jade construct, Cairn is a rather durable foe. The boss fight has no clear phases, although Cairn will gain more dangerous attacks and use them more frequently as its health drops.
Cairn's auto-attack, Impact, is to swing with its right arm followed by its left arm in a two-part arc towards the furthest player. Cairn will usually follow up with a Meteor Swarm by swinging its left hand back, throwing a spiraling fan of 9 bloodstone projectiles over a 120° arc at the furthest player; these projectiles will travel to the edge of the platform and knock players back for a short distance. This attack can be dealt with in two different ways, kiting and standing close.

- Kiting: One player, typically a druid or another with high self-sustain to tank constant agony, stands near the edge of the platform to always be the target of Meteor Swarm. The projectiles are much easier to avoid and/or block at this far distance.
- Close: Staying within the green and black outlined symbol on the platform allows players to avoid being hit by the projectiles generated from Meteor Swarm. Additionally, if all non-agony players stack in a single location, there is enough room for the three agony players to stand close enough to also avoid being hit by this attack (see image).
Every 4 seconds, Cairn will create 3 circles of swirling energy next to it. Once fully charged, players inside will suffer Displacement and be teleported anywhere in the arena within a 1000 unit radius (similar to the Vale Guardian's Unstable Magic Spike/blue circles). The teleport combined with the knockback of Meteor Swarm can easily knock players off the platform, instantly defeating them. Players in melee range of Cairn should make sure they stay off of the circles, and anyone hit should use mobility skills and dodges to get away from the arena's edges. The bloodstone clouds are projectiles, and can be destroyed or converted. Players should be careful not to reflect the projectiles, as they can hit other teammates instead.
Starting at 7:37 and every 20 seconds after that, the furthest player that does not already have it will gain the ![]() Shared Agony debuff, taking damage over time and creating a red AoE effect around themselves which deals damage to nearby allies. There can be at most 3 players with the debuff, and once a 4th player gains the debuff, the person who has the debuff the longest loses theirs. Afflicted players should try to stay close to healers, while keeping a small distance.
Shared Agony debuff, taking damage over time and creating a red AoE effect around themselves which deals damage to nearby allies. There can be at most 3 players with the debuff, and once a 4th player gains the debuff, the person who has the debuff the longest loses theirs. Afflicted players should try to stay close to healers, while keeping a small distance.
In later parts of the fight, Cairn may extend its arm into a sword blade, and shortly afterwards do an Orbital Sweep around the arena; the position of the sword depends on the 25% of health the boss is at, starting from the south and moving counter-clockwise 90°. The initial slam of its arm as a sword blade will knockback any players on its edge, and the Orbital Sweep around the arena will knockback any players hit by it. Since the attack is highly telegraphed, players should take care to dodge the sweep as it passes over them.
Starting at 25% health or lower, Cairn may also begin to use Gravity Wave after Orbital Sweep, a black tide of energy that ripples outwards and pushes players back towards the arena edges. Players next to Cairn in the middle will be unaffected, but caught players should attempt to dodge back towards the center.
If he is not killed in 8 minutes, he becomes ![]() Enraged.
Enraged. ![]() Unseen Burden will no longer be able to be removed or reduced.
Unseen Burden will no longer be able to be removed or reduced.
Challenge Mode[edit]
In addition to the above mechanics, players must use Celestial Dash once every 10 seconds, or else the skill will automatically activate for the maximum range in the direction the player is facing. The timer for doing this is denoted by an effect called ![]() Countdown. Furthermore, when players reach 99 stacks of
Countdown. Furthermore, when players reach 99 stacks of ![]() Unseen Burden, they will become petrified and lose access to their skills. However, they can still use Celestial Dash to a green circle to remove stacks.
Unseen Burden, they will become petrified and lose access to their skills. However, they can still use Celestial Dash to a green circle to remove stacks.
Mursaat Overseer[edit]
- Health: 22,021,440 (30,000,000 if the Challenge Mode is active)
- Enrage Timer: 6 minutes
- Enrage Effect: Enraged — Increases damage dealt by 200%. No longer able to Claim back tiles.
- Fixation Mechanics: Player with
 Claim
Claim
After defeating Cairn, the miasma below the arena will clear and players are free to walk into the bastion proper. In Death Row, there is a pile of rubble next to the wall with a broken shovel nearby. Heading west will allow you to find a shovel on the ground, and using that on the rubble will open the way into a courtyard, the Recreation Sector that the next encounter takes place in.
The fight takes place on a 'game board', with half the space as brown 'friendly' tiles and the other half as orange 'enemy' tiles, which deal 3,500 damage per second to players stepping on them. There are three pillars of light on the friendly side of the arena. Interacting with one of them will give the player a special action key and remove the pillar from the arena. Players can only have one of the pillars of light's effects at a time. Once three separate players interact with them, leaving no pillars of light behind, the fight begins.
The players who used the pillars of light at the start will gain a special action skill.
- Dispel removes the orange shield on a Jade Scout or Soldier. This should be used whenever off cooldown on any shielded target, with priority on Scouts/Soldiers directly next to the squad.
- Claim can retake an orange enemy tile, turning them brown and safe to stand in again. Aiming the claim skill close to the edge of a tile may result in failure, not claiming the tile.
- Protect creates a circular zone of radius 180 for 5 seconds which turns players invulnerable to damage for the duration that the bubble is up; this includes the spikes, and is the only way to negate them. This skill must be timed well to be helpful, and also has a long cooldown of 180 seconds so it effectively is usable once per fight.
If the players holding any of the three skills die during the fight, they will be available for pick-up again after their respective cooldowns. Claim will be available after 8 seconds, Dispel after 18 seconds and Protect after 180 seconds.
Overview[edit]
The Mursaat Overseer itself is a statue game piece, which simply fixates on the player who took Claim and follows them around. Players will have to deal with the room's various hazards while destroying it.

The most dangerous mechanic is the spike floor. Patches of the floor will glow slightly with small green spikes. After a delay huge spears will come out, instantly defeating anyone inside (with no downed state). The spikes cannot be avoided by conventional means; the only exception is the Protect skill. These traps follow a sequence of different arrangements, which become more difficult as the boss loses health, with every 25% health threshold changing the pattern (see graphic).
On the enemy side of the board, four Jade Scouts (smaller game pieces, or 'pawns') will appear and start moving down across the arena. Occasionally they may also gain an orange shield that makes them invulnerable, until it is removed by Dispel. Any tile that they first move over becomes orange, damaging players that stay on them. Bringing their health to 0 will stop them temporarily, but they will regenerate to full health and start moving to the other side of the board again.
Upon reaching the other side of the board, the Jade Scouts will transform into active threats. Jade Soldiers will fixate on the player who took Protect and attack the party, deal constant AoE damage around themselves while applying ![]() Poisoned,
Poisoned, ![]() Torment, and
Torment, and ![]() Slow, and will explode on death for high damage. They will still claim tiles and gain shields during this time. Since Jade Soldiers claim any tile they move over, if a Soldier will soon arrive at the tile players are on, it is recommended that the player with Claim wait until the tile gets claimed by the Jade Soldier before using Claim on it to turn it friendly again. Once a Soldier is defeated, a Scout will replace it on the far side of the room and begin moving across after some time.
Slow, and will explode on death for high damage. They will still claim tiles and gain shields during this time. Since Jade Soldiers claim any tile they move over, if a Soldier will soon arrive at the tile players are on, it is recommended that the player with Claim wait until the tile gets claimed by the Jade Soldier before using Claim on it to turn it friendly again. Once a Soldier is defeated, a Scout will replace it on the far side of the room and begin moving across after some time.
Challenge Mode[edit]

The Mursaat Overseer gains roughly 36% HP compared to the normal mode (30 million instead of 22 million). Transformed Jade Soldiers gain 90% extra HP (475 thousand instead of 275 thousand).
In addition to the above mechanics, certain sections of the floor will light up blue in a pattern at set intervals of 30 seconds. If players do not stand in these within the 4 seconds they are lit, they die. Additionally, each tile is different from player to player, i.e. client-side. While multiple players can have the same tile pattern, it is unlikely that the whole group will receive the same pattern. There are four possible patterns (as indicated by the adjacent graphic) which always have one blue tile in every row, column, quadrant and the four center tiles. This means that a blue square is (diagonally) adjacent to any possible square a player is standing in and that there is also always a blue field that has no spears in it even though it may be far away.
Blue patterns are announced every 30 seconds (roughly at x:33/x:03) starting at 5:33 and go off ~4 seconds later (x:29/x:59) which is simultaneous to the spikes in the first phase. Contrary to spikes, their timing is independent on the damage though which means it will be unlikely to have spikes and blues at the same time in the later phases.
Protection can NOT save people from dying for not standing in a blue field. If spikes coincide perfectly with the blue fields, one can drop the protect bubble on the center of the arena and cover all four middle tiles.
Samarog[edit]
- Health: 29,493,000 (40,000,000 if the Challenge Mode is active)
- Enrage Timer: 11 minutes
- Enrage Effect: Enraged — Deals 500% damage.
- Fixation Mechanics: Closest player to Samarog on encounter start then furthest player afterwards
A door will prevent entry into Samarog's arena. Interacting with the door gives players ![]() Gift of True Sight, allowing them to find keys in rubble piles in the rooms nearby. To open the door, 4 players with keys need to interact with door again in no particular order. After the cutscene, approaching Samarog will begin the fight.
Gift of True Sight, allowing them to find keys in rubble piles in the rooms nearby. To open the door, 4 players with keys need to interact with door again in no particular order. After the cutscene, approaching Samarog will begin the fight.
Alternatively, a thief can interact with the door to pick the lock, skipping the search for keys.
Phase 1 (100% - 66% health)[edit]
Samarog's arena is lined with spikes, which instantly kill anyone standing inside them. Many of its attacks will knockback players hit, making it very important to dodge attacks and also take note of positioning.
Samarog has two primary attacks. It will deal two spear sweeps in quick succession, and getting caught in both can send players flying. It will also use Impaling Stab, lifting up its spears before smashing the ground, dealing extreme damage to anyone on the point. This also releases a shockwave that travels outward, knocking back players hit; the shockwave can be dodged through, but can also be jumped over (similar to Tequatl's waves). The swipe attack is always 180 degrees from the currently fixated person.
Orange circles will also periodically appear throughout the arena. This indicates Spear Impact will strike there shortly afterwards, which deals damage and leaves a Spear of Aggression or Revulsion at the point which applies conditions to players nearby. The squad should try to keep some sections of the arena clear of these spears.
Whenever Samarog reaches 10% health intervals, it uses Brutalize, leaping to and disabling the fixated player while it beats them up. The remaining players must break the defiance bar to stop the attack. If the pinned player loses all of their health, or Samarog's defiance bar is not broken within a set time, they are defeated without a downed state. Samarog takes 100% less damage and immune to new conditions being applied to him while his defiance bar is up. Once the bar is broken, the furthest player will become fixated.
Phase 2[edit]
Upon reaching the 66% health interval, Samarog will become invulnerable and charge into an alcove just outside the spike walls. To make it return, the squad will have to fight both the jotun Guldhem and the human Rigom, both of whom will fixate on different squad members. Guldhem redirects all damage and conditions he takes to Rigom. Once Rigom reaches 1% health, he will use Anguished Wail, which if it hits Samarog will cause Guldhem to become vulnerable to damage for a short time. Rigom will then heal to 100%. Once Guldhem is defeated, Rigom can be killed normally.
The difficulty of this phase comes with keeping the two mini-bosses apart. If their orange shields are connecting they will gain buffs over time; Guldhem deals more damage, and Rigom gains more health. To avoid this, and to guarantee the ability to damage Guldhem, it is recommended to use ![]() Knockback and
Knockback and ![]() Immobile, or similar effects, to put Rigom into Samarog's alcove, and keep him there until Guldhem is dead.
Immobile, or similar effects, to put Rigom into Samarog's alcove, and keep him there until Guldhem is dead.
Phase 3 (66% - 33% health)[edit]
Once the mini-bosses are defeated, Samarog will charge back into the arena and resume his previous attacks. However, a new hazard is introduced in Inevitable Betrayal. Periodically, a random player will be surrounded in a large filling orange circle. Another player will gain a small green circle. The green circle player must stand within the center of the orange circle, or that player will take severe damage. The pair should also try and position themselves away from the rest of the squad, as the orange circle will also deal extreme damage to other allies inside it.
If there are too many spears in the arena, Samarog will also start recalling them to his location, and the spears deal heavy damage as they travel back to him. Their path will be indicated by arrows on the field.
Samarog's knockbacks will also increase in strength and cause long duration cripple.
Phase 4[edit]
Upon reaching 33% health, Samarog will charge back into its alcove and summon Guldhem and Rigom once again. They can be fought in the same method as before. However, Inevitable Betrayal will continue to take effect and players should stay alert.
Phase 5 (33% - 0% health)[edit]
With the pair defeated again, Samarog will return for its last stand. It gains a new attack, Bludgeon, which has similar animations to the previous shockwave attack but is executed much quicker. Its knockbacks will also become very dangerous, as they increase in distance knocked back[verification requested] and cause ![]() Stun.
Stun.
If the boss is not defeated within 11 minutes, it will gain ![]() Enraged, increasing its damage by 500%.
Enraged, increasing its damage by 500%.
Challenge Mode[edit]

Samarog gains roughly 10 million HP extra over normal mode. (40 million in CM vs 30 million normal)
There are no new mechanics to deal with, however existing ones are much more challenging.
Inevitable Betrayal begins from phase 1 of the fight, and now immobilizes the person with the larger AoE. In addition, a spear will spawn on top of the person with the larger AoE when it is fully charged. This means that the person with the smaller circle will need to run to the person with the larger circle. The rest of the group, especially the tank, should try to move away from the aoe and follow the tanking pattern. The interval is 24 seconds in the first phase, 19 seconds in the third phase and 14 seconds in the last phase.
Spear Impact now follows a set pattern, and the Spears it spawns cannot be removed by the players. They will be pulled in by Samarog once all 12 of them are on the field.
Due to the extra health and slightly advanced mechanics, it is recommended to get Samarog to 66% by approximately 8:30, and finish the phase at 33% by 3:00, to avoid reaching the Enrage phase.
Deimos[edit]
- Health: 35,981,456 (42,000,000 if the Challenge Mode is active)
- Enrage Timer: 12 minutes
- Enrage Effect: Enraged - Increases damage dealt by 200%.
- Fixation Mechanics: Highest toughness (Deimos), highest precision (Saul)
Passing through the collapsed walls after Samarog, players will find an isolated floating platform with a Shackled Prisoner on it and deadly miasma below. There is a short staircase on the closest side that players can glide to while waiting to start the encounter, which begins when any player approaches the prisoner. The encounter fails if the prisoner is defeated at any point. Standing near the gargoyles will cause your character to be ![]() Feared towards the center, so be careful.
Feared towards the center, so be careful.
It is recommended that your squad utilize a tank, a hand kiter, and optionally an oil kiter as well. Those 3 will generally stay on the main platform, while the other 7 continue to take green circle teleportation.
Initial Phase[edit]
Images of Greed and Pride will begin walking toward the Shackled Prisoner; if they reach him they will deal damage to him. The images of Greed deal a small amount and the images of Pride deal a large amount of damage. They are vulnerable to soft crowd control which can slow them down as players attack them. After a short delay one player will randomly be marked by an emptying green circle; when it is empty all players standing on it will be teleported to a demonic realm. From there players can break the chains to the north, east, south, and west while Deimos tries to knock them off the platform with a slow hammer swing telegraphed by an orange triangle AoE. While in the demonic realm, players will constantly gain stacks of ![]() ?? which decreases player movement speed with each stack similarly to Unseen Burden. As soon as a chain breaks the players will be teleported back. The phase continues until all four chains are broken, freeing the prisoner. Conditions on the chains will continue to tick damage even after the players have been teleported back to the main platform.
?? which decreases player movement speed with each stack similarly to Unseen Burden. As soon as a chain breaks the players will be teleported back. The phase continues until all four chains are broken, freeing the prisoner. Conditions on the chains will continue to tick damage even after the players have been teleported back to the main platform.
Second Phase[edit]
After the chains are broken, Deimos will teleport to the mortal realm to stop the players from assisting Saul. Saul throws a banner that lasts 20 seconds to the squad member furthest away from Deimos. The banner heals everyone within its range for 5% of their maximum HP every second. Saul will also cast ![]() Unnatural Signet (lasts 10 seconds) on Deimos 4 to 5 seconds after he appears, each minute. Deimos periodically uses his Annihilate skill - a powerful knockback that cascades from the front over the sides to the back of himself that cannot be prevented with stability, only with
Unnatural Signet (lasts 10 seconds) on Deimos 4 to 5 seconds after he appears, each minute. Deimos periodically uses his Annihilate skill - a powerful knockback that cascades from the front over the sides to the back of himself that cannot be prevented with stability, only with ![]() Aegis, blocking, dodging and invulnerability. Deimos will also periodically cast Soul Feast - up to 5 stacks of grasping hands will gradually spawn in ~1 second intervals underneath the player that is farthest from the boss. If Deimos walks over these grasping hands, he will gain
Aegis, blocking, dodging and invulnerability. Deimos will also periodically cast Soul Feast - up to 5 stacks of grasping hands will gradually spawn in ~1 second intervals underneath the player that is farthest from the boss. If Deimos walks over these grasping hands, he will gain ![]() Devour stacks. It is advised to have a player with channeled blocks and high healing "kite" the hands near the edge of the platform. This lets everyone else not worry as much about movement or getting knocked back.
Devour stacks. It is advised to have a player with channeled blocks and high healing "kite" the hands near the edge of the platform. This lets everyone else not worry as much about movement or getting knocked back.
At 90% health, Deimos begins to use Mind Crush, a powerful attack that is channeled for 5 seconds before dealing lethal damage to everyone, placing ![]() Weak Minded for 10 seconds on everyone that is hit. This skill can be completely mitigated with the protective bubble from Saul, by blocking it, or by using skills that negate all incoming damage or that prevent lethal damage from downing (such as "Rebound!"). Saul casts
Weak Minded for 10 seconds on everyone that is hit. This skill can be completely mitigated with the protective bubble from Saul, by blocking it, or by using skills that negate all incoming damage or that prevent lethal damage from downing (such as "Rebound!"). Saul casts ![]() Form Up and Advance! on every squad member within his 1,200 unit range for the duration of the Mind Crush channel. Deimos casts Mind Crush every 35-40 seconds.
Form Up and Advance! on every squad member within his 1,200 unit range for the duration of the Mind Crush channel. Deimos casts Mind Crush every 35-40 seconds.
Third Phase[edit]
Starting at 75% health, Deimos starts placing Demonic Tears on the platform every 15 seconds. These tears shoot unblockable bloodstone projectiles every few seconds, these will not remove ![]() Aegis or trigger block effects. A squad member can walk over its white effect circle to close it, gaining
Aegis or trigger block effects. A squad member can walk over its white effect circle to close it, gaining ![]() Tear Instability for 1 minute, which prevents closing another demonic tear for the duration. The affected player will also have a
Tear Instability for 1 minute, which prevents closing another demonic tear for the duration. The affected player will also have a ![]() skull above their head, not visible to other players.
skull above their head, not visible to other players.
At 75%, one player (except the tank or hand-kiter) will randomly be marked by an emptying green circle that teleports everyone standing in it to the demonic realm. This time, a copy of Saul with the ability text "Thief" will appear in the middle of the platform. This copy channels a skill that steals all boons from the squad if its cc bar is not broken by the players. He will try to channel this multiple times, so try not to burn every cc skill on the initial cast. When the copy of Saul reaches 50% health, everyone within the demonic realm, including the copy of Saul, will be teleported back to the main platform. With that, the grasping hands now start moving towards Deimos, but disappear after 5 seconds.
At 60% health, Deimos starts using Rapid Decay (Also known as oil/black circles), an AoE field that is telegraphed 3 seconds as an orange effect field. Rapid Decay deals damage and expands its radius every time someone is hit by its effect until ~80% of the platform is covered. Deimos uses Rapid Decay every 15 seconds and the fields disappear after 30 seconds. Deimos targets the squad member closest to the boss, excluding the tank. A player can be assigned to kite this mechanic away from the middle where Saul casts the bubble for Mind Crush.
Fourth Phase[edit]
When Deimos reaches 50% health, one player (except the tank or hand-kiter) will randomly be marked by an emptying green circle that again teleports everyone standing in it to the demonic realm. This time, a copy of Saul with the ability text "Gambler" will appear. It will periodically disappear and summon 3 clones, placed in direction of the previously destroyed chains. The squad members need to defeat the "real" copy of Saul, which can be identified by what weapon he is wielding: clones wield Prisoner's Treasured Bough, while the non-clone wields Staff of Matthias. When the copy of Saul reaches 50% health, everyone within the demonic realm, including the copy of Saul, will be teleported back to the main platform. The copy of Saul aggros on a player, presumably the one with the highest precision (see details in the discussion page). The grasping hands start moving towards Deimos, but disappear after 5 seconds.
At 40% health, the images of Greed and Pride from the initial phase start appearing again and walk towards Saul. They explode upon reaching Saul, dealing 2% and 25% of the maximum HP respectively to Saul and anybody in the vicinity. Players near the explosions will be hit as well, this will remove ![]() Aegis and trigger blocks.
Aegis and trigger blocks.
Fifth Phase[edit]
When Deimos reaches 25% health, one player (except the tank or hand-kiter) will randomly be marked by an emptying green circle that teleports everyone standing in it to the demonic realm. This time, a copy of Saul with the ability text "Drunkard" will appear. It will periodically teleport players on the platform around if its cc bar is not broken. The time frame to break him in this phase is considerably smaller than his "Thief" phase. When the copy of Saul reaches 50% health, everyone within the demonic realm, including the copy of Saul, will be teleported back to the main platform. The grasping hands start moving towards Deimos, but disappear after 5 seconds.
Final Phase[edit]
At 10% health, Deimos becomes invulnerable and teleports everyone to the demonic realm. Deimos now appears as a world boss/structure at the side of the platform. He no longer uses Annihilate and Mind Crush, but he will continue creating hands and Rapid Decay (oil) circles as before. He begins using an auto-attack chain of slamming the ground, alternating between the left and the right hand for the first two slams, then slamming with both. Each of the slams will knockback nearby players away unless blocked or with ![]() Aegis or
Aegis or ![]() Stability, the singular slams will affect their respective side of the arena, and the slam with both hands the middle part. Once Deimos is defeated, players and Saul will be teleported back to the Solitary Confinement platform and the prison will be cleared of miasma, allowing further exploration and investigation of the area.
Stability, the singular slams will affect their respective side of the arena, and the slam with both hands the middle part. Once Deimos is defeated, players and Saul will be teleported back to the Solitary Confinement platform and the prison will be cleared of miasma, allowing further exploration and investigation of the area.
Challenge Mode[edit]
- Deimos gains roughly 6 million HP over normal mode (42 million CM vs 36 million normal).
- Saul is no longer a part of the fight and cannot help, therefore the following must be dealt with:
- Saul will not create his ward in the center and thus Mind Crush must be blocked by other means such as Aegis.
- Since Saul remains trapped, he cannot be healed, so it is vital to kill as many Prides and Greeds as possible before they can damage him.
- Unnatural Signet will not be cast on Deimos, so overall damage dealt by the squad will be lower.
- The healing banner will not be placed on the squad member furthest away from Deimos, so the hand kiter must be prepared for extra pressure.
NPCs[edit]
Allies[edit]
Foes[edit]
- Deimos (boss)
- Humans
- Cairn the Indomitable (boss)
- Jade Scout
- Jade Soldier
- Mursaat Overseer (boss)
- Unknown
- Samarog (boss)
Objects[edit]
- Anvil
- Body
- Broken Shovel
- Corpse
- Challenge Mote
- Clothes Pile
- Crumpled Note
- Dagger
- Demonic Bond
- Dirt Pile
- Fire Pit
- Food Platter
- Food Stash
- Four Hidden chests
- Jotun Corpse
- Journal
- Journal Page
- Ley Rift
- Locket
- Open Book
- Prison Cell
- Pyramid
- Rack
- Shovel
- Spear of Aggression
- Spear of Revulsion
- Speared Corpse
- Strange Book
- Strange Object
- Strange Object
- Tattered Book
- Torture Chair
- Tree
- Urn
Dialogue[edit]
Upon approaching Glenna:
- Scholar Glenna: There you are! Now that you're here, we can explore this place.
- <Character name>: I see someone's a bit impatient. You think there's something important here?
- Scholar Glenna: Isn't it obvious? I make a discovery, I'm going to investigate the heck out of it.
- Scholar Glenna: And wait 'til you see what I found.
- <Character name>: Where exactly are we?
- Scholar Glenna: Good question! I don't know. But the answer is most certainly around us somewhere.
After deciding to move onward:
- <Character name>: All right. Lead the way.
- Scholar Glenna: Follow me.
- Cairn
Upon receiving Celestial Dash:
- (one of the following)
- Scholar Glenna: Huh. Do you feel that?
- Scholar Glenna: Whoa. That feels different.
- (one of the following)
- <Character name>: What the...
- <Character name>: I feel...strange.
- <Character name>: Whoa!
- (one of the following)
- Scholar Glenna: Wooooo!
- Scholar Glenna: Yeah!
Upon approaching Cairn:
- Scholar Glenna: Do you see that?
When hit by Shared Agony:
- <Character name>: It got me! Stay away!
- <Character name>: I'm hit! Keep away from me!
When stacking up Unseen Burden:
- <Character name>: Having...trouble...moving.
- <Character name>: My legs... What's happening?
When missing a mechanics and been thrown in the air:
- <Character name>: Somebody get me down!
- Mursaat Overseer
After gliding west off the platform
- Scholar Glenna: I'm over here!
- <Squad member>: On the way!
- Scholar Glenna: We need to talk.
- <Squad member>: Be right there.
Entering the prison:
- If asura:
- <Character name>: This is a place of incarceration. Who is it meant to contain?
- If human with Commoner background:
- <Squad member>: I swore to myself I'd never go back to jail, and yet... here we are. This one's for you, Serentine.
- If sylvari:
- <Character name>: Is... is this a prison?
- <Squad member>: Of course we'd have to find a dead body.
- Scholar Glenna: Not my fault!
- <Character name>: Is that what I think it is?
- <Squad member>: I see we're late to the party.
- Scholar Glenna: Totally not my fault.
- <Squad member>: Would you stop that already?
- Scholar Glenna: No.
- <Character name>: This poor fellow met an unpleasant end.
- <Character name>: Was there a riot here?
- <Squad member>: What was that?
While stepping over a dirt pile:
- (one of the following)
- <Squad member>: Why is the dirt uneven?
- <Squad member>: This dirt's been disturbed.
After interacting with the Dagger:
- <Character name>: This isn't a shiv. A prisoner didn't forge this.
After interacting with the first Speared Corpse in Death Row
- If asura:
- <Character name>: This poor fellow met an unpleasant end.
- <Character name>: Was there a riot here?
- If charr:
- <Character name>: (sniff) Heh. Stinks to be you.
- <Character name>: Looks like he was killed in a failed uprising.
- If human:
- <Character name>: I hope he died quickly.
- <Character name>: From the looks of it, these prisoners were rebelling against their captors.
- If sylvari:
- <Character name>: I hope he was killed quickly.
- <Character name>: Judging from his surroundings, it looks like he was part of a failed uprising.
- If norn:
- <Character name>: Whoever killed him was exceptionally strong.
- <Character name>: Almost like he was trying to quell an uprising.
After interacting with the second Speared Corpse in Death Row:
- <Character name>: Judging from the trajectory of these spears, the attacker struck from a precise location.
- <Character name>: But where was he situated?
After interacting with the Jotun Corpse
- If asura:
- <Character name>: This appears to be a multiracial incarceration facility. Humans, jotun... Who else is being kept here?
- If charr:
- <Character name>: (snort) Jotun and humans... who else did they lock up in this place?
- If human:
- <Character name>: Whoever ran this prison made some enemies. If humans and jotun were locked up, who else did they jail?
- If sylvari:
- <Character name>: So many lives cut short. I wonder... if they imprisoned humans and jotun here, who else did they incarcerate?
- If norn:
- <Character name>: If they imprisoned humans and jotun, who else did they hold here?
After interacting with the Clothes Pile:
- If asura:
- <Character name>: These clothes wouldn't fit a bipedal individual. And whoever wore the garments left scales behind on the fabric.
- If not asura:
- <Character name>: Whoever wore the garment left scales behind on the fabric.
- <Character name>: It's almost as if...they fit a serpentine creature. Did a krait wear this? Or some other being?
When approaching the Locket:
- <Character name>: Uh...
After interacting with the locket:
- (one of the following)
- <Character name>: Hm. Mmm-hmm.
- <Character name>: (exhale)
When approaching the rockfall:
- (one of the following)
- <Squad member>: (sniff) There's something in the next room.
- <Squad member>: The rubble here seems deliberately placed.
- <Squad member>: There's a light breeze coming through here.
- <Squad member>: There's an air current streaming through the debris.
- <Squad member>: This refuse was deliberately placed here.
- <Squad member>: Why would someone barricade themselves in here? What's on the other side?
- <Squad member>: I feel an air current.
When grabbing a shovel:
- (one of the following)
- <Character name>: Let's go dig up something interesting.
- <Character name>: Time to unearth some artifacts.
When digging up a dirt patch:
- <Squad member>: Let's see what we just found.
When digging up a chest:
- <Character name>: What mysteries have we uncovered today...
Upon arriving at the Mursaat Overseer arena:
- If asura:
- <Squad member>: This almost looks like prison polymock.
- If human:
- <Squad member>: I feel like we stepped into someone's board game.
- If sylvari:
- <Squad member>: Oh, this doesn't look ominous.
- If charr:
- <Squad member>: What the...
Upon obtaining the Dispel ability:
- (one of the following lines)
- <Character name>: I could get used to this.
- <Character name>: I should try this out.
- <Character name>: Well, that feels different.
- (or)
- <Character name>: Uh...
- <Character name>: I can pick this.
Upon activating the Mursaat Overseer:
- (one of the following)
- <Squad member>: I suppose we should have expected that to happen.
- <Squad member>: Perhaps that was a bad idea.
- <Squad member>: Look alive! (if charr?)
- <Squad member>: Should I act surprised?
When the floor becomes hazardous:
- (one of the following)
- <Squad member>: Watch your surroundings!
- <Squad member>: Watch your feet!
- <Squad member>: Look out!
When a Jade Soldier powers up:
- (one of the following)
- <Squad member>: One of them just powered up!
- <Squad member>: Our problems just got worse!
- Samarog
When approaching the locked gate:
- (one of the following)
- <Character name>: That doesn't sound good.
- <Character name>: What's this?
- <Character name>: What's that sound?
- <Character name>: What was that?
Interacting with the gate if a thief is present:
- (one of the following)
- <Thief squad member>: Lock, meet thief.
- <Thief squad member>: I've got this.
When Samarog has 66% or 33% health remaining:
- (one of the following)
- Rigom: I can't control myself!
- Rigom: Put me out of my misery!
- Rigom: He's taken over! He killed them!
- Rigom: He was one of us!
- Rigom: He's controlling me!
- (one of the following)
- Guldhem: He's controlling me!
- Guldhem: They never came back! He took over!
- Guldhem: They're making me do this!
- Guldhem: I don't want to hurt you!
- Guldhem: He murdered them all!
Upon defeating Samarog:
- Shackled Prisoner: Have you come to crawl inside my head? Join the others? There's no more room.
After interacting with the Speared Corpse in the Warden's Office:
- If charr:
- <Character name>: (sniff) He's been dead a long time, yet there's little decay.
- If human:
- <Character name>: The body is strangely preserved. Under normal conditions, he'd be a pile of bones by now.
- If sylvari:
- <Character name>: Curious. The elements haven't reclaimed his body. It's as if he's been preserved somehow.
- If norn:
- <Character name>: He didn't die recently, yet the corpse defies decomposition.
- If asura:
- <Character name>: This corpse is anything but fresh, yet it gives off very little odor. Like it's been preserved.
- Deimos
Upon approaching the Shackled Prisoner:
- Shackled Prisoner: What are you doing? You'll let him out!
- Deimos: The Eye has chosen its sacrifice!
Upon freeing Saul D'Alessio:
- Saul D'Alessio: I'd rather die than remain here any longer. I'll fight 'til my last breath!
- Deimos: You will never leave this place, D'Alessio. Not until you obey!
When Deimos channels Mind Crush:
- Saul D'Alessio: Stand in the ward! Quickly!
While fighting Deimos:
- Deimos: We are not finished with you yet.
- Deimos: Your guilty conscience betrays you!
After killing Saul D'Alessio's drunken vice:
- Saul D'Alessio: I was a slave to the bottle.
- Saul D'Alessio: I lost everyone I'd held dear.
After killing Saul D'Alessio's gambling vice:
- Saul D'Alession: I gambled away everything I had, and then some.
- Saul D'Alession: But they came to collect on my debts.
After killing Saul D'Alessio's thieving vice:
- Saul D'Alession: I was desperate, and turned to thievery to pay my creditors.
- Saul D'Alession: But I could not outrun my guilt. I was caught for my crimes and exiled.
- Saul D'Alession: I was left for dead. Until the mursaat found me.
When Deimos has 10% health left:
- Deimos: You will die where and when I decide!
- Deimos: You will be consumed!
- Deimos: Your soul will never rest! Your name will forever be poison on the lips of your people!
- Saul D'Alessio: You have no power over me!
- Deimos: (demonic laughter)
Cinematic upon defeating Deimos:
- Saul D'Alessio: It's all my fault.
- Saul D'Alessio: The mursaat betrayed us and murdered my men, and then dragged me to this terrible place.
- Saul D'Alessio: I've been trapped here, tormented by my own demons—paralyzed by the shame of selling out my people.
- Saul D'Alessio: The Eye kept me alive and used my guilt to try to break me down, force me to be the mursaat's puppet.
- Saul D'Alessio: Now I'm free.
After interacting with the Food Platter:
- <Character name>: Hm.
After interacting with the Urn:
- <Character name>: I guess not all of the prisoners were intended for release.
After interacting with the Fire Pit:
- <Character name>: I don't want to know what those hooks are for.
After interacting with the Torture Chair:
- If charr:
- <Character name>: I can see how this'd make someone talk.
- If human:
- <Character name>: The mursaat's cruelty knows no bounds.
- If sylvari:
- <Character name>: I wonder how many prisoners broke under duress.
- If norn:
- <Character name>: A confessional tool for cowards. Hmph.
After interacting with the Rack:
- <Character name>: Interesting.
After standing near the Dirt Pile:
- <Character name>: This soil feels different.
After interacting with the Journal:
- <Character name>: Hm. Mmm-hmm.
After interacting with the tree:
- <Character Name>: Life happens in the most unexpected of places.
After interacting with the Strange statue:
- <Character name>: Hm. Mmm-hmm.
Upon approaching the bag of coins in the Chamber of the Guilty:
- Saul D'Alessio: I'll see your two silver and raise you three gold.
- "Helpful Friend": Hold on. Hold on. What have you got up those sleeves.
- Saul D'Alessio: Show me your cards.
- "Helpful Friend": Balthazar's backside. I won again!
- Saul D'Alessio: Pleasure doing business with you.
- "Helpful Friend": What? How could you—
- Saul D'Alessio: Don't make bets you can't pay off.
- "Helpful Friend": You're a liar and a cheater!
- Saul D'Alessio: Come on. You can trust me. Does this look like the face of a liar?
- "Helpful Friend": Damn, Saul. You keep losing like this and your grandkids will be paying off your debts.
- Saul D'Alessio: What? That's impossible. Three in a row? No way I'm quitting now.
- "Helpful Friend": Pay up, D'Alessio. You lost fairly.
- Saul D'Alessio: Come on! At least leave me with a little something to get home.
- "Helpful Friend": Your word's not good around here anymore.
- Saul D'Alessio: Roll the dice!
- "Helpful Friend": You're all tapped out, friend.
- Saul D'Alessio: Gods! OK, OK. One more round. Come on.
- "Helpful Friend": We don't allow paupers in this game, D'Alessio. Get your ass out of here!
- Saul D'Alessio: You lying cheater! I saw what you did!
- "Helpful Friend": Hand over the gold unless you want a beating.
- Saul D'Alessio: You want the shirt off my back, too?
- "Helpful Friend": Every day you're late with payment, I'll break a finger. Run out of fingers? I'll snap your neck.
Upon approaching the dagger in the Chamber of the Guilty:
- Saul D'Alessio: Empty your pockets into the bag. That's right, everything.
- Bystander: What's going on here?
- Saul D'Alessio: Just...save the sob story and hand over the gold, all right?
- Bystander: You're making a big mistake!
- Saul D'Alessio: Keep a silver so you don't go hungry. Now get me out of here. Go on. Go!
- Bystander: Why are you doing this?
- Saul D'Alessio: Take off all your jewelry. Give it here.
- Bystander: This is all I have. Someone, help!
- Saul D'Alessio: Nobody's gonna get hurt. Just give me your coin and you can go.
- Bystander: Leave the children alone! Here, take everything we have.
- Saul D'Alessio: Forget you've ever seen this face.
- Bystander: Help us! Anyone! We're being robbed!
- Saul D'Alessio: I'm sorry. I'm...look. Look, I need to pay them or they'll kill me. Understand?
- Bystander: Don't hurt us!
Upon approaching the bottle in the Chamber of the Guilty:
- Bartender: When are you going to pay that tab? I've got a family to feed.
- Saul D'Alessio: Whoever buys me another drink gets a new best friend.
- Bartender: Hey, pal. I think you've had enough.
- Saul D'Alessio: Ha ha. Being sober is for quitters.
- Bartender: You OK, buddy? Here, have some water.
- Saul D'Alessio: My head feels like an ettin sat on it.
- Bartender: Hold on, everyone. I think we've got a camel in disguise over here.
- Saul D'Alessio: My definition of a drinking problem: last call.
- Bartender: You keep putting that liver of yours on trial, it'll jump on the bar and ask for leniency.
- Saul D'Alessio: Bartender, uncork that bottle and keep it flowing.
- Bartender: As long as you've got coin, I'll keep that cup full.
- Saul D'Alessio: What do you say you, me, and this bottle get a room for the night.
- Bartender: (laughing) Man down! We've got a man down over here.
- Saul D'Alessio: Don't get up. I'm fine.
In the Chamber of the Guilty:
- Saul D'Alessio: Deceitful murderers. They used me.
- Saul D'Alessio: My men died for a lie. What have I done?
- Saul D'Alessio: I never meant for any of this. All I wanted was Kryta to be free.
- Saul D'Alessio: They'll think me a traitor. My name will be reviled for generations.
- Saul D'Alessio: I have to escape. I have to find Hablion.
- Saul D'Alessio: They're not to be trusted. I need to warn the others of the mursaat.
- Saul D'Alessio: We must rally against them. They're even worse than the charr.
Gallery[edit]
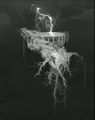
Concept art of the demonic realm.

Early concept art of Recreation Room.


Notes[edit]
- Bastion of the Penitent was released alongside the Living World Season 3 chapter The Head of the Snake on February 8, 2017.
- The raid wing was first announced by an article on massivelyOP.[6]
- This raid is a single wing, and will not be expanded in the future.[7]
Trivia[edit]
- Bobby Stein was the Lead Narrative Designer for the Guild Wars 2 Raids Team at the time of this wing's release.
- The instance was originally themed around a tomb, not a prison.[8]
- One iteration of the tomb idea had an entire room of statues that would come to life, evoking a similar visual to the terracotta army of Qin Shi Huang.[8]
- There are 1,222 spears in the map, for a total of 1.1 million triangles in spears alone.[8]
- Originally, there was no cinematic to introduce the shackled prisoner encounter—the cinematics team saw the model and asked [the raid development team] if they could make one.[8]
- The initial concept for the final boss involved players fighting the shackled prisoner, but the [raid development] team felt it would be more interesting to humanize that character and instead fight the fearsome demon that imprisoned him.[8]
- The ghostly moaning present at the waterfall near the spawn position was voiced by current ArenaNet developers and staff.[citation needed]
See also[edit]
References[edit]
- ^ Preview: Without Dragons, Guild Wars 2 Secrets of the Obscure Enters A New Era, MMORPG.com
- ^ Strange Book
- ^ Journal (Bastion of the Penitent)
- ^ Info graphic on Cairn mechanics/patterns, Reddit.com
- ^ How Cairn's Shared Agony mechanic really works, Reddit.com
- ^ Guild Wars 2: Head of the Snake living world episode coming February 7th, plus new trailer and Heart of Thorns sale, MassivelyOP.com
- ^ The Demons of Bastion of the Penitent, MMORPG.com
- ^ a b c d e Encounter Design: Tabletops and Chess, GuildWars2.com