User:Ninjazzy/Druid Guide
Welcome to my Druid guide for raids. This page has some notes on various raid encounters and how I usually Druid for them. This is supposed to be safer strategies/expectations that are more common outside of speed clearing raid groups (e.g., Snow Crows). Please don’t flame me if you think there’s something horribly wrong here (although I do accept feedback)!
Last updated: March 2021
Druid Basics[edit]
As a Druid, your job is to provide:
- Healing
 25 Might
 Fury
Fury Regeneration
 Protection
 Spotter
- Spirits
- CC
- ... and usually more!
Build & Gear[edit]
Your default build should be:
| wheeee | ||||||
|---|---|---|---|---|---|---|
  |
||||||
  |
||||||
  |
||||||
Your default slot skills should be:
Your default gear should be:
- Full Harrier's armor, trinkets, and weapons
- 6x
 Superior Rune of the Monk
 - Weapons: Axe/Warhorn & Staff, both sets with
 Superior Sigil of Transference and
  Superior Sigil of Concentration
- Additionally, having both a Longbow and Sword for certain situations is useful.
- Nourishment:
 Bowl of Fruit Salad with Mint Garnish or
  Delicious Rice Ball
 - Utility:
 Bountiful Maintenance Oil
A note about gear stats
The Harrier's stats (++![]() Power, +
Power, +![]() Healing Power, +
Healing Power, +![]() Concentration) is important. As a Druid, your two main responsibilities are healing and boons. We use Harrier's because Power converts into Healing Power due to the trait Instinctive Reaction, so despite not being a DPS build, you do benefit from maximizing extra attribute points into Power. By taking other stat combinations, you are losing out on the Healing Power bonus from power or losing Concentration, or other. You should only really take Minstrel's pieces if you need the Toughness for tanking on Druid or for some extra survivability for high pressure fights. There's probably some calculations for min-maxing by adding in Magi pieces after you've capped on Boon Duration, but honestly I feel like the difference is so small I don't even bother.
Concentration) is important. As a Druid, your two main responsibilities are healing and boons. We use Harrier's because Power converts into Healing Power due to the trait Instinctive Reaction, so despite not being a DPS build, you do benefit from maximizing extra attribute points into Power. By taking other stat combinations, you are losing out on the Healing Power bonus from power or losing Concentration, or other. You should only really take Minstrel's pieces if you need the Toughness for tanking on Druid or for some extra survivability for high pressure fights. There's probably some calculations for min-maxing by adding in Magi pieces after you've capped on Boon Duration, but honestly I feel like the difference is so small I don't even bother.
Pets
Try to gather these pets. They are the most needed pets for Druids.
CC pets
 Juvenile Electric Wyvern - CC pet. F2 does 232 defiance bar damage on a 30s cooldown, its auto-attack chain does 232 defiance bar damage and applies 6s of cripple.
 Juvenile Rock Gazelle - CC pet. F2 does 232 defiance bar damage on a 20s cooldown, its auto-attack chain does 200 defiance bar damage and applies 5 stacks of vulnerability.
- If only taking 1 CC pet (i.e., you need specific pet on swap), take Rock Gazelle if your group does high DPS and phases the boss quickly.
 Juvenile Black Moa - CC pet. It is the BiS CC pet, as its F2 does 300 defiance bar damage, but it requires you to play GW1 for Hall of Monuments points to tame.
 Juvenile Pink Moa - CC pet. F2 does 200 defiance bar damage on a 30s cooldown.
- The two Moa pets are excellent, more controlled pets because their auto-attacks don't have hard CC incorporated into it. This makes them a safer option for fights where you need CC on your pet but need finer control over when your pet CCs when you don't want to hard CC certain targets (e.g., Prides on Deimos, Tormented Dead on Soulless Horror).
Other pets
 Juvenile Jacaranda - 5-target auto-attack cleave, single-target root immobilize, for encounters where you need to play "keep away".
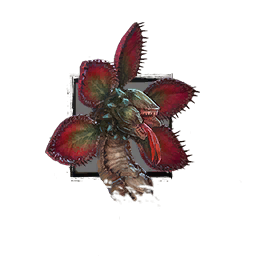 Juvenile Fanged Iboga - Condition-favored pet. Its auto-attack chain gets stronger the more unique conditions are on the boss, and apply torment and confusion. F2 does 150 defiance bar damage, and is a single-target pull.
 Juvenile Smokescale - F2 creates a smoke field, for blinding finishers for Mirage-heavy compositions or blasting stealth for certain pre-casts.
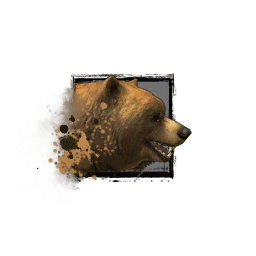 Juvenile Brown Bear - F2 cleanses 2 conditions from 5 allies, good insurance for inexperienced groups on condition-heavy fights.
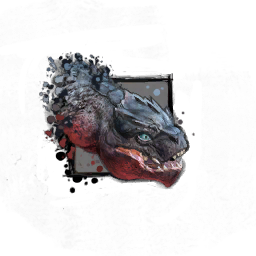 Juvenile Fire Wyvern - F2 creates a fire field, good for getting rid of remote trash mobs (e.g., spiders on Dhuum).
 Juvenile Black Bear - Useful for if you want to use your Druid Gear to Soulbeast Hand Kite for Deimos.
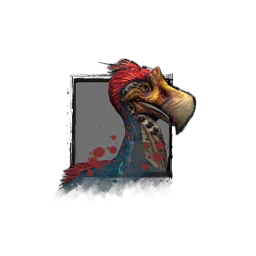 Juvenile Blue Moa - Useful for if you want to use your Druid Gear to Soulbeast Hand Kite for Deimos.
Usage[edit]
Your profession mechanic is Celestial Avatar (CA). In order to enter CA, you need to build up a full bar of Astral Force. Both healing and dealing damage build Astral Force, but healing builds it more quickly (1.5% per tick) than dealing damage (0.75% per tick). The actual amount of healing or damage does not affect the rate at which you accrue Astral Force. When you enter CA, Astral Force will slowly deplete until you leave CA or completely run out (approximately 15 seconds). If you exit CA prematurely, you will lose half your remaining Astral Force.
You will not gain Astral Force while in CA. Despite losing half your remaining Astral Force if you leave prematurely, doing so will allow you to re-enter CA more quickly as you will not have to rebuild an entire bar of Astral Force. As such, try to enter and exit CA as quickly as possible if there is low healing pressure and in fights where astral force is difficult to accumulate (e.g., no pulsing arena damage).
Other notes:
- Be sure to begin every encounter with full Astral Force.
- If your squad wipes and/or everyone is dead at the same time, you will be revived with full Astral Force.
- If you are downed in combat or if you die and are revived between wipes, you will lose all of your Astral Force.
- You can ask a squad member to /gg to build Astral Force, as fully reviving a dead squad member will completely fill your bar from empty. It may need to be done multiple times if other squad members help to resurrect, so be possessive about it if you need it for CA.
- Because Spirits lose health over time, healing them can also be used to generate CA. This is important in encounters where there is no ticking arena damage.
- Regeneration and any other healing that comes from you counts towards building Astral Force, not just direct healing! This is why keeping up Regeneration is very important.
| CA Skills | Notes |
|---|---|
| Cosmic Ray | Small radius, ranged, weak heal. Fairly short cast and no cooldown, so it's easy to spam, but its small radius means your allies must be tightly stacked to benefit. Since it's spammable and ground targeted, it's great for topping up might from range or healing up the last bit of your squad when bigger skills are on cooldown. |
| Seed of Life | Delayed, ranged, small heal. The skill effect activates when the seed "pops" in the animation, so you can precast if you know you'll need it. Light field and cleanses conditions. The skill will continue even after you exit CA so long as you have planted the seed. I might throw it down right before leaving CA. |
| Lunar Impact | Ranged, big radius, big heal, blast finisher, CC (daze). My favorite skill. It does everything you could possibly want. It does have a slightly longer cast time, so I would either try to lead your group with it because people run out of it all the time. |
| Rejuvenating Tides | Centered on you. Water field that moves when you do. Pulsing heal (x5), good for stacking might. If you interrupt this channel the water field goes away, so you cannot really combo it, but anyone inside will combo it a lot. Good for mobile fights. |
| Natural Convergence | Centered on you. Pulsing slow (x3) that spawns an immobilizing "black hole" on five foes when it finishes channeling. It works as a secondary Entangle should you need it. It grants you stability, but you cannot move while channeling or it will cancel. Use if you want to be PMA for your Chronos to have improved slow uptime. Additionally, you can use it to stack might as the might generation is also centered on your target, even if you are far away. |
![]() Might Stacking
Might Stacking
A Druid can upkeep Might (x25) on an entire squad of 10 without assistance. If you cannot do this, your squad damage will suffer and your DPS members will be rather unhappy. Keep an eye on your boon uptime! This is often more important than raw healing.
Due to the Druid trait Grace of the Land, you will grant Might (x2) to 10 allies who are within range of your CA abilities. This is per pulse, meaning that Rejuvenating Tides (CA 4) will generate Might (x10) because it pulses 5 times. This also includes the Lesser Seed of Life that spawns from any glyphs that are traited to Verdant Etching.
![]() Might comes from other places also. Call of the Wild (WH5) grants Might (x6). Frost Spirit active, Cold Snap grants Might (x3) due to Nature's Vengeance.
Might comes from other places also. Call of the Wild (WH5) grants Might (x6). Frost Spirit active, Cold Snap grants Might (x3) due to Nature's Vengeance.
Other boons
![]() Fury is granted by Call of the Wild (WH 5). If you camp staff, your subgroup will know. Storm Spirit's active skill, Call Lightning also grants Fury due to Nature's Vengeance, but it is often not used for that purpose.
Fury is granted by Call of the Wild (WH 5). If you camp staff, your subgroup will know. Storm Spirit's active skill, Call Lightning also grants Fury due to Nature's Vengeance, but it is often not used for that purpose.
![]() Regeneration is granted by Call of the Wild (WH 5) (noticing a trend?) due to Windborne Notes. It also is granted to allies who touch the water field created by Sublime Conversion (St 5), and pulsed to allies from the active skill for Water Spirit, Aqua Surge.
Regeneration is granted by Call of the Wild (WH 5) (noticing a trend?) due to Windborne Notes. It also is granted to allies who touch the water field created by Sublime Conversion (St 5), and pulsed to allies from the active skill for Water Spirit, Aqua Surge.
![]() Protection is granted by both the spirit passive for Stone Spirit as well as the active skill, Quicksand.
Protection is granted by both the spirit passive for Stone Spirit as well as the active skill, Quicksand.
Spirit Management
Spirits are special summons that grant bonuses to allies in range. The initial skill summons them, and then the skill flips over an "active" spirit ability. Using the active skill for a spirit teleports it to you and then does some ability. When traited with Nature's Vengeance, it will also grant boons to allies when activated.
Spirits slowly lose health over time, but they can be healed to extend their lifespan. They will die if you move out of range (5,000), or if you transition from land to water or vice versa (even if they are equipped in both your terrestrial and aquatic builds). You should always be using their active skills whenever they are ready, especially in fights that are mobile. This will ensure boon uptime and that allies are within range of the spirit's effect.
- Water Spirit: Heal on attack hit (ICD: 10 seconds) - Active boon: Regeneration
- Frost Spirit: +10% outgoing damage - Active boon: 3 Might
- Stone Spirit: Grants Protection on hit (ICD: 10 seconds) - Active boon: More Protection
- Sun Spirit: Inflict
 Burning on hit (ICD: 8 seconds) - Active boon:
  Vigor
Vigor - Storm Spirit: Inflict
 3 Vulnerability on hit (ICD: 10 seconds) - Active boon: Fury
 - Spirit of Nature: Heal per second - Active boon:
 Stability
Spirit actives also have other effects which occur.
- Aqua Surge: AoE burst heal
- Cold Snap: AoE
 Chilled
 - Quake: AoE
 Crippled and
  Immobile
 - Solar Flare: AoE
 Blinded
 - Call Lightning: AoE
 Daze
Daze - Nature's Renewal: AoE cure 3 conditions on 5 allies, and instantly revive up to 5 allies within range.
- Nature Spirit loses 30% of its health per ally revived, so it will die and go on a full 120 second cooldown if it revives more allies than it has health to sacrifice.
Wing 1: Spirit Vale[edit]
Vale Guardian[edit]
Pets:
and
Skills
Traits
 Druid (major): Take
  Verdant Etching.
Tips
Beginning of the encounter
- Start on A/Wh. Wait for everyone else to ready up, then summon your spirits and ready up last.
- When the boss is pulled, begin granting boons. Make sure combat has started! Boons are stripped at the beginning of encounters so any boons you grant prior to the fight starting will be stripped.
Boon "opener"
- Activate your spirits
- Call of the Wild (WH 5)
- Celestial Avatar
 Quick Draw Rejuvenating Tides (CA 4)
- Lunar Impact (CA 3)
- Rejuvenating Tides (CA 4)
- Release Celestial Avatar
- Sublime Conversion (St 5)
- Ancestral Grace (St 3)
Seeker Management
You will likely be on Seeker management. It's just a game of keep away from the rest of the squad. You just have to keep them away from the squad long enough for them to despawn. You do not have to kill them; slowing or immobilizing them is sufficient. You can do this a few ways:
- Entangle and Natural Convergence (CA 5) can hit and immobilize close Seekers, but you may need to move off stack a little bit to ensure that it hits both.
- Vine Surge (St 4), Winter's Bite (A 3) are single-target mobility-impairing weapon skills.
- Jacaranda's Embrace (Jacaranda F2) acts as a single-target version of Entangle.
- Glyph of the Tides is a AoE push, and it will also spawn a Lesser Seed of Life, which is nice.
Words of warning: Make sure you do not use Glyph of the Tides in CA, as it is a pull and you will instead scream as you realize your mistake and kill your squad by pulling all the surrounding Seekers on top of them. Be careful when using Natural Convergence (CA 5), as you will be rooted for the duration of the channel, so you risk getting ported if a port appears underneath you. You have the option of moving or dodging out of it like normal, but you will cancel the channel and the immobilize will not happen, as it happens with the last pulse of the channel.
Outhealing Greens
If you have good ![]() Alacrity, CA should be ready just before greens pop off. If you know a green is about to pop, don't go into CA too early. After the damage tick, you can easily top up your group with:
Alacrity, CA should be ready just before greens pop off. If you know a green is about to pop, don't go into CA too early. After the damage tick, you can easily top up your group with:
- Sublime Conversion (St 5) on group
- Ancestral Grace (St 3) to blast the water field
- Weapon swap to A/Wh
- Call of the Wild (Wh 5) to blast the water field again
- Celestial Avatar
- Lunar Impact (CA 3) to blast the water field again again
- Rejuvenating Tides (CA 4) to continue healing and stack Might
- Lunar Impact (CA 3) again if you were able to Quick Draw it the first time
- Release Celestial Avatar
Split Phase
Typically, I end up having to pull Green Guardian during split phase. You can use Ancestral Grace (St 3) to quickly move to the green pylon. Once you attune, you can return to Blue Guardian, stack boons, port spirits, and heal, as the rest of the blue-attuned squad will receive damage from the green aura. You can help with damage by using Hunter's Call (Wh 4) to quickly stack Vulnerability (x16) on the Green Guardian. You have enough sustain to help with red if they are still struggling after both of your side's guardians are defeated. You can get close and send your pet to CC Red Guardian, but I wouldn't waste CA since usually you need to save it to start stacking Might when everyone gets back together after the split.
Spirit Woods (Rifts)[edit]
Pets:
- Take whatever you want.
Skills
Traits
- Druid (major): Take
 Celestial Shadow.
Tips
Wow, you didn't think I'd do an actual write up for this did you?
Deciding on slot skills
If you have good Stability uptime or your group is relatively experienced, having the extra burning from Sun Spirit is good. It also grants Vigor which means more dodging. "Protect Me!" is more of an emergency group stunbreak button, so it's for groups that are much less experienced and are lacking in Blocks/Stability. I usually will bring all spirits and swap if something else is needed. I take full spirits 99.99% of the time.
Keeping up boons
- If you have the mastery, remember that Adrenal Mushrooms will reset all of your cooldowns and also refill your Astral Force completely, meaning you can blow all your cooldowns and CA then take the Adrenal Mushroom to instantly reset it all.
- Each Adrenal Mushroom can only be picked up once every 30 seconds, but there are two of them.
- Go into CA and grant boons/port spirits on top of portals as people are waiting for the exit portal and/or standing still while closing rifts, because that's mostly the only time that people will be standing still and stacked.
Getting to rifts
- The encounter is fairly situational, since rift locations are fairly RNG. If you have a mesmer who is porting it will make your life significantly easier. You can take portals while casting skills!
- If you don't have portals, your ability to give Swiftness and Superspeed through Celestial Shadow as well as cleanse Crippled become critical to the encounter success. It's still important even if you do have portals.
- Ancestral Grace (St 3) is excellent personal mobility.
- Call of the Wild (Wh 5) grants Swiftness.
- If you really really REALLY need more personal mobility, you can swap out your Axe for a Sword.
- Vine Surge (St 4) cleanses movement-impairing conditions from allies.
Other things to keep in mind
Your spirits will die once you make it across the bridge past the rifts area before Spirit Run if you do not summon them to the bridge first, as they will be out of range. Summon them again to the stack when your cooldown is ready, or you can unslot them and reslot them quickly before the next encounter and use the Adrenal Mushroom by the gate to summon them quickly but oftentimes there isn't enough time for that (or you will still be in combat).
Spirit Run (Race & Graveyard)[edit]
Pets:
- Take whatever you want.
Skills
Traits
- No change from previous.
Tips
WoOOooow, you didn't think I'd make different write ups for the first and second halves of the event, did you??
You'll probably be assigned to "capture duty" meaning you'll stay behind to close rifts as your DPS players race ahead to destroy the Ethereal Barrier. Afterwards, you'll need to catch up to your squad and help them destroy the barrier if it hasn't been destroyed already. The whole point of the slot skills is to allow you to quickly get to rifts and then quickly move to the barrier so you can give some boons to your squad.
- Use Ancestral Grace to quickly move to different rifts.
- Using "Strength of the Pack!" and then "We Heal As One!" will grant you Stability (x25), lots of Fury, and lots of Swiftness.
- You can use Quickening Zephyr as a stunbreak and it will also grant you Superspeed, which is helpful if you get knocked down or Crippled while capturing.
- "Protect Me!" is a group stunbreak.
- Vine Surge clears mobility-impairing conditions.
Before you reach the barrier, you can target it and have your pet attack using F1. Sometimes for memes I swap to a Juvenile Jungle Stalker so I can use the F2 to grant a small amount of Might to the stack. Also use Hunter's Call when you're in range to help top up any missing Vulnerability. When you get to the barrier, buff your party with Call of the Wild, summon your Frost Spirit if you can, and then give Might through CA. Exiting CA will give your group Superspeed to get to the next barrier.
Astral Force may be more difficult to generate here, so be careful not to waste it.
Graveyard
Grab a button. You can use your pet to help you distract ghosts so you can survive. You can also use the small amount of stealth from Celestial Shadow to alleviate some pressure. There really isn't much more to it.
Gorseval[edit]
Pets:
and
Skills
Traits
- Druid (major): Switch back to
 Natural Stride if you swapped it out earlier.
Tips Skill choice: Take Muddy Terrain only as a last resort if targeting Charged Souls becomes that much of an issue.
As the Druid, you have a few important roles here:
- Play keep-away with the Charged Souls during 66% and 33% splits.
- Keep your greedy DPS alive during Ghastly Rampage.
- Help clear orbs to prevent your squad from getting ghosted.
Beginning the encounter
Completely optional: If your squad wants to begin the fight in stealth, you will be expected to take out a Juvenile Smokescale for your squad to blast stealth with its F2 smoke cloud. You can blast for your subgroup using Ancestral Grace (St 3) and then Call of the Wild (Wh 5). Two blasts per subgroup is required to grant enough stealth to "properly" do this try-hard strat. It's a bit tricky because you will want to swap out the pet prior to the encounter starting, as you will use both pets on this fight for different reasons. So you have to F2, blast, blast, and swap back your slotted pet prior to getting in combat. The Smokescale is otherwise not very useful during the fight itself.
Start the fight with your CC pet out. You can grant your subgroup Swiftness to get to Gorseval faster, but remember that this will be stripped when he is aggroed. Go into CA and stack boons when you reach Gorseval; you can use Natural Convergence to give yourself Stability for his first slam if you do not have someone giving Aegis. Make sure you have Gorseval targeted.
Break bars
Make sure you know what "break pattern" your squad will be doing. This will help you prepare for keeping your squad alive during Ghastly Rampage. The pattern will be dependent on group DPS, as after the breakbar you have a limited and defined attack pattern before Gorseval starts channeling the squad-wiping World Eater. Groups with high DPS will break bars faster, and groups that struggle with DPS will break bars slower to give the squad enough time to DPS and phase/kill Gorseval prior to World Eater. When Gorseval begins doing his Ghostly Rampage attack, it gains an unremovable form of retaliation, Vivid Echo. DPS players will easily kill themselves when using multi-hit attacks that proc the retaliation multiple times and/or by standing in the black goop. The black goop will always spawn in the same pattern, so learn the patterns so you can stand in a safe spot and not be downed yourself.
Fast breaks
When doing a "fast break," the group is attempting to break Gorseval's break bar as quickly as possible. If you know that Ghastly Rampage is about to happen, you may need to delay entering CA so it will be ready during the break bar. When the break bar unlocks, you should:
- CC pet's beast skill (F2)
- Celestial Avatar
- Lunar Impact with Quick Draw (CA 3)
- Rejuvenating Tides (CA 4) to heal up
- Lunar Impact (CA 3)
- Release Celestial Avatar - If your squad is dying, stay in CA a bit longer to keep them alive.
- Winter's Bite (A 3)
- Weapon Swap
- Vine Surge (St 4)
(If when you come out of CA you're on staff, you can swap the order of the last two skills.)
If by the end of that sequence Gorseval isn't broken or broken almost immediately after, your group is having CC problems that needs to be addressed. Oftentimes I don't even finish this entire sequence before the bar is broken.
Slow breaks
Slow breaks are actually considerably harder because you need to keep your DPS players alive while they DPS a boss that has retaliation, while also avoiding CC'ing Gorseval too much by using your largest burst healing skill, Lunar Impact (CA 3). You can Quick Draw some abilities like Rejuvenating Tides (CA 4) and heal & clear Vulnerability with Seed of Life (CA 2), but you will not want to stay in CA too long as you will likely want to have it back for when the break is called for. You can also use Water Spirit active Aqua Surge to give your group some healing and Regeneration, blast the water field from Sublime Conversion (St 5) with Ancestral Grace (St 3) and Call of the Wild (Wh 5) to help heal.
If you are having a lot of trouble keeping people alive, you can think about swapping your healing skill out for Glyph of Rejuvenation instead, and trait it to Verdant Etching. It's not as great because it only heals your subgroup, but when used in CA, Glyph of Rejuvenation (Celestial Avatar) is a considerable burst heal to other allies (while only healing you for a little bit). Regeneration will be harder to upkeep if you do this, so you have to place Sublime Conversion (St 5) better so that your allies touch it to receive Regeneration (as well as making sure you are keeping up with Call of the Wild (Wh 5). Do not do this if you are the only healer.
There is only so much you can do until you run out of sustain. Positioning of everyone during the break bar phase is considerably more important during slow breaks, as the black goop will kill faster than you can out heal. Since you do not bring Spirit of Nature here, reviving multiple allies will also be much more difficult.
Split phase (Charged Souls)
You are likely going to be on Charged Soul duty during splits. Make sure you pet swap (F4) to Jacaranda. At 66% and 33%, Gorseval will go invulnerable and summon 4 ghosts who will slowly walk towards him. If they reach him, Gorseval will channel World Eater but remain invulnerable and the squad will wipe. They are susceptible to soft CC only, meaning you need to use mobility-impairing attacks to prevent them from reaching Gorseval to buy time for your squad to kill them.
Your squad will likely start at the northwest ghost and make their way clockwise around the arena. You will want to stand just south of Gorseval's hitbox and target the southwest ghost. Wait until both the southern ghosts are within range of Entangle (you can check this by waiting for the red bar to disappear under the skill icon), and then use Entangle to immobilize them. You will want them to get about halfway to Gorseval before immobilizing; immobilizing them early means that it will wear off sooner and your squad will have to run further to reach each one. You can command your Jacaranda to continue attacking the 4th ghost and run to your squad to give boons. Depending on group DPS you may need to go back and re-immobilize/mobility impair the ghosts. You can do this by using Vine Surge (St 4), using your Jacaranda to use Jacaranda's Embrace (F2) to entangle your targeted soul, using Natural Convergence (CA 5) to immobilize multiple, or chilling with Winter's Bite (A 3). You can also stand near the hitbox of one and summon your Stone Spirit to use Quicksand as that will summon it to your location for an AoE immobilize. You'll want to prioritize the last ghost with longer immobilizes or single target attacks since it is the one that will be up the longest, but make sure other ghosts don't get too close!
Charged Souls are notoriously difficult to target using both tab targeting and mouse. I've found that clicking their feet to target them is fairly consistent, which is important for Jacaranda's Embrace and if you are using Winter's Bite to chill. Since the other attacks are either ground-targeted or AoE, you don't have to have the ghosts targeted.
Charged Souls also pulse Weakness around them, so cleansing that (mostly with Seed of Life (CA 2) and giving the squad boons are important for a smooth split phase. Make sure boons are stacked up and spirits are resummoned as the last ghost is dying to ensure that the squad is ready to attack Gorseval when he becomes vulnerable again.
Sabetha[edit]
Pets:
and
Skills
Traits
- No change from default or previous.
Tips
A good Druid will be assigned to flak kite, bait & throw Sapper Bombs to the players doing cannons, and take care of kicking Heavy Bombs, while also keeping up boons, healing, and providing CC. This encounter can be fairly mechanics-heavy for the Druid, so it may take practice get the rhythm of it. Generally, these mechanics can be handled by others in the squad, but if you are able to do it all then it allows your squad to focus DPS on the boss and it will go much more smoothly. Also, there's a lot of damage everywhere, so don't forget you need to heal yourself!
Bandit pre-event
There really isn't much here. Just stay with your group and support them as they clear out bandits.
Beginning the encounter
You should be last to ready up. Wait for everyone to ready, then summon your spirits, ready up, then use Ancestral Grace to start the fight and make a large gap between you and the squad. Ancestral Grace should get you at least halfway between the east launch pad and Sabetha. From there, run to the western side of Sabetha while porting all of your spirits. Because you are closest to her, you will also get the first Time Bomb mechanic, a large spreading AoE. Simply dodge when the AoE fills to avoid it, or you will take massive damage. Begin flak kiting, swap to Warhorn and stack boons from range with CA if possible by spamming ranged CA skills on the group and using Natural Convergence (CA5) with Sabetha targeted.
Flak kiting
About every 5 seconds while Sabetha is on the platform and not doing the flame wall, she will shoot a flak shot (they look like slowly lobbed fireballs) towards the person who is furthest away from her, which leaves several small-but-threatening fiery AoEs on the ground. If kiting flak, you need to be furthest away, and far enough away that if the flak lands in front of you it will not be on group, as it does not always land exactly where you standing and they have a random spread pattern. You should be at least half distance between Sabetha and the edge of the platform or further from squad. When learning how to kite, you can be further for more safety, but remember that the further you are from your group the harder it is to heal and give boons, and you also risk getting kicked off the platform.
I will kite almost exclusively on the western half of the platform, because this allows me to bait Sapper Bombs more easily (more on that later). If practicing, you can use more of the platform, but try to utilize the western side first where possible. The flak spread is small enough that you can do two shots northeast and two shots southeast and still have a place to stand. The spread is also random, so there might be a safe spot in between the AoEs where you can stand! Utilize the space as best as you can. The closer you can stand to the flak AoE, the more tightly you can stack it and the less of a threat it becomes to others in the squad. I normally will kite a shot closer to the edge of the platform, then stack the next flak a little bit closer, then move to the southwest area to do the same.
If there is a squad member standing on a launch pad to do a cannon, then they will be targeted by flak. You can't really do much about that, but you can avoid putting the flak directly west (or directly between Sabetha and a launch pad) so that your DPS do not have to go through flak in order to reach the launch pad. Also, not standing in that area will keep you out of cannon fire when west cannon is up. Kiting in a predictable place also allows your squad members to more safely place Time Bombs away from you so they don't kill you by dodging out into you (it will still happen though).
Sapper Bombs
!! MAKE !! SURE !! YOU !! HAVE !! SPECIAL ACTION !! BOUND !!
Baiting Sapper Bombs is the reason why I kite flak primarily on the western side of the platform. Sapper Bombs are these little green ground-targeted AoEs that you can throw on a launch pad at each of the main cardinal directions to launch a squad player to the cannons. A few seconds before the cannon spawns a Bandit Sapper will throw a bomb to the person who is the west-most and in range. In range being the key words. If you are too far to the edge of the platform, the bandit will not be able to throw the bomb to you, so it will go to someone else. Position yourself accordingly to make sure that the Bandit Sapper targets you for bomb. Then move towards the appropriate launchpad and throw it so that they are launched to the cannon. Cannons spawn South → West → North → East → South → North → West → East and then repeat.
The special action skill has a fairly limited range, and a fairly short duration. You have 5 seconds to throw the bomb before it disappears. When launching east, bait fairly close to Sabetha, then use Ancestral Grace or run quickly with Swiftness towards east to throw, or you may not have time to throw it before it disappears. There is a delay from when you throw to when it lands, so you can throw even if the person is not quite on the launchpad yet, especially if you know that you are about to lose the bomb. Then you can either kite one flak shot on the eastern side or make your way back to the western side if you know she won't be shooting it soon.
Bomb baiting and throwing is not hard, but it does become more complicated as you have to make some fairly split-second decisions on whether or not to throw when the Flame Wall about to happen. You kind of have to look towards what your cannon-killer is going to do; often times the only thing you can do is throw it if you can, even if they're not there, since the bomb will disappear before you can make it all the way around the Flame Wall again. The worst thing you can do is not throw it when someone is waiting, and then watch them die a horrible, avoidable death to the Flame Wall while their voice in voice chat gets increasingly louder and higher pitched with anxiety.
Split phases
There isn't much to the split phases. When Sabetha steps to her bomb piles, you're free to move onto group and do normal Druid things. Help by kicking Heavy Bombs left on the platform when able, CC "Knuckles" with your pet when his break bar unlocks, and send your pet to help with turrets during Kardi B. When Sabetha returns, she always returns with a Flame Wall, and that's often your cue to return to position for flak kiting.
Giving boons
So how do you give boons and do your other normal Druid duties when you're off the group half the time kiting or baiting? It is considerably harder to give boons at range, but not impossible. Summoning spirits also moves them to your location, so you do want to try make sure they are on group when you activate them. Call of the Wild has 600 range, so if you're far from group, it may not reach everyone.
You have several windows of time to give boons while on group:
- During the boss phase, after Sabetha shoots flak, she will swap to her shotgun and shoot that once before swapping back to flak. You have a few seconds after her flak is fired to get on group to stack boons before she will shoot again. Don't get too greedy if you're still learning! You may only have time to activate one spirit before she shoots. She "takes aim" for flak a little bit before she actually shoots it, so if you wait until the animation it may be too late.
- Whenever Sabetha is doing her flame wall, you should immediately move towards group (while avoiding her wall). This makes it easier for you to avoid the wall as you have less distance to travel at the center than at the edge, and she does not shoot flak during her flame wall. It is the perfect long period of time to go to the center, activate spirits, and giving some healing and boons. If I know flame wall is happening soon, I will save CA for that.
- During bandit champs, you can be on group, as Sabetha is not on platform. Use this opportunity to top up and help your squad dispatch the champion quickly so they aren't on the platform for too long after Sabetha returns.
Other than being on group remember that you do have quite a few ranged skills which can heal or give boons or both! Use them as needed when you're off group to keep everyone topped off. This includes yourself.
Wing 2: Salvation Pass[edit]
Slothasor[edit]
Pets:
and
Skills
- Healing Spring
- Frost Spirit or Sun Spirit
- Stone Spirit
- Situational:
- Spirit of Nature
Traits
 Skirmishing (minor): Take
  Trapper's Expertise.
Tips
Slothasor is a higher-pressure fight for groups that are inexperienced with dealing with and/or mitigating the mechanics effectively. The pressure you have as Druid will vary greatly with the skill level of the group you are in.
Selecting slot skills
Take Frost or Sun depending on your squad composition. In most groups, you will take both, but in some inexperienced/weird comp groups your third utility slot will likely depend a lot on what your group expects of you.
- If your group does not have reliable Stability for the Fear after Slothasor's break bar, you will need to take "Protect Me!" to immediately stun break for your subgroup so they don't run into poison and die.
- For groups where you have Stability but people are still inexperienced or have poor positioning, you can take "Search and Rescue!" as insurance to pull a downed ally out of danger.
- Only take Juvenile Brown Bear if your group is struggling a LOT with conditions. Save its F2 for Shake.
Beginning the encounter
Summon your spirits prior to readying up. When the first mushroom is eaten, make sure the friendly slub is out of range before using active spirit skills, as they do do damage and inflict conditions which may make it difficult for your friendly slub to do their job. Tantrum is the first major attack Slothasor does, which does a lot of damage and easily downs inexperienced groups who don't stack well. Be prepared to revive downs as Slothasor moves away.
Break bars
Every 10% starting at 80%, Slothasor gets a break bar. It must be broken quickly so the fight can continue and so poison doesn't respawn on top of the group. Your "break a bar very fast" sequence should be something like:
- CC Pet's beast skill (F2)
- Celestial Avatar
- Lunar Impact with Quick Draw (CA 3)
- Rejuvenating Tides (CA 4) to heal up
- Lunar Impact (CA 3)
- Release Celestial Avatar
- Winter's Bite (A 3)
- Weapon Swap
- Vine Surge (St 4)
(If when you come out of CA you're on staff, you can swap the order of the last two skills.) Slothasor's break bar is not very big. It should not take the entire sequence to break it.
Immediately after Slothasor is broken, he will Fear everyone in range for 10 seconds. If you are required to stun break, you must use "Protect Me!" after the Fear is induced or you will waste the stun break.
Things to keep in mind
- The person who is fixated will generally take quite a bit of damage from Slothasor. Keep an eye on that person, and be sure to heal/cleanse (even if that person is you!). Slothsaor's flame breath can stack up to 8 stacks of burning which will make quick work of anyone without cleanses.
- Other than Iboga you don't have many pulls to bring slublings in, but you can help alleviate pressure by using Sublime Conversion (St 5) to help block their projectiles.
- If you know Shake is about to happen, you should save your Healing Spring to help clear conditions for those who did not dodge.
Bandit Trio[edit]
Pets:
and
Skills
Traits
- Skirmishing (minor): You can swap back to
 Sharpened Edges if you swapped to Trapper's Expertise during Slothasor.
Tips
There really isn't a whole lot to do. Just go with the group and give buffs.
Matthias[edit]
Pets:
and
Skills
Traits
- Skirmishing (minor): Take Trapper's Expertise.
- Druid (grandmaster): Take
 Lingering Light instead of
  Grace of the Land only if you have a boon thief and your squad is very good at stacking. Just remember to swap back after the fight if you continue to another wing.
Tips
This fight is fairly condition heavy, and your squad members will be running amok like a herd of cats startled by a plastic bag. The poison and corruption mechanics mean that a squad member will constantly be running away from the stack, so be sure you're keeping an eye on the health of all members during this fight. Utilize CA's ranged abilities and condi cleanse to keep your squad up.
You can take "Search and Rescue!" for an option to pull downed squad members out of poisons.
Situational
- If your team composition is extremely Mirage heavy and you don't have any classes that provide enough Vulnerability, you will need to bring Storm Spirit. You can replace Frost Spirit if you need it.
- Bring Juvenile Smokescale only if you have lots of mirages who can benefit from its smoke field. If you are doing this, use the F2 skill off cooldown whenever your pet is on Matthias. If you want to be SUPER PMA then swap your axe for a sword. This prevents you from unintentionally stealing combo finishers from your mirage players, while also giving you lots of extra mobility for mechanics!
Sacrfices
As a Druid, you will be expected to provide quite a bit of CC for sacrifices for the first half of the fight.
Utilize your CCs:
- CC Pet's beast skill (F2)
- Celestial Avatar
- Lunar Impact with Quick Draw (CA 3)
- Rejuvenating Tides (CA 4) to heal up
- Lunar Impact (CA 3)
- Release Celestial Avatar
- Winter's Bite (A 3)
- Weapon Swap
- Vine Surge (St 4)
(If when you come out of CA you're on staff, you can swap the order of the last two skills.)
Be aware that, unlike in Samarog, you cannot heal your to-be-sacrificed squad member while they are locked in the CC bar, meaning that specifically your CC is extremely important because your skills probably do not do as much damage as your DPS's CC. However, you should not be able to get through your entire "CC rotation" before the bar breaks; sacrifices have very small break bars and if your group struggles to break then that is a squad-wide issue.
Shards
Matthias's small bloodstone shards are projectiles that can be blocked or converted by Sublime Conversion (St 5). When he does his jump-flip animation (human phase) or his chest-exploding animation (abomination phase) you can put the water field directly under his hitbox to block all the shards. Be careful when using this attack, as it will also prevent reflects from breaking his bubble shield because it destroys projectiles that are meant to be reflected. Also note that Sublime Conversion will not block his Hadouken attack.
Skill Usage
- Remember that Healing Spring is a condition cleanse and a water field. You can blast it with Ancestral Grace (St 3), Call of the Wild (Wh 5), and Lunar Impact (CA 3) for extra heals.
- You can also clear movement-impairing conditions from you and your allies with Vine Surge (St 4).
- You can use Ancestral Grace (St 3) to get to fountains or the arena wall to drop poisons. If you find that you're struggling with mobility, you can use a main-hand sword instead of an axe.
- You can use Nature's Renewal and/or "Search and Rescue!" on downs that are in poisons.
Wing 3: Stronghold of the Faithful[edit]
Escort[edit]
Pets:
Skills
Traits
- No change from default.
Tips
You will be on babysitting duty. You must keep Glenna alive and out of danger.
Keep Construct[edit]
Pets:
- CC pets (bring 2):
Skills
Traits
- Druid (major): Take Natural Stride if taking the elite spirit or Verdant Etching if taking the elite glyph.
- The important thing is you should not take Celestial Shadow, as it can interfere with fixate mechanics.
- The important thing is you should not take
- You should put your pet on Avoid Combat (click the crossed swords icon to change it to a dove icon), or recall it (F3) during the orb pushing phase to prevent it from knocking it out.
- Turn off auto-attack on your staff to give yourself more control over pushing.
Tips
Skill selection: I normally go with Spirit of Nature over Glyph of the Stars, but some groups may ask you to bring Glyph. Its usage will be detailed below.
Orb Pushing
Probably the most important job is orb pushing. You will stack at the heart marker phantasm (door, north) and push south. You should be on staff for pushing, so make sure you swap to it if you are not on that set before the orb spawns. Normally you will push south then in a clockwise position. Chronos will hopefully help you with focus-pulls. You will need to push the orb through the rifts while keeping it away from projections and the red ring on the outside. The number of orbs you need to push is dependent on your group's DPS. The goal is to give your group enough time to burn to 66% or 33% (or 0%) to initiate the next phase. Typically, the commander will call how many rifts you should go for. Once you've completed your task, abandon the orb and go back to the middle to stack boons while the projections retrieve it. This allows for your group to burst with full boons as soon as KC becomes vulnerable.
Extra note: Staff actually has 3 "different" autoattacks. The 3rd pulse of the autoattack does not push. While not necessary, you can speed up pushing or practice high skill pushing by binding weapon stow and stowing your staff after the second staff auto pulse. This skips the 3rd useless pulse, allowing you to push even faster.
CCs
Utilize your CCs:
- CC Pet's beast skill (F2), and if needed, swap pets (F4) and utilize your other CC pet's beast skill.
- Celestial Avatar
- Lunar Impact with Quick Draw (CA 3)
- Rejuvenating Tides (CA 4) to heal up
- Lunar Impact (CA 3)
- Release Celestial Avatar
- Winter's Bite (A 3)
- Weapon Swap
- Vine Surge (St 4)
(If when you come out of CA you're on staff, you can swap the order of the last two skills.)
Why would anybody take Glyph of the Stars?
Great question. While you are out of CA, it prevents conditions from being applied. This is useful for KC's Phantasmal Blades attack, where it has a pink donut under its hitbox and it does the rotating pizza attack. Players inside the donut gain tons of stacks of Confusion, so they quickly die while they attempt to greed. You can allow them to greed by channeling Glyph of the Stars on top of the donut so players can greed, but honestly players can still attack while not touching the donut so I don't usually bring it unless it's specifically requested. You have to hold the channel (but you can still move); using other skills will cancel it early. It doesn't even last the entire duration of the attack, so it's a bit lackluster in my opinion.
Twisted Castle[edit]
Pets:
and
Skills
- "We Heal As One!"
- Glyph of the Tides or Glyph of Equality
- "Protect Me!"
- Quickening Zephyr
- "Strength of the Pack!"
Traits
- Druid (major): Take Celestial Shadow.
- Put your pet back on Guard (click the dove icon to change it to crossed swords).
- Turn auto-attack back on your staff.
Tips
You'll probably be expected to do the Druid skip and possibly get the fountains button. The skip involves using Ancestral Grace (St 3) to "fly" over to other platforms. It's probably easiest to just watch a video on how it's done. You can start the skip and get to a safe position (the ledge above the button) before your squad "starts" by killing the first group of mobs. For the rest of the castle, you can traverse more safely using the various traits and utilities at your disposal. You can use "Strength of the Pack!" followed by "We Heal As One!" to give yourself stability for years.
Xera[edit]
Pets:
Skills
Traits
- Skirmishing (minor): Take Trapper's Expertise.
- Druid (major): Switch back to Natural Stride.
Tips
- During pre-event, take the far button.
- Always take the portal back if you are ported to a tower during the second half.
- Do not have your Iboga out after 50%. Confusion caused by your Iboga's autoattack chain will convert to Retaliation if Xera happens to walk through a shard field.
Wing 4: Bastion of the Penitent[edit]
Cairn[edit]
Pets:
and
Skills
Traits
- No change from default.
Tips
- Camp Iboga, and take out your Smokescale to use the F2 if you have Mirages. If you have mirages utilizing the smoke field, bring a sword instead of an axe.
- Try to bait the first agony and every agony afterwards when it expires. Agony is put on the person farthest from Cairn.
Mursaat Overseer[edit]
Pets:
and
Skills
Traits
- Druid (grandmaster): You can take Lingering Light instead of Grace of the Land if you have a trustworthy Boon Thief.
Tips
Take a Special Action role if possible. Your job here is pretty braindead, so it shouldn't be too difficult.
Samarog[edit]
Pets:
and
Skills
Traits
- Druid (major & grandmaster): Take Verdant Etching. Switch back to Grace of the Land if you swapped it out during MO.
Tips
You should be on Rigom pushing and entangling duty.
Deimos[edit]
Pets:
- Juvenile Jacaranda
and - CC pet:
Skills
Traits
- Druid (major): Swap back to Natural Stride if you swapped it out during Samarog.
Tips
Keep Prides in check. If you need a ranged option, you take Muddy Terrain for extra insurance, but keep in mind also that the skill effect does cover up oil AOEs for the time that it is active. Be careful allowing your pet to attack Prides if it's an e-Wyvern or Rock Gazelle, as their auto-attacks are hard CC which will cause them to run. You should swap to Jacaranda or use a CC Moa on swap instead.
Wing 5: Hall of Chains[edit]
Soulless Horror[edit]
Pets:
and
Skills
Druid 1 (on group):
Druid 2 (main pusher):
- Healing Spring
- Glyph of the Tides
- Spirit 3
- "Search and Rescue!" or other situational
- Spirit of Nature
Split spirits between the Druids:
Traits
Druid 1 (on group):
- Skirmishing (minor): Bring Trapper's Expertise
- Druid (major): Bring Verdant Etching.
Druid 2 (main pusher):
- Drop Skirmishing for
 Marksmanship, and take 3-2-3
  Clarion Bond,
  Farsighted,
  Lead the Wind.
 - Druid (major): Bring Verdant Etching.
Weapons
- Both Druids should bring Staff/Longbow.
Tips
River of Souls[edit]
Statues[edit]
Dhuum[edit]
Pets:
and
Skills
Traits
- Skirmishing (minor): Bring Trapper's Expertise
- Druid (major): Bring Celestial Shadow
Tips
- There are usually two Druids, one for group and one for kiting messengers. (I only have experience with group Druid.)
Wing 6: Mythwright Gambit[edit]
Conjured Amalgamate[edit]
Pets: Bring two CC pets.
Skills
Traits
- No change from default.
Tips
You will probably be on Shields collecting duty. When an arm has been destroyed, you will want to go to the right side (facing CA) to begin shield collection.
Sorting and Appraisal[edit]
Pets:
Skills
Traits
- No change from default.
Twin Largos[edit]
Skills
Traits
- Skirmishing (minor): Take Trapper's Expertise.
Tips
Coordinate with the other Druid for the beginning of the fight who will begin by porting spirits and who will begin by stacking Might. Also know which way you are going for the split platform. If you are going right (Kenut), you will likely be in charge of baiting the boon steal.
Qadim[edit]
Pets Bring two CC pets.
Skills
Traits
- Skirmishing (minor): Take Trapper's Expertise.
Tips
Coordinate with the other Druid for the beginning of the fight who will begin by porting spirits and who will begin by stacking Might. Also know which way you are going for the split platform. If you are going right (Kenut), you will likely be in charge of baiting the boon steal.
Wing 7: Key of Adashim[edit]
Gate[edit]
Pets: Bring two CC pets.
Skills
Traits
- No change from default.
Tips
I think you are in charge of baby-sitting Glenna while she opens the lock. Just stay by her and make sure she doesn't die. Usually someone else will be with you to help kill minions that get randomly aggroed to you.
Adina[edit]
Pets:
Skills
Traits
- Druid (grandmaster): You can swap to Lingering Light if you have a good Boon Thief. Sometimes I don't take it just in case they're not able to get the steal prior to phases.
Tips
You should be baiting a pillar for the tank.
Sabir[edit]
Pets: Bring two CC pets.
Skills
Traits
- No change from default.
Tips
Qadim the Peerless[edit]
Pets: Bring two CC pets.
Skills
Traits
- No change from default.
Tips
You will be in charge of CC'ing anomalies in lava to prevent them from becoming a nuisance to your pylon kiters.