Sunqua Peak Fractal
Sunqua Peak Fractal

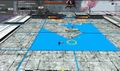
Map of Sunqua Peak Fractal
- Levels
- 80
- Type
- Fractal
- Dungeon
- Fractals of the Mists
- API
- 1384

Loading screen
| Image(s) |
|
Click to enlarge. |

“Sunqua Peak should be a peaceful place—suspended in a storm-lit sky, with beautiful stonework and flowering trees to mark the path up the mountainside. But something here is wounded, and the elemental spirits need your help to heal their home.
— Official site
The Sunqua Peak Fractal is a fractal which takes place in Sunqua Vale, a Canthan location, at scales 24, 49, 74 and 98. The area is said to be a convergence of elemental powers. With the area in turmoil, the players are tasked with climbing the peak and bringing peace to the area.[1]
Objectives[edit]
 Meet Dessa and assist with her experiments.
- Fractal Difficulty Scale: x
- Personal Fractal Level: x
- Quell the frenzied air elementals and traverse the floating terrain: x/2
- Voice of the Mountain

- Navigate the mountainside and calm the frightened water elementals: x/3
- Free the trapped water elemental!
-
- Traverse the volcanic cavern and stop the enraged fire elementals: x/3
- Travel father up the mountain.
- Bring stability to Sunqua Peak.
-
- Sorrowful Spellcaster
-
Rewards[edit]
Normal Mode[edit]
- Primary article: Fractals of the Mists#Rewards
Challenge Mode[edit]
 Endless Inner Demon Combat Tonic (Challenge Mode)
- Additionally, completing the Defeat the Sorrowful Spellcaster objective awards:


Walkthrough[edit]
- After speaking with the Spirit of the Mountain, lightning strikes will begin that leave behind small orbs. Gather these to gain stacks of
 Charged Leap to traverse the floating rocks. Killing the three Air Elementals allows more lightning and orbs to periodically spawn where they were. Upon reaching the top, the floating platforms will reform into a solid path no longer requiring the leap to traverse [verification requested]. Stepping into the upward wind will jump you to the boss platform.
Voice of the Mountain[edit]
- When Voice of the Mountain hits 66% and 33% health it becomes invulnerable, starts lightning strikes and spawns orbs. Running into the orbs allow you to jump higher and applies the Charged Leap buff. To make the boss vulnerable again, players need 3 stacks of Charged Leap in order to jump into the clouds to "disrupt the energy". When the boss reaches 1% it goes invulnerable and turns into an upward wind to get to the next area.
Free the water elemental[edit]
- Landing on the next area, three Frightened Water Elementals must be spoken to open the path to the next encounter. There is one on each of the main floating islands on the path guarded by Enraged Water Sprites and rushing water that will knock you off the platform. Wait until the flow decreases to run across. The sprites do not need to be defeated to move on but will pester you until the "boss" arena.
- The trapped water elemental can be freed by destroying the Fallen Boulders. This area has many yellowish aoes that do damage but can be blocked. Periodically one player will be tethered to a dark orb and gain stacks of
 Tidal Bargain. Pass in the beam to take it from another player. Freeing the elemental creates small wind platforms to bounce to the next area.
Fury of the Mountain[edit]
- Just before the arena, three sets of enraged fire elementals need to be defeated. Each set clears some fallen rocks to open the path. If reflects are put on the veteran elementals before they die the normal elementals that spawn will be friendly instead of enemy. This can be useful for condition damage players as the fire elemental spit applies burning. They will persist until killed (water phase of boss for instance) or the player controlling them dies.
- At 66% and 33% health, summons meteorites that do AoE damage and send out shockwaves. Jump over them to avoid getting knocked down. After hide behind a meteorite so you are covered from its channeling spell. At 66% the meteorites drop in two specific locations but for 33% two players are picked to drop where they stand after a few seconds. When the boss reaches 1% it goes invulnerable and lowers some rocks, opening the way to the next area.
Sorrowful Spellcaster[edit]
The Sorrowful Spellcaster casts multiple AoE attacks clearly telegraphed with circle and arrow indicators on the ground. When she casts AoEs around the players, everyone should spread out before they detonate to avoid getting hit by multiple AoEs. She also often dashes in a cardinal direction of the arena or back to the middle, ![]() Launching players caught in her trajectory. When her breakbar is broken she gains
Launching players caught in her trajectory. When her breakbar is broken she gains ![]() Resilient Form, which locks her defiance bar for 30 seconds.
Resilient Form, which locks her defiance bar for 30 seconds.
- Air Phase 100-66%
Approximately 45 seconds into the fight, she will go to the middle and become invulnerable in a whirlwind shield as she summons a storm. To disrupt it, players have to jump to the energy sources indicated on the ground with red arrows. Players will need to get 3 charges of ![]() Charged Leap in order to jump high enough to reach each of the 6 energy sources and lose all stacks upon dispelling a source. To build up stacks, players have to walk over the orbs that spawn on the ground. 3 Orbs spawn at north, east, south and west of the arena, and will not disappear to other teammates when picked up by a player. New orbs get spawned every 20 seconds. Throughout this phase, red AoEs will spawn at the location of players and will detonate after two seconds, dealing moderate damage. After 25 seconds of starting the attack, she will unleash a burst of energy on the arena (which can be dodged).
Charged Leap in order to jump high enough to reach each of the 6 energy sources and lose all stacks upon dispelling a source. To build up stacks, players have to walk over the orbs that spawn on the ground. 3 Orbs spawn at north, east, south and west of the arena, and will not disappear to other teammates when picked up by a player. New orbs get spawned every 20 seconds. Throughout this phase, red AoEs will spawn at the location of players and will detonate after two seconds, dealing moderate damage. After 25 seconds of starting the attack, she will unleash a burst of energy on the arena (which can be dodged).
After dispersing the storm, the Sorrowful Spellcaster will come back to the arena and continue with the air themed AoE attacks and dashes, most of which inflict ![]() Weakness. If not phased, she will summon a storm again every approximately 75 seconds after the previous one ends.
Weakness. If not phased, she will summon a storm again every approximately 75 seconds after the previous one ends.
- Fire Phase 66-33%
At the start of the phase she will leave the arena and call meteors with concentric circles indicating increased damage, stacks of ![]() Burning and
Burning and ![]() Agony the closer to the meteor when it lands and releases a firey shockwave. She will summon 2 meteors on opposite sides of the arena, then 2 opposite meteors at 90° of the first ones, and finally 4 meteors at 45° of the previous ones. She then comes back to the arena to cast an arena wide AoE explosion that can only be avoided by standing behind the remains of a meteor that is intact. Standing behind a destroyed meteor will not give any cover and any players caught in the attack will instantly down or lose
Agony the closer to the meteor when it lands and releases a firey shockwave. She will summon 2 meteors on opposite sides of the arena, then 2 opposite meteors at 90° of the first ones, and finally 4 meteors at 45° of the previous ones. She then comes back to the arena to cast an arena wide AoE explosion that can only be avoided by standing behind the remains of a meteor that is intact. Standing behind a destroyed meteor will not give any cover and any players caught in the attack will instantly down or lose ![]() Rigorous Certainty.
Rigorous Certainty.
After this attack, the Sorrowful Spellcaster will continue with the AoE attacks and dashes, which are slightly different to the first phase as they are now fire themed and most inflict ![]() Burning. If not phased, she will summon meteors again after approximately 45 seconds the previous one ends, but will skip straight to the final 4 meteors.
Burning. If not phased, she will summon meteors again after approximately 45 seconds the previous one ends, but will skip straight to the final 4 meteors.
- Water Phase 33-1%
At the start of the phase she will go to the middle and become invulnerable as she channels the waters. Players will get pushed out of the middle and a total of 4 dark blue orbs will spawn on the arena one at a time, starting south and then counterclockwise. The closest person to it when it spawns will be tethered to it and continuously gain stacks of ![]() Tidal Bargain. If someone intercepts the tether, they will be tethered instead. Reaching 10 stacks of
Tidal Bargain. If someone intercepts the tether, they will be tethered instead. Reaching 10 stacks of ![]() Tidal Bargain will instantly down the player or strip
Tidal Bargain will instantly down the player or strip ![]() Rigorous Certainty. Upon untethering all stacks of
Rigorous Certainty. Upon untethering all stacks of ![]() Tidal Bargain are removed after 10 seconds. In addition, random players will get targeted with a small green AoE and when it detonates it will distribute the damage among the players within.
Tidal Bargain are removed after 10 seconds. In addition, random players will get targeted with a small green AoE and when it detonates it will distribute the damage among the players within.
After the attack, the Sorrowful Spellcaster becomes vulnerable again and continues with the AoE attacks and dashes, which are now water themed and most inflict ![]() Slow. A notable difference in this phase is that the AoEs with arrow indicators that move across the arena are now bigger in diameter. If not defeated, she will channel the waters again after approximately 40 seconds the previous one ends. This attack is different to when she first phased, though, as she will still be vulnerable to damage, she will cast multiple radial AoEs and players will get slowly pulled in to the middle, which reflects projectiles, constantly deals damage and applies
Slow. A notable difference in this phase is that the AoEs with arrow indicators that move across the arena are now bigger in diameter. If not defeated, she will channel the waters again after approximately 40 seconds the previous one ends. This attack is different to when she first phased, though, as she will still be vulnerable to damage, she will cast multiple radial AoEs and players will get slowly pulled in to the middle, which reflects projectiles, constantly deals damage and applies ![]() Agony.
Agony.
- Notes
- Unlike every other fractal, all boons and most special effects (e.g. thief venoms) will be stripped from players upon boss aggro. This is similar to the status reset that happens in raids.
Achievements[edit]

| Sunqua Peak Fractal | 8 | |
|---|---|---|
Discover the truth.
|
1 Lost Letter Found | 1 |
| 3 Lost Letters Found | 1 | |
| 5 Lost Letters Found | 1 | |
| 7 Lost Letters Found | 2 | |
| 8 Lost Letters Found | 3 |

- See picture on the right for the locations of the letters. For detailed guide and locations, see the achievement page.
| Energy Dispersal | Sunqua Peak Fractal | 5 |
|---|---|---|
| On the Master tier, disperse all thunderclouds during the final boss fight within 10 seconds, and then complete the encounter. | Dispersed All Thunderclouds within 10 Seconds | 5 |
- During the fight with the Sorrowful Spellcaster on the first phase as she channels a storm, all energy sources have to be dispelled within 10 seconds. It is recommended to bring mobility skills and to assign at least one player to start on north, east, west and south, and decide in which direction to rotate. If restarting the boss to especifically hunt down this achievement, the effect
 Energy Dispersal Eligibility will only show up after finishing the storm phase if it has been successfully dealt with within the time limit. The achievement will be awarded afterwards when the boss is defeated.
| Raging Fire | Sunqua Peak Fractal | 5 |
|---|---|---|
| On the Master tier, defeat the final boss without being hit by Firestorm. Death removes eligibility. | Defeated the Final Boss without Taking Damage from Firestorm | 5 |
- During the fight with the Sorrowful Spellcaster on the second phase as she summons meteors, players have to pay attention to which meteors are intact so they can get cover behind them for the arena wide attack. Downing does not remove Raging Fire Eligibility.
| Respect for the Dead | Sunqua Peak Fractal | 3 |
|---|---|---|
| Show respect for those who walked before. | Showed Respect for Those Who Walked Before | 1 |
| Showed Respect for Those Who Walked Before | 1 | |
| Showed Respect for Those Who Walked Before | 1 |
- Use the kneel emote in front of each of the three interactable tombs that can be found between the Fury of the Mountain and the Sorrowful Spellcaster boss arenas.
| Tomb # | Location | Map Location | Description |
|---|---|---|---|
| 1 |  |
 |
Area to the left when looking at the wooden gate. |
| 2 | |
 |
Close to Tombstone #1. |
| 3 |  |
 |
Big Tombstone at the cliffedge to the north. |
| Running up the Mountain | Sunqua Peak Fractal | 3 |
|---|---|---|
| On the Master tier, complete the Sunqua Peak fractal within 15 minutes. | Completed the Sunqua Peak Fractal on the Master Tier within 15 Minutes | 3 |
- Achievement eligibility may be tracked by the Achievement Eligibility: Running up the Mountain effect on the player's bar.
| Share the Burden | Sunqua Peak Fractal | 5 |
|---|---|---|
| On the Master tier, defeat the final boss without anyone receiving more than 9 stacks of Tidal Bargain. Death removes eligibility. | Defeated the Final Boss with No Party Members Receiving More Than 9 Stacks of Tidal Bargain | 5 |
- During the fight with the Sorrowful Spellcaster on the third phase as she channels the waters, players have to pay attention to the amount of Tidal Bargain on their buff bar, breaking the tether when the stacks approach the upper limit of 9 and taking over tethers when they run out of debuff stacks. If any member of the party reaches 10 stacks, everyone loses the Achievement Eligibility: Share the Burden effect.
Challenge Mode Walkthrough[edit]
The Harbinger of Woe opens a portal and the party skips all the minibosses and goes directly to the endboss, Ai, Keeper of the Peak, as the players have already learned the mechanics from the minibosses in normal mode. The Sunqua Peak meta achievement must be completed to interact with the Challenge Mote.
Light phase[edit]
From 100 to 1% of the boss health the fight is mostly the same as normal mode, but mechanics are more punishing. The channeled element attacks are slightly different:
- Air storm: there are 8 energy sources to dispel instead of 6. The cooldown is roughly 90 seconds instead of ~75 seconds.
- Fire meteors: she summons 3 meteors, then 3 meteors, 3 more meteors and at the same time as the final 3 meteors, 2 players are targeted for 2 additional meteors. While she channels the arena wide attack, all meteors except 1 are destroyed. This meteor is the only one that does not have a visual fire aura. The cooldown is of roughly 60 seconds instead of ~45 seconds and increases by around 15 seconds after each successive attack.
- Water dance: the first dark blue orb spawns north and then the others clockwise. Up to two green AoEs can spawn among the party members.
Dark phase[edit]
Ai is overwhelmed by her Doubt, Fear, Sorrow and Guilt. The arena turns dark, her health goes back to 100% and the fight resumes. The party can /gg here to skip the cutscene, make build alterations, and refresh their Mistlock Singularities (note that this removes ![]() Achievement Eligibility: Dancing with Demons). The general mechanics and attack patterns from light phase persist, although Ai loses her elemental abilities and the fight consists of one long, uninterrupted phase.
Achievement Eligibility: Dancing with Demons). The general mechanics and attack patterns from light phase persist, although Ai loses her elemental abilities and the fight consists of one long, uninterrupted phase.
- Fear Phase 100-66%
During the second fight Ai will continue to cast multiple AoE attacks telegraphed with circle and arrow indicators on the ground and dash around the arena. The effects are now laser themed and apply ![]() Torment and
Torment and ![]() Confusion.
Confusion.
If not phased, 2 minutes after engaging and then every minute or so, she will go to the middle and start casting rings of circle AoEs. Four Fear enemies will spawn on the arena and ![]() Fixate onto players, following them around for ~15 seconds until they expire. Players must kite these, as they are invulnerable to damage and will detonate if they touch a player,
Fixate onto players, following them around for ~15 seconds until they expire. Players must kite these, as they are invulnerable to damage and will detonate if they touch a player, ![]() stunning and dealing heavy damage to anyone nearby.
stunning and dealing heavy damage to anyone nearby.
If a player fully dies, an enemy Doubt will spawn and attack the remaining teammates.
- Sorrow Phase 66-33%
At the start of the phase and then every approximately 70 seconds, she goes to the middle and casts rings of circle AoEs. Shortly after she starts channeling, a stationary Sorrow enemy spawns with a breakbar (1500 defiance) that must be broken within 10 seconds or else it casts a deadly spell that deals massive damage to the entire party. Fears will also spawn as described in the previous phase after casting the rings of AoEs.
- Guilt Phase 33-1%
Like in the previous phase, at the start and every 70 seconds, she goes to the middle and casts rings of circle AoEs. Shortly after 2 Sorrows spawn in addition to a stationary Guilt enemy that tethers to the nearest player, giving stacks of ![]() Crushing Guilt. If a player reaches 10 stacks they will down, so to prevent this other players should intercept the tether and share the burden. If Guilt tethers to Ai, she gains stacks of
Crushing Guilt. If a player reaches 10 stacks they will down, so to prevent this other players should intercept the tether and share the burden. If Guilt tethers to Ai, she gains stacks of ![]() Cacophonous Mind. Fears will spawn after the Sorrows are broken - kite them out and DPS Ai down to 1% to complete the CM.
Cacophonous Mind. Fears will spawn after the Sorrows are broken - kite them out and DPS Ai down to 1% to complete the CM.
- Tips
- As in Normal Mode, boons are stripped after pulling Ai in each phase. Don't bother with a prebuff.
- Don't hesitate to alter your build to bring more CC in the dark phase, especially for Sorrows. Low damage will merely prolong the fight, but low CC will wipe the party.
- Delaying CC against Ai will also delay her following attack patterns. This can be exploited to skip mechanics, particularly the elemental attacks in light phase. Don't wait too long, though - after four attacks, she gains an extremely damaging aura around her, in addition to spawning the familiar AoEs under each player.
- If it looks like your group won't CC her in time, move away so you don't down to the massive ticking damage around Ai. Breaking her bar will cancel this attack, so continue to CC from range.
- Tanking a Fear deals enormous damage and stuns players for a long time. Together with the other Fears and Ai's attacks, this is often enough to outright kill anyone hit. Kite carefully and consider bringing a source of group Stability.
Challenge Mode achievements[edit]
| Sunqua Peak Fractal | 5 | |
|---|---|---|
Accept the harbinger's challenge and defeat the final boss in Sunqua Peak.Bling-9009 has received reports of your exploits and now carries new items!
|
Defeated the Final Boss in Sunqua Peak on Challenge Mode | 5 |

- Complete challenge mode.
| Sunqua Peak Fractal | 5 | |
|---|---|---|
Accept the harbinger's challenge and complete the Sunqua Peak fractal with no one in your group being defeated.A full party of five must participate in the fractal from start to finish without dying.
|
Completed Sunqua Peak with No Deaths | 5 |
- Achievement eligibility may be tracked by the Achievement Eligibility: Dancing with Demons effect on the player's bar.
NPCs[edit]
Allies[edit]
- Lan (Challenge mote only)
- Spirit of the Mountain
Foes[edit]
- Demons (Challenge mote only)
- Air Elemental
- Enraged Water Sprite
- Fury of the Mountain (2nd miniboss)
- Lava Elemental
- Voice of the Mountain (1st miniboss)
- Ai, Keeper of the Peak (Challenge mote boss)
- Sorrowful Spellcaster (Last boss)
Objects[edit]
- Books
- A Poem for Mother—The First Day
- August in Beauty: In Her Memory
- Happy Birthday, Mama!
- Achievement letters and notes
Dialogue[edit]
- Upon arrival
- Spirit of the Mountain: Ah, great traveler! What fortune our destinies should cross paths on such a day!
- Dessa: Ummm, nice to meet you?
- Spirit of the Mountain: This mountain's natural balance is deeply disturbed. Please, quill its elementals and restore peace! You must hurry!
- Dessa: "Quill"? Did she mean "quell"? If you're going to lay it on thick, at least use proper vocabulary...
- Dessa: Moving on: We should deal with those elementals. They risk destabilizing the fractal.
- Dessa: And fast. This place feels...odd, but sort of familiar? It's unsettling.
- Before fighting Voice of the Mountain
- Dessa: There! Looks like a wind elemental. Must be what that weird spirit was talking about. Let's get to work.
- During Fractal before defeating Voice of the Mountain
- Howling Wind: Turn back!
- Dessa: Did you say something?
- Howling Wind: Leave here!
- Howling Wind: I don't need your help!
- Howling Wind: Go away!
- Howling Wind: Get out!
- Howling Wind: Why are you even here?
- Upon defeating Voice of the Mountain
- Dessa: You're doing great. I–this is strange. Why is it so– Sorry, I just feel a little off all of a sudden.
- During Fractal before freeing Sorrow of the Mountain
- Rushing Waves: What do you desire?
- Rushing Waves: Take what you want and go.
- Rushing Waves: What is it you're searching for?
- Rushing Waves: Leave. I'll give you anything.
- Dessa: Okay, you heard that, didn't you? My research didn't say anything about disembodied voices.
- Upon freeing Sorrow of the Mountain
- Dessa: Well done, but we should keep moving. I'm not in the mood to hang around here.
- During Fractal before defeating Fury of the Mountain
- Raging Fire: There's no point!
- Raging Fire: You're wasting your time!
- Raging Fire: I can't bring her back!
- Raging Fire: I couldn't save her!
- Dessa: "Her"? Who's "her"? And that heaviness... You feel it too, right?
- Upon defeating Fury of the Mountain
- Dessa: Hm.
- Meeting the Spirit of the Mountain
- Spirit of the Mountain: I can't just go up there with her like this. Maybe if they go first...
- Spirit of the Mountain: Ahem, you've done well, oh steamed one, yet her pain overpowers her still.
- Dessa: "Steamed one"? Okay, who or what is this thing, and–wait, "her pain"? Whose pain?
- Spirit of the Mountain: I must request that... Okay, I don't mean to rush you, but I'm sorta on a time limit...
- Dessa: So much for that enlightened spirit act.
- Spirit of the Mountain: Look, can you get her to calm down a little? But don't hurt her. Please.
- Dessa: Sounds like we're dealing with more than just elementals here. Let's be on our guard.
- Dessa: Hmmm. "Don't hurt her." I wonder...
- Spirit of the Mountain: I could tell her it's me, but that might make it worse. Didn't realize she'd be this bad...
- Spirit of the Mountain: Does she really blame herself?
- Before fighting with Sorrowful Spellcaster
- Sorrowful Spellcaster: Why are you here? I came to this mountain to be alone.
- Dessa: She must be who that "spirit" was talking about. Wait, isn't she the woman from that picture?
- During fighting with Sorrowful Spellcaster
- Sorrowful Spellcaster: I don't want to hurt you, but you need to leave. I can't control what happens if you don't.
- Sorrowful Spellcaster: I SAID LEAVE! I warned you!
- Dessa: This looks bad. Attack just enough to settle her down.
- Upon wiping
- Sorrowful Spellcaster: I warned you. It's pointless!
- Sorrowful Spellcaster at 66%
- Sorrowful Spellcaster: You don't need to be here. I can handle this on my own
- Dessa: Questionable.
- Sorrowful Spellcaster at 33%
- Sorrowful Spellcaster: What do you want? I'll give it to you, but you can't stay. I don't want anyone else to get hurt.
- Dessa: She claims she doesn't want to hurt us, but she keeps fighting.
- Upon defeating Sorrowful Spellcaster
- Sorrowful Spellcaster: Just take what you've earned and go. You're not safe here. No one is.
- Dessa: Well, we fixed the disturbance, but... are things going to be all right?
Challenge mode dialogue[edit]
- Upon beginning the second phase of the final battle
- Ai, Keeper of the Peak: Why are you still here? It'll just get worse!
- Fear: You deserve this.
- Ai, Keeper of the Peak: No...
- Fear: It was all your fault.
- Ai, Keeper of the Peak: No... I didn't w-
- Fear: How can you live with yourself?
- Ai, Keeper of the Peak: STOP!
(screen goes black and remains dark for the duration of the fight)
- Fear: You're weak.
- Sorrow: Why are you so useless?
- Guilt: No one can count on you.
- Fear: You're worthless.
- Sorrow: She's better off without you.
- Guilt: You're out of control.
- Fear: You were born flawed.
- Doubt: All you do is hurt everyone.
- Dessa: We're not just dealing with dark magic. This is something much more sinister. She needs our help.
- During Battle, at 66% transition
- Doubt: No one understands.
- Dessa: But I think I know how it feels. It's... heavy. And it hurts.
- Dessa: And even when you're not thinking about it, you still feel this... weight. 'Cause it never really goes away.
- Dessa: That feeling will drown you, if you let it. But we won't let it. We won't let you drown.
- During Battle, at 33% transition
- Doubt: She died because of you.
- Dessa: I don't know how "she" died, but I'm sure it wasn't because of you. In fact, I bet she's worried about you.
- Dessa: I wish she could hear me...
- Upon defeating Ai
- Ai, Keeper of the Peak: I've wanted to do this for so long. GET OUT OF HERE! GO! You heard me, OUT!
- Dessa: I'm glad we could be here for her. Losing someone's hard enough without blaming yourself.
- After giving the letters to Ai
(press dialogue option "Hand over the sealed letter.")
(Spirit of the Mountain and the 3 mini bosses appear)
- Spirit of the Mountain: H-hello, mighty spellcaster. I sense that your troubles have been irrigated...
- Ai, Keeper of the Peak: What? Who are you?
- Dessa: Here we go.
- Spirit of the Mountain: I, the Mountain Spirit, come with a message from the other realm: Your daughter is safe and well.
- Ai, Keeper of the Peak: How do you know–?
- Spirit of the Mountain: In fact, we've never had such an impressive spirit.
- Ai, Keeper of the Peak: Is that so?
- Spirit of the Mountain: Why, yes! She's talented, smart, kind–not to mention incredibly brave...
- Ai, Keeper of the Peak: You know what else my daughter is?
- Ai, Keeper of the Peak: A terrible liar. Hi, Lan.
- Spirit of the Mountain: Hi, Mama...
(Spirit of the Mountain transforms into Lan, a human child ghost)
- Ai, Keeper of the Peak: Why were you hiding?
- Lan: I... wasn't sure how to talk to you like this...
- Ai, Keeper of the Peak: You were scared of me.
- Lan: No... a little. I just didn't know how to get to you. But then they showed up. And they helped me. A lot.
- Dessa: Heh. All in a day's work.
- Ai, Keeper of the Peak: My powers can really take over when I'm upset. If I controlled them better, you wouldn't–
- Lan: You did everything you could! I don't blame you. And I'm okay now. I want you to be okay.
- Ai, Keeper of the Peak: I'm sorry I dragged you, and them, into this. I really did need your help. Thank you.
- Dessa: Don't mention it.
- Ai, Keeper of the Peak: I miss you so much. I've been really alone without you.
- Lan: You were never alone, Mama.
Gallery[edit]
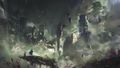
Concept art by Richard Anderson.
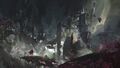
Concept art by Richard Anderson.

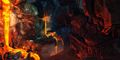


- Livestream pictures
Concept art from the GW2 8th Anniversary Livestream by Cameron Rich.


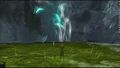
Alpha bug with the waterfall.
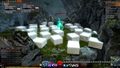
White boxes appearing instead of grass.


Related achievements[edit]
 Special Ops Final Course:
  Extreme Danger — Complete the Sunqua Peak fractal dungeon at scale[sic] 2 or higher.
Trivia[edit]
- A Child in Seitung Harbor references this fractal when talking to a Fledgling, who dismisses it as just a story.
- This fractal was announced during the Guild Wars 2 Anniversary Livestream on August 25th, 2020, and released on September 15th, 2020.
- Abyssal Fractal weapons were introduced with this fractal.
- Internally it was referenced as "the Mountain Fractal" before release.
- The initial fractal design was intended for another fractal which would have followed Arkk's storyline.[1]
- Sunqua Vale was previously accessible in Guild Wars Factions.
- Sunqua may be drawn from Sun Quan during the Three Kingdoms era.
- This fractal doesn't spoil End of Dragons, however, it offers a little bit of a taste of Cantha. The dates mentioned in the fractal set it about 50 years after the end of Winds of Change in Guild Wars.
- The fractal originally contained new assets from the EoD expansion, however, they were removed from the final product.[2]
- If players show interest, it might influence future decisions and they might continue the story of the fractal.[2]
- During development, the fractal contained several interesting bugs:[2]
- The moon was changing size based on the Challenge mode dialogue.
- The left waterfall was covering a creature because of problems with alpha.
- One set of stairs had about 4 separate bugs on it, including being able to walk through the terrain.
- About a week before shipping the fractal, the grass markers during the Voice of the Mountain boss changed into white boxes for unknown reasons. They called it the "Revenge of the Boxes."
- One of the Spellcaster's skills had an infinite loop, happening so quickly it slowed down the testing server.
External links[edit]
- Guild Wars 2 New Fractal - Sunqua Peak, Youtube.com
- Guild Chat: Sunqua Peak Preview, Youtube.com
- Ascend Sunqua Peak on September 15, Guildwars2.com
- Sunqua Peak: Journey to a Sacred Land, Guildwars2.com
References[edit]
- ^ a b Guild Wars 2 Anniversary Livestream, YouTube.com
- ^ a b c Sunqua Peak Development, YouTube.com