Uncategorized Fractal
Uncategorized Fractal
- Levels
- 80
- Type
- Fractal
- Dungeon
- Fractals of the Mists
- API
- 947
| Image(s) |
|
Click to enlarge. |
“Ascend an unknown asuran structure.
— In-game description
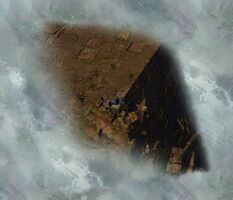
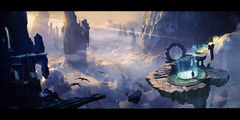
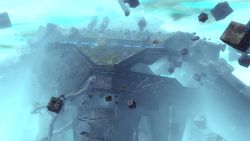
The Uncategorized Fractal is one of the Fractals of the Mists. It is a recreation of a past asuran disaster; despite appearances, it is not Rata Sum but another location built by like-minded architects.[1] It occurs at levels 2, 36, 62, 79 and 91.
Objectives[edit]
- Meet Dessa and assist with her experiments.
- Fractal Difficulty Scale: x
- Personal Fractal Level: x
- Enter the ruins.
- Investigate the ruined site.
- Fractal Difficulty Scale: x
- Personal Fractal Level: x
- Escape the holding area.
- Ascend to the upper level.
- Disable the security golem.
- Old Tom

- Dispatch the raving asura.
Rewards[edit]
- Primary article: Fractals of the Mists#Rewards
Defeating the Champion Rabbit, Veteran Bandit Saboteur, Champion Flame Legion Fire Shaman and the Champion Ettin is rewarded with a daily reward chest containing:
- 1 random piece of equipment of Fine rarity or better
- 1 Exotic Fallen Adventurer's Backpack
- 1 Exotic Singed Ritualist Bag
- 1 Exotic Oversized Rucksack
- 2 random Upgrade Components
Walkthrough[edit]
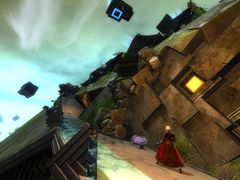
Jump up the platforms, killing harpies along the way. Be aware that being in combat causes you to move slower and not jump as far. If you are having trouble moving across the platforms, kill the harpies from one spot and continue after you have dropped combat. At fractal level 12 and above the Harpies have a knockback skill, (signaled by red circle and slow electric projectile), that throws characters off platform. Players respawn downed at start. Harpy density increases as the fractal level does; on lower levels it is possible to aggro single harpies, but on higher levels multiple harpies will aggro at once.
Harpies begin using knockback at level 10. Reflect or Stability skills can help counter this, but so can standing with your back on the edge of the platform you are on. The harpies' attack targets the center of the player's body and does not trigger the knockback effect until it hits the ground behind the player. If there is no ground behind the player the effect will not happen.
It is possible for a Mesmer or a Thief to safely skip all the harpies and reach the top using their Stealth skills. They can use Portal Entre or Prepare Shadow Portal, respectively, at the bottom before they begin ascending and activate the Portal Exeunt when they reach the top to port the rest of the party to the top.
The Holding Area[edit]
Destroy the Power Generator to open the way forward. However, this also opens the cells allowing the prisoners to get out. The escaping prisoners are a Champion Rabbit, a Veteran Bandit Saboteur, a Champion Flame Legion Fire Shaman and a Champion Ettin. It is recommended to defeat them in that order.
The Deadly Stairs[edit]
There is a staircase with four turrets at the top. These turrets shoot electric pulses that instantly down a player hit by them. You can dodge through them without taking damage, and can use movement abilities like teleports to avoid them. Reflection skills will reflect the pulses back up the ramp, while projectile destruction skills will destroy them entirely.
At the top, there are three consoles. Having three players activate these consoles at the same time will turn the turrets off. On activation of a console, the player is unable to move for a short duration. It is possible for one player to activate two consoles by using skills such as Mesmer's Blink or Elementalist's Lightning Flash. A thief can do all three consoles alone by using Infiltrator's Arrow to move between the consoles. Combining a Scourge's Sand Swell and Spectral Walk can also activate all three consoles solo.
Old Tom[edit]
Advancing onward, you will come to a room with a golem, Old Tom.
The room in which it is encountered periodically fills with poison gas that inflicts Poison and deals damage to all players. The console directly across the room will activate a fan to evacuate the poisonous green gas (strong poison debuff). On fractal difficulty level 12 and higher, players need to charge the fan batteries in the opposed two corners of the room with Tears of Dwayna manually before the fan can be turned on. It's recommended to bring at least two tears to each console, before you engage the boss.
Old Tom has two principal abilities. It can shoot volleys of projectiles in all directions around it and it can pull a player towards it. Other than these two abilities, it uses a standard melee attack as well as a bouncing ranged lightning attack that deals a fair amount of damage. To minimize damage taken from the poison whirl attack, players should stay at range so that they are less likely to be hit by multiple projectiles.
Platforms #2[edit]
After Old Tom is defeated, party will again encounter platforms and harpies similar to start of Fractal. Some of the platforms are a translucent yellow, making them difficult to see. Moving the camera to new angles may help.
The Raving Asura[edit]
The asura will activate his four golems one at a time. After 4th golem is defeated, they will all be (re)activated at once.
Don't bother fighting the shielded Asura, as he remains invulnerable throughout the fight. However, he will shoot slow-moving balls of lightning at players which can be reflected. At fractal level 20+, this attack applies agony. The best way to avoid them is to dodge toward them as they are homing in on you. Reflects or skills blocking projectiles can be used on the Raving Asura to save the group from his agony attacks.
The far right will put Positive Charge and Negative Charge on everyone. Stand next to people with similar charges when possible. People standing too near each other with opposing charges (e.g. one with a positive and one with a negative) will cause damage.
When all the golems are dead, the fight ends.
Achievements[edit]
| Uncategorized Fractal Stabilizer | Fractals of the Mists | 5 |
|---|---|---|
| You've completed the Uncategorized fractal inside the Fractals of the Mists.Whose cat is that? | 1 Fractal | 5 |
| Hop, Skip, and Jump | Fractals of the Mists | 1 5 |
|---|---|---|
| You've made it all the way through the Uncategorized fractal inside the Fractals of the Mists without falling to your death.It's all fun and games until someone falls. | 1 Challenge | 5 |
- Falling does not impact the achievement unless you are defeated. Being defeated in combat can also disqualify you from getting the achievement. It is not necessary to participate in the fractal to get the achievement; a player standing still at the initial spawn point will get credit if the rest of their party does the fractal without them.
NPCs[edit]
Foes[edit]
Objects[edit]
Dialogue[edit]
- Upon arrival
- Dessa: You've landed... I...need to go. I'm sorry.
- Dessa: I...I apologize for leaving you like that. Just...never mind. Keep progressing. You're getting closer to the local instability.
- Upon reaching the Raving Asura
- Raving Asura: All of us! Abandoned! You aren't real. You can't be here.
- Raving Asura: I couldn't save them. I heard them all. Pleading. All gone. All on my watch!
- Upon defeating the Raving Asura
- Raving Asura: (manic screaming)
- Raving Asura: Breach! Broken! Falling! Screaming! Dying!
- Dessa: There, stabilized. An expeditious departure would be optimal. Let me know when you're ready.
Related achievements[edit]
Upon completion[edit]
 The Dreamer I: The Experimental Short Bow: Dessa's Sadness — Find the letter meant for Dessa in the Raving Asura's chest in the Uncategorized Fractal, and bring it to Dessa.
 Astralaria III: The Mechanism: Mists Enchanted Mechanism — Found in the chest at the end of Uncategorized Fractal.
 Chuka and Champawat III: Tigris: Fiercest Feline — Defeat Old Tom in the Uncategorized Fractal.
 HOPE III: Prototype: Old Tom's New Reactor — A reactor component found in the chest at the end of the Uncategorized Fractal.
 Ad Infinitum II: Upper Bound: Uncategorized Challenge Mote
 Special Ops Basic Course 2: Survivor Search — Complete the Uncategorized fractal dungeon at any scale.
Objective during[edit]
 Bolt III: Zap: Bottle of Uncategorized Energy — Use a Capacitive Bottle to capture energy from the turrets guarding the ramp in the Uncategorized Fractal.
 Incinerator III: Spark: Caustic Paste — Form caustic paste by combining 10 Piles of Bloodstone Dust with the elements from an Inquest Power Core in the low-pressure environment found at the top of the Uncategorized Fractal.
 Quip III: Chaos Gun: Prank Old Tom — Throw a trickster's pie at Old Tom in the Uncategorized Fractal.
 The Juggernaut III: The Colossus: Poisoned Ooze — Coat yourself with your Mystic Chromatic Ooze and get hit by the poisoned environment while fighting Old Tom in the Uncategorized Fractal.
 Ad Infinitum III: Unbound: Old Tom's Vital Reading (He's Dead)
Notes[edit]
Trivia[edit]
- The Champion Rabbit is a reference to Killer Rabbit of Caerbannog from Monty Python and the Holy Grail film, which brutally kills anyone in one hit.
- All golems in this fractal have cat ears and whiskers, and mirror the ones found in the Mistlock Observatory.
- This fractal is linked to Dessa's past in some way, though details are few. First there is her dialogue itself, as well as the item Letter to Dessa which if turned to Dessa, she will give you Dessa's Sadness(only if The Dreamer I: The Experimental Short Bow is active). Lastly, before the the elimination of the old 4 fractals islands, after the group would agree to enter the next fractal, a short cut scene would play, showing the fractal you just climbed through, and Dessa seemed to panic and would run off as the fractal begins.
References[edit]
- ^ Post by Scott McGough, Official Guild Wars 2 Forums


