Deepstone Fractal
Deepstone Fractal
- Levels
- 80
- Type
- Fractal
- Dungeon
- Fractals of the Mists
- API
- 1290
| Image(s) |
|
Click to enlarge. |
“Aid a pair of master thieves as they journey into the lost dwarven city of Deepstone.
— In-game description
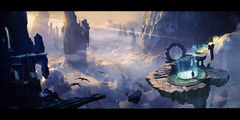
The Deepstone Fractal is a dwarf themed fractal that occurs at scales 11, 33, 67 and 84. Players take the role of treasure hunters trying to discover why the dwarven vault of Deepstone has been abandoned for centuries.
Objectives[edit]
- Meet Dessa and assist with her experiments.
- Fractal Difficulty Scale: x
- Personal Fractal Level: x
- Explore Deepstone.
- Explore Deepstone and recharge the crystal.
- Slay the Brood Queen.
- Brood Queen

- Slay the Deepstone Sentinel.
- Deepstone Sentinel

- Purge the corrupted creatures.
- Shadow Minotaur

- Defeat shades.
- Venture farther into Deepstone.
- Orbs of light activated: x/4
- Survive the ambush.
- Shadow creatures remaining:

- Free Torin from the dark Voice.
- The Voice:

- The Voice charges its power with the spectral flames: x/10
Rewards[edit]
- Primary article: Fractals of the Mists#Rewards
Walkthrough[edit]
The fractal opens with the players encountering two NPCs, Torin and Kay, trying to puzzle their way into a set of lost dwarven ruins.
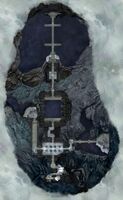
Jump down past the Veteran Bats into the dwarven ruins below. A large but dormant Vibrant Crystal is visible in the hallway.
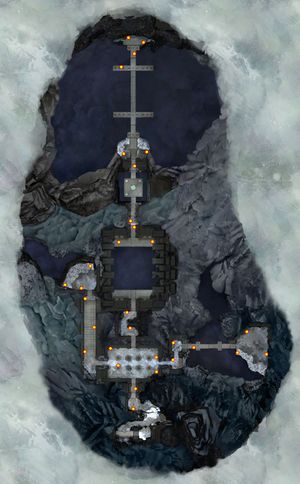
At this point in the fractal, the path splits into two. Players can either split up and do both routes at once, or travel as a full group down each path. There is however an achievement for killing both bosses within 3 minutes of each other (consider disabling the traps in both corridors before attempting this achievement).
- Eastern windy bridge and spider chamber
Spiders attack very fast here. Clear out the trash and then begin to progress across the bridge. Every few seconds yellow telegraphed environmental markers will spread from north to south in stripes across the bridge; step between them to avoid being knocked by wind into the chasm (if you do get knocked off, you will however be swept back on updrafts back to the start of the bridge). Standing on the spider nests will coat players in Sticky Webs and cause them to move more slowly. Two players standing simultaneously on the two runestones midway across the bridge opens the next area at the far end of the bridge and switches off the wind traps.
The room at the end contains two elite Broodmother spiders - killing these will spawn a champion Brood Queen spider. Cone attacks are telegraphed. Small spiders will spawn throughout the fight along with the occasional Veteran Shadow Imp. Spiders will apply several stacks of poison if you stand in one place long enough to let them hit you.
Defeating the Brood Queen reveals an orb of light. Interacting with the orb of light will teleport the player back to the central chamber.
- Western Tetris corridor and elemental chamber
This corridor contains AoE fields that cascade steadily from the far end of the room to the near end (in patterns resembling Tetris). Standing in the fields deals damage, and at higher scales inflicts Agony. Step smartly between the patterns and move quickly to the far end. Two players standing simultaneously on the two runestones at the far end of the cascading fields opens the next area at the far end of the corridor and switches off the traps. Movement skills are useful here (e.g. Lightning Flash, Infiltrator's Arrow, Ancestral Grace).
The room at the end contains a champion Deepstone Sentinel. During the fight every 20%, the elemental will conjure up Wind Sprites (tornados) which will slowly damage and carry players to the chasm opposite the entrance. The tornados themselves have low targeting priority and are awkward to target, but have breakbars that can be broken by players not caught in the tornado. If the breakbar is not broken on the Tornado, caught players will inevitably die. Since the Tornado always moves to the same place in the room, you can give yourself the most time to break the breakbar by standing at the side of the room closest to the entrance.
Defeating the Deepstone Sentinel reveals an orb of light. Interacting with the orb of light will teleport the player back to the central chamber.
- Central chamber
After collecting both orbs of light from the side rooms, players need to interact with the Vibrant Crystal at the south end of the central chamber. When both orbs of light have been used, all players are granted the special action skill Light of Deldrimor. Using this skill inflicts an effect similar to Vulnerability on foes, and reveals hidden objects - such as tiles to stand on or hidden chests (similar to the original Guild Wars) - see the achievements section below for a description of the 10 hidden chest locations.
Corrupted shadow foes, including a champion Shadow Minotaur, will then spawn in the central chamber. Use the Light of Deldrimor to remove invulnerability from the champion Shadow Minotaur and then kill the accompanying veterans to continue.
Head north through the twisting corridor until you emerge into a large chamber with a seemingly impassable chasm in the floor.
- Abyss chamber
There are four orbs of light floating above the chasm in front of you. Using the Light of Deldrimor will reveal hidden tiles which you can then stand on to cross the room. (Unrevealed tiles cannot be stepped on). Activate each light by using the Light of Deldrimor on them - note that doing this initiates the spawn of enemies. Continue using the Light of Deldrimor to make a path across the room to each of the four lights. Spectral Flames will slowly float across the chasm as you progress, making revealed tiles glow and then destroying them behind you - killing them will prevent them from destroying the tiles. Shades also appear and deal minor damage. There is no time limit to reaching the orbs.
- Sinking platform
The platform will begin to move downwards after dialogue between Torin and Kay. The platform will grind to a halt and the group will come under attack from various Shadow Imps. Kill them to progress to the next room.
- Final northern chamber
Torin will then rush ahead into the chamber towards the treasure. Unfortunately he is swallowed by shadows and becomes the final legendary foe of the fractal, The Voice.
During the fight tiles will begin to glow and disappear as they are struck by AoE. Elite Shade ghosts will appear throughout the fight. If you fall, you will have 5 stacks of Residual Updraft to protect you - this is only useful however if your allies have revealed tiles using the Light of Deldrimor.
At 80% and 40% The Voice will teleport away across the arena, gain a barrier, a breakbar and begin to inflict damage on all players with a red beam of light. Breaking the bar will disrupt the spell.
At 61% and 21% The Voice will become invulnerable and begin summoning Spectral Flames. Defeating 10 spectral flames before they reach the legendary will make him become vulnerable again. Failing to defeat the Spectral Flames will cause an AoE effect across the arena that may wipe your party.
Defeating The Voice concludes the fractal. Optionally you can vanquish Torin's ghost forever with one final use of Light of Deldrimor. If you want, you can now backtrack for any Hidden Chests you missed - see the achievements section below for a map of all 10 locations.
Achievements[edit]
| Riches Unveiled | Fractals of the Mists | 5 |
|---|---|---|
| In the Deepstone fractal, discover all 10 hidden treasure chests in one run. | Find All of Deepstone's Hidden Chest in One Run | 5 |
- Revealing a Hidden Chest by using Light of Deldrimor awards progress towards the Achievement Eligibility: Riches Unveiled effect to the whole party.
- Their placement is randomized for each instance; however, you can find them by looking for floating blue sparkles.
- The sparkles look similar to the lights under the big crystal at the beginning, but they're much less bright. You have to be fairly close to see them.
- They can optionally be looted for 2 minutes after they appear [verification requested].
- Each hidden chest awards a Deepstone Pack with Empyreal Fragments and a masterwork or better item.
- Achievement qualification may be tracked via the Achievement Eligibility: Riches Unveiled effect.
- The achievement can be safely completed in a finished instance.
- Please note that the chests appear in different random locations for each instance, however there will be the same number of chests per room.
| Of Spiders and Sentinels | Fractals of the Mists | 5 |
|---|---|---|
| In the Deepstone fractal, kill both the Brood Queen and Deepstone Sentinel within three minutes of each other. | Defeated the Brood Queen and Deepstone Sentinel | 5 |
- Killing both of the side room champions, the Spider Queen and the Deepstone Sentinel, within three minutes will be easier if you disable both sets of preceding traps before engaging the two bosses.
- Of the two, the Spider Queen is tougher as there are more additional foes. Consider sending the majority of party members to the Spider Queen.
- Achievement qualification may be tracked via the Of Spiders and Sentinels effect.
| Boots on the Ground | Fractals of the Mists | 5 |
|---|---|---|
| During your final confrontation with the Voice in the Deepstone fractal, do not fall or jump off of the platform. | Stayed Firmly Planted on the Ground | 5 |
- Use Light of Deldrimor smartly during the final fight to give your team plenty of room to manoeuvre around The Voice.
- Consider avoiding any weapons or skills which have a tendancy to roll the player backwards or leap forwards.
- Switching characters lets you have another attempt at this achievement if you fall.
- Achievement qualification may be tracked via the Achievement Eligibility: Boots on the Ground effect.
NPCs[edit]
Allies[edit]
Foes[edit]
- Deepstone Sentinel (champion)
- Wind Sprite
- Shade
- Spectral Flame
- The Voice (legendary)
- Broodmother (elite)
- Brood Queen (champion)
- Poison Spider
- Spider
Objects[edit]
- Death Rune
- Energy Orb
- Hidden Chest (revealed by using Light of Deldrimor)
- Spider Nest
- Vibrant Crystal
Dialogue[edit]
- Entering the fractal
- Torin: Kay, look. Your hired muscle's arrived.
- (One line chosen at random):
- Torin: Try and keep up.
- Torin: C'mon, let's go.
- (One line chosen at random):
- Kay: Don't mind Torin. He prefers...smaller groups.
- Kay: Well. That's Torin. That's how he says hello.
- Kay: Sorry about that. Torin's a man of few words. Well, NICE words. Tons of mean ones.
- Jumping down
- Kay: Anyway, welcome to Deepstone: lost treasure vault of the Deldrimor.
- (One line chosen at random):
- Dessa: I wonder what's down there. After all, abandoned treasure's still treasure.
- Dessa: Ah, grave robbers and a lost dwarven vault! This should be interesting!
- Dessa: So you're helping some thieves plunder a dwarven city. Classy.
- Approaching the crystal
- Kay: Looks like this crystal was set up to block the entrance. Like a ward.
- Torin: To keep us out?
- Kay: No, the facets are all wrong. The crystal's here to keep something in.
- Torin: Hey, you want to leave? Go ahead. It's my discovery anyway.
- Kay: MY discovery, Torin. I found the place.
- Torin: Yeah, in a BOOK. But I had to find it for REAL. You want to share the credit, help me open this door.
- Kay: Fine. The crystal can do it. We find a way to recharge it, and the vault should unlock.
- Torin: Let's split up; Kay, you take right.
- Heading right with Kay
- Kay: Oh gods, spiders everywhere! WHY do I let him pick the paths? I ALWAYS get the spiders.
- Kay: Share the credit... Psh. He can't boss me around like that. He isn't even in the GUILD anymore!
- Kay: Oh, yeah. I might've forgotten to mention that. This job is, ah...kind of his one shot at getting back in.
- Kay: Wait! I can feel the crystal's energy coming from across that bridge.
- Kay: If I stand on this... Right, step on those other runes. That should deactivate the traps.
- Dessa: I'm reading energy from that crystal. It's like the spiders are protecting it. Or...maybe it's protecting them...
- Kay: I think you missed one of the runes! Do you see it on the bridge? (if making it to the blocked door without standing on all runes)
- If the player falls off of the windy bridge (One line chosen at random):
- Dessa: Oh, no! Abort! Ab— Oh. No, wait. False alarm. All good!
- Dessa: Ahhh, no, no no— oh. You're okay. Don't scare me like that!
- Dessa: Ahhh! Look ou— You're... Phew. Okay, never mind.
- After removing the spider room barrier
- Kay: Okay, that did it!
- Kay: Did you...? What was that?
- Kay: Oh, great: more spiders. Clear 'em out and let's go get that crystal energy.
- Facing the Brood Queen
- Brood Queen: (hiss)
- One (random) reaction from Kay every time the Brood Queen hiss:
- Kay: Ohhh no. No, no, no.
- Kay: Watch out for the webs! And the fangs!
- Kay: You're doing great. Just avoid the pointy bits!
- Kay: Something's wrong. The room just got really cold...
- Kay: Wait...did you just feel that? Like all the warmth got sucked out of the room...
- Brood Queen: Omdebstea? Iph om lyvut?
- Kay: Oh gods—I am NOT okay with giant spiders talking!
- Brood Queen: Vmaite ba!
- Kay: Wait! I know those words. "Vmaite," that's "answer." "Answer us"!
- Brood Queen: Ejewptim devllts ba.
- Kay: "The rock-hewn" Dwarves? "The dwarves trapped us"? What is this thing.
- After defeating the Brood Queen
- Kay: Giant talking spiders... I don't— Just...let's get this thing to the crystal.
- Heading left with Torin
- Torin: Oh, great. The cavalry's here. I've got my eye on you—don't you forget it.
- Torin: Wanna earn your keep? Hit those runes on the other side. Should turn this damn thing off.
- Stepping on a trap
- Torin: This might go without saying, but you should try to avoid those trapped tiles.
- Back at the crystal, if Torin hasn't been assisted
- Kay: Hm. Probably needs another power boost.
- After removing the barrier
- Torin: Hm. Not bad. C'mon, let's keep moving. (if got through quickly)
- Torin: Good thing we aren't paying you by the hour. C'mon, let's keep moving. (if did not get through quickly)
- Facing the Sentinel
- Torin: An elemental...? That crystal's magic must be strong.
- Torin: Oh no, I'm trapped. Looks like you'll have to handle this one yourself. Good luck!
- Torin: You're definitely getting under its skin now! So to speak. (75%)
- Torin: You're getting there. Damn, that thing's strong! (50%)
- Torin: You've almost got it! C'mon, that orb's as good as mine! (25%)
- After defeating the Sentinel
- Torin: Looks like you're still in one piece. C'mon, grab the orb.
- Back at the crystal, if Kay hasn't been assisted
- Torin: Where's Kay? I'll be fine here. Why don't you, ah...go see what the holdup is?
- Dessa: Elementals like to form around magic, but that crystal energy's off the charts. What were the dwarves using it for?
- After the crystal is fully charged
- Kay: Did you just— I see. This must be how the dwarves fought those shadow creatures!
- Torin: Fascinating. Really. C'mon, let's go see if that door's open now.
- Torin: What's that thing?
- Kay: Try the light!
- Torin: All right, they killed it. How come the door still isn't opening? (after killing the champion but not the veterans)
- Kay: Maybe let them finish killing all the shadow monsters first.
- (One of the following)
- Torin: Okay, guess killing all the monsters worked. Good job.
- Torin: That did it! Look!
- Torin: There we go. Nice work. You know, with the monsters.
- Entering the abyss room
- Kay: Hm. Looks like another dwarven trap. Go and step on that other rune.
- Torin: This is just a hole in the ground. Dwarven traps are supposed to be clever.
(Deepstone Orb spawns revealing ledges)
- Kay: Stop whining. Look, that did something. Why don't you go take a look at that orb? We'll wait here.
- (One of the following)
- Torin: I can feel it, Kay. The treasure vault's gotta be right on the other side.
- Kay: Honestly, the treasure's the last thing I'm worried about right now. After everything we've seen...
- (or)
- Kay: There's a reason the dwarves left this place.
- (or)
- Torin: How many traps do you think these dwarves made? I know it's a treasure vault, but this feels like overkill.
- (or)
- Torin: Don't look so nervous. The treasure vault's gotta be right up ahead.
- Kay: Aren't you at all concerned what we've seen down here? There's a reason the dwarves left this place.
- (or)
- Kay: How are you so glib about this? Whatever's down here, it scared the dwarves off a whole VAULT of treasure.
- (One of the following)
- Torin: You've had plenty of opportunities to walk away. So, uh...why aren't you walking away?
- Torin: I already told you—you're free to leave whenever. So...what's keeping you here?
- Torin: Well, the exit's right behind us. But you know that. What's keeping you here, Kay?
- (One of the following)
- Kay: You don't remember?
- Kay: Guild's the only family I've ever known. That's thanks to you. I owe you.
- (or)
- Kay: Because twelve years ago, someone in the thieves guild asked a kid on the street if she needed a place to stay.
- Kay: I wouldn't be in the guild without you. Everything I am is because you gave me a chance. I owe you.
- (or)
- Kay: Because if it weren't for you, I'd probably be dead.
- Kay: I owe you, Torin. I owe you everything I've got. You got me into the guild.
- (One of the following)
- Torin: You don't owe me a damn thing. Everything you've got you earned yourself. I just got you started is all.
- Torin: You're one of the most gifted mesmers I've seen, Kay. You earned that yourself.
- Torin: YOU owe ME? Look, I made some mistakes, and I'm paying for them. But you don't owe me a damn thing.
- (One of the following)
- Torin: I don't know... Maybe I'm rushing into this. This is the sort of thing that got me in trouble in the first place.
- (or)
- Torin: Maybe this is all a bad idea. I'd never forgive myself if something happened to you.
- Kay: We've come this far. Maybe with our friends and the Light of Deldrimor, we've got a chance.
- (or)
- Kay: We might be in over our heads, but with the Light of Deldrimor? That's a different story altogether.
- (or)
- Torin: I mean, maybe you're right about this place. I got so caught up with getting back into the guild...
- Kay: The vault's just ahead. And with our friends and their light, we can open it.
- Torin: Well, we've also got you, Kay. Thanks. For not giving up on me.
- Entering the sinking platform
- Torin: Not bad. So, Kay, I never asked...why'd you hire the muscle? We've never needed it before.
- Kay: To keep you from doing something stupid. Because I know you.
- Torin: Well, we wouldn't be here without 'em. Guess you've earned your keep after all.
- While fighting Shadow Imps
- Torin: It's an ambush! Look out!
- Torin: Damn, more of those shadow things!
- After defeating Shadow Imps
- The Voice: O att uyjate sevi.
- Kay: Torin...Torin, that voice..."See you"..."drawing closer." It knows we're coming.
- Torin: Yeah—for the treasure vault!
- Reaching the final chamber
- Torin: There it is! C'mon!
- Kay: Torin, wait! You don't have the light!
- Torin: What's...happening?
- Torin: This form is...adequate.
- Kay: Wha— Torin? What's going on?
- Torin: I see what it sees. Now we will leave as one.
- Kay: I... I can't...move! You have the light—you have to use it!
- Using the Light of Deldrimor on Kay
- Kay It's...not working! Don't worry about me—save Torin!
- Voice's first use of Shadow Siphon
- The Voice: Can you hear my song echo through the darkness?
- One of the following when Spectral Flames spawn
- The Voice: Spectral flames, come forth! Tear free their souls.
- The Voice: The fire will purge your spirit from its mortal frame.
- The Voice: The fire in the darkness will claim you.
- When the Voice has 50% health left
- Kay: Torin, you have to fight it! Don't let it take you! Keep going! You have to help him!
- When the Voice has 30% health left
- The Voice: This form degrades. It will not last.
- Upon defeating the Voice
- Kay: I can still save you. I can—I can fix this.
- Torin: No, you can't, Kay. There's only one way to save me now.
- Kay: The Light of Deldrimor. But I don't have it... You. You have to do it. Please...make it quick.
- After using the Light of Deldrimor on Torin
- Kay: Torin... I won't let them forget you. I promise.
- Kay cries.
- Dessa: The fractal is stabilized. Still no idea what that thing was. Maybe we'll never know... Might be for the best.
Notes[edit]
- If a player manages to fall too many times to trigger the instant death on the final boss, they can still retain the Rigorous Certainty as the death bypasses the downstate trigger for the effect.
Related achievements[edit]
 Mad Armory: Carapace of Chaos: Ghostly Stone Essence — While under the ghostly aura of certain Halloween foods, loot the final chest of the Deepstone fractal.
Trivia[edit]
- This fractal island was added with Long Live the Lich release.
- The architecture is similar in design to the Rune-Locked Doors puzzles in the Desert Highlands.
- The internal name for the floor puzzle is Tetris.[1]
- The Brood Queen and the Voice speak a language used by Ephemereal Spirit which is also used in the Varajar Fells Notebook. The translation using a substitution cypher:
- Omdebstea? Iph om lyvut? — Intruders? Why in place?
- Vmaite ba! — Answer us!
- Ejewptim devllts ba. — Rorkhewn[sic] trapped us.
- O att uyjate sevi. — I see closer draw.
Gallery[edit]
External links[edit]
References[edit]
- ^ Comment by Benjamin Arnold, Reddit.com


