Ascalonian Catacombs (explorable)
Ascalonian Catacombs (explorable)
7 6
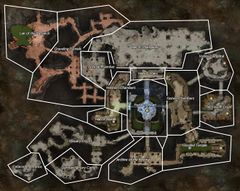
Map of Ascalonian Catacombs (explorable)
- Levels
- 35
- Type
- Dungeon
- Region
- Ascalon
- Connects to
- Phasmatis Corridor
- API
- 36
“A Durmand Priory team is researching the Ascalonian Catacombs, and has found darker things lurking within its depths.
— In-game description.
The Ascalonian Catacombs are incredibly rich in history, and the Durmand Priory has started to explore them. The scholars, however, are not alone in the depths. Without the Ascalonian Foefire ghosts, the endemic gravelings now run rampant through these ancient ruins. Three of those gravelings are particularly dangerous, the Graveling Patriarchs, but the explorers of the Durmand Priory cannot agree on which one to take care of.
The explorable mode of Ascalonian Catacombs is a level 35 dungeon and features three paths:
- In Path One, players help scholar Hodgins recover human relics to defeat the Howling King, capable of summoning a horde of gravelings with every roar.
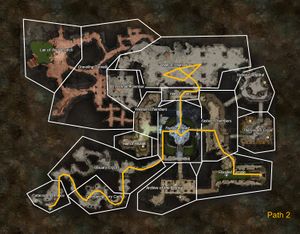
- In Path Two, players help scholar Detha defeat the mysterious Ghost Eater by turning its own minions against it.
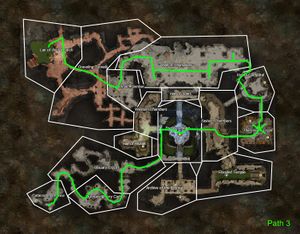
- In Path Three, players help scholar Tzark secure the help of Ascalonian ghosts to defeat Colossus Rumblus, who could collapse the entire catacombs with a single roar.
Dungeon information[edit]
Your Herald Continuing trouble in the Ascalonian Catacombs Congratulations on defeating King Adelbern and foiling his plot to send his ghost army to Tyria's surface. Unfortunately, it appears that there were more than angry spirits lurking in the catacombs. —As always, |
Requirements[edit]
- At least one party member must have completed Ascalonian Catacombs (story), that player has to be the one that enters the dungeon first. Players are advised to be, at least, level 35.
Objectives[edit]
- All paths
- Locate and assist the Durmand Priory camp.
- Find the Priory camp.
- Make your way to the Priory camp.
- Choose a course of action.
- Speak to the scholars to choose a path.
Optional Event[edit]
- Defeat the ghosts.

Hodgins' path[edit]
- Help Hodgins locate the flame scepters.
- Destroy the graveling burrow.
- Graveling Burrow

- Join Hodgins in finding the first scepter.
- Find the first scepter.
- Defeat Lieutenant Kholer.
- Lieutenant Kholer

- Defend Hodgins by destroying graveling burrows.
- Hodgins

- Graveling burrows remaining: x
- Search the secret room for the scepter.
- Accompany Hodgins to find the second scepter.
- Find the scepter pieces.
- Scepter pieces: x/5
- Return to Hodgins with the scepter pieces.
- Search the catacombs for the patriarch.
- Explore the graveling tunnels.
- Enter the tunnels.
- Kill the Howling King.
- Howling King

- Dungeon complete.
Detha's path[edit]
- Help Detha set a trap to kill the patriarch.
- Go with Detha to the flooded temple.
- Destroy the graveling burrow.
- Slay the spider queen.
- Spider Queen

- Go with Detha to the flooded temple.
- Defeat Lieutenant Kholer.
- Lieutenant Kholer

- Defend Detha from gravelings.
- Gravelings killed

- Detha's health

- Graveling Breeder

- Go with Detha to the Hall of Champions.
- Head to the Hall of Champions
- Trap and kill the patriarch.
- Defend Detha and her traps.
- Detha Tremblebones

- West Trap

- East Trap

- North trap

- Speak with Detha.
- Speak with Detha when you are ready.
- Kill Ghost Eater.
- The Ghost Eater

- West Trap Power

- East Trap Power

- North Trap Power

- Dungeon complete.
Tzark's path[edit]
- Help Tzark obtain ghostly essence.
- Destroy the graveling burrow.

- Defeat Lieutenant Kholer.
- Lieutenant Kholer

- Go with Tzark to the Lovers' Crypt.
- Wait in the crypt for Tzark.
- Defend the essence collectors.
- Essence obtained: x%
- Essence Collector Nirr

- Essence Collector Sorpp

- Enlist Warmaster Grast to help fight the patriarch.
- Locate Warmaster Grast in the Hall of Champions.
- Destroy the graveling burrows.
- Graveling Burrow

- Graveling Burrow

- Graveling Burrow

- Graveling Burrow

- Search the catacombs for the patriarch.
- Explore the graveling tunnels.
- Enter the tunnel.
- Locate Colossus Rumblus.
- Colossus Rumblus

- Dungeon complete.
Rewards[edit]
- 70% experience towards the next character level
- Between 12
 and 26
  , depending on level and diminishing returns
 - Bonus Gold (first time each day per account)
- 20
 Tales of Dungeon Delving for the successful completion of a path
Unique Loot[edit]
- Foefire Amulet (Rare)
- Foefire Amulet (Masterwork)
- Ghost Eater's Hide (path 2)
- Ghostly Spineguard
- Ring of the Catacombs
- Recipe: Claw of the Howling King (path 1)
- Recipe: Colossus Fang (path 3)
Walkthrough[edit]
All of the three paths share the same start:
Common enemies[edit]
Ascalonian ghosts[edit]
- Ascalonian Elementalist: all their attacks deal moderate damage in an area. Their fire storms apply burn.
- Ascalonian Mesmer: their basic attacks daze for a short duration, they can knock back players, and they can create a long-lasting purple bubble around them that reflects projectiles.
- Ascalonian Monk: their basic attacks bounce between foes, damaging them, and allies, healing them. They can also knockback players.
- Ascalonian Necromancer: these are the hardest Ascalonian ghosts, they can inflict fear, chill, blind, bleed, weakness, cripple, poison, and vulnerability. Their basic attacks steal health from players, and they can drop very long-lasting pools of poison. They should be prioritised over other ghosts.
- Ascalonian Ranger: their basic attacks cripple and poison, they can charge up an arrow to knockback players, and they can throw traps at range that activate upon landing to cripple, root, and bleed.
- Ascalonian Warrior: they attack with their swords, dealing moderate damage, and with their shields to inflict stun. They will attempt to heal themselves when low in health, players should try to kill them before they finish the healing animation, or interrupt said animation with crowd control.
Gravelings[edit]
- Common graveling: can jump at players to knock them down.
- Graveling Breeder: these graveling have the ability to summon additional common gravelings, indicated by a roaring animation that can be interrupted to prevent the spawning of more gravelings. Players should prioritize killing these gravelings first.
- Graveling Burrow: from the burrow will spawn mainly common gravelings, and sometimes also graveling Breeders.
- Graveling Howler: can scream to knockdown players and inflict confusion.
- Graveling Stalker: can burrow and then burst out, knocking down players in an area. If that attack hits, the stalker becomes translucent and invulnerable for a few seconds.
- Graveling Scavenger: jump on the player and knock them down like common gravelings. Only those knockdowns take way longer and the Scavenger eats at you doing lots of damage.
Locate and assist the Durmand Priory camp[edit]
- Find the Priory Camp
A Priory Explorer welcomes the party to the Catacombs and explains the situation. Afterwards, the door behind him will open. In the next room awaits an Elite Graveling Breeder, these type of gravelings have the ability to summon more gravelings. This is indicated by a "screaming" animation, but it can be interrupted. There are three spike traps in the room, indicated by red circles on the floor, they activate and deactivate each couple of seconds. There are similar spike traps all throughout the dungeon - players should wait until the red marker disappears before stepping on the area. After defeating the graveling, the three Priory scholars walk the party to the Priory camp.
- Make your way to the Priory Camp
Upon reaching the camp, a video will explain the three paths of the dungeons, and then players vote for the dungeon path they want to do. After the vote is finalized, anyone who crosses the upper threshold of the downward spiral steps will trigger a graveling burrow, a minor inconvenience that most groups choose to simply ignore and run past. Graveling burrows spawn gravelings, and are found in various places in the Catacomb sometimes including a Breeder as well. This one will only spawn gravelings.
If the voting finalizes after all players have gone downstairs, no graveling burrow will spawn.
- Destroy the graveling burrow
A minor inconvenience that spawns gravelings. Most groups choose to ignoring it and run past it.
- Defeat the ghosts
The event is located in a small room behind the staircase leading out of the Durmand Priory Camp. Interacting with the torch in the room will give you a dialogue option to start the event. Defeat the elite ghosts that spawn.
- Exploring the Ossuary Crypts
The crypts are filled with spike and fire traps, players should navigate them with care. The room below is filled with spiders, and there are four Gargoyle Heads that shoot flames at players.
Small spiders are a minor inconvenience and should be killed while moving to avoid the poison fields they shoot. Reflects, and blocks prevent the projectiles from creating poison fields. Clearing the few spiders under level 5 will spawn the Spider Queen. It may be prudent to kill the gargoyle heads in the walls prior to defeating these spiders and spawning the boss.
Slay the spider queen[edit]
The spider queen spawns a few small spiders when she spawns. Use the same strategies from the previous section to defeat them.
The Spider Queen has two main attacks; sharing animations, but not effects, with Malrona, the spider boss from Twilight Arbor:
- The queen raises her bottom to the sky, and then push her body forwards. When she pushes her body forward, a stream of webs will immobilize targets caught within it. Players should move behind or around her, as this attack is rather deadly and applies immobilize with each hit.
- The queen glows golden and shrinks into herself before shooting three poison clouds that will leave large poison fields where they land. (These projectiles cannot be reflected or blocked.) These fields deal massive damage and apply Poisoned. Players downed in these fields will require more than one ally to revive them, as their damage is higher than the healing one ally provides when reviving. Skills that teleport downed allies might be useful. Nevertheless, these fields are easy to avoid.
The best strategy is to stay in melee range, doing the most damage, running behind her to dodge the web immobilizing attack, then running away and attacking from range when she spawns poison fields, and repeat. Abilities that cleanse conditions can be useful here.
- Trap Hallway
This hallway is patrolled by a group of powerful gravelings, and is filled with deadly spike traps. Players can aggro the enemies, then hide behind any corner to negate line of sight and force the mobs to run to them, the rocks at the beginning of the hallway are commonly used to this effect. Once the gravelings are all grouped together, away from deadly traps, players can burst them down.
The group of gravelings features one Elite Graveling Breeder, one Elite Common Graveling, one Elite Graveling Howler, and one Champion Graveling Stalker.
Players then continue through the hallway, avoiding the traps. Each trap appears and disappears on their own individual timers. At the end of the hallway, to the left, is a switch that will disable the traps.
There are two Gargoyle heads here that are often simply skipped by running past them.
Legendary Troll[edit]
There is a chance for a legendary troll to spawn in this area, and other areas of the dungeon, as a bonus boss. His abilities are the same as the champion version in the story but they do a lot more damage. They include a Fear towards all the players he's facing, a Lightning Projectile that will stun each player it bounces to, and an AoE Stomp that is followed by shockwaves toward the direction he is facing (similar to an Ettin Smash) through the ground.
The Fear can be evaded, for the animation, it faces a player, folds its hands, and crouches down a little. Both the lightning projectile and the stomp's shockwaves in the ground are treated as projectiles and can be reflected or blocked.
Players can aggro the following boss, Kholer, and drag him to the troll, which causes them to fight each other. However, this is a very uncommon strategy as this takes far more time than simply killing the troll as normal.
Defeat Lieutenant Kholer[edit]
Kholer is accompanied by two Ascalonian ghosts. Players commonly approach the boss from the west side of the room, aggro it, then hide behind the pillar to force the boss and its adds to group together so they can be cleaved down.
Kholer attacks in melee range with a sword. He has a unique attack which is indicated by a charging up and a golden glow, then shoots out chains at all players that Pull them to him. If the attack connects with at least one player, he follows up with an extremely deadly spinning attack. The chain is a projectile, players should try to dodge it as normal, or use skills that negate projectiles. Players pulled in should dodge away as fast they can to avoid the deadly spinning attack. Kholer's other attacks include a jump attack that makes him evade, then poisons players hit.
The boss spawns two more veterans adds at 75%, 50%, and 25% health. These additional foes can be used for rallying.
| Lieutenant Kholer | |
|---|---|
| Boss Health | Veteran Professions |
| 100% (Start) | Monk & Elementalist |
| 75% | Warrior & Mesmer |
| 50% | Warrior & Necromancer |
| 25% | Mesmer & Ranger |
The veterans do not despawn if the party wipes (if everyone dies). If failing to defeat Kholer, it would be wise to engage the veterans, kill them, then reset the fight.
Kholer's defeat opens up a boss chest, and activates the Foefire's Heart waypoint. This fight is optional.
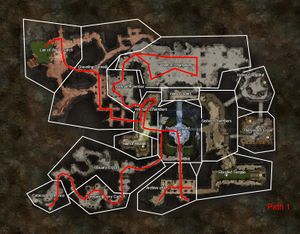
Path 1: Hodgins's Plan[edit]
Path 1 begins after killing Kholer.
- Find the first scepter
After Kholer, the party should head south into the Archive of the Resting. The steps to this room are guarded by gargoyle heads that breathe fire. Players can jump up on the gargoyle heads and "jump" their way down to avoid the deadly flame attacks. Faster players can simply run downstairs right after the gargoyles breathe fire, and reach the bottom before they breathe fire again. Once Hodgins enters the Archives, the dungeon continues.
- Archive of the Resting
Players must defend Hodgins from gravelings by destroying their Graveling Burrows. If Hodgins is defeated, the event resets.
Only two burrows will be active at a time. The initial burrows need to be destroyed before the next one comes up. The burrows have a set order in which they spawn. The one north of Hodgins will spawn another in the south-east corner of the room, and that one will spawn another one in the north-west corner of the room. The initial burrow west of Hodgins will spawn another further south-west, and that one will spawn one more in the northeast (directly east of the first burrow north of Hodgins). In total there are six burrows.
The party should split into two teams and kill the graveling burrows. It is best to focus the burrows and ignore the gravelings, killing a burrow stops it from summoning more gravelings, and all the gravelings disappear when all the burrows are destroyed.
- Search the secret room for the scepter
Afterwards, Hodgins opens a door to a secret room. Players should go up the spiral stairs, forward onto a wooden plank incline, and traverse some wooden scaffolding to reach a stone coffin in which they will find the first Flaming Scepter.
The dungeon continues in the Rockfall Chamber. Players can use the Foefire's Heart waypoint, rather than go back up the flaming stairs.
- Help Hodgins locate the Flame Scepter pieces
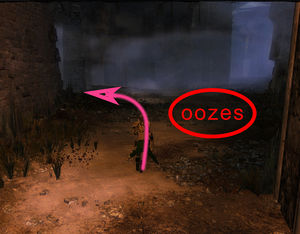
The path to the Rockfall Chamber is guarded by enemies. Upon entering the room, players might trigger a trap that spawns several oozes. Players can avoid the trap by turning left and going around the column once entering the Chamber.
Once there, Hodgins will note that 5 Scepter pieces must be recovered from the next room. Ideally, one person will not search for the pieces and will instead stay with Hodgins in the Chamber to talk to him once the rest of the party recovers the 5 pieces from the Hall of Champions while avoiding the gravelings. The first group of gravelings at the entrance to the Hall has to be killed, or Hodgins will aggro it and become unresponsive until they die. The same is true for the ooze of the ooze trap, if players triggered it.
The scepter pieces are guarded by gravelings. It takes about 1 second to pick up these pieces, so it is useful to bring blinds, stun breakers, stealth, or invulnerability. Players should ignore the gravelings and just take the scepter pieces.
If unsure of how to approach a group, players can kite around the scepter piece and dodge the gravelings' knockdown attack, then go in and pick up the piece and keep running.
If keeping one person behind to talk to Hodgins, it is expected that the other 4 will continue running east to the far end of the chamber to leave combat, then use the newly created waypoint.
- Return to Hodgins with the scepter pieces
After the five scepter pieces are found, someone must speak to Hodgins, who will repair the Flaming Scepter, and a new Waypoint spawns. There is also a chest to loot.
- Explore the graveling tunnels
The Graveling Tunnels are, as expected, infested by gravelings. Most groups will skip these enemies and simply run past them.
To make the run easier, it is recommended to bring skills that provide party-wide benefits such as Swiftness, Stealth, or Stability.
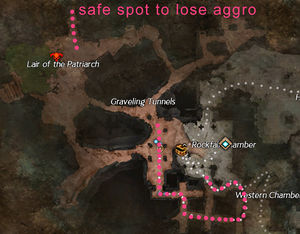
After reaching the final room, players should keep running north to lose aggro on the enemies chasing them before engaging on the Howling King.
- Kill the Howling King
The howling king has two dangerous attacks.
- It will quickly rear back and scream forth a sonic cone of death that deals high damage.
- It will get up on its hinder legs and flail his arms around while swaying in a circle then shoot out a laser that inflicts Confusion.
Players can avoid both of these attacks by walking behind the boss.
Additional enemies will periodically arrive from the Graveling Tunnels during the fight. However, they can be instantly incinerated by the fire AoEs on the floor. Nevertheless, these fire fields will also apply burn damage to players. Because of this, parties will often want to engage the Howling King in the far corner to increase the time before these mobs arrive.
It is possible for one or two people to kite the additional gravelings while the other three tackle the Howling King. This is, however, not recommended as it is a considerable DPS loss.
Path 2: Detha's Plan[edit]
Path 2 begins after killing Kholer.
The group continues east then south into the Flooded Temple. Spiders, gravelings, and spike traps guard the path.
- Flooded Temple
Near the Altar of Death, players will find five chains, interacting with them will activate five different spike traps. Players can pull the chains before the fight to learn the location of the traps. These traps deal no damage to players.
The party should split into 2, 2 players on the "bait" team, and 3 on the "trapper" team.
The bait team runs in circles around the traps, holding the attention of the enemies that swarm in, while the trapper team obliterates the enemies by activating the traps by pulling the chains.
The trapper team should split appropriately: one player takes the 2 top left chains, another the 2 top right chains, and the final will take the central chain. The bait team may want to bring swiftness, blocks, and/or stun breaks. After the first wave, a Graveling Breeder will spawn, the Breeder does not take damage from the traps and has to be killed normally. The event finishes once enough gravelings are killed, and a reward chest spawns.
The dungeon continues in the Hall of Champions, players can use the Foefire's Hearth waypoint then head north. These corridors are filled with gravelings and oozes, the party should decide whether to kill them or run past them. At the top of the stairs, before the Hall, players have to interact with a chain to open the door.
- Ghostly defense
Detha will start to build three traps for the next fight, while players defend her from attacking Ascalonian ghosts. Every time Detha goes to build a trap, new ghosts spawn and charge her. At first, only 4 spawn, but one more will spawn for every group after, up to 8. The ghosts disappear when Detha finishes building all the traps. When killing the ghosts, the group should prioritize necromancers, elementalists, and rangers. Monks and warriors are less dangerous. Stability, stun-breaks, and condition removal will be useful to counter the knockdowns and fear effects. Skills that group enemies together are also extremely useful here.
- The Patriarch
The Ghost Eater is protected by a Ghost Shield. This shield protects the boss from all damage, and spawns ectoplasmic oozes when the Ghost Eater is hit.
The three traps installed by Detha will remove the boss's shield, but they must be charged first. To charge these traps, the party must pull the ectoplasmic oozes to the traps by using the Anti-Spectral Ordnance guns that are near the traps. Skill 1 will lift the oozes with a yellow beam, while skill 2 will pull lifted oozes in with a green beam. One player will need to use skill 1 to lift an ooze up, while another player simultaneously uses skill 2 to pull the lifted ooze in. Once oozes are inside the area of the trap, players need to lift them using skill 1 which will allow the trap to consume them, causing it to gain charge. Three oozes are needed to fully charge a trap. It is possible to spawn the oozes without aggroing the Ghost Eater by using skill 1 (lift) on him. This way the party can fully charge all the traps before engaging the boss.
Once a trap is charged and the Ghost Eater itself is pulled within range of the trap, the trap fires and discharges, removing the boss' Ghost Shield. At this point, he is vulnerable to the player's attacks. Players have to drop the guns and attack it.
The Ghost Eater spawns deadly area of effect attacks, blue pools on the ground, it is imperative to get out of them as soon as possible as they deal massive damage over time.
Path 3: Tzark's Plan[edit]
Path 3 begins after killing Kholer. The party heads east into The Lovers Crypt. The path is guarded by spiders, Ascalonian ghosts, and traps. The party should decide whether to kill the mobs or skip past them.
- The Lovers Spawns
In this section, players must defend two asuran beacons. If either of the beacons is destroyed, the event resets.
Graveling burrows will spawn one after the other and gravelings will spawn from them. A new one burrow spawns every ten seconds. This fight is fairly simple as burrows do not have much health, and enemies take a few seconds to spawn from them once the burrow is created. The party should stay together and quickly kill the burrows. If the party has low damage and gravelings do spawn, they should cleave them down while focusing the burrows.
Afterwards, players are transformed into Ascalonian ghosts, and the north door opens. The dungeon continues in the Hall of Champions, the path there is guarded by spiders.
- Hall of Champions' burrows
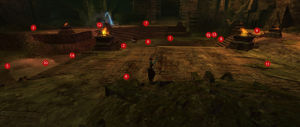
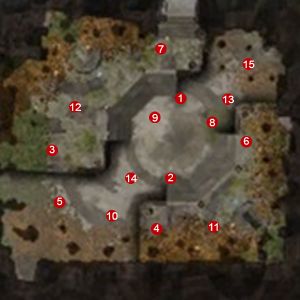
Inside the Hall, four graveling burrows will spawn, each spawning hordes of gravelings. The party needs to destroy all four of them. Gravelings disappear when their burrows are destroyed.
Clearing the fourth burrow opens the exit and unlocks a waypoint. The Ascalonian ghost Warmaster Grast joins the party to help them defeat the final boss.
Players then go to the Rockfall Chamber, and enter the Graveling Tunnels. These tunnels are, as expected, infested by graveling. The party should decide if they are going to kill them, or simply skip past them. Skills that break stun or provide stability will be extremely useful for these tunnels.
- Colossus Rumblus
Colossus Rumblus is notorious for one dangerous attack players should take care of. It will get on all fours and flail its arms for a while as it sways in a circle. This creates a cave-in, rocks will fall from the ceiling, dealing massive damage in a large area. To dodge this deadly attack more easily, players can use skills that destroy or reflect projectiles.
If present, the ghost NPC Warmaster Grast should throw up a protective blue shield that destroys the rocks - as long as he stays alive, the party doesn't need to bring their own projectile negation. It may benefit the party to keep a target above the Warmaster's head so it is easy to find him when the boss does this attack.
The boss has other less dangerous attacks, including a swipe that will Launch and add various conditions to a single player, and a seismic attack that sends out 5-6 radial earthquakes which Knockdown. Players should take note that these attacks might throw them outside Warmaster Grast's protective shield during a cave-in.
NPCs[edit]
Allies[edit]
- Various
Foes[edit]
- Elite Ascalonian Captain
- Elite Ascalonian Elementalist
- Elite Ascalonian Necromancer
- Elite Ascalonian Ranger
- Elite Ascalonian Warrior
- Elite Ascalonian Monk
- Elite Ascalonian Mesmer
- Lieutenant Kholer
- Champion Graveling Breeder
- Champion Graveling Stalker
- Colossus Rumblus
- Elite Graveling
- Elite Graveling Breeder
- Elite Graveling Howler
- Elite Graveling Scavenger
- Elite Graveling Stalker
- Graveling Hatchling
- Graveling Stalker
- The Ghost Eater
- The Howling King
Objects[edit]
- Anti-Spectral Ordnance
- Essence Collector Nirr
- Essence Collector Sorpp
- Flaming Scepter Fragment
- Graveling Burrow
- Gargoyle Head
Dialogue[edit]
Initial dialogue[edit]
- At entrance
Approaching the Priory Explorer (cinematic):
- Priory Explorer: Finally, a friendly face. We thought pushing back the ghosts would make us safe. Instead, we're in more danger than before.
- Priory Explorer: Our camp is barely holding out against the graveling attacks. The scholars say the only hope is to kill one of their patriarchs.
- Priory Explorer: But our scholars can't agree on which patriarch to target. Maybe you can break the deadlock.
- Priory Explorer: Please, head down there and find our camp. We need your help.
On the way to the camp:
- Tzark: See? This is why we need a cohesive plan. People just wander in here and get attacked.
- Detha Tremblebones: No one's arguing about the need for a plan. Your plan is just stupid and won't work.
- Hodgins: Don't mind them. Come with me. We have a Priory base of operations set up nearby.
- Priory Camp
When everyone has arrived at the camp (cinematic):
- Detha Tremblebones: Your ignorance will get us killed, Tzark. The Ghost Eater represents a threat we've never seen before.
- Tzark: Your "Ghost Eater" only eats spirits, Colossus Rumblus will collapse the catacombs! That's a real risk.
- Hodgins: You're both wrong. The Howling King is gathering an army that could easily overrun us.
- Tzark: We've been arguing like this since the graveling patriarchs appeared. You'd think three scholars could agree on something.
- Hodgins: We should settle it now. Now talk with us, decide which beast is the biggest danger, then speak to Shrill Sunderbark about a course of action.
Talking to the scholars before deciding the path:
- Hodgins: Again, my apologies. The rise of the graveling patriarchs has this camp on edge.
- Where did the gravelings come from?
- Adelbern's presence kept them underground. When he was defeated, they just sprung up everywhere. We've been arguing which patriarch is the most dangerous.
- Which one are you most concerned about?
- I spotted him—well, heard him a few weeks ago. I call him the Howling King. I've seen him summon a dozen gravelings with a shout that would chill Grenth.
- What's you plan to stop the Howling King?
- In my research, I learned the Flaming Scepter Mages of old Ascalon are buried here—with their weapons. A pair of their scepters would certainly kill the Howling King.
- Where are they?
- The old journals don't pinpoint exact burial sites, but I've norrowed it down to the most likely.
- Interesting. I'll think about it.
- I'll think about it.
- Doesn't sound so bad.
- Without the ghosts to keep them in check, they'll eventually come up here and dine on us. We don't have the defenses to stop a graveling army.
- So, what's you plan to stop the Howling King?
- Yeah. Sounds bad. Good luck.
- I'm not interested in digging up graves.
- Thanks.
- I'll get back to you.
- Tzark: My colleagues remain ignorant. The graveling patriarch they need to worry about is Colossus Rumblus. Fortunately for everyone, I have the ideal method for its defeat.
- What's your plan?
- Finally, someone who'll listen to reason. First, we gather ghostly essence. Then, I reverse the process to coat us in spirit energy—effectively making us ghosts.
- Hold on. Don't we have to be dead to be a ghost?
- Negative. We'll appear as ghosts to other ghosts, however, which is vital for the second part of my genius plan.
- Which is?
- The ghost of Warmaster Grast lurks in the chambers beneath us. As ghosts, he will recognize us as one of his kind, and we shall recruit him to kill the patriarch.
- Increase our numbers to attack theirs. I'll think about it.
- I'll think about it.
- Interesting, but I've heard enough for now.
- Tell me about the patriarch you are worried about.
- I surveyed it after we set up camp here. It's a massive creature that makes the ground shake as it walked. I estimated its potential energy to be similar to that of an earthquake.
- But it's safely underground. What's the harm?
- Do I have to use small words? Fine. Big quake-causing creature. Unstable network of catacomb tunnels. Big rocks fall on us. All dead. Are we clear?
- So what's your plan?
- Completely. Thanks.
- Understood.
- We can talk about it later.
- Detha Tremblebones: These two don't realize what the Ghost Eater represents: a new, dangerous foe we don't know anything about. We need to go down and kill it.
- What's so dangerous about a graveling that eats ghosts? As long as it eats them, you're safe, right?
- That's what these fools keep saying. The problem is, we don't know anything about it. What if it can phase through walls like ghosts? We'd be defenseless against it.
- What's your plan to fight it?
- How dangerous are the other gravelings?
- I'll give it some thought.
- So you must have a solid plan to defeat the patriarch.
- It's simple. I plant bait, gravelings come. You annihilate them with turrets, and focus on the patriarch when it shows its ugly face.
- What do we use for bait?
- I can craft it out of pheromones of graveling females.
- How do we do that?
- Gravelings have been invading the catacombs for centuries, so there were a lot of defenses built to kill them. The southeast section still has working ones.
- Let me ask you something else.
- Not bad. I'll think it over.
- Let me ask you something else.
- I've heard enough for now, thanks.
- Ver straightforward. I'll think about it.
- What about the other kinds of gravelings? How dangerous are they?
- Besides the patriarch, I've categorized five types: regular, stalker, scavenger, breeder, and pillager.
- What's the difference between them?
- Regular gravelings will knock you down and try to rip your legs off. The others are nastier.
- What do you know about scavengers?
- Scavengers will knock you down and tear into your entrails with sharp teeth.
- Tell me more about the different gravelings.
- I think I have to go now.
- What do you know about stalkers?
- Stalkers will burrow underground and pop up beneath you. Watch for signs of reemergence and move fast. Oh, yes—they're also poisonous.
- Tell me more about the different gravelings.
- That's all for now.
- What do you know about pillagers?
- Pillagers vomit flaming bile and grave rot. It'll burn a hole right through your armor, skin, and bones. So don't linger in it.
- Tell me more about the different gravelings.
- That's so gross, I have to go now.
- What do you know about breeders?
- Breeders'll knock you down like the others, but they also spawn tiny and vicious versions of the full-grown gravelings.
- Tell me more about the different gravelings.
- Thanks for the information.
- That's all I need to know for now.
- I'll be back in a bit.
- I must be going.
Talking to Shrill Sunderbark:
- What are the orders?
- Hodgin's plan: collect the flaming scepters to defeat the Howling King.
- Detha's plan: trap and kill the Ghost Eater.
- Tzark's plan: get the ghosts to help fight Colossus Rumblus.
- I need more time to think.
After deciding a plan:
- Depending on selected path
- Hodgins: You made the right choice. Ascalonians had a penchant for using flaming scepters against their enemies.
- Hodgins: I've learned of several scepters hidden away in these catacombs. Let's go; I'll guide you to them.
- or
- Detha Tremblebones: Excellent choice. Let's get to work.
- or
- Tzark: Excellent choice. Undeath essence awaits. To the Lovers' Crypt!
- Common parts of all paths
On the way out of the camp, when the graveling mound appears:
- Priory Guardian: Do you hear that? Sounds like... Dammit! Another graveling mound!
- Priory Guardian: Close it before they overrun the camp! We'll guard the entrance.
Approaching Lieutenant Kholer:
- Lieutenant Kholer: You heard Grast. Hold the Line! Send the intruders to Grenth!
Hodgins' route[edit]
At the Archive of the Resting:
- Hodgins: This must be the Archive of the Resting. Many great mages of Nolani Academy are buried here.
- Hodgins: They're usually buried with their writings and, if they were special, a flaming scepter
- Hodgins: Keep those gravelings off me! I'm working as fast as I can.
- Hodgins: The archives say there's a hidden switch that'll let us into the weapon storeroom - found it!
In the secret room:
- Hodgins: Hrm. Go check the upper section. I'll search down here.
- Hodgins: You got it? Remarkable! Beautiful! I can feel it humming with energy.
At the reliquary room:
- Hodgins: Ah, the reliquary of the king's guard. My notes are unambiguous. There's a scepter here.
- Hodgins: It's...it's not here. Just a broken piece! Those wretched graveling scavengers must've taken it.
- Hodgins: I can reassemble it, but I'll need more pieces. Five should do it.
- Hodgins: I'll stay here and prepare a workspace. Go hunt some graveling scavengers for the missing pieces.
After getting all the pieces:
- Hodgins: OK, stand back. This'll only take a moment.
- Hodgins: Good as new. Almost. It shouldn't explode, at least. That's good enough, right?
- Hodgins: - and not a moment too soon. That sounded like it came from the western chambers. Let's head there.
After defeating the Howling King (cinematic):
- Hodgins: I knew such great weapons of the past would be useful!
- Hodgins: Neither ghost nor graveling will pose a problem for the Durmand Priory!
- Hodgins: To be honest, I was worried. I didn't know if the Howling King could be killed.
- Hodgins: Because of you, our camp is that much safer. Many thanks for your work down here.
Detha's route[edit]
At the graveling traps (cinematic):
- Detha Tremblebones: According to my research, the original Ascalonians would lure gravelings into deathtraps like this.
- Detha Tremblebones: If this works, we'll have enough pheromones from the female corpses to lure out the Ghost Eater
- Detha Tremblebones: Here's the plan. There are switches surrounding the stair. Each one controls a different spike trap.
- Detha Tremblebones: I'll lure the gravelings out of the water into this room, but they'll be coming straight for me.
- Detha Tremblebones: You need to fire off a trap when they come. And do it right. I don't like using myself for bait.
During defend Detha from gravelings:
- Detha Tremblebones: Breeder incoming! Come here, darling, I got plans for you.
After defending Detha from gravelings:
- Detha Tremblebones: Okay, that's enough bait. Let's go.
In the Ghost Eater room before the traps are set:
- Detha Tremblebones: I had scouts drop off the parts I needed to build the traps, but I have to build them myself.
- Ascalonian Captain: A charr! It's building some nefarious device—surely the vanguard of an invasion. Brothers and sisters, to arms! For Ascalon!
- Detha Tremblebones: Wonderful. Keep them off my back and away from the traps!
In the Ghost Eater room after the traps are set:
- Detha Tremblebones: The cannon traps are set. Tell me when to plant the bait.
Talking to Detha Tremblebones:
- The traps are ready, but I strongly advise that you form a plan before I plant the bait. Any questions?
- Save your breath and just plant the bait.
- Tell me about the traps.
- They absorb and weaponize ectoplasmic energy. When they're full, you can discharge them in a burst. Should be potent enough to hammer the Ghost Eater.
- Actually, I'm ready to get started.
- Anything else I should know about the traps?
- Yeah, there's a recharge rate, so we can't just fire it all the time. Keep that in mind.
- Got it. Let's kill the Ghost Eater.
- Wait. Let's go back a step.
- I need a minute.
- Wait. I need a moment.
- How do we keep Ghost Eater in place?
- Easy. I'll put out special bait that releases a scent gravelings can't resist.
- That's enough information to get started.
- I have more questions.
- I'm not quite ready.
- Give me some time to think about this.
Once the bait is set:
- Detha Tremblebones: It must really want that bait. Here it comes!
After defeating the Ghost Eater (cinematic):
- Detha Tremblebones: Haha. A good trap works any day!
- Detha Tremblebones: Wait until Hodgins and Tzark find out about THIS!
Tzark's route[edit]
At the Lovers' Crypt:
- Tzark: Lovers in life, bound eternally in death. Think of the concentrated ecto-undeath distillate!
- Tzark: Now to set up ectocollectors and transmit the undeath essence to my storage unit.
- Tzark: The process is attracting gravelings. Well? Stop them!
- Tzark: I'll just be a few moments. Easy enough to keep them from my equipment, I imagine.
After successfully defending the collectors:
- Tzark: A veritable bounty of ecto-undeath distillate! Now to make us ghosts.
- If failed to defend the collectors:
- Tzark: Both collectors—destroyed! We'll have to start over. Thankfully, in my impeccable forethought, I brought spares!
- Tzark: Let me know once you're prepared to restart the essence collection.
In the Hall of Champions:
- Warmaster Grast: Thank the gods! You must be the reinforcements. It feels like we've been here for ages...
- Warmaster Grast: Horrible creatures have overrun the hall! Drive them back immediately!
After destroying all burrows:
- Warmaster Grast: Well done! Now, we must find the leader of these creatures. It shall know the strike of an Ascalonian warhammer!
- Tzark: The tunnels are all obstructed at the moment, but I've discovered a structural vulnerability.
- Warmaster Grast: Lead the way. No barrier can stop me from defending my homeland!
- Tzark: My resonance cascader will dislodge the rocks blocking the graveling tunnels.
- Tzark: Hmm. The ethereal flux oscillator indicates an opened path...in the next room. Let's go!
After defeating Colossus Rumblus:
- Warmaster Grast: I'm grateful for your help. Let us rejoin the front lines to repel the invaders.
- Warmaster Grast: Look for me there, brave soldiers. I would be glad to have you fighting by my side in the coming battles!
Final cinematic:
- Tzark: Considering I had no firm idea what would happen, I'd say that was a successful experiment.
- Tzark: So, tell me. How do you feel? Nauseous? Any pain in your head or feet? Can you taste colors?
- Tzark: Never mind. I'm sure you'll survive. Anyway, be proud. Today, you've furthered the bounds of science!
Notes[edit]
- If any of the three Path NPCs, Hodgins, Detha, or Tzark, are killed, they will join the party regardless of the path chosen which allows the respective path daily rewards to be earned.
- A large part of the Ascalonian Catacombs was overhauled in the February 26 update of 2013.
- In-game description:
“If the Ascalonian Catacombs feel too easy, try the explorable mode. It's more challenging and has greater rewards. (The story version must be completed first.)
— Level 35 rewards.
Trivia[edit]
- When entering the Votive Cathedral during Hodgins' path by breaking out of the map, he will voice the following dialogue and his AI will become stuck, endlessly circling the statue at the point of interest. This shows that Hodgins' path was longer at some point during development.
- Hodgins: Kasha's tomb. One of her subordinates buried here was a Flaming Scepter Mage.
- Hodgins: I don't know which subordinate, unfortunately, so we may have to search all the sarcophagi.
