User:Chieftain Alex/The Engineer Handbook
| Note: This is not the work of Chieftain Alex. This is the work of "Wolfineer", a guy who used to have this entire guide on his website. |
General Information[edit]
This section briefly talks about the author, the purpose of the Engineer Handbook as well as how you, the reader, can contribute to the Engineer Handbook.
Who am I?
My name is Wolfineer, I live in the Netherlands and am currently 21 years old. I am studying Business Economics at a school nearby which takes a lot of effort from time to time but hard work is good I'd say. I have been on Aurora Glade since the headstart but since February 2015 I moved to Gandara. Aurora Glade's match ups bored me that much that I decided to transfer. I am now having a blast on Gandara!
I have been playing Engineer since June 2013, it has been a blast and I haven't stopped playing the profession ever since. I simply don't enjoy other professions anymore after playing the Engineer profession as the Engineer just feels a lot more skillful. I have tried Elementalist as people suggested it to be at an equal skill level but it just didn't feel right to have a set combo. Maybe one day I transfer to another profession but chances are really low on that.
I always aimed at helping people in a MMORPG, I have done it in the past with games like Archlord, World of Warcraft, Guild Wars 1 et cetera. I started a YouTube channel at some point in the winter of 2015 as I wanted to reach more people with my knowledge (which was when I started my channel not a lot). This channel is almost exclusively for the Engineer, if you are unaware of my channel, you can check it out by clicking here. I aimed at creating a channel that could help out those that are new to the profession as well as entertain players by making game play videos . It ended up being a real hit (in my opinion) as I am now sitting at a whopping 6000 subscribers!
I also wished to help those that have issues with listening to me (because of accent or because of own personal skill in the English language or because they much rather have a 'quick' version) I therefore started writing a guide all about the Engineer. I started small with just a few builds but as the weeks progressed I started adding more and more and more and look at what we are at now. I have my own website which is filled with information and much appreciated by a lot of players. That is just amazing!
It's amazing in general though that I was able to setup such a specific thing and yet get liked by a lot. This is everything I wished for and I am more then happy with you guys. Thanks for supporting me with my channel and/or website.
What is the Engineer Handbook?
The Engineer Handbook is an complete overview of the Engineer profession in Guild Wars 2. This handbook contains every bit of information about the profession and will expand/change based on additions or changes by the developers of Guild Wars 2. This handbook features weapons, skills, traits, runes, sigils, food and much more. If you ever have any questions regarding the Engineer, you will find the answer in here.
The Engineer[edit]
This part of the handbook provides general information regarding the Engineer profession. This includes a profession description and the good and bad about the profession. If you are new to Guild Wars 2 or new to the profession I recommend you to read this part of the handbook to give you a general understanding of the profession. One thing I can say for sure, if you want a challenge.. this is the right profession!
Description of the Profession

“Masters of mechanical mayhem, engineers love to tinker with explosives, elixirs, and all manner of hazardous gadgets. They can take control of an area by placing turrets, support their allies with alchemic weaponry, or lay waste to foes with a wide array of mines, bombs, and grenades.
The Engineer profession is the mechanical profession of Guild Wars 2. The Engineer makes use of Turrets, Kits, Gadgets, Elixirs and Gyros (Heart of Thorns only) to aid in battles. The turrets allow for strong defense of a position like the capture points in PvP. They are also often used for their utility instead of their damage. The Kits is what the profession is really all about. The Engineer will often use at least one kit in his builds and sometimes even three or four. The kits are the core of the Engineer profession and while learning them can be tough, it really becomes awesome to play with once mastered. The gadgets offer some neat tricks like knocking enemies down with a trail of slippery oil or launching them with a personal battering ram. The Elixirs are the boon/enchantment tonics, they provide the Engineer with a ton of useful buffs like stealth and the ability to become immune to all attacks for a few seconds. Lastly the Gyros are a mix of the Turrets and Gadgets, they offer things like stealth, reflection as well as mass condition removal. All abilities work well together as builds often consists of abilities from multiple categories.
The Engineer is often called the 'Jack of All Trades' profession as the Engineer is able to do pretty much everything decently well. This is because the abilities are often strong both for the direct damage aspect and the condition damage aspect. A great example is the Grenade Kit, it offers the Engineer with conditions on every grenade as well as strong direct damage, truly amazing. Any play style can often be fulfilled with the Engineer profession due to the vast diversity of the profession. This is the reason I personally play Engineer and nothing else since the release of the game. The Engineer is a really fun profession and it has many good things to it; but there are also a few really strong counters to an Engineer. If an enemy (or group) makes proper use of their abilities they can shut down an Engineer completely.
The Good and the Bad
- The Good
- A very unique profession, completely new to the Guild Wars series.
- 'Jack of All Trades', good at everything.
- Able to maintain a high amount of Vulnerability (20+) thanks to the Grenade Kit.
- Lots of abilities that cause CC.
- Access to a lot of blast finishers and fields.
- Strong healing even without the stat healing power thanks to the Healing Turret and blast finishers.
- Able to give the group a ton of Might, Healing and Stealth.
- Most suited profession for outnumbered fights due to it's mechanics.
- The Bad
- Has a steep learning curve, might be tough to a beginner Engineer at first.
- Most stun breakers are not that useful together in one build meaning we often end up with just one in a build despite having a lot of stun breakers.
- Lack of condition removal meaning the Engineer is vulnerable to condition spam.
There sure is a lot more to be said about the profession and everyone will have it's own positive and negatives about the profession. One thing I can say for certain: It is one of the most difficult professions in Guild Wars 2.
Weapons[edit]
The Engineer only has a few weapon choices but this is completely fine as the Engineer has a ton of diversity thanks to the kits. A kit gives five additional skills and an Engineer can have up to five kits in his bar which means a total of 25 more skills, not even counting the toolbelt skills. The weapons are still really important for the build choice, as there are builds that really benefit from direct damage and builds that really benefit from damage over time, which is also known as condition damage.
The Pistol
The Pistol is a main- and offhand weapon focussed on applying various conditions and therefore often picked when running a condition orientated build. It provides the Engineer with so many strong (and different) conditions that it's almost a must have for any condition orientated build. It can also have it's uses in a power orientated build although people generally prefer the Rifle or Hammer for those kind of builds.
- Fragmentation Shot: This is the autoattack, it applies bleeding on hit and deals a little bit of direct damage. The auto attack is pretty fast making it a great auto attack to proc on-crit effects like that of the Sigil of Torment. It also deals AoE damage (very small radius).
- Poison Dart Volley: This attack applies poison on every hit while also dealing moderate direct damage. This ability will miss often, even if the distance between the Engineer and the opponent is very small. Nonetheless it's not a weak ability, a couple of hits already apply quite a few stacks of poison on the target while the cooldown isn't that high either.
- Static Shot: This attack shoots off lightning at the opponent at fast speed which will apply 2 stacks of confusion and the blind condition. The attack can bounce and can potentially hit the same enemy twice. This is a very strong ability mainly because of the blind. See a monster charging up his power attack or a Warrior leaping at you with Earthshaker? Well, hit them with Static Shot and it will miss.
- Blowtorch: This attack will 'shoot' fire out of your pistol, burning people for a certain duration which goes up the closer they are to you. This attack is AoE so you could effectively hit 5 people with it for a burning duration that can reach 10s each! This is a very strong ability but since it also misses often it's not that great for PvP/WvW. You miss it because of the way this skill works, opponents most likely move a lot and thus hitting this ability with it's small cone is difficult. If you get to hit your opponent with it, it's strong though!
- Glue Shot: This attack immobilizes targets on impact and then cripples them if they stay in the clue. This attack is very similar to Bomb Kit's glue bomb. Immobilize is a strong condition especially with condition duration, increasing the duration. The cripple after that is nice to keep your enemies stuck in the puddle of glue. This is a strong ability but just like blowtorch, it is sometimes tough to hit in PvP/WvW.
The Shield
The shield is our defensive yet offensive weapon, we can only use this weapon in our offhand (no double shield madness, sorry) and therefore it only gives us two skills. These two skills are interesting though and can be devastating in certain situations.

- Magnetic Inversion: The first time you press this ability, it will create a reflective aura around you which will be active until the skill ends. You can move around freely in the meantime. If you then press the ability again you will release the reflective aura pushing back targets and creating a blast finisher.
- Static Shield: The first time you press this ability you will block enemy attacks for a short duration and stun those that hit you in melee range. Very effective if you are able to get close to your target as you can just run up to them, they hit you and get stunned. The second time you press this ability you daze your target for a few seconds, which will cause them to not be able to use any abilities until the daze is gone. This is also a 100% projectile which can be great in combination with a combo field. For example using Static Shield into a Fire Field will also apply burning to the target.
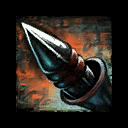
The Rifle
The Rifle is a two handed weapon meaning you get 5 skills from it instead of just 2-3. This also means you are not able to take another weapon if you decide to go for the Rifle. Like I said before, the rifle offers you with five skills. These skills are mainly power orientated as they barely apply any damaging conditions to your target and scale strongly off your own power.


- Hip Shot: This is your autoattack, it does a strong amount of direct damage and also pierces the target. This means that if there is a guy behind your target, he will also get hit by the shot. Really don't underestimate the power of this autoattack, it can easily crit for 2-3k every single hit versus targets with low defense. Very powerful for PvP/WvW where hitting your Grenades (for example) is far less reliable.
- Net Shot: This attack shoots out a net which immobilizes your target for a short duration. This is an excellent ability to catch people who run away or when you need them in place for a strong burst. With immobilize they can't move so you can freely apply a ton of pressure to them by using the Grenade Kit for example.
- Blunderbuss: This attack acts like a shotgun attack, it deals more damage the closer the target is to you. This attack will deal a lot of damage when your build is centered around power as the power scaling is strong. The attack also applies a little bit of bleeding the closer the target is to you. This is nothing spectacular though, at least not worth investing into condition damage for it.
- Overcharged Shot: This attack is your CC ability, it will launch your target and do a fair bit of damage to them. The downside to this ability is that it knocks you back as well. You can stop this by making use of Stability which Toss Elixir B (toolbelt skill of Elixir B) will give you or the Juggernaut trait in Firearms.
- Jump Shot: This attack is incredibly strong in terms of damage. The first damage comes in when you activate the skill, then you will fly to your chosen position to deal your second damage. If your target is right in front of you, you can hit them twice with this attack which can lead to very high numbers. This ability is also a leap, meaning that you can use it to cover a decent distance to chase or escape and since it's a leap finisher you can also use it in combo fields for an additional effect. A very strong ability and something that makes the Rifle great for power builds.
The Harpoon Gun
The Harpoon Gun is our only underwater weapon. It's a pretty good hybrid weapon, it is able to inflict a solid amount of burning while also being quite bursty if needed. Since underwater combat is not our strongest area, we will often avoid fighting there.
- Homing Torpedo: This ability is a slow moving projectile that does a decent amount of damage. It can hit up to three targets and tracks the target you aim it at. It's very slow and it has an incredibly clear animation so it's rather easy to avoid.
- Scatter Mines: This ability spreads out three mines which you detonate by pressing the skill again. If you want to deal a strong amount of burst, instantly press the skill again and the mines explode at the exact same position. That can inflict a strong amount of damage to your target. Make sure you are close to him though!
- Capture Line: This ability fires you backwards and shoots out a grapple hook in front of you. If it hits a target, it pulls him towards you, deal a little bit of damage and inflict bleeding. Since the damage is rather low, it's great to use this ability to retreat from the battle. Combining this with the Elixir Gun's Acid Bomb can get let you travel quite a distance underwater in a matter of seconds!
- Timed Charge: This ability shoots out a timed charge that get stuck on your opponent. After a few seconds it explodes dealing moderate damage and applying burning. It is quite an effective single target ability so always try to use this one when you need to hop in the water for a while. Especially since it's almost impossible to miss it!
- Net Wall: This ability launches a net wall (in a shell) and releases at maximum range or when you press the skill again. It immobilizes anyone going through it which makes it perfect for escaping a situation you simply can't survive without fleeing. It will see it's most use in World vs World as it does no damage and thus is rather pointless in the Player vs Environment.
The Hammer
The Hammer is part of the Scrapper's elite specialization. This means that if you wish to use this weapon you need to own Heart of Thorns. This weapon is very CC/Defensive orientated while still being able to deal out a pretty solid amount of damage. Having a reflect, evade, block and stun makes it into a very effective weapon.
- Positive Strike → Negative Bash → Equalizing Blow: This chain of attacks is the autoattack of the hammer. The first ability called Positive Strike deals damage and grants you a stack of might. The second ability called Negative Bash deals damage and applies Vulnerability and the last ability in the chain called Equalizing Blow deals damage, applies Vulnerability and grants a stack of Might. Since the Might duration is quite long (especially if you use a might duration rune), just by auto attacking you can end up with over 10 stacks of Might. That is quite strong for an auto attack! However, you won't be auto attacking all the time so 3-5 stacks from this autoattack is a more reasonable and expected amount. Nonetheless, it is a solid autoattack.
- Electro-whirl: With this ability you spin around, dealing damage to opponents around you, and reflect projectiles for a short period of time. If timed well, this can be devastating when you fight opponents with a lot of projectiles. In PvP/WvW for example you have many Longbow Rangers that have a lot of projectiles. It can be absolutely deadly for them if you get to reflect their Rapid Fire. Even in Dungeons using reflects is very strong. Also note that the ability is a whirl finisher meaning that if you stand in a fire field, you will 'shoot' burning projectiles to your opponents which will inflict burning.
- Rocket Charge: This ability causes three leaps and deals damage after each leap. Since this ability involves three leaps, you can combo it effectively with Lightning Fields to daze the target or perhaps leap in an Ice Field to give yourself Frost Armor. Not to mention that if you leap in a Water Field you can end up healing yourself for around 3-4k. That's quite large for one skill! There are a lot of possibilities with this skill as you can use it both offensively as well as defensively. Lastly, the ability also evades all attacks while you are in the animation meaning that a well timed Rocket Charge can save your life from a devastating attack.
- Shock Shield: This ability blocks attacks for 2 seconds while dealing damage to opponents in front of you. It also applies 8 stacks of Vulnerability (once) which is quite a lot. It means a damage increase of 8%. The cooldown of 20 seconds is pretty long although it is understandable. You can compare this ability to the Tool Kit's Gear Shield which is also 20 seconds and blocks attacks for 3 seconds. That's the only thing the Gear Shield ability does while Shock Shield still does a lot more!
- Thunderclap: This ability stuns opponents when hit and creates an area (radius of 240) that deals constant damage as long as the opponent remains in it. It also caused a stack of vulnerability on every pulse. The area created by this skill is also a Lightning Field meaning that in combination with Rocket Charge, you can consistently daze the target because a leap into a lightning field causes a Dazing Strike. It's pretty clear that combining Thunderclap and Rocket Charge together is quite effective as they compliment each other so well.
Skills[edit]
I will go over all the skills the Engineer has. I will tell you what the skill does, give some information regarding the good and bad things of the ability, tell you how you generally should use the ability and end with my own personal opinion on the ability. Everything here can change overtime due to a change of my own personal opinion or changes done by ArenaNet to the ability.
Healing
A.E.D.
- A.E.D. : Activate your A.E.D., enabling the system to heal you after a brief period of time. If you take lethal damage while the A.E.D. is active, it ends and heals you for a large amount. A.E.D.: Heals when timer expires. If lethal damage is taken, the damage is negated and you are healed for a large amount.
- Toolbelt skill: Use your A.E.D. to stun an enemy.
- What's good, what's bad?
- (+) You get a big chunk of your health back when you lost more health than you have.
- (+) Has a nice toolbelt skill which stuns the enemy for just a second.
- (+) Removes damaging conditions when the effect triggers.
- (-) Has a huge cooldown.
- (-) If you don't take lethal damage you get a rather weak heal.
- (-) Does not remove torment and confusion.
- Usage of A.E.D.
- You want to utilize the 'A.E.D.' effect so this ability should only be used while on low health. Best is when people won't expect it, some people tend to wait for it to end to then finish you off, it's only a 5 second buff so. In PvE it's also risky to use as a monster could kill you too slowly or suddenly switches targets, you have to be sure they will kill you then.The stun (toolbelt) can be used when you want to 'spike' your target, dealing significant damage in a few seconds while they are stunned.
- Personal opinion
- I don't like it, I find it way too situational since if you don't proc the 'healing when lethal damage taken' part it is a bad heal. I don't use this healing skill in any of my builds simply because it's way too situational.
Elixir H
- Elixir H: Drink Elixir H to heal yourself and randomly gain protection, regeneration, or swiftness.
- Toolbelt skill: Toss Elixir H to randomly grant protection, regeneration, or vigor to allies.
- What's good, what's bad?
- (+) Good heal combined with a nice boon.
- (+) Works well with the HGH trait which gives might when you drink an Elixir.
- (+) Tool belt skill has a nice set of boons to it and can also be used on allies.
- (-) Boons are random, if you need swiftness to get away there is only a 33% chance of you getting it which is sad.
- (-) Can be interrupted due to a one second cast time (although that barely happens, it still can be a problem)
- (-) No condition removal unless traited for.
- Usage of Elixir H
- Elixir H is usually used in combination with HGH . In that case it will heal, grant regeneration, swiftness or protection as well as might and remove conditions.
- Personal opinion
- It's a nice heal, it works great in combination with HGH (might on drinking elixir). Only downside is the cast time, it is quite easy to interrupt.
Healing Turret
- Healing Turret: Deploys a turret that heals you briefly, then regenerates you and your allies.
- Healing Turret #2: Overcharge your healing turret, supplying a burst of healing that cures two conditions.
- Toolbelt skill: Release a mist of healing liquid to regenerate nearby allies. This skill also has a water combo field.
- What's good, what's bad?
- (+) Highest amount of healing.
- (+) Short cool down (15 when you pick the turret up, 20 when you destroy it)
- (+) Has two Water combo fields (one from 'Overcharging' your turret and one from the tool belt skill)
- (+) Removes two conditions.
- (+) Can barely be interrupted since the it's half of a second to place and after that nothing can be interrupted.
- (+) It is an AoE heal so your whole party benefits from it
- (-) Can be hard to use since you will always be picking it back up right away
- (-) Needs practice when it comes to combo fields etc.
- Usage of the Healing Turret
- You don't use the Healing Turret like other turrets, you will pick it right back up after placing. This is what you have to do:
- Press the Healing Turret skill.
- Press the skill again, overcharging it which also creates a water field.
- Pick it back up or blast it by detonating, creating a water blast finisher which will grant you additional healing.
- By picking it back up right away, you will reduce the cool down by 5 seconds but reduce the amount of healing you do. You have to make the choice between additional healing (or a blast finisher) or the reduced cool down. It depends on the situation but you will generally pick it back up unless you are in a critical situation. The blast finisher detonates on you instead of at the turret so you can move away from the turret, stand in another field like a fire field to give you 3 stacks of Might instead of healing. This can be a really nice bonus if you don't need the additional healing nor reduced cool down. This works for all turrets and it is smart to make use of it, you don't want to blast something useless like 3 seconds of weakness instead of 3 stacks of Might.
- Personal opinion
- I find this the strongest heal we got at the moment. It provides you with two Combo fields, condition cleanse and AoE heal while still being on a short cooldown. I run this healing ability in 99% of my builds. It requires a little bit of practice to use well but it should be quite easy to learn. I use this skill in almost all my builds, when browsing builds you will meet it often.
Med Kit
- Med Kit: Equip a kit that replaces your weapon with healing skills.
- 1. Med Blaster: heals allies with a wave of healing energy. Heals more for each boon on that ally.
- 2. Throw Bandages: throw out a bandage pack that heals, applies regeneration, and removes a single damage condition.
- 3. Throw Stimulant: throw out a stimulant that heals, grants fury, and removes a debilitating condition.
- 4. Throw Accelerant: throw out an accelerant that heals, grants swiftness, and removes a movement-impairing condition.
- 5. Throw Antidote: throw out an antidote vial that heals, cures a condition, and applies resistance.
- Toolbelt skill: Bandage your wounds and heal yourself.
- What's good, what's bad?
- (+) Has plenty of condition removal.
- (+) Gives you Fury, Regeneration, Swiftness and Resistance.
- (+) Allies can pick up your skills to heal up, get conditions removed and gain Fury, Regeneration, Swiftness and Resistance.
- (+) Amazing tool belt skill which heals for a lot with quite a short cool down.
- (+) Can give you 'on weapon swap' buffs easily as well as providing a good up time of Runes that give buffs when you use your healing skill.
- (-) The tool belt skill can be interrupted due to a one second cast time.
- (-) While the conditions removal is great, it only removes one condition of each 'category' so if you are loaded with damaging conditions you have a problem.
- (-) Allies could 'steal' your skills while you need them badly.
- (-) Makes you unable to cast any other skills until you go out of the kit again, this can be a problem in some situations.
- Usage of the Med Kit
- This is a 'on the go' healing skill. You can use all the skills while on the move, it provides you with plenty of healing and great buffs. You can use the kits before going into a battle so you already got some packages on the ground (while the cool down is recharging) which you can quickly fall back to, to heal back up.
- Personal opinion
- It's a great skill and has some amazing ally support. It should work perfect with certain builds that have 'Gain X when using Healing Skill' and 'Gain X when swapping to a weapon (kit in this case)' as well. The amount of healing done is not that high though and it only removes one condition of every 'category'.
Medic Gyro

- Medic Gyro: deploy a medic gyro to heal nearby allies.
- Medic Gyro Self-Destruct: order your Medic Gyro to self destruct early. This deals a little bit of damage and dazes opponents around the Gyro.
- Toolbelt Skill: establish a defensive field, granting protection to allies in its area. It also is a water field.
- What's good, what's bad?
- (+) Solid amount of healing, also helps allies.
- (+) Can be focussed by opponents instead of focussing you.
- (+) Great toolbelt skill, synergizes well with Rocket Charge.
- (-) The Gyro can be focussed down quickly (or end up standing in a lot of AoE) which means it is not able to do much before being destroyed.
- (-) Can fly out to an ally instead of healing you when you can use it as well (i.e. staying above 90% of your health for damage bonusses)
- (-) No Condition Clear
- Usage of the Medic Gyro
- Use it when you need healing, yeah that makes sense. The thing is that it will heal you overtime as well. So you don't have to use it if you are at 10% of your health, you can use it already at 50% of your health and ‘regenerate' back up over time. Because it also heals allies, you can deploy it for allies as well to keep them up. Do keep in mind it has a rather large cooldown and thus if used wrong you can end up getting killed rather quickly. The toolbelt ability offers yourself protection and also grants it to allies. Do keep in mind the duration is short and thus you have to stay in the ring to maintain protection. It also is a Water Field so you can effectively blast in it (with Rocket Charge for example) to heal yourself up.
- Personal opinion
- I am asking myself: why would I take this over Elixir H or Healing Turret and too be honest, I don't know why I would. If you need group support, the Healing Turret outperforms the Medic Gyro and if you just need healing for yourself, the Healing Turret absolutely destroys the Medic Gyro. Not to mention that the Healing Turret also has condition clear and gives you an additional water field. The tool belt skill is great though.
Elixirs
Elixir B
- Elixir B: drink Elixir B to gain fury, might, retaliation, and swiftness.
- Toolbelt Skill: toss Elixir B at a location, granting stability and one of the following boons to allies: fury, might, retaliation, or swiftness.
- What's good, what's bad?
- (+) So many boons which all come in really handy.
- (+) Gives stability (also to allies) when using the tool belt skill, our only reliable way of getting stability.
- (+) Works great in combination with HGH (might on drinking/tossing Elixir) and Alchemical Tinctures.
- (-) Decently long cool down.
- (-) It gives a lot of boons which can be corrupted by Necromancers when they use Corrupt Boon.
- Usage of Elixir B
- You want to use this ability before or during a fight with an enemy, it is an incredible waste if you use it for the swiftness to move faster across the match as the Fury, Might and Retaliation are really strong. You can also save this ability until a huge condition spike hits you (if you expect that to happen) as with Alchemical Tinctures this ability is an additional condition cleanse. The toolbelt ability is excellent if you have to walk through CC like the Elementalist's Static Field, it also works great in combination with Overcharged Shot so you won't get knocked back yourself.
- Personal opinion
- It is an excellent ability for WvW Zerging due to the stability it gives, pretty much a must have. It's also really good while roaming especially if you run with HGH, it's a must have in any build that runs one of those two traits pretty much. The Toss Elixir B + Overcharged Shot combo is also really cool as it can be devastating to your enemy if you can follow it up strong (think of a full Grenade burst or a SD burst).
Elixir C

- Elixir C: drink Elixir C, converting all conditions into random boons. The duration of these boons will be 5 seconds. The skill states random but that's not actually the case, check here for a list of what you get per condition.
- Toolbelt Skill: toss Elixir C, converting conditions into boons for allies (and yourself). The ability converts 2 conditions into boons, can hit 5 targets, has a radius of 240 and a range of 900.
- What's good, what's bad?
- (+) Mass condition cleanse, strong on both the main and toolbelt skill.
- (+) Can give you a ton of boons that you can put to good use.
- (+) Decently low cooldown for a condition cleanse.
- (-) A Necromancer can corrupt the boons which will cause massive damage to you.
- (-) The boons we get are great but most of them aren't that useful, it's mainly Swiftness and Regeneration.
- (-) Has no use in a Elixir spec which has Alchemical Tinctures already, it would be overkill.
- Usage of Elixir C
- Of course you want to use this ability when you got conditions on you but you don't just want to use it for one condition. You want to make use of the boons as well of course so àlways try to use it when you got a lot of conditions on you. For the small amount of conditions you can then use your toolbelt ability. If this is the only condition cleanse you got you can use it more frequently of course and not aim for just the boons.
- Personal opinion
- It's a cool ability and has strong condition cleanse although I really doubt if it's that useful as we generally already use Healing Turret and Elixir Gun (which also has condition cleanse) in our skill bar as well. It can be useful if we don't use those abilities I guess.
Elixir R

- Elixir R: drink Elixir R to refill your endurance and remove the immobilize condition.
- Toolbelt Skill: toss Elixir R, curing conditions and reviving allies (only downed). Revive percent per pulse 17% (affected by poison), conditions removed per pulse is 1, number of targets affected is 5, the duration is 10 seconds (which means 10 pulses), the radius is 180, this ability has a combo field, the combo field on this ability is a light field (retal on blast, light aura on leap) and the range is 1,200.
- What's good, what's bad?
- (+) Instantly refills your endurance with low cast time, the immobilize removal is also a nice extra.
- (+) Insane mass condition removal with the toolbelt ability, works with Alchemical Tinctures as well PER PULSE.
- (+) Revives allies really fast and can revive up to 5 targets!
- (+) Has a combo field, although not the strongest combo field it still helps.
- (-) Long cooldown on the toolbelt ability although understandable.
- (-) Very situational and requires coordination.
- (-) The main skill doesn't do that much what Vigor or Sigil of Energy can't do.
- Usage of Elixir R
- The main skill is of course used when low on endurance, if you don't run Invigorating Speed or Sigil of Energy it might be a great skill for you. You can also use it to cleanse immobilize if you get hit by it often, this is very situational though. The toss ability is either used for reviving or condition cleansing, try to use it when a key ally is down in your group composition or when you (and your team) suffer from mass condition damage spam. I would not use it just to make use of the Light Field, that would be a waste of the great stuff the ability offers.
- Personal opinion
- It's an awesome ability when used in the right situation, it can really turn the battle around. That said, it's only good in a few situations making it kind of a weak ability to run all the time.
Elixir S
- Elixir S: drink Elixir S to shrink yourself, recover from stun, and evade attacks. The duration on this one is 3 seconds, it breaks stun and it stops you from capping anything. So in PvP and WvW you are not able to cap a capture point/camp.
- Toolbelt Skill: toss Elixir S, granting stealth to nearby allies in the target area. The stealth duration is 5 seconds, the radius is 180, the number of targets is 5 and the range is 900.
- What's good, what's bad?
- (+) Group Stealth and a long duration too.
- (+) Stunbreaker which also makes you immune to all incoming attacks.
- (+) Works well with a lot of builds.
- (-) Long cooldown on the stunbreaker.
- (-) Allows people to burst you right when you come out of the Elixir S.
- (-) Can lose you a capture point or a tower in PvP/WvW.
- Usage of Elixir S
- The main skill is used mainly as anti-burst in WvW/PvP. It is excellent and preventing you from being instantly killed by the enemy as it blocks all attacks and stun breaks you from whatever CC they had on you. So when a group of players is focussing you, consider popping it right when they all jump on you. This ability can also be used as stun breaker in fights where the enemy can't really burst you down that well. The toolbelt ability is excellent to surprise your enemy or escape safely. It's an incredible strong group stealth which is often used in PvP and WvW. All in all Elixir S is not that great in PvE.
- Personal opinion
- Strong in PvP and WvW but really weak in PvE. It is a life safer with the stun break and stealth. It is a great addition to any build and shines really well in HGH builds. It's a strong Elixir and kind of a must have in a HGH setup for WvW.
Elixir U
- Elixir U: drink Elixir U, granting quickness and either five stacks of Might or fury. The quickness duration is 6 seconds but goes up by quite a bit if you go into Alchemy.
- Toolbelt Skill: toss Elixir U, creating a random reflect at your chosen location. Creates either a Smoke Screen or a Wall of Reflection, has a duration of 12 seconds and a range of 900.
- What's good, what's bad?
- (+) Gives quickness, can be deadly if you are able to burst with it.
- (+) Gives a way to reflect enemy attacks, strong in Dungeons but also in open fields in WvW.
- (+) Breaks stun.
- (-) It's RNG, so you can't adjust to it well on the go.
- (-) Smoke Screen is really awful compared to Wall of Reflection.
- Usage of Elixir U
- The main skill is strong for quick burst due to quickness, it's great to use it right before you want to burst a target down. You can also save it until someone CCs you but that's generally a waste as there are better stun breakers out there. The toolbelt ability is ideal for PvE Dungeons as reflecting things has a major impact on the group's performance in Dungeons, the only downside is that Smoke Screen is not really good. The toolbelt skill has RNG so you just have to get lucky.
- Personal opinion
- Very good ability if you are able to utilize the quickness well. For example with builds using the Grenade Kit or Mortar Kit it's great for additional pressure on multiple targets. The Mortar Kit kind of turns into a machine gun while you have quickness!
Kits
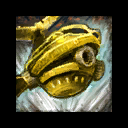
Flamethrower
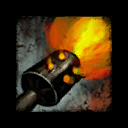
- Flamethrower: Arm yourself with a flamethrower that replaces your weapon skills.
- Flame Jet: Spray fire in a cone pattern while on the move, burning enemies on the final attack. Deals 10% bonus damage to burning targets.
- Flame Blast: Fire a napalm ball that rolls through foes and explodes. -→ Detonate your napalm ball.
- Air Blast: Push back foes and projectiles with a hot air blast.
- Napalm: Burn foes with a wall of napalm at the target location.
- Smoke Vent: Vent smoke from your flamethrower, blinding nearby foes.
- Toolbelt Skill: Burn foes with your next three attacks. Burning: 3 s (984 damage), the duration of the 'buff' is 45 seconds or until used.
- What's good, what's bad?
- (+) Can trigger on-crit sigils/traits easily because of the multiple attacks on Flame Jet (x10)
- (+) Works well with both Condition Damage and Power builds
- (+) Offers a Fire Field for Might blasting
- (+) Has a blast finisher which can be used often.
- (+) Great burning uptime with the #1 ability and the Toolbelt skill
- (+) Has a push which can come in handy in both PvE, WvW and PvP (pushing the boss in a corner, pushing someone off a cliff and pushing someone out of a capture point)
- (+) Yelling 'BUUUUUUUURN' when killing someone. Aaah, feels great.
- (-) Auto attack has a short range which can be a risky place to be at as a Medium geared profession
- (-) The damage is quite low when you compare it to the Grenade Kit and Bomb Kit.
- (-) Retaliation hurts a lot as you will get hit by this boon for every attack you do meaning you will get hit 10 times if you use your autoattack.
- Usage of the Flamethrower
- You can spam the first skill as it does some decent DPS. The second skill does quite a lot of damage, has a low cool down and is a blast finisher, this skill should be detonated right when it hits the enemy for the best damage or in a combo field to get a combo finisher off. The third skill is a knockback, you can use this to knock people off cliffs (WvW), knock a boss in a corner so others can spike him (PvE) or knock people out of the capture circles (PvP). It also reflects back projectiles but that is extremely hard to time, good luck with that! The fourth skill isn't that great damage-wise, it does provide you with a Fire Field which you can blast in for 3 might per blast. The fifth skill can be used to stop important attacks or to stop (for example) a Warrior throwing his Hammer (when downed) at you while you are in the 'finish him' animation since this skill can be cast at ANY time. The toolbelt skill can be used to apply some serious pressure to the enemy, this will work for both power and condition damage builds.
- Personal opinion
- It's a strong kit and works well with Power Builds. You don't see it that often though which is very unfortunate, I find it very fun to use and has a lot of good utilities. It can be used in condition damage builds as well due to the nice toolbelt skill applying a ton of burning.
Elixir Gun
- Elixir Gun: Arm yourself with an elixir gun that replaces your weapon skills.
- 1. Tranquilizer Dart: Fire a dart that bleeds and weakens foes.
- 2. Elixir F: Fire a bouncing glob of Elixir F that cripples foes and grants swiftness to you and allies.
- 3. Fumigate: Spray a cone of elixir fumes, inflicting poison and vulnerability to foes and curing conditions on allies with every strike.
- 4. Acid Bomb: Leap backward, spraying an acidic elixir on the ground that damages nearby foes.
- 5. Super Elixir: Launch an elixir orb, healing allies on impact and creating an area of continual healing.
- Toolbelt skill: Vent a healing mist, granting regeneration to yourself and allies. Regeneration: 10 s (1300 health) and the Radius is 240, it also Breaks stun.
- What's good, what's bad?
- (+) The auto attack has a very high bleeding duration on hit.
- (+) Gives you a cripple and poison as well as party support with swiftness and removing conditions.
- (+) Has a nice blast finisher which also is a leap and does great damage.
- (+) Has an AoE heal that removes two conditions and also has a combo field that can be used to remove more conditions
- (+) Has a strong stun breaker
- (+) Works very well with condition damage builds because of the long bleed duration on auto attack as well as with power builds due to Acid Bomb's high damage output.
- (-) It's not really a strong damaging kit compared to the Grenade and Bomb Kit.
- Usage of the Elixir Gun
- The first skill is excellent, being able to apply permanent weakness with a high amount of bleeding stacks is very powerful. The second skill is hard to aim as it is a slow moving projectile but when it hits it does some good damage as well as crippling the enemy, use this to catch targets who run away or to stop people from running after you (WvW and PvP) or just for the damage (PvE). The third skill is excellent when you want to proc Incendiary Powder as it does 5 quick hits, for power builds it is just for the strong ally condition cleanse. The fourth skill gives you a leap to get away from/closer to people (use ‘About Face' hotkey to leap ‘forward' like Rocket Boots), it gives you a blast finisher and it does significant damage when people stand in the ‘mud' pool. All in all a strong skill that, when used correctly, makes the difference between life and dead. The fifth skill is an incredible healing skill, it also removes one condition, you can use this in combination with Throw Wrench to remove three conditions. The Combo Field on this ability removes conditions with projectiles.
- Personal opinion
- It's such a good kit and I can't imagine playing without it anymore. I use it for both Power and Condition damage builds with great success. For example you pretty much always see this ability in my condition damage specs.
Tool Kit
- Tool Kit: Equip a kit that gives you a variety of tools.
- Smack/Whack/Thwack: Smack, Whack and Thwack your foe. Repair turrets.
- Box of Nails: Scatter nails that bleed and cripple foes. (radius of 240)
- Pry Bar: Confuse your foe by smacking them with a pry bar.
- Gear Shield: Block attacks.
- Magnet: Pull your target to you.
- Toolbelt skill: Throw a wrench that returns to you, striking foes each way. Damage: 244 and Vulnerability: 6 s with Projectile Combo Finisher of 100% (always triggers combo field effects). The range is 900.
- What's good, what's bad?
- (+) Works well for both Condition Damage and Power builds.
- (+) Gives you a block which can counter strong enemy attacks (think of basilisk venom and blurred frenzy)
- (+) Gives you a hard hitting skill that also applies five stacks of confusion, works well with the pull that is also a strong CC.
- (+) Gives a 100% Physical Projectile which can remove two conditions from your allies when you use it inside Super Elixir (Elixir Gun #5) a.k.a. a light field.
- (-) Barely works in PvE, only for certain speedrun builds.
- (-) Barely works in WvW Zerging, only for pulling people off the wall (which a Mesmer is much better at)
- Usage of the Tool Kit
- The main skills are Magnet and Pry Bar, you can chain them well together to CC the enemy aswell as apply 5 stacks of confusion. This is usually how I start a battle in WvW versus a decent enemy. The Box of Nails is ment to stop people from chasing you due to the cripple aswell as another AoE field, the range is actually quite big so it's a nice addition to your other AoE (think of Grenades/Bombs). The Block is also incredible, it is a stronger block than your Shield #5 since it has a way lower cooldown, it can save you from spikes like the mesmer Blurred Frenzy ability. The AutoAttack shouldn't be used.. ever.
- Personal opinion
- It's a very strong skill for WvW Roaming, I use it on most of my roaming builds (like static discharge and condition damage). It is also really excellent in PvP but rarely of any use in PvE. The damage it does is simply much lower than that of the Grenade Kit and the Bomb Kit. That does not make it a bad kit though!
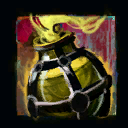
Bomb Kit
- Bomb Kit: Equip a kit that replaces your weapon with bomb skills.
- Bomb: Set a timed charge that damages nearby foes.
- Fire Bomb: Set a timed charge that burns nearby foes.
- Concussion Bomb: Set a timed charge that causes confusion to nearby foes.
- Smoke Bomb: Set a timed charge that creates a cloud of smoke, blinding nearby foes.
- Glue Bomb: Set a timed charge that creates a puddle of glue, immobilizing and crippling nearby foes.
- Toolbelt skill: Set a timed charge with a big blast that launches nearby foes. Damage: 548 with Launch of 400. The radius is 300 and it has a Blast Combo Finisher.
- What's good, what's bad?
- (+) Works great with both Condition Damage (burning and confusion) and Power builds (high AutoAttack damage)
- (+) Has two combo fields which can be used for stealth (smoke bomb) or might (flame bomb)
- (+) A strong counter for enemies that need to hit you from close range (thieves, warriors and guardians usually)
- (+) Highest AutoAttack damage (yes, Grenade Kit is lower)
- (+) A strong toolbelt skill that offers a good amount of damage, a CC and a blast finisher.
- (+) Works well in any type of content.
- (-) Close range which isn't always the best option for a medium geared profession.
- (-) Can be easily avoided by some professions (blinking Elementalists and Engineers with Rocket Boots for example)
- (-) Is less save in PvE than something like the Grenade Kit or Elixir Gun.
- Usage of the Bomb Kit
- The first skill has an incredible damage output. When you are going for max damage these bombs can hit up to 9k each per 0.9 seconds, that is insane! The second skill has a lot of uses, I suggest you to watch these combos (Might Combos) to get a better understand of what you can do with the Fire Bomb other than burning the enemy. The third skill isn't that great in PvE as confusion is weak in PvE, for WvW and PvP this skill can be deadly. Think of autoattackers like a Longbow Ranger for example, he will kill himself in no time. The fourth skill is much more complicated then it looks, have a look at these combos (Stealth Combos) to get a general understand of it other than to blind enemies. The fifth skill is great for stopping enemies from moving due to the Immobilize and Cripple, it works well in WvW and PvP and decent in PvE.
- Personal opinion
- A very strong kit. It gives you so much utility while also providing you with a good amount of damage because of the burn and confusion (5 stacks is a lot!). It also has the highest autoattack for the Engineer making it perfect to take down foes that can't have conditions on them. Think of Arrow Carts and Gates.
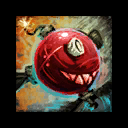
Grenade Kit
- Grenade Kit: Equip a kit that replaces your weapon with grenade skills.
- Grenade: Throws a grenade that explodes.
- Shrapnel Grenade: Throws a grenade that explodes in a hail of shrapnel, causing bleeding.
- Flash Grenade: Throw a grenade that explodes in a blinding flash.
- Freeze Grenade: Throw a grenade that chills enemies with a frigid blast.
- Poison Grenade: Throws a grenade that explodes in poisonous clouds.
- Toolbelt skill: Throw several grenades at once. Damage: 122 with an explosion radius of 150. It throws 6 grenades, 7 when traited and has a range of 1200.
- What's good, what's bad?
- (+) Great for both condition damage and power builds
- (+) This kit is used a lot in all types of content with good reasons. It is a strong all round kit.
- (+) Applies loads of conditions in combination with certain traits.
- (+) Has a strong toolbelt skill even whitout power (can also apply bleeding per grenade)
- (+) offers some decent utility with Blind and Chill
- (+) Has an Incredible range of 1,500 when traited (Grenadier trait), this is the 2nd highest range in the game.
- (-) Can be hard to aim
- (-) Easily avoided when Roaming alone unless the opponent is at close range.
- Usage of the Grenade Kit
- Spam spam spam spam, that is what most people do with it and that is exactly how it should be used. When the other skills are on cooldown you spam the first skill for damage, not much to say about it. The second skill is also used when off cd for Bleeding damage as well as a solid amount of direct damage (higher than the auto attack). The third skill shouldn't always be used on cooldown as it can come in handy to stop certain attacks, it also does barely any damage so you can skip this one until it comes in handy. The fourth skill does a lot of damage and CC's the enemy, throw this one when it is off cooldown. The fifth skill does a solid amount of damage and is great versus enemies that rely on healing to survive.
- Personal opinion
- I find it a great kit but it is annoying to use since you constantly have to press ‘1' to Auto Attack. I don't like that but other than that, a very strong kit for every type of content. For example, you will often see it used to maximize damage. It also is often used in WvW/PvP builds for the strong burst/pressure it gives.
Gadgets
Personal Battering Ram

- Personal Battering Ram: Launch a target foe with a concealed ram head.
- Toolbelt Skill: Shoot out a ram's head in front of you, crippling any struck foes.
- What's good, what's bad?
- (+) Launches a target which is a strong CC tool.
- (+) Ideal for heavy CC orientated builds (Edge of the Mists, knocking people off).
- (+) Works well with Synaptic Overload which causes Quickness when an enemy gets CC'ed.
- (+) Works well in combination with Static Discharge due to the low CD on the toolbelt skill.
- (-) Hard to pull off sometimes as it has quite a short range and is easily prevented.
- (-) Has a moderate long cooldown which makes it less viable for sustain builds.
- Usage of the Personal Battering Ram
- This is a CC ability, you can use this ability the best in combination with other CC. Think of Immobilized for example so you are ensured the opponent can't dodge it. The Personal Battering Ram compliments well from Static Discharge and so it is very useful to use the ability with this trait.
- Personal opinion
- It is a strong skill for SD but worth trading out for something like Elixir Gun, Rocket Boots or Rifle Turret? I am not sure as SD usually means you have low defense and using this ability makes you vulnerable to opponents that can fight back after your initial burst.
Rocket Boots
- Rocket Boots: Fly forward, damaging foes with your rocket exhaust. Cures immobilized, crippled, and chilled
- Toolbelt Skill: Use your rocket boots to do an explosive kick that burns foes..
- What's good, what's bad?
- (+) Big leap distance to get away or to chase.
- (+) Has a blast finisher which can be used to heal, grant might or stealth.
- (+) Has a strong burning up time due to the tool belt skill, useful for both Power- and Condition Engineers.
- (+) Cures immobilized, crippled and chilled and does so before the leap so the range won't be affected.
- (+) It is fun and easy to use. Excellent for beginner Engineers.
- (-) Doesn't give access to a stun breaker like the leap from Elixir Gun does (tool belt skill)
- (-) Has a moderate long cool down.
- (-) The tool belt skill requires you to be at close range and often misses.
- Usage of the Rocket Boots
- You use this generally to get away from your opponent because you can't overcome him/them. You can also use this to grant yourself stealth, might, healing etcetera due to the Blast Finisher that is involved with the skill. It is a pretty straightforward skill and does not require that much explanation.
- Personal opinion
- I like it, it's a really good and fun skill. I personally do like to take Elixir Gun over Rocket Boots because of the stunbreaker, condition removal, heal and strong bleed/weakness stacking while not losing the ability to leap. This ability is stronger when it comes to escaping though, in a way it's a personal preference.
Slick Shoes
- Slick Shoes: Spray oil behind you, knocking down foes. If underwater, foes entering the field are blinded.
- Toolbelt Skill: Run at double speed. This skill sets your movement speed to 200% of movement speed out-of-combat, overriding in-combat movement speed and slowing effects.
- What's good, what's bad?
- (+) Strong AoE knockdown that can cause multiple knockdowns to the same target.
- (+) Unblockable so ideal for those that have access to a lot of blocks (Engineer for example)
- (+) Has a stunbreaker on the toolbelt skill.
- (-) Incredibly long cooldown (45 seconds) which makes it rather weak as you can't use it often.
- (-) Sometimes doesn't work properly and lets people walk right through the trail.
- (-) Easily avoidable if people pay attention.
- (-) The toolbelt skill is nice to have but as you only get superspeed when out of combat it isn't that useful.
- Usage of the Slick Shoes
- You generally want to run around your target so he gets knocked down as often as possible (generally max 2 times). You can use other abilities for the duration so when you wish to ‘nuke' someone with your bombs you can also trigger Slick Shoes which causes them to get hit by all your bomb damage as they are knocked down.
- Personal opinion
- Due to the long cooldown and easily avoidable trail this ability won't be used often in WvW and PvE. In PvP, however, the trail of oil is much harder to avoid when you stand on a capture point making it a solid ability for PvP.
Throw Mine
- Throw Mine: Throw out a remote-controlled land mine that damages, knocks back, and removes a boon from nearby foes.
- Toolbelt Skill: Plant five mines around yourself.
- What's good, what's bad?
- (+) Can remove up to 6 boons from the target.
- (+) Both skills do very high damage so ideal for Berserker builds in WvW, PvP and PvE.
- (+) Throw Mine is unblockable so is a great tool to get someone out of his block.
- (+) Has a build in blast finisher which is great for healing, might stacking or stealth stacking.
- (-) Can be hard to hit especially if the opponent is ranged.
- (-) Easily avoided as the mines make a very noticeable sound and are quite easy to spot.
- Usage of the Throw Mine
- You want to be able to hit your target with it, in PvE this is no issue as mobs generally run to you (when stacking). In WvW and PvP you need to be smart with this ability by using it in combination with Magnet from the Tool Kit for example. Make use of Line of Sight when needed so you can hit your opponents with the mines.
- Personal opinion
- A strong ability which has it's uses mainly in PvE but can be used well in WvW as well for Zerging or general Roaming. The direct damage it does is insane when you get all the mines to hit.
Utility Goggles
- Utility Goggles: Break out of stun, gaining fury and immunity to blindness. Fury: 10s, Blind immunity duration: 10s and Breaks stun.
- Toolbelt Skill: Analyze a foe, applying vulnerability. 10 stacks of Vulnerability: 8s and a Range of 1,200.
- What's good, what's bad?
- (+) A stunbreaker (with benefits).
- (+) An easy way to get Fury (instant cast)
- (+) Immunity to blind can come in handy in some encounters.
- (+) Has a strong Toolbelt Skill for Static Discharge builds.
- (+) Adds Reveal to the target when the toolbelt skill is used, absolutely devastating versus Thieves.
- (-) High cooldown.
- (-) Using the ability for the Fury means you lose your stunbreaker.
- Usage of the Utility Goggles
- It is a simple press of a button but when do you use it? You can use it offensively or defensively. When you are sure you are able to kill your target you can use it offensively for the Fury but if you are unsure about it you can hold onto it and make use out of it if the opponent uses CC on you so you are able to stun break out of it. This ability requires you to think ahead to get the most use out of it. The toolbelt skill is ideal for Static Discharge specs and to stop Thieves and Mesmers from stealthing all the time, it's also instant cast and won't interrupt your other skills so make good use of that.
- Personal opinion
- It's a good skill in Static Discharge specs, the toolbelt skill called Analyze has reveal on it so you can make Thieves and Mesmers (or any other profession with stealth) very vulnerable. It also is instant cast so it can be used at anytime you like. The downside on this ability is that the stun breaker is coupled with Fury, so it is either no Fury or no stun break unless you have to use it mid fight of course. Generally, you use this for the stun breaker.
Turrets
Flame Turret

- Flame Turret: deploy a turret that burns foes.
- Flame Turret #2: overcharge your flame turret, releasing a smoke screen that blinds nearby foes. Pulses blind each second for 5 seconds, the duration on this blind is 2 seconds.
- Toolbelt Skill: throw a ball of napalm that explodes on impact, burning foes around target location.
- What's good, what's bad?
- (+) Strong burning pressure, can maintain it on a target with a little bit of condition duration.
- (+) Allows you to stealth by overcharging the turret and blasting in it.
- (+) Allows for might stacking with the toolbelt skill, also nice for the additional burning.
- (-) Can easily be avoided, the range is short.
- (-) The toolbelt skill moves slow, therefore it can be easily dodged.
- Usage of the Flame Turret
- You place it down on a key location where people are bound to walk past or have to fight you near to make maximum use of it. A great example is a capture point in PvP. When you need to stealth you can activate the overcharge ability and blast near the turret, you can even blast the turret for stealth. Keep in mind that you shouldn't randomly use the overcharge ability. The toolbelt ability is a great tool to stack might while the burning duration is also pretty high, I advice to use it mainly for the might stacking unless you have already another good source to stack might with.
- Personal opinion
- It's a really strong skill although because it can be avoided so easily it only works in a few situations. There are some great plays to be made with this ability though thanks to the smoke field and fire field.
Net Turret
- Net Turret: build a Net Turret that immobilizes nearby foes, The attack range is 600, the immobilize duration is 2 seconds and the rate of fire is 10 seconds.
- Net Turret #2: overcharge your turret to fire an electrified net that immobilizes and stuns. The damage is 318, the attack range is 600, the immobilize duration is 2 seconds, the stun duration is 2 seconds and the duration the effect is applied to the turret is 10 seconds. It only shoots one electrified net though.
- Toolbelt Skill: fire a net from your belt to immobilize your foe. Range of 600 and the immobilize duration is 3 seconds.
- What's good, what's bad?
- (+) Strong ability to immobilize foes which is a strong condition.
- (+) Stuns your target while also immobilizing them so if they stunbreak they are still stuck.
- (-) Easy to avoid.
- (-) Often bugs out. It sometimes randomly misses or doesn't trigger the overcharge.
- Usage of the Net Turret
- It's an excellent CC turret and therefore the best usage is to drop on someone when unexpected. The immobilize condition is really strong and so if you are able to hit even one net with the turret, the turret already does an excellent job. You can quickly use the overcharge ability when you place it to ensure the first net will actually stun and immobilize your target. The toolbelt skill is also a great immobilize addition, it's a good opener if you wish to burst someone down.
- Personal opinion
- A cool turret but often bugs out. It can be really strong though as the immobilize condition is really good. Fitting this in a setup is sometimes just difficult as there are a lot of other (and potentially better) skills. It is only good in PvP and WvW though, in PvE it really has no use.
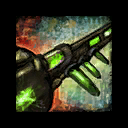
Rifle Turret
- Rifle Turret: build a rifle turret that shoots at foes.
- Rifle Turret #2: overcharge your rifle turret to fire piercing shots that inflict vulnerability.
- Toolbelt Skill: surprise shot, fires a bullet out of your belt.
- What's good, what's bad?
- (+) Strong consistent damage.
- (+) Able to apply a good amount of Vulnerability which will up your and the turret's damage.
- (+) Excellent damaging toolbelt skill with no cast time.
- (+) Excellent for Static Discharge builds due to the low cooldown on the toolbelt skill.
- (-) Can be avoided but since the range is so high this is tough to do effectively.
- Usage of the Rifle Turret
- If you run a turret build, you can put the turret down as soon as you are near an enemy. The turret simply deals damage so you really don't have to play that tactical with it compared to other turrets like the Net Turret. The toolbelt skill is excellent for Static Discharge orientated specs due to the instant cast and decently high damage, it also has a really low cooldown. This turret is usually one of the core turrets of a turret orientated build while also performing well in other builds due to the strong toolbelt skill.
- Personal opinion
- I like this turret a lot, it has a low cooldown on both the main and toolbelt skill which makes it really good. There is not much bad about this turret to say as it is a great addition to almost every single build.
Rocket Turret
- Rocket Turret: build a turret that fires rockets.
- Rocket Turret #2: overcharge your turret to fire explosive rockets.
- Toolbelt Skill: fire a rocket out of your belt that explodes on impact.
- What's good, what's bad?
- (+) Really strong damage.
- (+) Homing overcharge ability, almost a guarantee hit.
- (+) High damage on the toolbelt skill.
- (+) Long range on the turret itself and the toolbelt skill.
- (-) The toolbelt skill is really easy to avoid.
- (-) Has an incredible long cooldown.
- Usage of the Rocket Turret
- This is a strong damaging turret, you generally want to use it as fast as possible when you encounter an opponent to start dealing some serious damage to them. The overcharge should be used when the opponent does not have stability, stability will prevent the target from getting knocked down which is something you really want to happen els it is a waste of your overcharge ability. The toolbelt skill should be used at close range so you can ensure it hits, at long range it will almost always miss or hit the ceiling if you are in a house.
- Personal opinion
- An awesome turret that deals some serious damage, too bad it has such a long cooldown as if it gets taken down fast it's kind of a bad ability. With some proper positioning though it really shines and when I use it, I often see people fall just to this turret because of the strong damage.
Thumper Turret
- Thumper Turret: build a high-health thumper turret that damages nearby foes.
- Thumper Turret #2: overcharge your thumper turret to launch nearby foes.
- Toolbelt Skill: release a shockwave of inertial force to damage nearby foes.
- What's good, what's bad?
- (+) Strong CC turret.
- (+) High health, means it is able to take quite a few hits.
- (+) Has a stunbreaker with the toolbelt ability that also gives you a little bit of stability.
- (+) Gives you three blast finishers from the overcharge, detonate turret and toolbelt skill.
- (-) Long cooldown on both the turret and toolbelt skill.
- (-) Easy to avoid due to short range.
- Usage of the Thumper Turret
- This turret is used the best for either keeping people out of a capture point (PvP) or for blasting for Might/Stealth (PvE). It can also be used in WvW although way less effective as people easily avoid the turret then and the blast finishing can be done in other ways as well, might is more important in PvE than in WvW.
- Personal opinion
- It's a strong CC turret but due to the long cooldown and short range it is only good in a few situations, I wouldn't run the turret in WvW but I would in PvP and PvE as that is where the turret shines. This turret was often part of the famous (and often hated) Decap Build.
Gyros
Blast Gyro Tag
- Blast Gyro Tag: hurl a tracking dart for your blast gyro to seek out and detonate at. This ability has a range of 1,500, is unblockable and knocks the target back.
- Blast Gyro Self-Destruct: order your Blast Gyro to self destruct early. This deals a little bit of damage and dazes opponents around the Gyro.
- Toolbelt Skill: splash a hypercoating on nearby allies, granting superspeed.
- What's good, what's bad?
- (+) Unblockable damage and knock back.
- (+) Very large range.
- (+) AoE superspeed is very powerful.
- (-) The tag is a projectile so if an opponent avoids it, the Gyro becomes completely useless.
- (-) The gyro can be destroyed before reaching his target.
- Usage of the Blast Gyro Tag
- It's important that the tag is used when it is a sure hit. Even though it has a massive range, it is still a projectile so a simple dodge will allow the opponent to avoid it. Even a blind is enough. When the opponent is hit by the blast gyro, a combination of CC abilities like Thunderclap and Overcharge Shot can greatly influence the outcome of the fight. For the toolbelt skill, AoE superspeed is amazing. This can be used to escape from your opponents or charge right into them. The trait Rapid Regeneration also grants healing based on the duration of super speed making it an excellent combination.
- Personal opinion
- Because there is such a high risk involved in me missing the projectile, I don't see much use of this Gyro. Especially since it can get destroyed before reaching it's target. The toolbelt skill, however, is really nice but taking such an ability solely for the toolbelt skill is not really that great in my opinion.
Bulwark Gyro - Bulwark Gyro: deploy a bulwark gyro to apply watchful eye to nearby allies. Watchful Eye reduces damage taken by those allies by 50% and redirects the damage to the Gyro instead. It can apply this buff every 3 seconds and lasts for 15 seconds.
- Bulwark Gyro Self-Destruct: order your Bulwark Gyro to self destruct early. This deals a little bit of damage and dazes opponents around the Gyro.
- Toolbelt Skill: project a reflective dome around you (which moves around with you). It reflects projectiles for five seconds and allies can stand in it as well.
- What's good, what's bad?
- (+) Can soak up a lot of damage.
- (+) Can apply Watchful Eye to multiple allies.
- (+) The toolbelt skill is incredibly powerful versus ranged opponents.
- (-) Can apply Watchful Eye to (too many) allies that take massive damage which instantly destroys the Gyro.
- (-) Situational.
- Usage of the Bulwark Gyro
- When entering a (difficult) fight, the Gyro can be used before the fight starts to already have the Watchful Eye buff on the Engineer and thus be ready for any attack launched at the player. Avoid using it when multiple players will take massive damage due to for example an incredibly powerful hit that needs to be dodged to survive. First of all the Gyro won't dodge it and if it did, one played getting hit by the attack would mean the Gyro is instantly destroyed. The toolbelt skill is great for an AoE reflect which is fantastic in pretty much any type of content, especially in Dungeons.
- Personal opinion
- This is a great Gyro. The damage reduction is very strong and having a reflective 'bubble' that lasts for five seconds is very good as well. This is a Gyro I see myself using in WvW group roaming thanks to the great reduction in damage for my allies as well as the reflect. In a way it's a bit situational though. It depends on if you actually need the reduction in damage and the reflect to overcome an encounter.
Purge Gyro

- Purge Gyro: deploy a purge gyro that removes conditions from nearby allies. It removes two conditions every 3 seconds for 15 seconds.
- Purge Gyro Self-Destruct: order your Purge Gyro to self destruct early. This deals a little bit of damage and dazes opponents around the Gyro.
- Toolbelt Skill: generate a poison field, applying two stacks of poison on every pulse with a total of 4 pulses. It is also a poison field.
- What's good, what's bad?
- (+) Mass condition removal.
- (+) A lot of poison stacks if the opponent stays in the field.
- (-) Poison Field is not really useful.
- (-) Long cooldown means if it is destroyed quickly, it is a complete waste on your skillbar.
- Usage of the Purge Gyro
- This Gyro is used when fighting a lot of condition orientated opponents. The amount of condition clear it has is very high and thus it can keep you safe from those encounters with ease. It's very situational though since versus opponents that don't apply a lot of conditions, it doesn't really have any uses. The toolbelt skill applies a solid amount of poison and you can blast in the Poison Field. This is not adviced though as it will apply weakness to your opponent which isn't that great in comparison to what else you could have blasted in.
- Personal opinion
- I think it is a great Gyro if I am fighting condition orientated opponents. If not, there is not much reason to grab this Gyro as you already have a decent amount of condition clear coming from the Healing Turret, Elixir Gun and perhaps even Alchemical Tinctures.
Shredder Gyro
- Shredder Gyro: deploy a shredder gyro to whirl at target location, striking foes and using combo fields. Every hit done by this Gyro is a whirl finisher.
- Shredder Gyro Self-Destruct: order your Shredder Gyro to self destruct early. This deals a little bit of damage and dazes opponents around the Gyro.
- Tool Belt Skill: set down a lighting capacitor to daze and damage foes near it. This is also a lighting field.
- What's good, what's bad?
- (+) Good chunk of damage.
- (+) Whirl Finishers which is great in combination with a Fire Field for example to stack burning on the targets around the Gyro.
- (+) Toolbelt skill also deals damage, dazes and is a lightning field. Synergizes well with the Shredder Gyro itself.
- (-) I'ncredibly easy to avoid by enemies. Counts for both the Shredder Gyro and the Tool Belt Skill.
- (-) The radius is quite low making it tough to hit enemies that are slightly spread.
- (-) It's right next to your opponent and thus it can be destroyed instantly.
- Usage of the Shredder Gyro
- This Gyro needs to be involved into a 'combo' meaning that if you want to make sure the damage comes through, you need to trap your opponents in for example a stun or a cripple/chill/immobilize. Yes, it could hit all opponents if they don't move but chances are that they will especially in PvP/WvW. Also, make sure when you use it that the Shredder Gyro is inside a Combo Field so you can utilize the Whirl Finishers properly.
- Personal opinion
- I think it's too easy to avoid and can be too easily destroyed to be effective. Especially in PvP/WvW I see this bot have no use at all. The toolbelt skill is decent but that's about it. There are much better skills to take instead of this Gyro.
Elites
Sneak Gyro
- Sneak Gyro: deploy a sneak gyro to provide stealth to nearby allies. It has a duration of 30 seconds, interval of 3 seconds and affects five allies. The Gyro itself remains visible.
- Sneak Gyro Self-Destruct: order your Sneak Gyro to self destruct early. This deals a little bit of damage and dazes opponents around the Gyro.
- Toolbelt Skill: remove stealth from enemies in a large area (a radius of 900!). The reveal is for 6 seconds and affects 5 targets.
- What's good, what's bad?
- (+) Perma stealth for 30 seconds.
- (+) Anti-Stealth thanks to the toolbelt skill
- (+) Super low cooldown for an Elite.
- (-) The Gyro itself is visible so the opponent will still know where you are, they just can't see you.
- (-) Can't run properly past monsters because they will attack the Gyro. Still doable to some extend though.
- Usage of the Sneak Gyro
- Before you enter a fight, you can activate this ability to ambush your opponent. Even though players can see the Gyro, they don't know if there are 2 or 5 players under it. Even during a fight you can use it to retreat. Even though the opponent can see the Gyro they can't target you anymore which allows you to regen some health back. The toolbelt skill is used to counter any opponent stealthing. Due to the large radius it's almost a guaranteed hit. No Thief is safe anymore in their Shadow Refuge!
- Personal opinion
- Absolutely amazing elite! I am liking it a lot. Group stealth is very great for any type of content and the reveal is deadly to any organised team that also uses stealth and Thieves/Mesmers in general when it comes to PvP/WvW. In PvE you can stealth effectively past monsters especially since it's a very long stealth duration aslong as the Gyro doesn't die.
Supply Crate
- Supply Crate: request a supply drop of turrets.
- Toolbelt Skill: call down a supply drop of med packs into a target area.
- What you get is 1 Net Turret, 1 Flame Turret, and 1 Healing Turret. When the crate is dropped they immediately start attacking/healing and so if you stun your target you can expect an immobilize and burn as well. The toolbelt ability gives you multiple bandages which can be excellent for additional healing for yourself or allies.
- What's good, what's bad?
- (+) Strong stun combined with immobilize.
- (+) Strong burning uptime when opponent is near.
- (+) 'Game Changer', it can turn the fight around.
- (+) The toolbelt ability drops bandages for strong additional healing.
- (-) Often hated due to how strong it is.
- (-) Animation is easy to tell.
- (-) Can be easily avoided if the opponent is able to get to a safe distance.
- (-) Barely any use in PvE other than some pressure off your allies.
- Usage of the Supply Crate
- You want to use this Elite on unexpected moments against your opponent, in a WvW/PvP scenario it's even better to use it versus multiple opponents as being able to stun them both is really strong. Since the animation it's easy to tell you have to do it on unexpected moments els your opponent is likely to dodge it which makes it almost useless. In PvE you can use it for additional pressure (and blast finisher) but other than that it's not that a great addition in PvE.
- Personal opinion
- This is one of our best Elites, it simply is. The amount of power it has when you are able to land it succesfully is insane although it is sometimes annoying that people whine about me using it. I do tend to not use it in a 1v1 though but hey, if they use their elite, why aren't we 'allowed' to use ours?
Elixir X
- Elixir X: drink Elixir X, becoming a rampaging brute or whirling tornado on land. Underwater become either a withering plague or a whirlpool.
- Toolbelt Skill: toss your Elixir X, transforming enemies at the location into moas for 3 seconds. (Max targets: 3).
- What's good, what's bad?
- (+) Possible strong CC.
- (+) Possible strong Damage.
- (+) Incredibly powerful toolbelt skill if you can land it.
- (-) So much RNG, you have to get lucky.
- (-) Easy to avoid.
- (-) With the wrong transform, you waste the ability.
- (-) Not able to use any other skills, hurts Condition Damage and Static Discharge builds badly.
- Usage of Elixir X
- You use the ability, hoping you get the right transformation. For example a tornado has no use in open field while the rampaging brute can have a good use. The rampaging brute is okay in close quarters but the tornado again really shines there. So, once you prayed to the RNG gods and got the right transformation you are able to apply some decent pressure
- Personal opinion
- This ability is really no good, the transformations can be nice to have but it will make you unable to use any of your other abilities. For example in a Static Discharge build you want to use your toolbelt skills, you can't with this Elixir. If you run a condition damage build you want to apply condition damage pressure, well you barely can with the elixir. In PvE it barely inflicts any damage and only lowers your total group DPS.
Mortar Kit
- Elite Mortar Kit: equip the mortar kit.
- 1. Mortar Shot: launch an explosive round from your mortar, damaging foes in the target area.
- 2. Poison Gas Shell: launch a mortar round that spreads poisonous gas in an area.
- 3. Endothermic Shell: launch a mortar round that chills foes in the target area.
- 4. Flash Shell: launch a psophorous mortar round that burns brightly at impact point (blinding).
- 5. Elixir Shell: launch a mortar round that heals allies in the target area.
- Toolbelt Skill: call down energy from the sky to blast an area.
- What's good, what's bad?
- (+) Incredible long range.
- (+) Very strong direct damage.
- (+) Attacks rather quickly.
- (+) Good control through Chill and Blinding.
- (+) Loads of Combo Fields.
- (+) The first attack is a 100% projectile finisher.
- (-) The toolbelt skill is really hard to hit if the target moves around a lot.
- Usage of the Mortar Kit
- The Mortar Kit can be used both at long and close range. It's most effective at close range due to being able to reliably hit the target with every shot. This applies mainly to WvW and PvP. If a monster does not move around a lot, you can stay at a large distance and take him out. Try to make good use of your combo fields when you can, the Ice Combo Field can give you Frost Aura which is the strongest aura in the game right now for PvP and WvW.
- Personal opinion
- This is an excellent kit. It gives great control, deals a high amount of damage and grants you many combo fields. It's really worth going for and does beat the Supply Crate in several areas. It can be tougher to handle however especially if you are already playing with three kits.
Traits[edit]
What makes a build are the traits. Without traits you simply lose a lot of damage, utility and defense. On this page I will tell you what the trait does and give some short information about how it can be used effectively (and my personal opinion on it). This is more of a general description of traits. For a more specific trait description, have a look at the build page of the specific build you wish to run.
Explosives
The explosives traitline focusses around, you guessed it, explosives. This means that the Bomb Kit, Mortar Kit and Grenade Kit benefit greatly from this line. For example, this traitline has the trait Grenadier (Adept 1) in it which will make the grenade kit a lot stronger with increased velocity and radius. It isn't just the Bomb Kit, Mortar KIt and Grenade Kit though as it also holds some strong traits like Aim-Assisted Rocket (Master 1) and Glass Cannon (Adept 3) that increase your damage by a strong amount without relying on the three kits mentioned earlier.
Minor Traits
 Evasive Powder Keg (Adept Minor): this trait drops a bomb behind you whenever you dodgeroll. This bomb deals an equal amount of damage to the Bomb Kit's autoattack. This means it is able to deal some serious damage your target as the bomb kit's autoattack deals very high damage. This trait has the most use if you are running with a power setup but also has it's uses in a condition damage setup as it can proc on-crit things or just for some moderate extra damage.
 Steel-Packed Powder (Master Minor): this trait applies vulnerability to your target whenever you use an explosive. This is a really strong minor trait, it could even be considered a major trait if you look at how much power this trait gives you. This trait works very well with the Grenade Kit where you throw multiple grenades at once which all proc this trait. This way you are able to stack a lot of vulnerability on your target which ups the damage for yourself and allies. This trait is what the Engineer makes such a good vulnerability stacker.
 Explosive Powder (Grandmaster Minor): this minor trait knockbacks targets whenever your turrets explode. This can be done manually by detonating the turret or by the enemy destroying the turret. This trait is very good in PvP as people fight on a point there and thus have a high chance of getting knocked back. It is also good in a setup that does not have a lot of defense like my Static Discharge setup. You can then make use of it well to prevent thieves from melting you down easily as you can put a turret on your own location and blow it up whenever a thief decides to hit you with melee. This trait is used often in both power and condition damage setups. This minor trait also increases your explosive damage by 10% which means it will boost the damage of the Grenade Kit, the Bomb Kit and your mines do. Whenever you run a power build focussed around the Grenade or Bomb Kit, this is a very strong trait to pick up. The increase in damage is really noticable.
Adept
 Grenadier (I): this trait allows you to throw grenades faster as well as increase the radius of your Grenade Kit by 60. Whenever you run the Grenade Kit, this trait is really worth grabbing. The range is not that spectacular but the fact you can quicker as well as have a larger radius allows for far more (potential) DPS. For example without the trait you could miss targets because they move too quickly (as the velocity of your grenades is increased) as well as hit that additional monster because the radius is increased.
 Explosive Descent (II): this trait reduces the fall damage you take by 50% and releases mines that instantly explode when you hit the ground. This is a great trait when you have to jump off things often. This is the case in Edge of the Mists often which makes this a good trait for that content. You can also use it when you are exploring the world to prevent yourself from dying whenever you fall of a cliff.
 Glass Cannon (III): this trait increases your damage by 5% when you are above 90% of your health. If you can keep your health above 90% most of the time, this trait is really powerful. Especially if fights only last for a very short time, like when speedrunning Dungeons or when you play Static Discharge in WvW, this trait is really worth picking up!
Master
 Aim-Assisted Rocket (I): this trait gives you a 33% chance on hit to shoot out a rocket at your opponent. It deals a solid amount of damage, can hit up to three targets and has a range of 1,500. This is a very powerful trait when you play PvP/WvW because this allows for additional burst that could totally surprise your opponent. Do keep in mind that it has a cooldown of 10 seconds so it can't be 'spammed' all the time. Still, 10 seconds is not high at all.
- Shaped Charge (II): this trait increases your damage by 5% whenever the target has vulnerablity on him. It's a great trait when you are able to inflict damage to the target consistently. This is the case in PvE but not in PvP and WvW as people can be very unpredictable there. This trait competes with Aim-Assisted Rocket on what deals the most damage. For PvP/WvW you are going to get more out of Aim-Assisted Rocket but for PvE.. Shaped Charge is actually much better!
 Short Fuse (III): this trait reduces the cooldown of your Bomb Kit skills by 20%. It also reduces the 'fuse time' by one second. This means that your bombs will explode faster. This is great for when targets are very close behind you or when you are in the 'frontline' of a Zerg (with the commander) in WvW. Other than that the trait has it's uses for condition orientated builds because you can stealth up quicker through blasts in the Smoke Bomb as well as deal damage more frequently.
Grandmaster
 Siege Rounds (I): this trait increases the fields' duration by 50% of your Mortar Kit skills. It also fires your Orbital Strike an additional time which means it will do double damage as well as act as a double blast finisher. That is really useful for every single game mode. If you use the Mortar Kit a lot, this trait is really worth taking.
 Shrapnel (II): this trait has a 15% chance of applying a long lasting bleed (16s) and a short lasting cripple (2s) whenever you hit someone with an explosive. The 15% chance is not affected by your critical hit chance. Since you will cause multiple explosives with the Grenade Kit, this trait is often used if you use the Grenade Kit. It can stack a lot of bleeds on your target due to the high base duration. You can also maintain cripple reasonably well making it a great control ability. A very effective trait for both power and condition damage.
 Thermobaric Detonation (III): this trait turns the bomb created by the adept minor trait: 'Evasive Powder Keg' into a blast finisher. This trait is very powerful but it does require proper timing. This is so that you don't waste the blast finisher randomly because you dodgeroll outside of a field like a Water Field or Fire Field. Use this trait only if you have already spend a good amount of time on your Engineer and understand the profession (and other professions) quite well. You really don't want to blast nothing everytime you activate this trait with a dodgeroll.
Firearms
The firearms traitline focusses a lot on improving your weapons (Rifle and Pistol) as well as increase the power of the flamethrower which benefits well from this trait line. The traitline holds traits that reduce the cooldown of your rifle (Skilled Marksman) as well as increase the duration of your Pistol's conditions (Chemical Rounds). It also has the trait Juggernaut in it which gives you stability and might while using the Flamethrower, excellent for Might stacking builds. This trait line is often used for improving your Rifle or Pistol but is also good for maximizing damage due to the trait Modified Ammunition.
Minor Traits
 Sharpshooter (Adept Minor): this trait has a 33% chance on critical hit to cause one stack of bleeding to your target. This is a very nice addition to any build and is often utilized greatly by the Grenade Kit as that kit hits multiple times with just one attack. All those attacks can crit and thus proc Sharpshooter.
 Hematic Focus (Master Minor): this trait increases your critical hit chance by 10% whenever your target is affected by bleeding. This is a solid addition to many specs simply because both condition orientated builds and power orientated builds can use an increase in critical hit chance. Thanks for Sharpshooter you can also ensure there is atleast one bleed on the target!
 Serrated Steel (Grandmaster Minor): this trait increases the bleed duration by 33%. A solid trait for both condition damage and power builds. It's not that spectacular but it's a great addition nontheless. Especially since it's a minor trait which basically means it's a 'free' bonus.
Adept
 Chemical Rounds (I): this trait increases the condition duration of your pistol skills by 50%. This makes attacks like Poison Dart Volley and Static Shots have their poison, confusion and blinding duration increased. A solid trait for when you got into this traitline with a condition damage builds. It also is the only trait in the adept tier that is useful for a condition orientated build.
 Heavy Armor Exploit (II): this trait gives you a 50% chance to get swiftness on critical hit. With this trait you can ensure a 100% uptime of swiftness while in combat. It is a nice addition if you have to move around a lot while fighting but other than that you are generally better off with Speedy Kits in the Tools line or Mecha Legs in the Inventions line. The trait also applies vulnerability to the target whenever you critically hit them. This also has a 50% chance. Pretty solid to stack on some vulnerability but due to the low duration it won't give you that many stacks on the target. Due to it not having a cooldown, however, it's pretty good if you use it with the Grenade Kit as it allows for far more vulnerability stacks than you would be able to do with just your Rifle or Pistol.
 High Caliber (III): this trait gives you a 10% increase in critical hit chance when your opponent is closer than you than a range of 240. This trait mainly sees it's uses when most of your attacks are close-ranged orientated. Something that would work for example is when you play a build that uses the Grenade Kit, Tool Kit and the Rifle. Especially a celestial build can really benefit from this trait.
Master
 Pinpoint Distribution (I): this trait gives you more condition damage based on 7% of your precision. This is a great trait when you run with a lot of precision (rabid and sinister gear). For a condition orientated build, this is pretty much your only option in this tier as the 2nd trait is about the Rifle and the third grants Fury that simply isn't important for a condition orientated build. In PvE you can use it to maximize condition damage and thus increase your damage.
 Skilled Marksman (II): this trait grants an attack speed increase of 10% on your Rifle and on your Harpoon Gun while also lowering the cooldown of the Rifle's and Harpoon Gun's skills by 20%. A very solid trait for when you go into Firearms and use a Rifle. Both the attack speed and the reduced cooldown are very noticable. Being able to use skills like Overcharged Shot and Jump Shot more frequently increases your damage output as well as your survivability. The attack speed is not that much but it can certainly help with damaging your opponent when you can't come close to him.
 No Scope (III): this trait grants fury when you critically hit someone within a range of 240. The base fury uptime is 4s and the cooldown is 10s. This is an ok trait. I would say since you can't always come close to targets and the fact it's not that big of an uptime (40%), you would get much more out of the other traits. If you have a fury orientated rune or got quite some boon duration, by all means take this trait because fury is a really powerful boon!
Grandmaster
 Juggernaut (I): this trait grants you one stack of stability (3s) and one stack might (15s) every 3 seconds whenever you have the Flamethrower equipped. This is an excellent trait when you run a Flamethrower orientated build or a build that is focussed around might. You can get 5-6 stacks of Might from this trait even when you switch around kits. The stability allows you to use Overcharged Shot without any drawback which is incredibly powerful in PvP/WvW. The stability also protects you from any CC engages from your opponent like a Thief opening with Basilisk venom.
 Modified Ammunition (II): this trait increases your damage by 2% for every condition on the foe. This has to be an unique condition. This does not mean that if you have 2 stacks of bleeding on the target that you get a 4% damage increase. This trait is excellent in maximizing damage as it synergizes so well with the Grenade Kit. The Grenade Kit applies a lot of (different) conditions which will help this trait greatly.
 Incendiary Powder (III): this trait causes burning whenever you critically hit a target. It has a cooldown of 10 seconds. This trait is amazing and is almost always picked up whenever a build focusses around condition damage or has some condition damage like celestial. The burning is very strong especially since it is close to impossible to avoid. The duration increase makes the trait even stronger as it will mean the burning will last for 5,3s making it a burning uptime of over 50%! Now add in a rune like Rune of the Balthazar and you are sitting at a very high uptime that can reach up to 80%!
Inventions
The inventions traitline focusses mainly around turrets and support, this traitline offers you with turret-orientated traits like Experimental Turrets which gives boons to you and allies depending on what turret you created and Advanced Turrets which creates a reflective dome around your turrets for 4 seconds when placed as well as offer a 33% damage decrease on turret. This traitline also offers you with supportive traits like Bunker Down which creates a health pack and a mine whenever you critically hit and Soothing Detonation that heals you and your allies whenever you use a blast finisher. This is our most defensive traitline right now.
Minor Traits
 Cleansing Synergy (Adept Minor): this trait removes a damaging condition (like burning and confusion) whenever you use a healing skill. It also affects allies but only has a radius of 300. Because of the small radius, allies have to be close to you to benefit from the trait. Nontheless a very powerful trait. Engineers are weak versus conditions and this trait helps us fight conditions more effectively! If you use your healing turret, it will now remove three conditions!
 Heal Resonator (Master Minor): this trait grants 6 seconds of Regeneration to you and your allies (radius of 240) whenever you use your healing skill. If you use the Healing Turret as healing skill, this regeneration can stack up well to an almost permanent uptime. This minor trait works very well with the third minor trait in Inventions making all of your heals much stronger!
 Energy Amplifier (Grandmaster Minor): this trait grants 250 healing power whenever you are affected by regeneration. This is an excellent trait as in most cases we will be affected by Regeneration. Either from ourselves through the Healing Turret, Elixir H and/or Heal Resonator or from our allies. It's a powerful trait.
Adept
 Over Shield (I): this trait gives you and nearby allies 4s of protection (radius 240) whenever you use a shield skill. It also reduces the cooldown of the shield abilities by 20%. A very solid ability when you use the shield. Do keep in mind that the protection uptime is not really high so use your shield skills wisely. Sometimes it might be better to use one of your abilities offensively in which you hardly make use of the protection.
 Automated Medical Response (II): this trait will cause all your healing skills to recharge whenever you hit 25% of your health. This is actually an extremely powerful trait as it can allow you to heal twice within a few seconds. This trait can truely be a lifesaver and often people go into inventions for just this trait.
 Autodefense Bomb Dispenser (III): this trait will drop a smoke bomb whenever you get a CC on you like a stun or a daze. This can prevent incoming damage from melee orientated builds or can allow you to quickly stealth up as well as the Smoke Bomb is a smoke field. It has some tactical uses but other than that it is not that useful.
Master
 Experimental Turrets (I): this trait grants the ability to turrets to give boons to you and your allies (radius 600). It has an interval of 10 seconds so every 10 seconds, each turret grants a boon. For the flame turret it's 3 stacks of might, for the healing turret it's vigor, for the net turret it's swiftness, for the rifle turret it's fury, for the rocket turret it's retaliation and for the thumper turret it's protection. When you run a turret build, it's a very nice addition to the turrets especially being able to stack on might and fury by using the Flame- and Rifle turret.
 Soothing Detonation (II): this trait heals you and your allies whenever you trigger a ‘combo' using a blast finisher. This means that if you blast in a firefield, everyone around it is healed for a decent amount. This trait is great for support orientated builds especially if you are blasting in waterfields due to everyone get healed twice in that case. The radius is only 240 however which is pretty small.
 Mecha Legs (III): this trait permanently gives you 25% movement speed. This is less than swiftness gives you (33%). When you are not able to grab Speedy Kits or wish to slot something different there, this is a solid option. Keep in mind that you are slower than those with swiftness. This trait also reduces the duration of Chilled, Immobilize and Cripple by 33%. This is excellent for both WvW zerging and roaming but will not see much use outside of that. This is because you can make use of food and runes to lower the condition duration greatly. For WvW Zerging you can run with Hoelbrak Runes and Lemongrass which will give you (in combination with this trait) immunity to Chilled, Immobilize and Cripple.
Grandmaster
 Advanced Turrets (I): this trait gives your turrets a 33% damage reduction. This is great when you run a turret build as it will make your turrets last much longer. this trait also grants your turrets a reflective bubble for 3 seconds when placed down. This is a great to be able to stop a lot of pressure on point in PvP or when dueling in WvW. It is mainly used in these two game modes as reflecting a monster's attack doesn't do enough before the turret are destroyed by AoE (which is quick).
 Bunker Down (II): this trait creates a proximity mine and a medpack on your location whenever you critically hit. It has a cooldown of 2 seconds. Since the mine drops on your location and does not do a large amount of damage, this trait doesn't look very effective. Luckily, the Med Pack is really good. It grants a base heal of 500 and it grants regeneration for 4 seconds which synergizes really well with Energy Ampiflier. Since the cooldown is also very low it's a great trait to heal yourself frequently as well as maintain regeneration.
 Medical Dispersion Field (III): this trait heals your allies around you (radius is 240) for 20% of the amount of healing you receive. Sadly this does not count for traits like Backpack Regenerator so no passive healing for your allies. It's quite a weak trait as you have to run a specific build (preferably with A.E.D.) to get much out of this trait. It doesn't come close to the healing Bunker Down gives you.
Alchemy
The alchemy traitline has a strong focus on elixirs and active defenses. The elixirs get buffed in this traitline in various ways, they can get lower cooldowns and stack might with HGH and remove conditions on use with Alchemical Tinctures. The active defenses in this traitline are generally boon based, for example with Invigorating Speed you get vigor when you get swiftness which will allow you to dodge more often and Protection Injection gives you protection when you get disabled (CC'ed) which will reduce all direct damage by 33%.
Minor Traits
 Hidden Flask (Adept Minor): this trait will use Elixir B when you reach 75% of your health. This is an excellent minor trait as the Elixir B gives us Fury, Might and Swiftness. Especially the Fury is a really great addition as an Engineer can make great use out of more precision. Also don't forget that this is still an Elixir meaning it will work with Elixir orientated traits like the third minor in Alchemy and HGH.
 Transmute (Master Minor): this trait convert an incoming condition into a boon. The boon it gives depends on the condition converted. Bleeding gives Regeneration, Blind gives Fury, Burning also gives regeneration, chilled gives swiftness, confusion gives retaliation, fear gives stability (!), immobilized gives swiftness, poison gives vigor, torment gives might, vulnerability gives protection and weakness also gives might. This trait can really do a lot for you and is often underestimated. For example when a Warrior starts the fight Pin Down, you will stop the Immobilize thanks to transmute.
 Alchemical Tinctures (Grandmaster Minor): this trait removes a condition whenever you use or throw an elixir (and it hits yourself). This is an incredibly strong trait to remove conditions especially when you run an elixir build. We are quite vulnerable to conditions so this is a great trait to go for if you run with elixirs. Even if you run just one elixir, it's already great as it allows you to remove two conditions. This trait also increases our boon duration by 20% which is a great overall buff.
Adept
 Invigorating Speed (I): this trait grants you vigor whenever you het swiftness. This is an absolute excellent trait when used in combination with Heavy Armor Exploit. Sadly due to the long cooldown of Streamlined Kits, the skill is not really great with it. With Heavy Armor Exploit and Invigorating Speed equipped, you will be ensured with a very high vigor uptime which allows you to dodge more frequently. Dodging is quite important in any type of content and therefore this trait is very useful.
 Protection Injection (II): this trait grants you protection whenever you are hit by a CC. The cooldown of this skill is 5 seconds. This is a very strong trait as it allows for a high protection uptime. It makes you able to survive CC from for example a Hammer Warrior much better.
 Health Insurance (III): this trait grants a 15% increase in outgoing heals from your Med Kit. If you use the Med Kit it's a decent trait but especially in PvP and WvW, you really want Invigorating Speed or Protection Injection. If you are going for a Healing Build, this is a great trait though but I advise to compare Healing Turret with Med Kit to see what would be the most useful for your build.
Master
 Inversion Enzyme (I): this trait grants boons whenever you remove a condition with your Elixir Gun. This sounded like a great trait until I discovered that it will only work for Super Elixir and Fumigate. Especially when you play a alone, it's really not a great trait. One condition converted into a boon (thanks to Super Elixir) is really not worth it.
 Boiling Point (II): this trait uses Elixir S whenever you hit 25% of your health. At first this looks rather good but because you can't use any skills and can get interupted while performing a move, it is not really a good trait. This trait can cause you to screw up completely which is not something we want. It can however have it's uses when you are getting focussed hard in PvP or WvW (Roaming and Zerging) but in general that won't be the case.
 Backpack Regenerator (III): this trait heals you every second when you are in a kit. Since most builds use kits, this is an excellent trait . The healing helps really well even without healing power.
Grandmaster
 HGH (I): this trait grants you two stacks of Might when you consume an elixir and when you throw an elixir (and it hits yourself). This trait also reduces the recharge of your elixirs and increases the duration of the boons on the elixirs. Whenever you run an elixir build, this is absolutely the core. It makes your elixirs so much stronger that it is a must have for any elixir build.
 Stimulant Supplier (II): this trait drops a stim pack when you use a healing skill. This stim pack grants a moderate heal equal to Bunker Down's Med Pack (500). It also grants 6 seconds of Fury. This means you have quite a high fury uptime with this trait which is really strong. The downside is simply that all it does it grants Fury as the healing is not really special for a trait that has a cooldown of 10 seconds. If your build really benefits a lot from Fury, consider choosing this trait.
 Iron Blooded (III): this trait reduces the incoming damage by 2% for every boon on you. So if you got five boons on you, the damage you take is reduced by 10%. This is a very underwhelming trait. The reduction is not really that high because we can't maintain 5+ boons all the time. And even if we can, 10% is still very low. The other traits grant you with far more.
Tools
The tools traitline has a strong focus on gadgets and toolbelt skills. Our gadgets get strong improvements with the reduced cooldowns from Gadgeteer. The only downside here is that gadget builds are often not effective at all making the traits rather bad. The toolbelt skills get a strong buff due to the trait Static Discharge which often the main factor in a burst build and Kinetic Discharge which is really incredible for quick burst (or a double Orbital Strike). This traitline is generally the core of Static Discharge builds.
Minor Traits
 Optimized Activation (Adept Minor): this trait grants you 2 seconds of Vigor whenever you use a toolbelt skill. This is a great trait when you need that extra little bit of endurance the dodge roll an important attack. The only downside is that in this traitline we also got Adrenal Implant which is often taken. Adrenal Implant makes Optimized Activation completely useless.
 Mechanized Deployment (Master Minor): this trait reduces the recharge of your toolbelt skills by 15%. A solid trait for every type of build. Having reduced cooldowns on your toolbelt skills is simply useful for every single build you play especially if you run a Static Discharge build.
 Excessive Energy (Grandmaster Minor): this trait increases your damage output by 10% whenever your endurance bar is full. This is excellent for situations where it is not needed for you to dodge or for an opening burst. For a static discharge spec this is great additional damage for when you unleash your first burst on the target.
Adept
 Static Discharge (I): this trait releases a lightning bolt whenever you use a toolbelt skill. This trait is the core of many burst orientated builds. It gives so much additional burst as the lightning bolt can hit pretty hard. It can also bounce between targets and hit the same target twice.
 Reactive Lenses (II): this trait uses Utility Goggles whenever you get CC'ed (stun, knockback etc). It has a cooldown of 40 seconds. Since Utility Goggles is a stunbreak, this trait stops the first CC you get hit by in a fight. Utility Goggles also provides with Fury and immunity to blind for a moderate duration. Absolutely a good trait as we are weak versus Crowd Control. It also grants us fury which is something we usually don't have a lot of. This trait is worth grabbing if the other traits simply don't have any use for you (or don't fit well in your build).
 Power Wrench (III): this trait lowers the cooldown of your Tool Kit skills by 20% as well as gives the ability a 10% damage increase. This trait is really good for when you have the Tool Kit equipped. The main usage however will be for PvP and WvW as the Tool Kit does not provide much AoE damage to be effective in PvE. Nontheless a very useful trait if you use the Tool Kit. The only exception you would not take this is if we you run a burst orientated build aimed at dealing damage through your toolbelt skills (aka a Static Discharge build).
Master
 Streamlined Kits (I): this trait gives you swiftness and creates an effect (based on the kit you use) whenever you use a kit. This trait has a 20 seconds cooldown. Since the base duration is also 20 seconds, this trait gives us a permanent uptime of swiftness which is very strong. It allows you to move quickly through any type of content. This trait is often taken as it is such a great addition to any build. The effect that is created with each kit is interesting for some kits and absolutely useless for other kits. Experiment with this in-game!
 Lock On (II): this trait uses Analyze whenever you hit someone in stealth. Analyze is the toolbelt skill of Utility Goggles and applies 10 stacks of Vulnerability and 6 seconds of Revealed. This skill is an absolute Thief Killer. Especially builds like D/P and P/D that rely a lot on stealth get absolutely destroyed by this trait. If you don't need Streamlined Kits' swiftness (because you got Mecha Legs for example), this is an incredible trait to have. That is, for PvP and WvW atleast. It's not really effective in PvE because monsters hardly stealth.
 Takedown Round (III): this trait creates a mine at the target location that explodes after 1 seconds. The target has to be above 50% for this trait the work. This trait hits just as hard as Aim-Assisted Rocket meaning it's pretty powerful. The cooldown is also 10 seconds making it very similar to Aim-Assisted Rocket. The only downside to this ability is the requirement that the target has to be above 50% of it's health. It's a bit odd but still worth taking for when targets don't move around a lot. Often has it's uses in WvW Zerging and General & Dungeons PvE.
Grandmaster
 Kinetic Battery (I): this trait recharges your next used toolbelt skill after you succesfully dodge an attack. The cooldown is 40 seconds. At first, this trait looks really good! Being able to use a skill like Orbital Strike is really powerful. The issue is, the cooldown is 40 seconds. Meaning that you hardly can use this more than once each fight. This makes it a rather weak trait although it can still be quite effective when things die quickly (monsters).
 Adrenal Implant (II): this trait increases your endurance regen by 50%. This is 50% is equal than what Vigor gives you. This makes it an incredibly powerful trait pushing out most traits that grant Vigor. Keep in mind that Vigor and Adrenal Implant don't work together. So if you take Adrenal Implant, don't bother with things that give Vigor like Heavy Armor Exploit and Invigorating Speed.
 Gadgeteer (III): this trait reduces the cooldown of your next gadget skill by 25% when you collected 5 static charges. You collect these charges by getting hit by your opponent. Meaning that after five hits, the trait is charged and the cooldown of your next gadget is reduced by 25%. This is quite a bad trait.. a cooldown reduction of 25% is really not that much. Especially if you compare it to the other Grandmaster traits it's not really a great trait.
Scrapper
The Scrapper trait line is the first Elite Specialization of the Engineer, it focusses around super speed, gyros, passive sustain and stability. An important note to this trait line is that you can't use multiple Elite Specializations in one build.
Minor Traits
 Function Gyro (Adept Minor): this trait gives you access to the Function Gyro. This is a Gyro that revives allies and stomps enemies if you command it to. This gyro will always be on your side but does have a cooldown. Thanks to this minor trait you can continue fighting while the gyro is reviving your ally or perhaps stomping another opponent.
 Decisive Renown (Master Minor): this trait grants five stacks of might and superspeed whenever you revive an ally or stomp an enemy. This is AoE and will be granted to all allies in a radius of 240 (including yourself). This makes stomping and reviving very rewarding for you and your allies and thanks to the other traits, you can soak up quite some damage to ensure this trait procs. Do keep in mind there is a cooldown of 10 seconds on it.
 Impact Savant (Grandmaster Minor): this trait increases the stun and daze duration you apply to your enemies by 25% while lowering the stun and daze duration applied on yourself by 25%. This trait improves your Thunderclap ability on your hammer and makes you a bit more resilient versus stuns and daze. It's an okay addition but nothing major.
Adept
 Shocking Speed (I): this trait grants super speed to you and your allies in a radius of 240 whenever you use a leap finisher or blast finisher in a lightning field. It's a pretty solid trait especially when combined with Rapid Regeneration in the Master tier. Sadly there is a cooldown of 10 seconds on the trait which makes it quite a bit weaker. Still, thanks to Rapid Regeneration you would heal yourself for almost 1.5k thanks to a simple leap in a lightning field.
 Stabilization Core (II): this trait grants two stacks of stability to you and the gyro whenever you activate the Function Gyro. This allows the function gyro to safely stomp your opponent as they can't interrupt it. This is a very great trait for PvP/WvW in outnumbered situations.
 Recovery Matrix (III): this trait grants a base of 5,75 seconds of protection whenever you use your healing skill. If you were to use the Healing Turret (and pick it back up) this will be a 38,3% uptime which is pretty high. It is on demand protection which is excellent versus burst orientated opponents. Especially if you go into Alchemy you will have Alchemical Tinctures which increases your boon duration by 20%. This makes the protection coming from this trait 6.9 seconds. That in combination with Protection Injection gives you quite a bit of protection uptime.
Master
 Rapid Regeneration (I): this trait grants healing (per second) based on if you have swiftness and/or super speed on you. The trait is absolutely amazing when you are able to generate Superspeed fairly frequently. Shocking Speed, Final Salvo and Decisive Renown will help greatly with that and if you use Slick Shoes it's an on demand heal of 1,5k. Also, with Streamlined Kits you will have permanent swiftness which means solid healing per second. In combination with Backpack Regenerator you can end up with a heal per second of over 300 and that does not include any super speed you give to yourself!
 Expert Examination (II): this trait grants weakness and five stacks of vulnerability whenever you stun or daze an opponent. It has no cooldown meaning if you would use Rocket Charge after Thunderclap you could end up with stacking 24 seconds of Weakness and 15 stacks of Vulnerability. That is really incredible! Issue is that you need to be able to frequently stun/daze your targets to really get something out of this trait. If the opponent would stun break your Thunderclap for example and run out of it instantly, you end up with only 9 seconds of Weakness and 5 stacks of Vulnerability. Not to mention that in PvE some monsters won't be affected by daze/stun and thus making this trait useless.
 Mass Momentum (III): this trait grants power based on the amount of toughness you have. So if you would have 500 toughness, this trait would grant 10%*500 = 50 power to you. What it also does is give Might while you have Stability. It works great when you use Elixir B and Perfectly Weighted to have a very solid stability uptime which grants you might. Another option is the Juggernaut trait in firearms although it's only effective if you stay in the flamethrower all the time which won't be the case all the time.
Grandmaster
 Adaptive Armor (I): this trait grants 60 toughness when struck (maximum of five stacks) and lasts for 10 seconds per stack (cooldown of 1 second). It also reduces incoming condition damage by 20%. This is an incredibly powerful defensive trait. Having 300 more toughness is really strong and punishes players and monsters for attacking you. It also works well with Mass Momentum to give you an additional 30 power (with max stacks).
 Kinetic Accelerators (II): this trait grants super speed to you and creates a lightning field. This is great in combination with Shocking Speed to give you another lightning field to leap in for super speed. It's an okay trait, as most of the Gyros are a bit situational I don't see us getting the most out of this trait and thus making this trait rarely picked.
 Perfectly Weighted (III): this trait grants a 10% damage increase on your hammer and grants two stacks of stability whenever you evade an attack. It has a cooldown of 5 seconds and the stability duration is 3 seconds. This means you have a pretty high stability uptime (60%) assuming you dodge an attack every 5 seconds of course. The damage increase on the hammer is also very solid. Especially if you otherwise lack in stability, this trait is very solid and the damage increase on the hammer can be very beneficial.
Runes[edit]
Runes come in different shapes and all add up to a great build. I separated the runes per gamemode as there is quite a difference between what rune works in what gamemode. For example in PvE you aim for maximizing damage so you go for a rune that buffs your damage greatly while in WvW you don't always aim for maximizing damage which opens up other rune options. You can click on the names of the Runes to open a new tab and go to the wiki page of that rune. The rune choices below are the runes I find the most useful. There are plenty of other runes that can work in certain scenarios. If you rather use a different rune, feel free to do so.
PvE
- Rune of the Berserker: this rune is the meta for the Condition Engineer in PvE. This is currently the strongest PvE Engineer build for Dungeons/Fractals/Raids. It gives both condition damage and power damage and the 5% condi+power modifier is very great. Worth to invest your gold in!
- Rune of the Nightmare: in case you can not afford the Rune of the Berserker yet, you can also use this rune set. I do recommend to slot in a Coral Orb instead of a full set of the nightmare rune as the fear is really not helpful in PvE. It could damage your team more than it will damage the enemy.
- Rune of the Scholar: this rune is used for maximizing damage output on a Power Engineer. It provides an incredible strong damage output thanks to the power, ferocity and 10% damage increase above 90% of your health. To make this rune worth it you have to be able to maintain 90%+ of your health though around 50-60% of the time. This shouldn't be a big issue though but if it is, I suggest going with a cheaper rune at first until you are able to manage your health better. The Rune of the Flame Legion is a cheap alternative. You can always just go for this rune and just try your best to keep your health above 90%.
- Rune of Strength: a strong alternative to the rune of the scholar. It gives you more might duration which will come in handy as you stack might often anyways. The damage increase of 5% is therefore permanent. As you want to make use of the additional might duration, this rune helps you with making proper use of your combo fields and blast finishers. It would be a waste to ignore getting additional might right? Right. This rune has less risk involved than the scholar rune as you don't have to pressure yourself to stay above 90% of your health all the time.
- Rune of the Flame Legion: when you don't have a lot of money, this is an excellent rune. We will be able to apply permanent burning thanks to the Flamethrower's Incendiary Ammo and Napalm which means we always get the damage increase. Keep in mind that your damage output won't be as high as when you run with the rune of the scholar but if you are short on money and don't want to fall too much behind other Engineers' DPS, this is a solid option.
WvW
- Rune of the Antitoxin: this rune is excellent for condition orientated builds. It gives you raw condition damage and five stacks of might when you get hit by poison or torment which will happen in almost every encounter. This rune also gives 24% less condition duration on yourself which is very strong. Engineers are generally weak versus conditions so any kind of reduction is strong especially when you combine it with condition reduction traits/food.
- Rune of the Aristocracy: a very strong rune when you are stacking might often. You need some proper understanding of your profession though if you wish to run with this rune as you need to know when you should blast for Might and when for Healing. For example if you blast for might with the help of your bomb kit only before a battle, this might not be a rune for you as then you will only make use of the additional might duration in the first minute of the fight. You should be blasting during the fight as well when you got the chance (which is when you don't need healing). A very strong rune when roaming especially in groups.
- Rune of the Scholar: a very powerful damaging rune that is excellent for burst orientated builds like static discharge. Keep in mind that this will make you very glassy meaning you can get killed within a couple of hits. Nonetheless the damage is insane. You can essentially just grab your PvE power set and go wild in WvW. A build that will suit that is a Static Discharge build which is aimed at getting strong burst damage out within a few seconds (one of the strongest burst builds in the game currently).
- Rune of Strength: a very solid rune for power orientated specs that make good use of might. Think about specs like HGH, a Flamethrower Juggernaut spec and specs with the Bomb Kit in it. Sigil of Battle will help greatly here as well. This is the offensive might rune choice compared to the rune of hoelbrak.
- Rune of Hoelbrak: very similar to the rune of strength but instead you get a duration reduction of 20% from incoming conditions which the Engineer is weak against. As so many players run condition damage builds in WvW having reduction durations on conditions is huge. I am running this rune on HGH specs with great success. This is the defensive might rune choice compared to the rune of strength.
- Rune of the Pack: this rune is in terms of damage pretty much equal to the rune of strength. What this rune shines at is group support as the rune has a AoE buff that grants all allies in range swiftness, might and fury. That is really strong especially because of the fury. The only downside is that it does not offer you might duration but instead gives you swiftness duration which is really pointless for an Engineer as we already have permanent swiftness through Streamlined Kits. Nonetheless it's funny to be able to sit at 2 minutes of swiftness constantly. This is a great choice when you are playing a power oriented or hybrid build. I run this rune on my Celestial Engineer build.
PvP
- Rune of Balthazar: this is an incredible strong rune in PvP. You can't get condition duration food in PvP thus the additional condition duration on your strongest condition is very strong. With this rune you will also apply AoE burning when you use your healing skill (which will be often) which fits perfectly in a capture point. So if an opponent is fighting you, he will get burned just by you using your healing skill. This is simply the best rune for a Condition Engineer in PvP. Pick this one whenever you are playing as a condition Engineer.
- Rune of Strength: a very strong rune for Celestial Engineers. It gives us a strong increase in power while also providing us with a 5% damage boost which we will make use of often thanks to Sigil of Battle. You can also use this rune when running a build focussed around might stacking like HGH or Juggernaut builds. Always remember to utilize the might duration with whatever build you are playing, simply blasting in other's fire fields already does a lot.
- Rune of Hoelbrak: very similar to the rune of strength but instead you get a duration reduction of 20% from incoming conditions which the Engineer is weak against. This is the defensive might rune choice compared to the rune of strength.
- Rune of the Pack: this rune is in terms of damage pretty much equal to the rune of strength. What this rune shines at is group support as the rune has a AoE buff that grants all allies in range swiftness, might and fury. That is really strong especially because of the fury. The only downside is that it does not offer you with might duration but instead gives you swiftness duration which is really pointless for an Engineer as we already have permanent swiftness. Nonetheless it's funny to be able to sit at 2 minutes of swiftness constantly. This is a great choice when you are playing a power oriented or hybrid build.
Sigils[edit]
I go over the most viable sigil choices and those that are most used in PvE, WvW and PvP. I separated the sigil choices per game mode as every single game mode uses a different set of sigils. Combining the three would only cause confusion. In PvE you aim for increasing your damage as much as you can while in PvP and WvW you often opt for defensive sigils. You can click on the names of the Sigils to open a new tab and go to the wiki page of that sigil. The sigil choices below are the sigils I find the most useful. There are plenty of other sigils that can work in certain scenarios, this is just what I find the most useful for my builds. If you rather use a different sigil, feel free to do so.
PvE
- Superior Sigil of Malice: this sigil increases your condition durations by 10%.Condition Duration is stronger than Condition Damage due to the fact that one additional tick of for example Burning can already add 500 additional damage whereas 100-200 additional condition damage will not be able to reach that amount. This is a core sigil on the Condition Engineer specs.
- Superior Sigil of Geomancy: this sigil inflicts three stacks of bleeding on up to five enemies near you. Since you are stacking monsters often, this sigil will hit pretty much always. The additional bleeding is great and the most optimal sigil for the Condition Engineer when it comes to inflicting damage.
- Superior Sigil of Force: a flat damage increase of 5% which is actually really strong for the Power Engineer. In PvE it is really all about dealing damage so any increase in that is much appreciated.
- Superior Sigil of the Night: this sigil is used in combination with Sigil of Force when doing dungeon/fractals/raids on a Power Engineer, it gives a 10% damage increase when playing at night (in-game). Keep in mind that this sigil does not work for every type of content. All Dungeons for example are at night except for Caudecus's Manor, Honor of the Waves and The Ruined City of Arah.
- Superior Sigil of Accuracy: this sigil is used in combination with Sigil of Force when you are playing a Dungeon that is in the day (Caudecus's Manor, Honor of the Waves and The Ruined City of Arah). The additional precision is very strong for an Engineer due to our many on-crit sources. The 10% damage increase from Sigil of the Night is a must though when not playing the dungeons mentioned above.
- Superior Sigil of Frailty: this sigil has a 50% chance to apply a stack of vulnerability. It has a cooldown of 2 seconds. Due to Grenades hitting multiple times that all can proc this sigil, it's a great sigil to have. It's especially effective while pugging to maintain a high amount of vulnerability on bosses at all times.
- Sigil of X Slaying: these sigils are used to increase the damage versus a certain monster by 10%. Use these kind of sigils if you truly wish to min-max. It will require multiple ascended weapons.
WvW
- Superior Sigil of Energy: a very strong sigil when not making use of Adrenal Implant. This sigil pretty much covers what Adrenal Implant does therefore giving you the option to select a different trait. It is not advised to use both Sigil of Energy and Adrenal Implant as that is an overkill in endurance regen.
- Superior Sigil of Cleansing: due to the Engineer's weakness to conditions, this is a great sigil. It removes one condition every 9 seconds and 2 conditions every 18 seconds which is equal to the Healing Turret's condition removal. This sigil is absolutely incredible in WvW because of the fact so many players play condition orientated builds nowadays. For an Engineer it's also on demand cleansing since we can proc the sigil by swapping to (or out of) a kit.
- Superior Sigil of Intelligence: this sigils is great for ensuring the maximum amount of damage comes through on your target. Often used in combination with a power orientated spec and the Rifle. For example you can effectively use an Overcharged Shot, Blunderbuss and Jump Shot dealing massive damage due to the crits. If your crit chance is high (50%+) don't bother with this sigil as you will most likely crit anyways.
- Superior Sigil of Doom: this sigil will apply poison to the target on hit when you weapon swap. Although we have access to a lot of poison already when running a typical condition damage build, this is still a strong sigil as poison is a strong conditions very many opponents. The reduction in healing does a lot. If you run a Hybrid setup, this sigil can also be quite beneficial.
- Superior Sigil of Torment: this sigil gives you access to a condition that we don't normally have access to. This sigil is mainly used as coverup for stronger conditions like burning. For example when an enemy uses a condition removal that removes one condition right after you got a stack of torment on them, the enemy will remove the stack of torment while your burning keeps ticking. The condition torment is strong by itself as well making this a very solid sigil for condition damage builds.
- Superior Sigil of Earth: this sigil is very strong in combination with other bleeding effects like Sharpshooter and Shrapnel. This can be very strong in combination with the Grenade Kit as if you use the Shrapnel Grenade skill on an enemy, you are able to stack 7-8 stacks of bleeding when everything procs which is really strong. It also works well with the Elixir Gun where you can inflict some serious bleed pressure at range with Tranquilizer Dart.
- Superior Sigil of Generosity: this sigil is an excellent replacement for sigil of cleansing. Instead of removing a condition from you, it will apply the condition to you enemy where it doesn't matter how much stacks you have on you. If you have for example 20 stacks of bleeding on you, you can transfer that over to your enemy by just critically hitting him. The only downside to this sigil is that you have to hit something to make it pop which is not always an option. This sigil is also very expensive.
- Superior Sigil of Air: a very strong sigil when aiming for a burst oriented build. For example with a static discharge build this sigil is very good as it will cause additional burst to your enemy. Keep in mind that this sigil can not crit and thus you are not able to achieve incredible high numbers with this sigil although 1k-1,5k damage is the normal amount which is perfectly fine as the cooldown is only 3 seconds. Keep in mind that this sigil is a projectile which means it can be reflected back at you.
- Superior Sigil of Fire: this sigil is very similar to the sigil of air, the difference is that the damage is a little bit lower but it's AoE. It's basically an explosion around the target. When a group is stacked this sigil can do very strong damage but if it is only able to hit one target it is not that strong. Another advantage though is that this is not a projectile which means it can't be reflected back to you.
- Stacking Sigils: stacking sigils will increase a specific stat by 250 when maxed out. For example Sigil of Corruption gives you 250 more condition damage. The clear downside with these sigils is that if you get downed or die, you will lose all stacks. Also, Sigil of Battle is not far behind this sigil with 180 condition damage and 180 power although that needs time to build up. If you think you can survive most encounters without going down or dieing, this is a good sigil choice.
PvP
- Superior Sigil of Energy: a very strong sigil when not making use of Adrenal Implant. This sigil pretty much covers what Adrenal Implant does therefore giving you the option to select a different trait. It is not advised to use both Sigil of Energy and Adrenal Implant as that is an overkill in endurance regen.
- Superior Sigil of Doom: this sigil will apply poison to the target on hit when you weapon swap. Although we have access to a lot of poison already when running a typical condition damage build, this is still a strong sigil as poison is a strong conditions very many opponents. The reduction in healing does a lot. If you run a Hybrid setup, this sigil can also be quite beneficial.
- Superior Sigil of Hydromancy: this sigil causes AoE chill whenever you weapon swap. Chill is a very strong condition and since we weapon swap often, we can always proc the sigil right when it's off cooldown. Try to use this sigil smart though, it would be a waste to swap kits at range as then you would miss the sigil's attack. A good combination for this sigil is the Tool Kit where you pull the target, hit them with your pry bar then weapon swap.
- Superior Sigil of Geomancy: this sigil causes AoE bleeding whenever you weapon swap. It inflicts 3 stacks of bleeding to anyone around you which is quite strong. Just like the previous sigil, try to use this sigil smart, it would be a waste to swap kits at range as then you would miss the sigil's attack.
- Superior Sigil of Intelligence: this sigils is great for ensuring the maximum amount of damage comes through on your target. Often used in combination with a power orientated spec and the Rifle. For example you can effectively use an Overcharged Shot, Blunderbuss and Jump Shot dealing massive damage due to the crits. If your crit chance is high (50%+) don't bother with this sigil as you will most likely crit anyways.
- Superior Sigil of Generosity: this sigil is an excellent sigil as a replacement for sigil of cleansing as that sigil is not available in PvP. Instead of removing a condition from you, it will apply the condition to your enemy where it doesn't matter how much stacks you have on you. If you have for example 20 stacks of bleeding on you, you can transfer the entire stack over to your enemy. The only downside to this sigil is that you have to hit something to make it pop which is not always an option.
Food[edit]
Food is generally meant to ‘give that extra edge' over your opponent. However, there are some very powerful food choices out there that really can make a big difference. This section is only for WvW and PvE as in PvP you are not able to use food. I will separate PvE and WvW as there is quite a big difference between the food options as in PvE you aim for maximizing damage with food while in WvW that is not always the case. As I am sure for most of you in-game money is also, I will also list the ‘budget' food choice. You can click on the names of the Food to open a new tab and go to the wiki page of that food. Notes that the food choices below are what I choose between when I do either PvE or WvW. There is plenty of other food options that can work in certain scenarios, this is just what I find the most useful. If you rather use other food, feel free to do so although I can always recommend using condition duration food since it works well with basically any Engineer build.
PvE
- Koi Cake: this is the best food choice for the Condition Engineer and it is a great budget option for the Power Engineer. This food grants both condition duration and condition damage which are the main stats the Condition Engineer should get. You can almost never go wrong with Koi Cakes when you play Engineer!
- Bowl of Sweet and Spicy Beans: in case you wish to play as a Power Engineer this is the most optimal food choice. It is quite expensive though to make which often doesn't justify using for casual play. In case you want to be as quick as possible (for example during a raid or a speedrun), then you should use this food as a Power Engineer. If not, I recommend using Koi Cakes instead. What really matters is the condition duration.
- Slaying Potions: these are your default nourishment options. They buff the damage you deal to the specific monster in the Dungeon/Fractal by 10% while also decreasing the damage you get hit with by the specific monster by 10% If you are not doing dungeons/fractals, you can go for Superior (or Hardened) Sharpening Stones when running power or Master (or Quality) Tuning Crystals when running condition damage.
WvW
- Koi Cake: the most used food by an Engineer in WvW by far. The increase in condition duration is incredibly strong for an Engineer as we are able to apply a lot of conditions with both a power and a condition damage build. The added condition damage is always a good addition although you can also go for Bowl of Sweet and Spicy Beans or Prickly Pear Stuffed Nopale for additional power. Those two food choices are very expensive though.
- Omnomberry Ghost: this food is excellent for power orientated builds, specifically burst builds like static discharge. If you simply can't make use of the increase in condition duration, grab this food. It's a solid damage increase through the lifesteal which is armor ignoring damage. The downside might be that you get turned into a ghost for the first 5 minutes of the food. It's only 5 minutes out of the 40 minutes duration though!
- Plate of Steak and Asparagus: my default choice when it comes to power orientated builds. This food gives me both power and precision which are great stats for a power orientated build. If I am not able to apply that many conditions with my build or/and the build does not involve around soft-cc conditions, then I go for this food.
- Bowl of Lemongrass Poultry Soup: this food is often used while running in larger groups like a ‘Zerg' or ‘Blob'. The minus condition duration prevents you from falling behind to slows or the general damaging conditions. It still has a strong use while roaming as well however. An Engineer is weak versus conditions so any boost we can get to decrease our weakness versus conditions is really good. This is basically the defensive choice where Koi Cake is the offensive choice, make your own choice depending on what you think you need.
- Superior (or Hardened) Sharpening Stone: this is your default choice when running a power orientated spec. It gives you additional power based on your toughness and vitality. If you run hybrid, this is also an excellent choice if you wish to lean more towards power instead of condition damage. You can go for Superior (expensive but strongest) or Hardened (less-expensive and slightly weaker). The choice depends on your money and if you are willing to maximize your character or not. I personally just use the Hardened Sharpening Stones.
- Master (or Quality) Tuning Crystal: this is your default choice when running a condition damage orientated spec. It gives you additional condition damage based on your toughness and vitality. If you run Hybrid, this is also an excellent choice if you wish to lean more towards condition damage instead of power. You can go for Master (expensive but strongest) or Quality (less expensive and slightly weaker). The choice depends on your money and if you are willing to maximize your character or not. I personally just use the Quality Tuning Crystals.
- Master (or Quality) Maintenance Oil: this nourishment is rarely used. Often you find yourself with enough precision through your gear that this is really not needed. In a power orientated build you are often making use of precision on your armor/weapons already as you need it for the ferocity. For example if you are going full berserker you will sit at a very high critical hit chance making this nourishment really not needed. For a condition damage orientated build you don't need much precision because you only need it to ensure a proc from Incendiary Powder.
Blast Finishers and Combo Fields[edit]
This part is fully dedicated to Blast Finishers and Combo Fields. This part will tell you what skills will grant you blasts and what skills will grant you fields. You can then use this information to make combination of skills to cause certain effects like healing or might for you and your allies. I went over every single skill that causes a blasting effect and every single skill that causes a field to give you a proper understanding of the abilities and their uses. Making good use of your Blast Finishers is really important as it can give your group and incredible boost in whatever is needed. Think of 12 seconds of Stealth which you can use to pass by a group of monsters or flank your enemies in WvW or 12 stacks of Might which suddenly ups 5 players' (including you) power and condition damage by 360, that is just huge! To make this happen though you need to make use of the fields you have or fields that your allies lay down and that is why these two things, Blast Finishers and Fields belong together.
Blast Finishers
- The Blast Finishers we have are:
- Healing Turret
- Rifle Turret
- Rocket Turret
- Net Turret
- Flame Turret
- Thumper Turret
- Magnetic Inversion (offhand shield)
- Throw Mine
- Rocket Boots
- Acid Bomb (Elixir Gun's 4th skill)
- Big Ol' Bomb (Bomb Kit's toolbelt skill)
- Flame Blast (Flamethrower's 2nd skill)
- Supply Crate
- Orbital Strike (Mortar Kit's toolbelt skill)
- Evasive Powder Keg (with Thermobaric Detonation)
- 1. Healing Turret
- The healing turret is our strongest healing skill, this is because of the condition removal which Engineers kind of lack, the amount of healing done and the water field + blast finisher. You don't use the Healing Turret like other turrets though, you will pick it right back up after placing. This is what you have to do:
- Press the Healing Turret skill.
- Press the skill again, overcharging it which also creates a water field.
- Pick it back up or blast it by detonating, creating a water blast finisher which will grant you additional healing.
- By picking it back up right away, you will reduce the cooldown by 5 seconds but reduce the amount of healing you do. You have to make the choice between additional healing (or a blast finisher) or the reduced cooldown. It depends on the situation but you will generally pick it back up unless you are in a critical situation.
- The blast finisher detonates on you instead of at the turret so you can move away from the turret, stand in another field like a fire field to give you 3 stacks of Might instead of healing. This can be a really nice bonus if you don't need the additional healing nor reduced cooldown. This works for all turrets and it is smart to make use of it, you don't want to blast something useless like 3 seconds of weakness instead of 3 stacks of Might.
- 2. Rifle Turret, 3. Rocket Turret, 4. Net Turret and 5. Flame Turret
- These turrets have no special usage if you just wish to make use of the blasts. You simply have to place them down and detonate them to get the blast finisher. Of course the abilities got a lot of other uses but since this part is about blasting, we don't go over those things. I advice you to use the abilities before dropping your field though as the animation of placing them down is quite long.
- 6. Thumper Turret
- The thumper turret has three blasts, this makes it the strongest skill for blast finishing. The only issue with it is the long cooldown which makes other skills better for blast finishing overall unless the fight is over before other skills (like Rifle Turret) are able to provide with more Might for example. Getting three blasts with the thumper turret is faily simply, this is what you have to do:
- Press the Thumper Turret skill.
- Press the skill again, overcharging it.
- Detonate the Thumper Turret, this will cause two blast finishers from the detonate turret ability and the overcharge ability.
- Use the Toolbelt skill which also a blast finisher.
- That't it, this will cause three quick blasts which you can use for additional might, stealth, healing or whatever your group needs.
- 7. Magnetic Inversion
- Magnetic inversion is the first skill from the Engineer's shield. It is a reflect and pushback but also a blast finisher, the idea is that you press the skill twice as the first time you press it, it will create a magnetic aura around you which blocks projectiles, it also makes you unable to move. The second time you press it, it will release the magnetic aura pushing back target and creating a blast finsher. A quick double press will grant you the blast finisher without needing to stop moving or anything.
- 8. Throw Mine
- This ability is really basic for blasting, you simply have to throw down the mine and then manually explode it. This will create a blast finisher. Always use this ability before creating the field you wish to use as the animation takes a while which could mean other blasts can't go off in time.
- 9. Rocket Boots and 10. Acid Bomb
- The blast finisher on the Rocket Boots ability kicks in right when you finish the animation of this ability which means it is highly adviced to use this ability as the last one when you are comboing abilities. The same thing applies for Acid Bomb, the animation is quite long and thus you should always use it as the last finisher when comboing multiple abilities. It is also important you cancel the animation if you have to stay at a certain position (for example when on the edge of a cliff you don't want you shoot yourself off it just for the blast finisher). To cancel the animation of this skill you have to be in a kit., then you use the ability and immediately press the weapon swap/drop bundle button to cause the animation to stop.
- 12. Flame Blast
- This ability is similar to the Throw Mine ability as it also requires you to detonate before getting the blast finisher. Due to the low cooldown and it dealing some great damage makes it an ideal blast finisher while fighting opponents. The ability also explodes on impact so if you are stacking and fighting a monster it will automatically cause a blast finisher which makes it very easy to use in PvE.
- 13. Supply Crate
- This ability is an Elite which means it has quite a long cooldown. You will make use of the blast finisher mainly in PvE and PvP as there it is easier to use. Keep in mind it has a decently long cooldown so try to use it quickly when a field goes up and preferably on a good position.
- 14. Orbital Strike
- This ability deals a large amount of damage but has a delay of 1 second before impact. It is a blast finisher and when traited with Siege Rounds can become a double blast finisher as well as deal double damage. Pretty strong when timed correctly!
- 15. Evasive Powder Keg
- This is a trait that creates a bomb on dodgeroll. This can happen every 10 seconds. In combination with the trait Thermobaric Detonation, this trait becomes a blast finisher. This will allow for additional blasting but does require proper timing. You can't randomly dodge as then you risk the chance of wasting this blast finisher.
Fields
- The Fields we have ourselves are:
- Fire Field
- Water Field
- Smoke Field
- Poison Field
- Light Field
- Ice Field
- Ethereal Field
- Lightning Field
- 1. Fire Field
- Let's start off with pretty much the most important one, the Fire Field. If you use a blast finisher while this field is active you will give 3 stacks of AoE Might, meaning everyone near you (including you) gets 3 stacks of Might. Might is an incredibly strong boon and so making good use of it is vital for any type of content. To give you an idea, the 3 stacks of Might from using just one blast finisher already provide you with an additional 105 power AND 105 condition damage. Skills that are able to create a Fire field are: Flame Bomb (Bomb Kit's 2nd skill), Napalm (Flamethrower's 4th skill) and Throw Napalm (Flame Turret's toolbelt skill).
- 2. Water Field
- The water field is used a lot while fighting as an Engineer, this is mainly because your primary healing skill, the Healing Turret, already creates one. What this does is heal you for a decent amount when blasted in, with good use of this field it can be a life saver to you or/and your allies if you are able to use multiple blast finishers at once in the water field, healing for a very high amount. Skills that are able to create a Water Field are: Cleansing Wave (the Healing Turret's overcharge), Regenerating Mists (the Healing Turret's toolbelt skill) and Elixir Shell (Mortar Kit's fifth ability).
- 3. Smoke Field
- The smoke field is used for stealth, something that is really strong in any type of content. It can get you past a group of monsters or can get you out of an outnumbered fight. For every blast you do in a Smoke Field you get 3 seconds of stealth but don't forget you lose some of the duration when activating skills. A great skill for stealth is the Thumper Turret as it is very quick while granting you 3 blast finishers. Skills that are able to create a Smoke Field are: Smoke Bomb (Bomb Kit's 4th ability) and Smoke Screen (Flame Turret's overcharge).
- Note: the Elixir S also gives you stealth, it simply does not create a Smoke Field.
- 4. Poison Field
- The poison field will give the weakness condition when blasting in it, deadly for players that rely on power orientated attacks as their damage basically gets halved. The issue is though that it only works in a few situations as it hurts people the most that rely on a burst (think of the Static Discharge Engineers). It has no use in PvE though as blasting Might is much stronger there and bosses generally have (almost) immunity to the condition. The only skill that is able to create a poison field is Poison Gas Shell (Mortar Kit's 2nd skill).
- 5. Light Field
- The light field will gives us retaliation for 3 seconds when blasting in it, this is deadly versus opponents that do multiple hits in a quick succession like Longbow Rangers or Engineers using either the Grenade Kit or the Flamethrower. It is highly situational though as you also got other sources to give you Retaliation like Elixir B and some extra might stacks might be more welcome. The skills that are able to create a light field is Super Elixir (Elixir Gun's 5th skill), Toss Elixir R, Toss Elixir U (if you get lucky and get the wall of reflection) and Flash Shell (Mortar Kit's 4th ability).
- 6. Ice Field
- The ice field will give us a Frost Aura when blasted in. This is incredibly powerful for WvW and PvP. A frost aura reduces the damage dealt to you by 10% as well as chill attackers for a brief moment. This aura prevents people from chasing you (as they keep getting chilled and thus their movement speed is lowered) as well as make you more resilient to attacks during a fight. The only skill that is able to create an ice field is the skill Endothermic Shell (Mortar Kit's 3rd ability).
- 7. Ethereal Field
- The ethereal field will give us chaos armor when blasted in. This effect gives yourself random boons while give your oppponent a random condition when struck. It's a great effect but often not worth blasting in especially since it could have very low impact (opponent not hitting you, you only receiving bad boons). We can create this field by using Streamlined Kits (in Tools) in combination with The Mortar Kit. By swapping to the mortar kit you create a puddle which is an ethereal field which you can then blast in.
- 8. Lightning Field
- The lightning field will give swiftness when blasted in. This is great for allies that don't have access to a lot of swiftness. You could even opt to remove your own swiftness source (Streamlined Kits) and rely on blasting in lightning fields. We can create this field by using Thunderclap (Hammer #5), Final Salvo (Scrapper Grandmaster II), Spare Capacitor (Shredder Gyro's toolbelt skill).
Combos[edit]
This section of the handbook is dedicated to the various combos with abilities. There are a ton of ways to combo abilities and I am going to list them down right here. Of course it's impossible to go over every combination of abilities but I will cover the most used ones and will talk about variations on them. There are always more combos out there and some might suit your play style more while it's not even listed here, if that is the case just go ahead and use it. Just always keep in mind if your combo will work often or not and if it's worth the cooldown cost. The combos you use often in PvE are under Universal.
Universal
This is a very small (but often not used) combo. I often meet Engineers dropping their Big Ol' Bombs and using their Magnetic Inversions just for the effect it gives which is launching your opponent in case of the Big Ol' Bomb or pushing back your opponent in case of the Magnetic Inversion. Sure, that can be effective WHEN it actually hits. But what if it doesn't? Your opponent can easily avoid a Big Ol' Bomb. Well, without any field under it you just wasted a long cooldown ability. What you could have done is dropped a Fire Bomb under Big Ol' Bomb or Magnetic Inversion. In case you then miss the ability you still get 3 stacks of Might (90 power and 90 condition damage) which is also AoE and thus grant your allies the same amount.
This combination of abilities gives you 9 stacks of AoE Might (270 Power and Condition Damage) or 9 seconds of Stealth. This combination of abilities is often used in Dungeons/Fractals and can be done with the power or condition spec. The might will give you a huge damage boost especially since it's AoE meaning it can affect up to 5 of your allies, if you are in Dungeons (and stacking) your entire group will get 9 might. This is really strong before and during the fights so whenever you can, try to blast for Might. If you need to run past a group of enemies and in case of WvW see a huge zerg approaching, you can use this combination to stealth away safely. Do keep in mind though that Acid Bomb leaves a puddle so if the enemy stands in it you get revealed. With proper placement of this puddle this won't be the case and if it is impossible to place without getting revealed you can just skip the Acid Bomb ability.
This combination is also referred to as the ‘Wombo Combo' as it will give you the maximum amount of healing possible with just the healing skill. It's basically using your healing turret, then overcharging it which is called Cleansing Burst. Then since Cleansing Burst creates a combo field you are able to blast in it by detonating the Healing Turret which will cause a water combo field healing you for an additional amount. You generally use this move if you really need the healing right away due to very low health, you can even combo it with other blast finishers like Magnetic Inversion. If you just need a little bit of healing or a condition removal, you skip Detonate Healing Turret and instead pick the turret back up again. This will reduce the cooldown by 5 seconds.
This toolbelt ability from the Healing Turret creates a water field meaning you are able to blast in it with a blast finisher. The ability itself isn't that strong but if you make use of the water field it becomes a really strong toolbelt ability. For example a basic move is using Regenerating Mists then using Magnetic Inversion to trigger a combo finisher and heal for an average of 2k. What you can also do when you run turrets is use Regenerating Mists and detonate your turrets in it which can cause (if you choose so) multiple blasts. Also, you can use leaps to get healing as well, this means that you can also use Jump Shot from the Rifle to get healing with this skill.
PvP and WvW
This is a very basic combo but often does not get utilized. This combo allows you to ensure your opponent is not able to dodge your Grenade Barrage. Whenever you immobilize someone, you can unleash a ton of burst with the Grenade Kit by simply using your Grenades on the target's location. Keep in mind that they can still block or go invulnerable though.
These two abilities are from the Tool Kit and are often used together. This combination works because if you pull someone with your Magnet they are not able to move for a split second making you able to freely hit your Pry Bar ability on them dealing strong direct damage as well as applying 5 stacks of Confusion. Keep in mind though that if you pull someone at max range he won't come all the way to you as there is a max distance that can be pulled. This means if you do that, be prepared for it as you will not be able to hit your Pry Bar. The Magnet also bugs out every now and then as sometimes the target is on your screen still far away while the game already registered him as being right in front of you. It's really odd but it does happen from time to time. The best moments therefore to pull a target is at medium range so that it barely bugs out.
This combo is used in combination with the Explosives trait line. In this trait line, there is a minor trait named Explosive Powder that knocks back targets whenever your turrets gets destroyed or you destroy the turrets. By making use of this combo, you can ensure that the target gets knock backed by the turret. You can then follow it up by using a Magnet or an Overcharged Shot while he is not able to move because of the knock back. You can do this with any turret as long as you got the Accelerant-Packed Turrets trait. I do not advise you to use it for the Healing Turret as you can then potentially waste your heal.
This combination will prevent you from getting knocked back due to the Overcharged Shot while still being able to launch your opponent. This works because Toss Elixir B gives you stability which grants immunity to CC (which means you won't get knocked back). A strong combination of abilities which is often used in a HGH Power build like my FT/Rifle spec. Keep in mind that this is primarily for PvP and WvW as in PvE it doesn't really have such a big impact. After you launched your target you can follow it up with whatever you have, this works well with the Grenade Kit for example as the grenades can often miss and when they are launched they can't move. You could even follow it up with a Net Shot to continue dealing damage to them while they are stuck at the exact same position still.
Juggernaut is a trait that grants you Might and Stability while using the Flamethrower. You can time the stability time right so that you are able to use Overcharged Shot without CC'ing yourself. This is incredibly powerful combo as it allows you to use Overcharged Shot without any drawbacks every single time it comes off cooldown. This allows you to follow up Overcharged Shot with for example a Blunderbuss or/and a Jump Shot. It's a really scary combo for your opponent!
This is a combination of abilities used by the Scrapper, the first Elite Specialization of the Engineer. Thunderclap stuns the target and creates a lightning combo field. If you leap through this combo field, you daze the target. Since Rocket Charge consists of three leaps, you can effectively stun the target and daze him three times. This works well in combination with the trait Expert Examination which can potentially cause 15 stacks of Vulnerability and 24 seconds of Weakness.
Tricks[edit]
This section is dedicated to the various tricks the Engineer can do. When you master these tricks it will improve your overall skill with the profession as well as help you in various situations. For example if you are on the edge of a cliff and you wish to blast finish with your Rocket Boots you don't want to shoot yourself off the cliff. Well, there is a small trick for that to still make use of the blast finisher and not get shot off the cliff!
Ability Cancelling
There is a trick you can do to cancel your abilities, if you do this right the ability will only go on a 3 second cooldown instead of the normal cooldown. This can be really helpful when you notice that the opponent tries to counter the move you are making. An often used move is the cancelling of the Magnet ability as if you see your opponent dodge roll when it is about to go off you can cancel it quickly to use it again 3 seconds later. There are multiple ways to cancel an ability.
- Kit Cancelling
- Equip a kit, it doesn't matter which kit you use.
- Use a skill that is not instant cast.
- Press ‘Stow Bundle' which will cancel the ability.
- Weapon Swap Cancelling
- Use a skill that doesn't require you to be equip a kit (toolbelt skills are fine).
- Stow your weapon (Default hotkey: *)
- ESC Cancelling
- Use ANY skill you like.
- Press ESC to cancel the ability.
Downside here is that if you press ESC twice, it opens a menu. You can rebind ESC through an external program.
ESC cancelling is by far the most effective way of cancelling abilities. It simply requires a little bit more effort as you will need an external program to change the function of the ESC key. You can not do that under the default keybinds. If that is too much (or too complicated) for you, I suggest to just play around with kit and weapon swap cancelling.
Stomping and Reviving
This post is about the various ways you can stomp an opponent without getting CC'ed by the opponent and thus taking more time to actual kill the opponent and reviving your allies effectively without making them go down. I list all the ways I know and I add more if I find more or someone of you finds more.
Stomping
Smoke Bomb: use smoke bomb and start stomping, this will blind the opponent multiple times and he will (most likely) miss his CC. The issue here is that when the opponent starts auto attacking while you are stomping him as that could potentially cause you to get hit by it's CC because the blinds come in every pulse which is 1 second. Most CC abilities have a cast time shorter than a second so if they combine an auto attack with their CC ability they are most likely able to hit you. This does not happen that often though so it's still a reliable method.
Flash Grenade: a risky choice but it can work out well, it will blind the target on hit but only once and thus if the enemy start auto-attacking first, he will be able to use his CC. If the opponent does not realise he is blinded due to not knowing what the flash grenades does you can still go for the stomp as he will most likely waste the CC ability thanks to the blind.
Elixir S: this is the strongest way of stomping an enemy, you will be invulnerable to ALL attacks and thus it is almost impossible for your enemy to stop the stomp. The only way the enemy is able to stop the stomp is by reviving their ally or if the ally gets knocked back by an attack from your allies.
Toss Elixir B: this will grant you stability and thus makes you invulnerable to any CC thrown at you, the opponent is able to damage you though so keep that in mind when your health is low. Keep in mind that enemies can strip stability making you vulnerable to CC again.
Smoke Vent: this is the Flamethrower #5 skill, use it right when the opponent wants to use his CC while you are channeling the stomp. This will blind him and you can finish your stomp as this ability does not interrupt you while stomping. This is because the skill is instant cast and thus will not stop any animation.
Important: not every profession can be stomped with this method as some can simply teleport away. These tricks work on Necromancers, Warriors, Engineers, Rangers and Guardian but do not work on Mesmers, Thieves and Elementalists. Also, there are more methods but these are generally the most reliable ones.
Reviving
Toss Elixir S: toss this on the target to get him stealthed, it is very important he does not attack as that would get him out of stealth again. Someone who is stealthed can't be stomped and an opponent who is stomping already when you throw Elixir S won't get the stomp off either. Try to use this ability while near the target so you get stealthed as well, it ensures both you and the target survive as the enemy does not know where you are. Of course if they are aware what the ability does they will AoE the location your ally died though.
CC the Enemy: you can make use of Shield #4 or Rifle #4 to get the opponent of your ally. Then you can use Big Ol' Bomb (if you have bomb kit equipped) to stop him from trying again while you are reviving. This is only effective if the enemy is not blinding you, not blocking and does not have stability.
Toss Elixir R: this will create a circle that is able to revive allies, it is extremely strong and can revive multiple allies at once. Keep in mind that it is affected by poison if your ally has it on him and it has a long cooldown. This ability is best used in coordination fights.
Safe Waypointing
Ever been in that spot in WvW where you see a (huge) group of enemies approaching you which you clearly can't escape from nor beat? Well, your best option is to waypoint to the nearest waypoint then but what if you can't do that in time before they cause you to be in combat? Well, here are a few tricks that will keep you out of combat so you can safely way point away.
Blocking all damage by using your Gear Shield of the Tool Kit or the Static Shield from the Shield.
If you block all damage the opponent is inflicting on you, you will stay out of combat. This could give you that extra time you need to waypoint back to base. Keep in mind that there are a few attacks that go through a blocking effect like the poison grenade from the Grenade Kit. If that happens, you will get in-combat. An important thing to realise is that this does not work with Static Shield from the Shield if the enemy is in melee range. This is because the target will get stunned when he hits you in melee range which will cause you to go in-combat.
Using Elixir S to become invulnerable to all attacks
By using Elixir S, not a single attack will get through. This will mean that you will stay out of combat for as long as the skill lasts. This is an equal duration as the Gear Shield from the Tool Kit which is plenty of time to open up your map and click on the waypoint. No attacks can go through this elixir meaning you are completely safe from any harm for the duration. Keep in mind that while you are in this state, you are not able to use any of your other abilities except for dodge rolling. This shouldn't be a problem though as you only have to waypoint anyways.
Stealthing through various ways
Stealthing, the most obvious way to avoid combat. You can do this by blasting (bomb kit's smoke bomb and blast finishers) or with Elixir S's toss ability. If you are in stealth and not hit by any AoE/attack from your opponent, you will stay out of combat. By doing this you can also decide to not waypoint at all and just stick around as long as your stealth is long enough. If you only got stealth for 3 seconds (one blast), consider still waypointing as the enemies will most likely still be able to catch up to you. Also, when you are performing a stealth combo, keep in mind that some abilities do damage which will be stealth you when an enemy is close to you while you are performing the combo.
Anti Soft-CC
I am guessing none of us enjoys being Crippled, Chilled or Immobilized. Well, there is a way to let you be very resilient to those conditions without sacrificing a lot of offensive stats for it. This is mainly for people that spec as a condition damage Engineer as those will benefit from the things I mention the most. Keep in mind that this only applies for PvE and WvW this does NOT work for PvP.
Let us start off by buying the Rune of Antitoxin. This rune gives us -24% condition duration while not losing on any condition damage as the rune provides us with that. It also grants you 5 stacks of Might when you get a poison or torment stack on you. That right there is really good!
At this point we have a reduction in Cripple, Chilled and Immobilize of 24%.
Next up is speccing into inventions. We get Mecha Legs here to reduce Cripple, Chilled and Immobilized by 33%.
At this point we have a reduction in Cripple, Chilled and Immobilize of 57%.
Lastly we grab ourselves a Bowl of Lemongrass Poultry Soup, this food grants us -20% condition duration which is really really good. If you find this food too expensive (like me) you can also get Bowl of Poultry and Leek Soup which is -16% condition duration. The only downside on using Lemongrass or Poultry and Leek is that we have to replace this with our +20% condition duration Koi Cakes. Luckily you can cover that by using Sweet Bean Buns that, in addition to giving -20% condition duration, gives +15% condition duration.
At this point we have a reduction in Cripple, Chilled and Immobilize of 77% (Lemongrass) or 73% (Leek).
Builds[edit]
What's the meta? What works and what does not? In this section I will showcase many builds that have proven to be very effective in each gamemode. What's important to note here is that these are not the only builds out there but these builds have proven to be very effective and thus are always a safe choice to use. You can click on the blue text to go over to the build.
PvE
- Condition Grenadier (Raids/Fractals/Dungeons)
This build is currently the meta Engineer build for Raids/Fractals/Dungeons. It has more damage than any other Engineer build currently available. Even though the page displays a very long rotation, you don't have to memorize it at all. What's important is that you keep the following skills always on cooldown: Blowtorch, Flame Bomb and Shrapnel Grenade. Check out a build video here. - Power Grenadier (Raids/Fractals/Dungeons)
While dealing less damage over time (and a bit more damage in the first 10 seconds of the fight), this build is still highly viable and if you dislike condition builds or simply don't want to spend so much time farming Viper gear, this is a great alternative for you. It has a large rotation just like the Condition Grenadier but aim at keeping the following skills always on cooldown: Grenade Barrage, Orbital Strike, Acid Bomb, Flame Blast, Jump Shot, Blunderbuss, Freeze Grenade, Shrapnel Grenade and Poison Grenade. - The Farmineer (Open World) — Heart of Thorns Edition
This is a build aimed at getting you through the open world content with ease or assisting you in farming the open world with things like World Bosses and World Events. The build has a high mobility through Rocket Boots and Rocket Charge with a permanent swiftness uptime while still having a solid damage output. Check out a build video here. - The Farmineer (Open World) — Guild Wars 2 Edition
This variant of the farmineer is for those that do not own the first expansion pack of Guild Wars 2. In case you do, it is highly advised to use the Heart of Thorns edition as it simply features more mobility.
WvW
- The Engineer is not great at Zerging. I do know they can be very beneficial in the focus squad of a GvG guild. I lack the knowledge of these builds but I am very happy to receive more information on this topic.
- Condition Engineer (Roaming)
A build focussed around applying multiple conditions to your foe with a very high damage numbers. In comparison to the PvE Condition build, this build has far more defense which is absolutely needed when fighting other players. The combination of gear allows for a high amount of condition duration, defense and condition damage making. - Celestial Engineer (Roaming)
With a good mix of power and condition damage, this build is considered a hybrid build. It works well since the Engineer is able to apply conditions and direct damage at the same time thanks to the Grenade Kit. It also offers the user with an incredible amount of sustain without lacking in damage. - Static Discharge Engineer (Roaming)
One of the top burst builds out there in Guild Wars 2 right now. It has an incredible amount of burst that can be inflicted on the target in less than a second. Especially versus glassy opponents (people with a low amount of defense) it can instantly kill them. Check out a build video here. - The Juggernaut (Roaming)
This build is a heavy might stacking build that focuses around a few very hard hitting skills which are: Blunderbuss, Flame Blast and Jump Shot. Due to the high amount of power this build can achieve, the damage output from those skills can reach an incredible level. Check out a build video here. - The Scrappineer (Roaming)
This build is (also) a heavy might stacking build which makes use of the Scrapper trait line in combination with the Hammer. It's a build that is very effective in outnumbered situations thanks to the Function Gyro (with Stabilization Core). Check out a build video here.
PvP
- Celestial Hammer
This is currently the meta Engineer build for PvP. It offers an incredible amount of sustain while not lacking that much in damage either. A pro player that often uses this build is Chaithh. You can check him out over at twitch with this link. - Soldier Rifle
This is an old-meta build but it is still very effective. In case you do not own Heart of Thorns, this is a great alternative to the Celestial Hammer build. It is very tanky while not lacking in damage either. Do try to play around with the Sigil of Intelligence and your hard hitting Rifle skills so that you do not waste the sigil. - Flamethrower Condi
While this build does not involve as much sustain as the other two builds above, it still is an effective build. The build does suffer heavily from condition removal and transfers while also lacking a little bit in condition clear. I personally consider this a one trick pony build since if you can't get the burning off (or it gets cleansed fast) the damage is very mediocre. Nonetheless it's quite effective in Hot Join and Unranked. - The Scrapineer
This build is heavily focused around might stacking making for a very high power stat which allows for very powerful hits. Thanks to the Soldier Amulet, the build is able to absorb a lot of damage without lowering its damage too much. Check out a build video here.