Marjory Delaqua
Marjory Delaqua

- Race
- Human
- Profession
- Necromancer
Reaper - Rank
- Legendary
- Location
- Dragon's Stand (Heart of Thorns)
(Heart of Maguuma)
Dragon Response Mission: Gendarran Fields
(Gendarran Fields)
Shattered Steppes
(Grothmar Valley)
Jora's Keep
(Bjora Marches) - Organization
- Dragon's Watch
Durmand Priory
Delaqua Investigations
Ministry Guard
Brim & Scarab Detective Agency
| Image(s) |
|
Marjory's appearance before Living World Season 3. .jpg)
Marjory's appearance at the start of Out of the Shadows. |
.jpg)
“Listen closely. There are forces at work in this city, in this world, that will take us all down if we let them. Together, you and I can make a difference.
— E
Marjory Delaqua is a human detective of Canthan descent. She is the business as well as the romantic partner of Kasmeer Meade, and forms half of Delaqua Investigations.
Biography[edit]
Early years[edit]
Marjory was born to a working class family of Canthan descent in Divinity's Reach. The family lived in the district of Rurikton and consisted of a father, mother, Mireille Delaqua, Elyse Delaqua, Belinda Jane Delaqua, and Marjory. The parents had inherited Canthan items from their parents.[1]
At some point, Marjory studied necromancy together with the norn Jhavi Jorasdottir. She was impressed by how efficient Jhavi was, and she learned about the pressure the norn was under to live up to the expectations set up by her great grandmother Jora.[2]
Marjory got her start in the Ministry Guard of Divinity's Reach, but grew disillusioned and left after witnessing Ministry Guard Henrick Baker murder Mendel, a young boy, for threatening to unravel a conspiracy surrounding an unidentified member of the Ministry who had captured and tortured a woman with dark magic. The boy's ghost entrusted his weapons to Marjory, but the ghost was dispersed by the necromancer-for-hire Kraig the Bleak before Marjory could interrogate the boy properly about the identity of the minister. After an encounter with a mysterious benefactor known only as "E" who suggested they start working together to right wrongs in Divinity's Reach and beyond, Marjory then decided to leave the Ministry Guard and become a private investigator. The case of the ghost boy remained unsolved to this day although Marjory promised to have justice for Mendel and other victims involved in the case someday in the future.[3]
Later, Marjory had joined the Durmand Priory. Although she eventually went inactive in the order, she would still occasionally exchange information with them.
Living World Season 1[edit]
In 1326 AE, shortly after the murder of Captain Theo Ashford, Captain Logan Thackeray arrived in the Dead End to recruit Marjory to ensure the killer was caught. Accepting Logan's offer, Marjory and Kasmeer headed to Lion's Arch to track down the killer. While there, she encountered Inspector Ellen Kiel, the leader of the Lionguard's investigation.
Kiel asked what Marjory could do that the Lionguard couldn't and Marjory responded that she could use a specialized box designed by Magister Tassi to track energy fluctuations, and demonstrated the device by using it on the deceased charr ambassador. Marjory concluded the ambassador had came into contact with arcane residue similar to that of the explosion, but not when the blast had occured. In the following days, the Lionguard tracked down the suspects and Marjory sent the Pact Commander to interrogate the suspects, though Marjory herself remained in Lion's Arch.
When the Tower of Nightmares appeared in Kessex Hills, Marjory and Kasmeer were there on the scene to investigate. With the help of adventurers, Marjory was able to develop an antitoxin for Scarlet's poison and deliver it to the heart of the tower, destroying it.
She later fought the Twisted Marionette in Lornar's Pass with Braham, Rox, and Taimi. Later, Marjory once again puts her head together with Kasmeer (and Vorpp) trying to determine Scarlet's plans, and concluded she was aiming to attack Lion's Arch.
The group were too late to stop the attack, but Marjory and Kasmeer traveled to the besieged city nonetheless to assist in the evacuation of its citizens. After the miasma cleared out, they joined the assault of the occupied city, and eventually found themselves aboard the Breachmaker, Scarlet's airship. Marjory and Braham approached Scarlet, intending to put her down, but were knocked back by a powerful blast, with Braham injured and Marjory thought dead. However, Rox was able to work some battlefield magic on her while an enraged Kasmeer engaged Scarlet.
Living World Season 2[edit]
At the Festival of the Four Winds, Marjory, along with the Commander, Rox, Kasmeer, Braham, and Taimi, were noted as heroes and introduced to the Zephyrite Master of Peace. She, Kasmeer, and Taimi spent most of their time during the festival at the Labyrinthine Cliffs, with Kasmeer keeping a close watch on Marjory after her significant injuries.
In 1327 AE, the Pact Commander met up with Marjory and Kasmeer in Tangle Root. Marjory revealed that her ribs have mostly recovered from Scarlet's attack and she no longer needed to be fussed over. A small Seraph squad has set up a camp in an old fort and they needed assistance with clearing the vines. Marjory's sister Belinda was revealed to be part of this squad. While they were talking with the commanding officer Corporal Jantzen, the Inquest attacked and Marjory joined in with the defense of the fort together with Kasmeer, Braham, Rox and Taimi. After defeating the final Inquest Golem, she tried to get Belinda to join her in the expedition to the Maguuma Wastes, but Belinda was deployed to Fort Salma. Marjory promised to meet up with her there in the future and joined the Pact Commander in entering the new area beyond the vines.
Upon encountering the Zephyrite crash site in Dry Top, Kasmeer, Marjory, and the Commander were chosen to explore the wreckages. Fighting through the crash site and the Inquest's defenses, they tried to save Morning, but she succumbed to her injuries, only managing to tell them that the Master of Peace was in danger. Despite witnessing more death and destruction so soon after Scarlet's campaign, finding out about the reasons of the crash reawakened Marjory's investigating instincts.
She continued to assist the Commander in their search for the Master of Peace, helping to fight and bring down the saboteur Aerin. She wanted to know everything she could about him, as he reminded her too much of Scarlet.
Marjory followed the Commander along with the others in Scarlet's Secret Room, then in the Cavern of the Shining Lights. In order to see how far Mordremoth's corruption reached, Rox and Braham went to Fort Concordia, while Kasmeer and Marjory went to Fort Salma.
When the Commander reached Fort Salma, Belinda Delaqua told them that Kasmeer and Marjory were holding the courtyard. All three of them defended the fort against the Mordrem, Marjory summoning explosive minions to take down a Mordrem thrasher, with the Commander and Marjory protecting the minions from lesser Mordrem's attacks. With the attack repelled, they returned inside the fort, only to discover with dread that Belinda did not survive, her body still held by a vine. Despite Kasmeer's insistence that she should not be left alone with her grief, Marjory answered that Kasmeer should not be too sweet with her, lest she cracked emotionally. She told Kasmeer to stay with the Commander and the others, while she would take care of her sister's body and her family.
Marjory sent her regards to the Commander through Kasmeer, who got to spend a little time with her after Belinda's funeral.
Marjory returned to the Commander and their allies for the World Summit, worried that leaders could easily be assassinated amidst the crowd, but happy to see Kasmeer again, escorting Queen Jennah. She accompanied them to Omphalos Chamber, helped defend the leaders when the Mordrem attacked, and escorted Queen Jennagh through Kasmeer's portal. After the Shadow of the Dragon's demise, the Commander tasked Kasmeer and Marjory to search what they could find about dragons at Durmand Priory.
Magister Ela Makkay asked the Pact Commander to meet with Explorer Campbell at Fort Salma. Campbell was investigating what happened there, but was assaulted by Seraph ghosts, whose violent deaths made them see every intruder as attacking Mordrem. The Commander fought through the ghosts and reached Campbell, who was almost killed by Belinda's ghost, when Marjory arrived with Kasmeer, and reasoned with her sister's spirit. Seeing her sword in Marjory's hands, Belinda fused her soul with the weapon, so she could always protect her sister. Troubled by what just happened, but resolute to pursue her mission, Marjory continued her journey with Kasmeer to the Priory.
When they hit a dead end in their research, Marjory sent a letter to the Commander, to get the cipher that would allow them to meet with the Priory's dragons expert, Ogden Stonehealer.
Ogden made the trio unknowingly enter Glint's lair. While the Commander was searching for their way, discovering visions of a past Master of Peace receiving an egg, Kasmeer and Marjory discussed what they knew about Glint, the legends and the stories surrounding her, until a Malevolent Memory attacked a the moment the Commander joined them. With the Memory vanquished, they were finally able to exit Glint's lair and ask their questions to Ogden.
Back to Camp Resolve, the Pact Commander tasked Kasmeer and Marjory to report everything they learned to Marshal Trahearne, while they, Rox and Caithe would go after the Master of Peace. According to Kasmeer, Marjory was, in her free time, practicing hard to learn how to wield her sister's sword in combat. When the Commander spoke to her, Marjory reasserted her dedication to them, and to their fight against Mordremoth.
After they found the Zephyrite Aspect Masters, the Commander sent Rox to gather Braham, Kasmeer, and Marjory, so they could finally go after the Master of Peace together. They tracked him into a labyrinth, but he succumbed to his injuries, while Caithe snatched Glint's egg and disappeared.
Along with Marjory, the Commander went back to the Grove, to the Pale Tree, to understand what Caithe was planning, and where she would be. The Pale Tree gave memory seeds to the Commander, so they could relive Caithe's memories in specific places. She protected the Commander while they used the memory seedsuntil the last one led them to the Sealed Cavern's entrance.
They both returned to Durmand Priory to find a way to open the cavern. Ogden Stonehealer advised them to use divine fire, to bypass Forgotten's magic. Marjory helped the Commander perform a ritual, involving the memories of Turai Ossa, which granted them a torch of divine fire, that the Commander entrusted to Marjory, while they reported back to Camp Resolve. After having repelled a Mordrem attack, they joined Kasmeer, Marjory, Braham and Rox to open the cavern's gate. Once inside, the Commander relived a final memory of Caithe, who reappeared briefly afterwards. The Commander asked Caithe to justify her actions, but the Shadow of the Dragon attacked again. This time, the Commander managed to defeat definitely, but Caithe had taken advantage of the fight to flee with Glint's egg once again.
Heart of Thorns[edit]
- Act I
After the Pact launched its failed attack on Mordremoth, Marjory and Kasmeer went to Amber Sandfall to defend against the Mordrem, before joining with the Commander on the edge of the jungle.
When they entered Verdant Brink and encountered remnants of the Pact Fleet, Marjory was not surprised that Laranthir was no longer trusted by his soldiers, saying that Mordremoth always uses sylvari, like Scarlet or Aerin, to do its dirty work. Afterwards, when they encountered the Itzel, who were attacked by Mordrem, Marjory was of the opinion that the soundest strategy was to wipe out the Mordrem raiding party before they attacked, thus negating the need for defenses.
Marjory witnessed the death of Eir Stegalkin at the hands of the Mordrem Vinetooth and aided in killing the beast.
- Act II
The Commander's party went on deeper into the jungle: in Auric Basin, Kasmeer and Marjory were asked to escort Priory explorers back to their camp after they were attacked while studying Exalted ruins, while the Commander was pursuing Ruka the Wanderer, and then recovering Glint's egg from Caithe, after a corrupted Vinetooth Faolain attacked her. Marjory was the first one to meet again with the Commander, after they entrusted the egg to the Exalted, and followed Taimi's hints. Marjory filled them in about Faolain and Caithe's whereabouts, then gathered the rest of the party while the Commander looked for Taimi.
- Act III
Pursuing the remaining members of Destiny's Edge and the Pact into the Tangled Depths, Marjory was among those who protected the first Pact survivors encountered there, while the Commander and Braham searched for a lost Magister. Both of them searched for the lost asuran city of Rata Novus, together with Taimi and Canach, while the others tracked the prisoners caravan.
- Act IV
The party reunited soon after entering Dragon's Stand, fighting through Mordrem patrols, only to separate again briefly to rescue both Zojja and Logan. The Commander, Marjory and Canach rescued one of them, while the four others were to save the other one. The first member of Destiny's Edge was conscious, and Marjory quickly tried to confort and reassure them. In the meantime, the Commander and Canach went ahead to help the other half of the party. Unfortunately, the latter was delayed by Mordrem forces, which was enough for the blighting pod to spawn clones of the second member of Destiny's Edge, forcing the party to fight the clones before saving the original, who was more unconscious, deeply affected by the blighting pod. Kasmeer and Rox were asked to escort Logan and Zojja to safety, while Marjory, along with the rest of the team, went after a taunting, corrupted Faolain, who brought them to Mordremoth's heart. They cut down Faolain for good, then dived deeper into the thorns to save Trahearne.
When they reached him, he told them that Mordremoth's roots were spread too far and deep to defeat him. They concluded that entering the dragon's mind, into the Dream of Dreams, to eradicate his consciousness, was the only way to truly defeat him. The Commander, along with two companions, would enter Mordremoth's mind and fight him there, while Marjory, Rytlock and another team member would stay in the real world to protect them. Marjory mentioned the risk that even Trahearne could be a trap set by the plant dragon.
In Mordremoth's mind, Marjory was among the illusions and memories that were created to fight the Commander, only to be turned to their side, against the dragon.
After the Commander's victory in the Dream, Marjory witnessed them kill Trahearne with Caladbolg, after he begged them to do it, to destroy the last remnants of Mordremoth's mind. The dragon's death marked the end of Marjory's quest to avenge her sister Belinda.
Living World Season 3[edit]
Marjory answered the Commander's call to investigate the intense magic activity in Bloodstone Fen, and joined them with Rytlock and Canach when they tracked Caudecus to the Colosseum of the Faithful. According to her, Caudecus' activities were on everyone's lips in Divinity's Reach. She pointed out some of the bloodstones' properties to the Commander during their fights against the White Mantle. When they heard Caudecus barking orders through a door, she was reminded of a boss she had when she worked on a cotton-candy stand during her younger years. After the subsequent fight and Lazarus' reappearance, she raised a wall of bones to help Canach reach Caudecus, but he fled thanks to Valette Wi's mesmer magic. Lazarus not having shown any interest in the throne of Kryta, she expressed her curiosity as to his motives.
Marjory was contacted by Ruka the Wanderer when Glint's egg shew signs of activity, but felt obviously awkward in the presence of Caithe. Nonetheless, they both defended Tarir from the destroyers outside of the egg's room. After the battle, during which Lazarus made a surprise appearance to help defend the egg, Marjory interrogated him about his motives, and quickly decided to follow Lazarus everywhere, both to keep him under close surveillance, and to dig deeper into his claim. She explained that the necromancer in her was intrigued by his resurrection, and that she was determined to find out what made her feel something was amiss about him.

After discovering the truth about Lazarus' deception, Canach sent a warning to Marjory, and she regrouped with Kasmeer, Taimi and the Commander as Taimi was pursuing her experimentations on dragon magic. Only a few minutes ahead of Lazarus, she warned them that he replaced his White Mantle followers with a mercenary army, and built a base in the Ring of Fire. She told them he was always keeping close a mirror, that Kasmeer identified as a possible vessel of mesmer magic, explaining that their own mirrors could break Lazarus' illusion. While Taimi and the Commander set up the lab's mirrors as a trap, Kasmeer told Marjory she would have liked having a warning about Marjory's decision to follow Lazarus, but they were ultimately relieved to see each other. When the mirror trap was set, Phlunt returned to say that he and his krewe could not leave through the portal, meaning that Lazarus was on his way. The Commander convinced Taimi to let everyone into the secret dragon lab, before the so-called mursaat entered, vividly interested in a machine that could kill dragons. The Commander's team triggered the trap, shattering the illusion, revealing Lazarus to actually be the human god Balthazar. Revealed, he strucked Marjory in revenge for her meddling, and disappeared with Taimi's machine, as Phlunt ordered his krewe to protect his research from Balthazar's mercenaries. When the battle was over, an asuran medic took care of Marjory, saying she would survive. But her faith shaken, and in shock of having witnessed a god in person, Kasmeer fled through a portal, while Marjory realized with a heavy heart that she nearly died, and that Kasmeer had gone rather than staying with her.
Path of Fire[edit]
According to Kasmeer when she met the Commander in Amnoon, Marjory was still recovering, and the relationship between them was fine.
Following her recovery, Marjory arrived in Elona together with Taimi, after Balthazar's defeat.
Living World Season 4[edit]
After the defeat of Balthazar with Kralkatorrik and Aurene absorbing his powers, Marjory was sent with Kasmeer to keep an eye on the Elder Dragon's movements. They found Kralkatorrik perched on a mountain in Western Kourna and noticed him acting strange.[4] These actions were later revealed to be the Elder Dragon testing his newfound powers by creating remote Brandstorms and creating Death-Branded minions from corpses.
During the political summit between Elonian factions in the Fortress of Jahai in 1331 AE, Taimi initially could not raise Kasmeer and Marjory on the remote communicator, which made her worry. Some time after, the pair did manage to get in contact with Taimi much to her relief, only to reveal that Kralkatorrik had suddenly vanished from the mountain.[5] The Crystal Dragon's disappearance was later revealed to be him mastering Balthazar's power to traverse the Mists, which he had entered to devour more magic and send Branded minions throughout Elona in search of Aurene.
As the Pact and the Elonian alliance prepared to face Kralkatorrik in Thunderhead Peaks in 1332 AE, Taimi contacted Kasmeer and Marjory and updated them on what had been happening in Elona since their last meeting. During the conversation Kasmeer and Marjory learned that Aurene had devoured Palawa Joko, and they let Taimi know that they had been busy evacuating villages which had been targeted by the Branded.[6]
The Icebrood Saga[edit]
Some time after the death of Kralkatorrik, Marjory, along with Kasmeer, Braham and the commander, were invited to the celebration organized by Imperator Bangar Ruinbringer in Grothmar Valley. Kasmeer and Marjory met with the Commander, Braham, Rytlock and Gorrik at the Black Citadel where they boarded a chopper to the Blood Keep.
Upon arriving in Grothmar, Marjory promptly excused herself in search of a drink, purposely missing the start of the ceremony. She was more interested in investigating what the Ash Legion Imperator Malice Swordshadow could be planning. She eventually found Recon Cove, where she sympathized with Ash Legion scouts. When the Commander found the place themselves, she was there to welcome them, and to help them uncover details about the Ash Legion's activities.
After Gorrik's abduction, she informed the Commander that Bangar, Ryland and several dozen warbands were moving West, and that Crecia had gone after them. At the Commander's request, Marjory gathered Braham, Malice, Smodur, and Efram, to meet with Rytlock, Crecia and the Commander in the mountains, while Bangar and his army had fled. She is then ordered to help Kasmeer persuade Malice and Logan to share information, in order to quell the Renegades and the Separatists.
Marjory joined the party that went to Jora's Keep, telling the Commander that she had trained in necromancy with Jhavi Jorasdottir, who is stationed there since Almorra was leading the Vigil against Kralkatorrik. Her detective skills helped uncover what happened to the Keep's garrison, whose members were all dead or missing. She followed the soldiers' trail, which led her and the Commander to ritual sites, where Jormag's whispers subjected her to a traumatic vision of her dead sister. The Commander eventually found Almorra, albeit too late to save her. However, they reclaimed her Raven lens, which, together with Jhavi, allowed them to pursue the Fraenir of Jormag into the Raven Sanctum. Marjory, still shocked by the hallucinations, declined to join them this time, preferring to stay in the keep, and desperately attempted to contact Kasmeer on her communicator, to no avail. [7]
Marjory did not see the Commander again until the Destroyers launched attacks all over Tyria. Together with Jhavi, she helped defend Gendarran Fields. Despite Jhavi's orders, she insisted to see to the wellbeing of the villagers, persuading Jhavi to defend them instead of retreating to Lion's Arch.[8]
She later called the Commander, in addition to sending an emergency broadcast, to warn that the Frost Legion was attacking Cathal in Caledon Forest.
End of Dragons[edit]
- Epilogue
Several weeks after Dragon's Watch had resolved the Void problem,[9] Kasmeer sent an invitation to the Commander and other Dragon's Watch members, including Taimi, Gorrik, Logan, Rox, Rytlock, Canach, and Braham, to meet her and Marjory in the Dead End bar in Divinity's Reach, which now belonged not only to Marjory but partially to Kasmeer too.[10] Kasmeer and Marjory greeted everyone while being visibly excited, and they also made small talk till everyone arrived. Once the group had gathered, Kasmeer and Marjory recounted the time they had spent together since they first met and proposed to each other while all of their friends cheered on them. The whole group shared a toast and Marjory stated that while there might not be the need for Dragon's Watch anymore, they will always be a guild.
Locations[edit]
- Divinity's Reach
- Walking through the city (During Wintersday only)
- Dragon Response Mission: Gendarran Fields
- Kessex Hills
- The Tower of Nightmares
- Arborstone (only before Looking Back has been started)
Historical locations[edit]
- Divinity's Reach
- Lion's Arch
- Grand Piazza (during Sky Pirates of Tyria)
- Postern Ward (during Escape from Lion's Arch and Battle for Lion's Arch)
- Kessex Hills
- Thunder Ridge
- Thunder Ridge Camp (from Blood and Madness 2013 to A Very Merry Wintersday 2013)
- Thunder Ridge
- Lornar's Pass
- Bouldermouth Vale
- Bouldermouth Vale Refugee Camp (during Escape from Lion's Arch)
- False River Valley (during The Origins of Madness)
- Bouldermouth Vale
Story involvement[edit]

Living World Season 1[edit]
- Episode 2: Sky Pirates
- Episode 3: Clockwork Chaos
- Episode 4: Tower of Nightmares
- Episode 5: Battle for Lion's Arch
- Living World Season 1 (historical)
- Episode 7: Dragon Bash
- Episode 13: Tower of Nightmares
- Episode 14: The Nightmares Within
- Special Event: The Nightmare Is Over
- Episode 16: The Origins of Madness
- Episode 17: Edge of the Mists
- Episode 18: Escape from Lion's Arch
- Episode 19: Battle for Lion's Arch
- Episode 20: Battle for Lion's Arch: Aftermath
- Special Event: Festival of the Four Winds
Living World Season 2[edit]
- Episode 1: Gates of Maguuma
- Episode 2: Entanglement
- Episode 4: The Dragon's Reach: Part 2
- Episode 5: Echoes of the Past
- Episode 6: Tangled Paths
- Episode 7: Seeds of Truth
- Episode 8: Point of No Return
Heart of Thorns story[edit]
- Act I:
- Act II:
- Act III:
- Act IV:
Living World Season 3[edit]
- Episode 1: Out of the Shadows
- Episode 2: Rising Flames
- Episode 5: Flashpoint
Path of Fire story[edit]
- Act III
The Icebrood Saga[edit]
- Prologue: Bound by Blood
- Episode 1: Whisper in the Dark
- Episode 5: Champions
End of Dragons story[edit]
- Act I
- Act II
- Act III
- Act V
Items offered[edit]
- Offers the items only at Thunder Ridge Camp.
- The items below require the achievement Toxic Spore Sampler and the active story step Making the Antitoxin.
| Item | Type | Rarity | Cost |
|---|---|---|---|
| Recipe sheet | Exotic | 250 | |
| Recipe sheet | Exotic | 250 | |
| Recipe sheet | Exotic | 250 | |
| Recipe sheet | Exotic | 250 | |
| Recipe sheet | Exotic | 250 | |
| Recipe sheet | Exotic | 250 | |
| Recipe sheet | Fine | 250 | |
| Recipe sheet | Fine | 250 | |
| Recipe sheet | Fine | 250 | |
| Recipe sheet | Fine | 250 | |
| Gizmo | Masterwork | 10 | |
| Gizmo | Masterwork | 10 | |
| Gizmo | Masterwork | 10 | |
| Consumable | Basic | 5 |
Combat abilities[edit]
- Skills
-
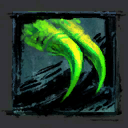 Rending Claws - Slash your foe twice with ghostly claws to make them vulnerable. Vulnerability applied increases against foes below the health threshold.
 -
 Ghastly Claws - Summon spectral claws to slash your foe in a quick flurry of strikes, gaining life force per strike. This attack deals increased damage per stack of vulnerability on your target.
 -
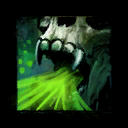 Unholy Feast - Cripple nearby foes and remove their boons. Release an Unholy Burst on foes below the health threshold.
 -
 Deathly Swarm - Unleash an insect swarm to blind and transfer conditions to your enemies.
 -
 Enfeebling Blood - Inflict weakness and bleeding on foes in the target area.
 -
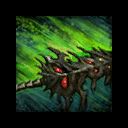
 Summon Flesh Wurm - Minion. Summon an immobile flesh wurm to attack foes.


- Skills (Bjora Marches during The Wind and Nothing More and during Heart of Thorns)
-
 Strike
 -
 Vengeful Strike
 -
 Wrathful Strike


- Skills (End of Dragons)
-
 Dusk Strike - Chain. Cleave foes in front of you.
-
 Fading Twilight - Chain. Cleave foes in front of you again.
-
 Chilling Scythe - Chain. Strike foes, and chill them. A successful strike reduces the recharge on Gravedigger.
-
-
-
 Gravedigger - Perform a huge swing that deals heavy damage. Recharges faster if it hits a downed or low-health foe.
 -
 Grasping Darkness - Conjure claws of darkness from the shadows to attack foes, applying a condition to them and pulling them to you. Gain life force for each struck foe.
 -
 "Nothing Can Save You!" - Shout. Damage foes around you, converting their boons into vulnerability. Your next few attacks become unblockable. Deal additional damage and gain additional unblockable attacks when striking foes within melee range.
 -
 Summon Bone Fiend - Minion. Summon a bone fiend that attacks foes at range. Delivers a crippling attack once every ten seconds. (In The Scenic Route)


Dialogue[edit]
For previous dialogue, see here.
The Tower of Nightmares[edit]
- Kasmeer! KASMEER! Have you... Oh my gods. Did I die?
 Don't panic. You're hallucinating.
- Hallucinating? Really? It's the air in here, isn't it? It's messing with...ahh! Mendel?
- Follow me. I'll get you out of here. Stay close.
- I don't know yet. I've hit dead ends with every clue I turn up. Mendel, I'm sorry. I won't give up. I promise. Not ever. Don't cry, kid.
 Time to move.
- Hang in there.
- Hang in there.
The Battle For Lion's Arch[edit]
- Before completing Scarlet's End
- This is far worse than I ever imagined anything could be. Everyone's saying it's Scarlet.
- What else are they saying?
- Her allies are all over the city. Molten Alliance are attacking the south side, and Aetherblades are invading the streets to the north.
- We knew this would happen.
- You figured it out. I hate that you were right. She's landing that giant drill on the probe. Taimi must be right about it being a ley line.
- And she's taking no chances.
- No, she's hitting us with everything she's got—all the better to ensure success. I don't see how we can win this one.
- Our focus, for now, is to keep the exit paths open.
- Understood.
- After completing Scarlet's End
- Before you even say it...I know.
- You shouldn't be on your feet.
- It's just pain. I can't be bedridden while there are still people in danger. I'll rest and heal later.
- And what about Kasmeer? She's upset.
- I...I know. But she understands that I have to do this. I want nothing more than to take her home, but...people are dying. I'll be careful, for her.
- You better. You owe me a drink.
Dragon's Stand (Heart of Thorns)[edit]
- Before completing Hearts and Minds
- I'm not sure how to feel. This is it, the culmination of everything we've worked toward over the past two years. I feel nervous and anxious, and I feel ready to bury Belinda's sword deep into Mordrem's heart.
- Belinda's memory will see you through the coming battle.
- I've lost people before, but Belinda... I wasn't prepared for how deeply her loss wounded me. She was my family. My sister. A part of me.
- That's why we keep on fighting, so no one else has to lose a part of themselves.
- That's right. Just say the word, Boss, and we'll teach that dragon a thing or two about suffering.
- Soon, Jory, soon. For Belinda.
- After completing Hearts and Minds
- I can't believe it's really over. I've barely had time to process anything since Belinda died. I feel like this fog of dread has finally been lifted from me.
- I've been worried. You and Kas have been uncharacteristically quiet.
- We've been dealing with a lot. Some of it's...personal and I'd rather not discuss it. It's time to celebrate our victory. You earned a few smiles.
- I couldn't have done it without you and the rest of the guild.
- That's exactly what a great leader should say. Sorry, I don't mean to put you on the spot, but I really do mean it. This guild is strong because of your leadership.
- Thank you.
Grothmar Valley[edit]
- Commander, good to see you found this little hideout.
- With Ash Legion, there's always more than meets the eye.
- Marjory Delaqua: Malice set up this camp when she caught wind of possible Renegade activity here in the homeland.
- Sorex Ripshadow: Surveillance only, Commander. Imperator's orders.
- Jory, how'd you get here?
- (If not completed An Eye for Detail)
- Have you discovered anything interesting since you've been here? (for the spoken elements that follow, see An Eye for Detail)
- I'll see you later.
Jora's Keep[edit]
- I don't think I've ever felt less...me. This place has a way of changing people, Commander. We need to look out for each other.
- None of us has to do this alone. If you need support, ask for it.
Quotes[edit]
For previous dialogue, see here.
- Greets
- Join me.
- It's you.
- Can't get enough of me, huh?
- You're my lucky charm.
- Well, hello there.
- Hey, sugar.
- Hello, good-lookin'.
- What's the word?
- I'm armed and dangerous.
- I'm ready when you are.
- Hello.
- Let's get this show on the road.
- Aggro
- Here we go.
- You'll regret this.
- Deaggro
- Okay. If that's how you want to play it.
- See you...on the other side.
Gallery[edit]
- Screenshots

Kasmeer Meade kissing Marjory during Scarlet's End.

Marjory's attire during Wintersday.
Marjory Delaqua, Kasmeer, Detective Rama, Caithe, Taimi, and Gorrik in the Guild Wars 2: End of Dragons Gameplay Features trailer.

.jpg)
- Renders/Concept art

Render

Portrait by Jamie Ro.

Concept art by Naomi Baker.

The Dead End loading screen with Marjory and Kasmeer Meade.

The Nightmare Unveiled loading screen with Kasmeer Meade and Marjory by Jamie Ro.

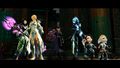
Braham Eirsson, Taimi, Marjory, Rox, and Kasmeer Meade planning the Battle for Lion's Arch.

Into the Labyrinth loading screen with Rox, Kasmeer Meade, Marjory and Braham Eirsson.

Concept art of Marjory from The Complete Art of Guild Wars.

Concept art of Marjory from The Complete Art of Guild Wars

End of Dragons concept art with Soo-Won, Marjory and Kasmeer.

Marjory with Dragon's Watch and Canthans.

Marjory, Kasmeer and Taimi in the Dead End bar.


_loading_screen.jpg)


- Miscellaneous

Sky Pirates promotion of Marjory.
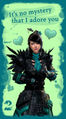
Valentine's Day Card from 2014 featuring Marjory.


Related achievements[edit]
 Sky Pirates: Hard Boiled (2013) — Track down and talk to Marjory at The Dead End in Divinity's Reach. (5
 )
)- Sky Pirates: Hard Boiled — Complete the story chapter Hard Boiled. (1)
 Dragon Bash 2013: Every Piece Matters — Find all the missing suspects in the world. Talk to Marjory at the Lion's Arch crime scene for more details. (5) (Historical)
- Sky Pirates: Tassi Master — Use the Tassi box to scan 11 potential suspects, primary or otherwise. (1)
 Tower of Nightmares: Toxic Spore Sampler — Bring 50 spore samples to Marjory at Thunder Ridge Camp. (5)
 Escape from Lion's Arch: Delaqua Investigator — Help Marjory and Kasmeer investigate Scarlet's motives. (20
 )
) Entanglement: Butterflies and Viscera — Defeat the Mordrem thrasher without losing any of Marjory's minions. (5)
 Tangled Paths: Connect the Dots — Rescue your allies in this order: Rox, Braham, Marjory, and Kasmeer. (5)
 Prologue: Bound by Blood: An Eye for Detail — Solve all of Marjory's challenges. (3
 )
) End of Dragons: Act 5: I Brought Flowers — Pick up a bouquet from the flower merchant to bring to Marjory and Kasmeer's gathering. (1)
 Arborstone: Looking Back — Accompany Marjory to various locations that had significance to Belinda. (5
 )
)
Trivia[edit]
- Marjory is voiced by Sumalee Montano.
- Much of Marjory's dialogue prior to The Icebrood Saga is delivered in a film noir style.
- During the story of Living World Season 1, 2 and Guild Wars 2: Heart of Thorns Marjory wore Trickster's Light-Armor Skin, which was eventually made available to players via the Gem Store. She currently wears Marjory's Shrouded Outfit which appears for the first time in the Living World Season 3 episode Out of the Shadows.
- Marjory's house, The Delaqua & Meade Residence, is located in the Eastern Commons of Divinity's Reach.
- The building was first labeled as "The Delaqua Residence" as part of the Edge of the Mists release.
- With the Festival of the Four Winds release, the dialogue was updated to: The name plaque reads "M. Delaqua." Below that is a handwritten addition: "and K. Meade." This suggests that the couple had moved in together.
- An alternate version of the Battle for Lion's Arch included a cutscene in which Marjory died.[11]
- Marjory has three sisters, one of whom is Belinda Delaqua. The names of the other two were unknown until the End of Dragons release, where we learn more about Mireille Delaqua and Elyse Delaqua whilst touring Cantha with Marjory as part of the Looking Back achievement.
- According to Wild-Eye Miller, the Delaqua sisters are Marjory, Belinda and Mai Trin.
- Marjory Delaqua is, after Trahearne, the second necromancer to fight with a greatsword. The weapon was given to her in The Ghosts of Fort Salma, and first used during Return to Camp Resolve. While Trahearne's sword Caladbolg is a special case, Marjory's use of a greatsword could be interpreted as her taking the Reaper elite specialization.
- Narrative designer Scott McGough has suggested that Marjory's first case, involving the unsolved murder of Mendel and macabre human sacrifices in Divinity's Reach, will be resolved.[12]
- In Prosperity's Mystery, it is revealed that Marjory can speak ettin.[13]
- Since Wintersday 2021, she and Kasmeer can be found walking through Divinity's Reach during the festival.
See also[edit]
- Associated items
 Bowl of Marjory's Experimental Chili
 Marjory's Axe Skin
 Marjory's Dagger Skin
 Marjory's Journal
 Marjory's Shrouded Outfit
 Mini Dragon's Watch Marjory
 Mini Marjory Delaqua
External links[edit]
- Inside ArenaNet: Developing Kasmeer and Marjory, Guildwars2.com
References[edit]
- ^ Marjory Delaqua historical dialogue
- ^ Silence
- <Character name>: Seems like you know Jhavi pretty well.
- Marjory Delaqua: We trained in necromancy together a long time ago. She's incredibly...efficient.
- Marjory Delaqua: But she has some big shoes to fill. Especially given that the keep is named after her ancestor.
- ^ Marjory's Story: The Last Straw
- ^ Eye of the Brandstorm
- <Character name>: We should check in with Jory and Kas. See if they've caught up to Kralkatorrik.
- Taimi: They already checked in. Kralk is perched in some mountains. They said it's acting strange...
- ^ A Shattered Nation
- Braham Eirsson: About that. Taimi wanted an update on Kralk...only we can't raise Kas and Jory on the comm. She's starting to worry.
- <Character name>: I'm...sure they're okay. Keep trying. Let me know as soon as you reach them. [...]
- Taimi: Commander! I finally heard from Kas and Jory—and it's not good. They lost Kralkatorrik!
- <Character name>: Define "lost."
- Taimi: They said he just...vanished! I think he—
- ^ The Auditorium ambient dialogue
- ^ The Invitation
- Marjory Delaqua: Kas? Kas, please pick up. I need you.
- Marjory Delaqua: (sigh)
- ^ Dragon Response Mission: Gendarran Fields
- Marjory Delaqua: Oh, gods. Destroyers on the move! They're swarming the Ascalonian Settlement! Where are those reinforcements?
- Jhavi Jorasdottir: Fall back to Lion's Arch! You know we can't save everyone.
- Marjory Delaqua: These settlers lost everything once already, Jhavi. This isn't what I signed up for. And neither did you.
- Jhavi Jorasdottir: Aaah—DAMMIT. Vigil, reinforce the settlement! Move it!
- ^ The Cycle, Reborn journal "After a couple of months of relative quiet, I received a message from Kasmeer inviting me to attend a party being thrown by her and Marjory at the Dead End Bar."
- ^ Legal Document Let this document serve to notify you of an official change in the ownership of THE DEAD END. Previously, this property was held by DELAQUA, MARJORY. The ownership has been updated to DELAQUA, MARJORY and MEADE, KASMEER.
- ^ [Spoilers] How the living story ending was changed (and why you NEVER should trust data-mined info) : Guildwars2, Reddit.com
- ^ Lore Interview with Jeff Grubb, Ree Soesbee and Scott McGough in GuildMag Issue 9, GuildMag.com (archived)
- ^ Prosperity's Mystery
- Taimi: She hasn't been here in a very long time. This - oh, and that! Great glarrgh!
- Marjory Delaqua: Language.
- Taimi: Sorry. I didn't know you spoke ettin.
- Spoilers
- Living World Season 1 content
- Living World Season 2 content
- Heart of Thorns content
- Living World Season 3 content
- Path of Fire content
- Living World Season 4 content
- The Icebrood Saga content
- End of Dragons content
- Humans
- Necromancer NPCs
- Legendary NPCs
- Dragon's Watch
- Durmand Priory
- Delaqua Investigations
- Ministry Guard
- Brim & Scarab Detective Agency
- NPC stubs
- NPC articles with stub sections
- Story characters
- Queer characters