Solid Ocean Fractal
Solid Ocean Fractal
- Levels
- 80
- Type
- Fractal
- Dungeon
- Fractals of the Mists
- API
- 958
| Image(s) |
|
Click to enlarge. |
“Explore the solid ocean, and slay the beast within.
— In-game description
The Solid Ocean Fractal is a fractal in Fractals of the Mists. It occurs at level 20, 35, 44, 60 and 80.
Objectives[edit]
- Explore the solidified ocean.
- Fractal Difficulty Scale: x
- Personal Reward Level: x
- Kill the Jade Maw.
- Jade Maw

- Tentacles slain: x/2
- Jade colossus killed

- Fractal stabilized. Depart when ready.
- Fractal Difficulty Scale: x
Rewards[edit]
- Primary article: Fractals of the Mists#Rewards
Walkthrough[edit]
Preliminary[edit]
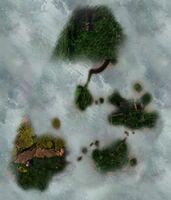
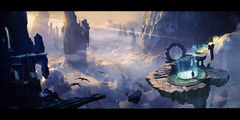
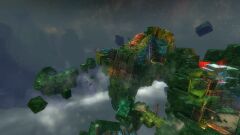
Traverse across floating jade platform fragments until you reach the stage with the Jade Maw. You can either fight the Irukandji as they are encountered during the path, or skip the monsters, and run all the way to the Jade Maw as slaying all the monsters before the Jade Maw is not required to complete the fractal. Be careful in jumping however as falling off the edge will transport you to the platform you were at prior to your fall -- Team members will not be able to revive you if they have continued ahead of you. Upon reaching the Jade Maw's platform, you will go through three phases to defeat the Jade Maw.
Mechanics[edit]
The platform will have 2 Jade Tentacles and multiple Irukandji. Killing the tentacles causes the Jade Maw to begin using his laser beam and causes more Tentacles to spawn. Tentacles do not move from their spawn locations. He will also begin summoning Veteran Jade Colossi. Killing them fills the bar in the top right. When the bar is filled, he no longer spawns Colossi and resummons all of his tentacles.
The Jade Maw will continue to attack and summon tentacles for the duration of the fight. Stability can be crucial during the Jade Maw encounter to avoid being knocked down by Jade Maw Tentacles and Jade Colossus, which can lead to an inevitable death if the player has also been targeted by a green laser attack at the same time.
- Jade Maw
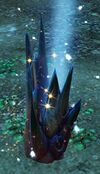
Throughout the fight you will need to use Reflecting Crystals to damage the Jade Maw and to avoid being downed. Because of the Jade Maw's Dense Scales, it is invulnerable to normal damage. The only way to damage it is to throw a charged Reflecting Crystal at it for 5% of its health, or to kill its summoned tentacles for roughly 3% of its health.
To charge the Crystals, players must absorb the Maw's laser attack while holding a crystal. A player will know if they are targeted by this ability by the ![]() large red skull above their head. Crystals can absorb an endless amount of beams, though this doesn't increase the damage done. Being hit by a beam without a Reflecting Crystal will deal lethal damage. Invulnerability/resurrect or alternate health pool effects such as Necromancer's Death Shroud or Rigorous Certainty will be depleted by the beam, but will leave the player alive.
large red skull above their head. Crystals can absorb an endless amount of beams, though this doesn't increase the damage done. Being hit by a beam without a Reflecting Crystal will deal lethal damage. Invulnerability/resurrect or alternate health pool effects such as Necromancer's Death Shroud or Rigorous Certainty will be depleted by the beam, but will leave the player alive.
- The death ray attack may be evaded. Dodge when the skull disappears or flickers. Dodging will not charge a crystal.
- Reflecting Crystals only hold charge for about 5 seconds. [verification requested]
- Reflecting Crystals will disappear after about 45-60 seconds of being on the ground, so picking them up and dropping them resets the internal timer.
- You can revive someone while holding a Reflecting Crystal, but you cannot attack (with skills 1-5) while holding one. Skills 6-10 work normally.
- Jade Tentacles
These creatures will be present throughout the fight and respawn periodically. When their health reaches 0, they will become invulnerable and will continue their last attack. (If they were performing a sweeping knockdown on death, this attack will finish.) Tentacles may be stunned or dazed to halt attacks. Tentacles drop Reflecting Crystals upon death. This will be how players get more crystals after the Colossi phase completes.
The damage caused by a reflecting crystal or killing a tentacle cannot trigger more than once at the same time, so performing any of these actions at the same time will waste the potential damage. It is therefore better to quickly kill the tentacles one by one, and pausing whenever the Jade Maw attacks with its beam attack to let the reflected crystal do its damage.
Phase 1[edit]
- Slay 2 tentacles
Upon arriving at the Jade Maw's platform, you will be hit with one agony check. There will be two Veteran Jade Maw Tentacles and several Irukandji. Under level 60, you only need to focus on the Maw Tentacles, as after the phase objective is complete, any remaining Irukandji will despawn. On level 60 or above, they do not despawn, so killing them is recommended. After the second tentacle is killed, the party may find a safe spot at the corner of the arena where members first entered if they wish.
- It is possible to climb the left wall upon entering the stage. Going towards the back and then around the edge (underneath the Jade Maw) will position you to kill the farthest tentacle without alerting the Irukandji. The range is over 900 and closer to 1200 from this ledge to the tentacle.
Phase 2[edit]
- Kill Jade Colossi
During this phase is where you will start to need to collect the Reflecting Crystals and avoid the Jade Maw's death ray. Tentacles spawn and respawn around the arena. There is at least one safe spot from the tentacles: the corner where you first entered by jumping. Note this "safe" spot is safe only from tentacles, not from the Jade Maw's attacks.
- Colossi
- Reflects projectile attacks. This buff may be removed by stunning them.
- Melee AoE knockdown (Range ~350)
- Drops Reflecting Crystals
Finish[edit]
- Finish defeating the Jade Maw
After clearing out all the Jade Colossi, the Maw Tentacles and the Maw will remain, so continue to kill the tentacles and use the Crystals to deplete the Jade Maw's health. When the Maw nears death, it will target all players with the skull and do a final laser attack that hits all players. To prevent dying, simply pick up a crystal and hold it, letting the animation play out. At least one person needs to avoid instant death by grabbing a crystal. If all players die the entire fight is reset.
Achievements[edit]
| Solid Ocean Fractal Stabilizer | Fractals of the Mists | 5 |
|---|---|---|
| You've completed the Solid Ocean fractal inside the Fractals of the Mists.Don't forget to ride the wave. | 1 Fractal | 5 |
| No Lasers! | Fractals of the Mists | 5 |
|---|---|---|
| Defeat the Jade Maw without anyone in your party being hit by its beam attack. | Your Party Avoided All of the Jade Maw's Eye Beams | 5 |
| Open Grave | Fractals of the Mists | 1 5 |
|---|---|---|
| Your party killed all of the monsters in the Solid Ocean fractal inside the Fractals of the Mists.Pest-free ocean front property. | 1 Challenge | 5 |
- Players must defeat all creatures in the area, except the foes in the Jade Maw's platform.
- A few Crabs and Irukandji are behind the starting location.
NPCs[edit]
Allies[edit]
Foes[edit]
Dialogue[edit]
- Upon arrival
- Dessa: How bizarre. The readings state that this was water once. But good news, this fractal appears fairly stable. You should be out in no time.
- Upon getting near Jade Maw
- Dessa: I retract my statement. Unstable event! Right in front of you!
- Upon defeating Jade Maw
- Dessa: The fractal's stable, thank the Alchemy. Now, hurry up and exit before something else appears.
Objects[edit]
Related achievements[edit]
Upon completion[edit]
 The Bifrost III: The Legend: Jade Maw's Eye Lens
 Nevermore III: The Raven Staff: Chase the Spirit in Jade — Use the Subtle Spyglass with the Spirit Containment Unit in your inventory to see the true nature of the raven near the Jade Maw in the Solid Ocean Fractal.
 Twilight III: Dusk: Jade Night — Use the Gloominator to capture the night after killing the Jade Maw in the Solid Ocean Fractal.
 Astralaria IV: The Cosmos: Whisper of Jade Wind — An artifact full of Mists energy found in the chest after defeating the Jade Maw in the Solid Ocean Fractal.
Objective during[edit]
 Kraitkin I: The Experimental Trident: Irukandji Tentacle — Harvested from the Irukandji of the Solid Ocean Fractal.
 Bolt III: Zap: Bottle of Jade Energy — Use a Capacitive Bottle to capture energy from the Jade Maw's beam attack in the Solid Ocean Fractal.
 Quip III: Chaos Gun: Prank the Jade Maw — Throw a trickster's pie at Jade Maw in the Solid Ocean Fractal.
 The Juggernaut III: The Colossus: Agonized Ooze — Coat yourself with your Mystic Chromatic Ooze and take Agony Damage in the Fractals of the Mist.
 Ad Infinitum I: Finite Result: Jade Kraken Timed Mote
 Ad Infinitum II: Upper Bound: Jade Maw Fang
Trivia[edit]
- Completing this fractal during Fractured awarded the Fractal Fortnight: Solid Ocean achievement.
- This fractal corresponds to the Jade Sea, originally appearing in Guild Wars Factions and reappearing as an explorable zone in Guild Wars 2: End of Dragons.
- This Fractal is actually on the same map instance as the Urban Battleground Fractal. There is a spot just south of the center island where you can jump down and not get ported back, and after a long fall you land in the water surrounding the Urban Battleground Fractal, you have to jump to the very last of the floating jade debris at the very south of the island and jump off to hit the spot. It also is on the same map as the Underground Facility Fractal, swimming for a bit will take you there. You can enter both (empty) Fractals by shadowstepping thgrough the "ceiling" (floor) of the Fractals. This can only be done by standing on a ramp which sticks out of the floor in both Fractals. On Urban Battleground it is located in the starting area, around where you spawn. There is 3 of them in a "cluster" of sorts. For Underground Facility it is one ramp that sticks out on ground level, leading to the cage with the massive drill. For both of them you have to swim under the invisible walls, sometimes seemingly placed at random, in the water. Thief is ideal for this, as it possesses many eligible teleports, such as shortbow's Infiltrator's Arrow and Shadowstep, Guardian's Crashing Courage might also work, further testing is required.


