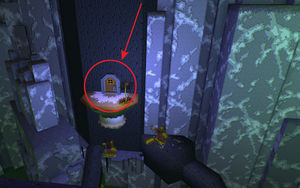
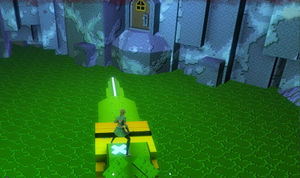
Kingdom of Fungus
Kingdom of Fungus
- Tier
- World 1 Zone 3
- Type
- Area
- Dungeon
- Super Adventure Box
- Connects to
- World 1 House, Dark Woods, Cart, Hub
| Image(s) |
|
Click to enlarge. |
“We must enter the KINGDOM OF FUNGUS, where tales are told of a terrifying tyrant.
— Loading screen description
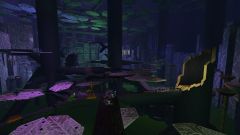
Kingdom of Fungus is Zone 3 of World 1 of Super Adventure Box. There are 6 Hidden Rooms, 2 Furniture shops and 63 baubles to collect.
Objectives[edit]
- Super Adventure Box
- Team Score: X
- Finished!
- Warping in: 1:00
Walkthrough[edit]
| Search YouTube for videos related to World 1 Zone 3. |
- For Tribulation Mode, see: Kingdom of Fungus/Tribulation Mode
- This guide is for Normal mode to pick up all baubles for Master of Baubles, World 1. In Exploration Mode, the majority of this zone can be completed by using the rainbow clouds, and foes are more likely to drop food than Baubles.
Starting Area to Checkpoint 1 (Maze; honeycomb)[edit]
You start out in a dimly-lit pit with a tree trunk, some Flytraps, and some sticky plants around you. In front of you is a shopkeeper who sells a candle that provides the Light skill (recommended for this zone). If you prefer not to pay, you can replay Dark Woods and receive the candle for free after Checkpoint 3 instead.
Shop #1 items[edit]
| Item | Cost | Description |
|---|---|---|
| Candle | 150 |
Creates light and heat. |
| Small Health Refill | 5 |
Restores one heart. |
| Mini Bomb | 200 |
Can be thrown or placed; requires that you have baubles which you use as ammo. |
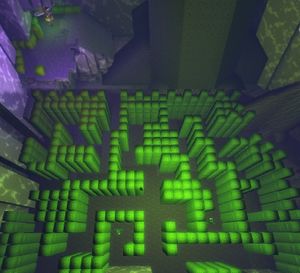
Purchase any health potions you need from the shopkeeper, then enter the tree trunk. If you have Light, you can use it to burn Sticky Plants throughout the zone to avoid being caught by them (required for the Minor in Elusion achievement). Take the mushroom to the top of the tree trunk, then cross the Flytrap to the horizontal tree trunk, being careful to avoid the pink center of the trap. Grab the two baubles on the inside of the trunk, then climb to the top and grab a third one #1-3. Cross the Flytraps to the other side of the rift. Be wary of two Toads waiting for you on the other side—they can pull you into the sticky plants if you are not careful. To reach the Queen Bee Dog and Honeycomb, follow the Bee Dogs that spawn in this area through the maze (see picture on the left). Otherwise, head toward the checkpoint. Hop up onto the slanted tree root coming up from the ground, then jump to the checkpoint.
You can remove all of the Sticky Plants in front of the first checkpoint by jumping on to the yellow flower right in front of it and lighting them on fire. You can also jump over the plants standing if you stand high enough on the root and use a jump roll to clear the plants. On Exploration mode, you can light the plants on fire from the rainbow bridge.
Checkpoint 1 to Checkpoint 2 (Canopy)[edit]
Hit the Alligator so it becomes docile then use the alligator to cross to your right and defeat the Toad resting on the tree root. From there, take the mushroom in front of you up to the balcony above, defeat another Toad, and get a blue bauble #4. Turn around and take the same mushroom up to the branch on the opposite side.
From this branch, head forward and turn right. Going forwards, you should see another branch on your right that rises above your current level and ends with a leaf supporting a red monkey and a barrel. That is your destination. Kill any monkey that gets in your way. Facing toward the stem of the leaf, there should be a steep root on your right. At the top of this is a blue bauble #5. You must jump from this leaf to that root. This jump is tricky and may take you a few tries.
Turn around now and wrap around the tree. Follow the branches to the next tree, burning plants as you go. If you already have the key, be wary of the sticky plants. If you become entangled in a sticky plant or a fly trap while you hold a key, you will drop it and need to recover it.
You should find a branch in front of you that goes up and ends with a blue monkey and a blue bauble. Get past the monkey and take the spoils #6. From here, find the branch extending from the next tree. Navigate to that branch, then to the next tree. Be wary of the blue monkey and the sticky plants all along it.
Once at the tree, head to the left and jump onto the ledge along the wall. Follow the ledge forward to the Flytraps. Cross the Flytraps and up the wall to reach the Locked Chest #1 with two red baubles #7-8. Cross the ledges from here to the checkpoint and enter the next area.
Checkpoint 2 to Checkpoint 3 (Hidden rooms; second canopy)[edit]
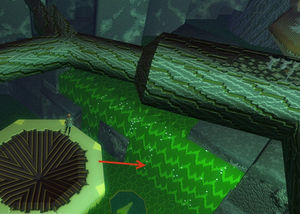
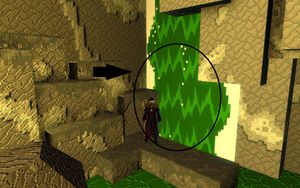
Entering this area, drop down to the clifftop below. Jump down to the lily pad below then immediately turn around and jump into the waterfall. You have now entered Hidden Room #1 (Master of Secrets, World 1: Short waterfall).
Shop #2 items[edit]
| Item | Cost | Description |
|---|---|---|
| Bauble Purse | 250 |
This purse will allow you to hold up to 500 baubles. |
| Key | 25 |
Used for opening chests. |
| Mini Bomb | 200 |
Can be thrown or placed; requires ammo. |
| 1-Up | 20 |
Grants one extra life. |
| Small Health Refill | 5 |
Restores one heart. |
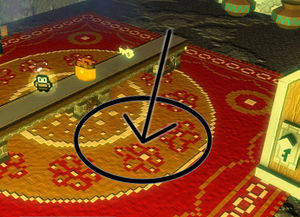
From here, burn the rug with your Candle and use a Mini Bomb to blow a hole in the floor and grant you access to Hidden Room #2 (Master of Secrets, World 1: Inside the room).
Shop #3 items[edit]
| Item | Cost | Description |
|---|---|---|
| Purple Bauble | 25 |
Worth 50 baubles. |
| Yellow Bauble | 25 |
Worth 10 baubles. |
| Blue Bauble | 25 |
Worth 1 bauble. |
After entering the hole, before leaving, throw a Mini Bomb at the left waterfall against the back wall to reveal the Furniture shop #1 (Master of Decor, World 1: Shopception). The room is filled with toxic water and contains 5 Fancy Furniture Coins. Return to Hidden Room #1, then exit to the clifftop above the waterfall.
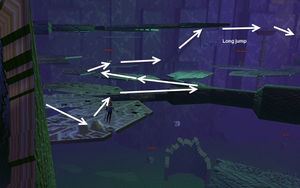
Navigate the lily pads to the tree trunk and wrap around it to the platform on the other side. Climb onto it and defeat the two blue monkeys waiting for you. Walk up the slope and around the stack of mushroom platforms to a root with a mushroom launcher. Use the launcher to get onto the branches above. Head toward the checkpoint, but don't use it. On the wall to the left there should be a mushroom launcher and a mushroom launcher pod on a ledge below. Drop down and release the pod (by hitting it) to create a shortcut from the bottom of the map to the top. Take the mushroom launcher back up onto the branches. In front of the upper checkpoint there should be 1 bauble #9. Take it.
Turn around. In the middle of the map, there should be a large, hollow, tilted tree trunk. On top of it are 3 more baubles #10-12. From the log, jump onto the nearby leaves. Looking to the right from the log, there's a chest resting on a leaf attached to the branch you are on. Open the Locked Chest #2 to receive two red baubles #13-14.
Drop down onto the hollow log below you. Inside it should be 4 more baubles #15-18. Jump out the side of it and cross the water to the nearest tree's roots. Wrap around this to the other side, where there is a branch coming up out of the water. Follow the branch up until another branch crosses in front of you. Jump onto the crossing branch and turn right to find 2 more baubles, sitting on decaying leaves #19-20.
Go back to the intersection. Facing the start of the area, there should be a hollow trunk to your left. Head to it and wrap around to the mushroom to the left of it. Follow the ledges along the wall to the left to find a yellow bauble hidden in a corner #21. Continue following the ledges along the wall to reach a shop with a green bauble in front of it #22 Hidden Room #3 (Master of Secrets, World 1: Overlooking the swamp). If you don't make it along the ledges from the yellow bauble, you can follow a different series of ledges from the upper checkpoint to it.
Shop #4 items[edit]
| Item | Cost | Description |
|---|---|---|
| Bauble Purse | 250 |
This purse will allow you to hold up to 500 baubles. |
| Key | 25 |
Used for opening chests. |
| Mini Bomb | 200 |
Can be thrown or placed; requires ammo. |
| 1-Up | 20 |
Grants one extra life. |
| Small Health Refill | 5 |
Restores one heart. |
When you have what you want from the shop, fall down to the bottom of the map and follow the ledges to the lower checkpoint. Don't take the lower checkpoint, but instead take the mushroom launcher you made earlier up to the upper checkpoint and proceed from there into the next area.
Checkpoint 3 to Checkpoint 4 (Moto's Breath; glitch)[edit]
Entering from the upper checkpoint, there are 10 baubles for you to collect scattered among the decaying leaves #23-32. The stems of the leaves are safe, so you don't need to grab them all at once. One is slightly obscured by a leaf above it that also supports a bauble.
Note: The last two require jumping up to another set of leaves, rather than descending to the next level. It is easiest to make this jump from the stem of the lower level to the leaf of the higher level. If you cannot make this jump, you can backtrack into the previous area and take the mushroom back to the upper checkpoint to try again.
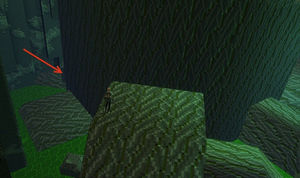
Follow the branch you are now on to its end, where there is a hollow tree stump. On the edge, you can release a mushroom launcher pod by attacking it. In the stump, there 1 yellow bauble #33 and 2 blue baubles #34-35. Go back to the top and fall down where you released the mushroom launcher pad. Wrap all the way around the trunk to find Hidden Room #4 (Master of Secrets, World 1: Behind a tree stump).
Shop #5 items[edit]
| Item | Cost | Description |
|---|---|---|
| Bauble Purse | 250 |
This purse will allow you to hold up to 500 baubles. |
| Key | 25 |
Used for opening chests. |
| Mini Bomb | 200 |
Can be thrown or placed; requires ammo. |
| 1-Up | 20 |
Grants one extra life. |
| Small Health Refill | 5 |
Restores one heart. |
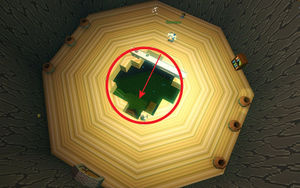
Do not leave the shop yet, but burn the carpet with the candle and bomb the floor of the shop to reveal a hole beneath. Carefully jump down to where a huge Alligator is waiting, and jump into its mouth to find the Hidden Furniture shop #2 (Master of Decor, World 1: Too big to flail). Return the way you came and use the mushroom to get back on top of the tree stump.
Continue into the enormous horizontal log. Defeat the monkeys here (there are moon power ups in the barrels if you need them). Exit out the left side of the log onto the mushrooms, and continue up to the top of the log to find 5 more baubles #36-40.
Continuing along the top of the log in the direction of the next checkpoint; jump onto the leaves after the log and walk on them to the large clifftop in the far corner of the room. On the clifftop, there's 1 bauble #41 and Locked Chest #3 with 2 red baubles inside #42-43. Turn around and drop down into the short, hollow tree stump below the cone plant closer to the log to find 1 green bauble #44.
Exit the stump and head backwards parallel to the log. Cross the alligator and go up the tree root and down the next. At the base of the root, there are lily pads that lead into a cave guarded by an alligator. Enter the cave and cross the plants until you come to a lighted region. Jump up the tree roots to reach a mushroom launcher, and use it to bounce upwards towards other mushroom platforms. Bounce your way to the top of the up the tree, collecting 10 baubles #45-54 along the way. At the top, find 1 green bauble #55.
- Note: Be careful with your jumps from mushroom to mushroom. Some jumps are longer than they look, and although you do not take fall damage, the fall into the poisonous water below can result in enough damage to defeat you.
Drop down to the ledge on your right. Walk to the very edge, then jump to the mushroom platform below with a sticky plant. Inside the door is Hidden Room #5 (Master of Secrets, World 1: Many mushroom bounces), where you can claim the elite skill, Moto's Breath.
Hidden Room #5 (Moto's Breath)[edit]
| Item | Cost | Description |
|---|---|---|
| Moto's Breath | free | Summon Moto's Head to blow nearby foes away. |
Exit now and head to the checkpoint. Before you enter the boss battle, take a detour across the gator to your right to find Hidden Room #6 (Master of Secrets, World 1: Right, before the king).
Shop #6 items[edit]
| Item | Cost | Description |
|---|---|---|
| Small Health Refill | 5 |
Restores one heart. |
| Key | 25 |
Used for opening chests. |
| Mini Bomb | 200 |
Can be thrown or placed; requires ammo. |
| 1-Up | 20 |
Grants one extra life. |
| Slingshot | 225 |
Flings stones; requires ammo. |
Checkpoint 4 to Boss (King Toad)[edit]
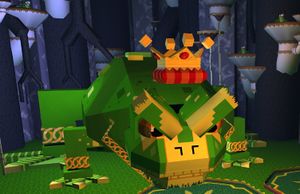
The fight with King Toad takes place on a poison pond full of small lily pads that sink when stepped on and three large lily pads in front of the King. There are two rocks among the small lily pads that can be used for safe spots. King Toad has three different attacks:
- Single Stomp: Raises an eyebrow and glances in the direction he's about to stomp. This sends out a wave that covers the corresponding lily pad and the center lily pad. Players can avoid the attack by moving to the opposing lily pad or dodging through it.
- Belly Flop: Glances downward and makes heaving motions. The attack sends out two waves that wash over all three large lilies. This attack cannot be dodged due to the two waves being close together. Players can avoid the attack by moving to the small lilies and the rocks for safety.
- Tongue Lash: Looks left and right, then opens his mouth for a few seconds. If he is not stunned during this time, then he will finish by quickly whipping his tongue from right to left across the entire arena. Players can avoid the attack with a well-timed dodge or fleeing to the rock in a corner next to the right-hand large lily pad.
King Toad is invulnerable to normal attacks except when stunned prior to a tongue lash. To stun him, first break off Jewel Shards from the Ruby Jewel amulet around his neck by attacking it. Then, throw a jewel shard into his mouth when it opens before he attacks with tongue lash. When successful, King Toad becomes incapacitated and vulnerable to damage for around 10 seconds.
Tips[edit]
- When King Toad first spawns, he starts by preparing to tongue lash.
- If you are fast enough after stunning the King Toad, you should be able to attack the jewel before it becomes un-targetable, which drops another shard to replace the ones you have thrown and can easily grab.
- King Toad's amulet can't be targeted if his next attack is the belly flop or tongue lash. His pattern of attack typically involves 1-4 stomps and belly flops before using a tongue lash attack. If the player is solo, King Toad has 625 health total. He can be killed in three cycles with the stick or two cycles using the Slingshot.
Achievements[edit]
- For Tribulation Mode achievements, see: Kingdom of Fungus/Tribulation Mode#Achievements
| Master of Baubles, World 1 | Super Adventure Box: World 1 | 5 |
|---|---|---|
| Collect all of the baubles in World 1, Zone 3 in one playthrough. Baubles from foes aren't counted.This bauble tastes improper. | Collect All Baubles in World 1, Zone 3 | 5 |
| Master of Secrets, World 1 | Super Adventure Box: World 1 | 5 |
|---|---|---|
| Find all of the hidden rooms (excluding furniture shops) in World 1, Zone 3.Secrets...mastered. |
6 Hidden Rooms Found World 1, Zone 3 | 5 |
| Minor in Elusion | Super Adventure Box: World 1 | 5 |
|---|---|---|
| Complete World 1, Zone 3 without getting caught by sticky plants or flytraps.Not the friendliest of plants. | Elude Sticky Plants or Flytraps in World 1, Zone 3 | 5 |
Achievable in Exploration Mode.
Digging spots[edit]
A total of 380 baubles can be dug up in Kingdom of Fungus per day.
| # | Image | Last Checkpoint |
# of Baubles | Notes |
|---|---|---|---|---|
| #1 |  |
Start | (20) |
Above the shopkeeper at the start of the level is a digging spot. Climb on top the large hollow log nearby to reach the ledges along the wall, then carefully cross the ledges to some Flytraps and then a platform. Finally cross some more Flytraps to reach the higher area. |
| #2a #2b |
 |
Start | / (50)/(50) |
(These spots require the Mini Bomb to reach.) Return to the previous platform before the three flytraps. Bomb the wall next to the stone block and jump up and into the cannon which will launch you to a high branch. From there, you can access a hidden maze full of poisonous water. Beyond the maze is a 1-Up and two dig spots. Be careful while digging as it is possible to reveal both chests at the same time which will result in obtaining only 50 baubles instead of the intended 100; dig them up one at a time. Imposible on tribulation mode |
| #3 |  |
Start | (20) |
Enter the Bee Dog Maze. Turn right the first time you get near the outer wall and look for what appears to be a dead end with four trees. |
| #4 |  |
Start | (50) |
Head to where the Queen Bee Dog is, then jump on top the maze walls and head straight back towards the entrance. Drop down to the enclosed area with the large tree roots. |
| #5 |  |
Start | (10) |
To the right of the first checkpoint in the corner, before crossing into the next area with the swamp water, there are two trees with a digging spot between their roots. |
| #6 |  |
Start | (10) |
Near the first checkpoint, walk up the long tree root, then jump across the Flytraps to a narrow ledge and the dig spot located in the alcove. |
| #7 |  |
1 | (50) |
Just past the first checkpoint, head all the way into the corner on the left-hand side. (Impossible on tribulation mode) |
| #8 |  |
3 | (50) |
Climb to the top of the large hollow tree log near the last checkpoint before King Toad, and use the platform on the opposite side to reach another platform on the wall. |
| #9 |  |
3 | (20) |
Run to the end of the hollow tree log towards the checkpoint, and then make your way towards the platform that has a locked chest and a blue bauble. Jump on the hard funnel-like objects along the wall in the direction of the hollow tree to get to a platform with the dig spot. |
| #10 |  |
4 | (50) |
At the final checkpoint, use the checkpoint bounce to reach the area above and to the left. Jump across the sheer cliff face until you reach the area with the Toads. (extremely difficult to get to) |
Glitch location[edit]
- Primary article: Unintended Coursework
Rewards[edit]
Normal Mode[edit]
- Glorious Chest (Once per day) containing:
- 2 Bauble Bubbles
- 1 Continue Coin
- A chance to get a Super Weapon Box
- A very rare chance to get a Kaiser Snake Weapon Box
- Glitched Chest (Once per day, only if this zones glitch has been destroyed)
- Bonus Reward Chest
- 32-75 Baubles (random amount)
Tribulation Mode[edit]
- Glorious Chest (Once per day) containing:
- 2 Bauble Bubbles
- 1 Continue Coin
- A chance to get a King Toad's weapon skin
- A very rare chance to get a Kaiser Snake Weapon Box
- Glitched Chest (Once per day, only if this zones glitch has been destroyed)
- Bonus Reward Chest
- 1 King Toad Z-3
- 32-75 Baubles (random amount)
NPCs[edit]
Allies[edit]
- Betty Bauble
- Fancy Proprietor
- Gourdon the Racing Choya (Normal Mode only)
- Shopkeeper
- Villager
Foes[edit]
- Alligator
- Bee Dog
- King Toad
- Monkey (blue)
- Monkey (brown)
- No Cloud (Tribulation Mode only)
- Queen Bee Dog
- Toad (green)
- Tribulation Cloud (Tribulation Mode only)
- Turtle
Objects[edit]
- 1-Up (see Digging spots section above)
- Barrel
- Block
- Bouncy Mushroom
- Cannon
- Chest
- Cloud Flag (Tribulation Mode only)
- Flytrap
- Furniture
- Helping Hand
- Honeycomb
- Happy Cloud (Exploration and Tribulation Modes only)
- Invincibility (Super Adventure Box) (Exploration and Normal Modes only)
- Jumping Rock (Tribulation Mode only)
- Spikes (Tribulation Mode only)
- Spears (Tribulation Mode only)
- Sticky Plant
Trivia[edit]
- The name of this zone is a reference to the Mushroom Kingdom, the main setting for many of the games in the Super Mario franchise.
- The music in Shopception slows/pitches down by half everytime you enter the next shop.[1]
- Killing the King Toad worked for the Daily Dodger, a historical daily achievement, as the King Toad's tongue attack and single stomps counted for about three dodges if correctly timed.
- Killing all the Green Toads in King Toad's arena will spawn a Unimpressive King Frog in the background.

