Test Zone
Test Zone
- Tier
- World 3 Zone 0
- Type
- Area
- Dungeon
- Super Adventure Box
- Connects to
- Hub
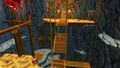
| Image(s) |
|
Click to enlarge. |

“This year, Moto is inviting heroes to the Test Zone,* a new area he’s working on! The choya miners are still carving it out, so it’s not completely finished—but Moto will welcome your help testing the area that is available! To visit the Test Zone, pick up the note on the door of the World 3 House in the Hub and follow the instructions. Have fun!
*The Test Zone is presented as is and should not be viewed as World 3 confirmed, either express or implied. Moto, Lord Vanquish, and other residents of the Super Adventure Box will not be held liable for injuries sustained in the Super Adventure Box. Baubles not intended for human (or charr, asura, norn, or sylvari) consumption.
Test Zone is a testing zone of World 3 of Super Adventure Box.
Getting there[edit]
“Reach out to seize your super adventure! You convinced Moto to let you play in the Test Zone. It's not completely finished, but you're happy to help Moto and see a new area!
— In-game description
- Read the note on the World 3 entrance door inside the Super Adventure Box Hub.
- Talk to Moto in Rata Sum.
- Access to the Test Zone inside the Hub is now unlocked back at the World 3 house.
Objectives[edit]
 Super Adventure Box
- Team Score: X
- Finished!
- Warping in: 0:30
Walkthrough[edit]
| Search YouTube for videos related to World 3 Zone 0. |
- Currently this zone has Normal mode only.
Starting Area to Checkpoint 1[edit]
Shop #1 items (Potion Cart)[edit]
| Item | Cost | Description |
|---|---|---|
| 200 |
Can be thrown or placed; requires ammo. | |
| 20 |
Grants one extra life. | |
| 5 |
Restores one heart. | |
| Choya Seeds | 500 |
A bag of seeds. |
| 250 |
Flings stones; requires ammo. |
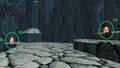
- (Optional) Path to Green Bauble #1.
- After spawning you follow the bridge and see to the right a green Bauble in the water (as well a Green Bauble #4 above on a wooden beam), if you approach it from the left you can jump across the gap below it and grab it before falling into the underwater section of the map. Follow this path to get Green Bauble #4 that you could see previously next to the waterfall.
- (Optional) Path to Green Bauble #2.
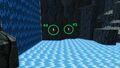
- Follow the bridge from spawn, past the three green oozes to the two spiders. Instead of crossing the broken bridge, continue past it and jump off the ledge to down to Green Bauble #2.
- (Optional) Path to Green Bauble #3.
- From Green Bauble #2, jump down to the wooden scaffolding. Follow the scaffolding until you run into a vertical beam. Jump onto the side of the dirt-covered pillar to your left. Walk around it clockwise and climb onto the higher scaffolding. (You can also climb the pillar starting from the ground, next to the scaffolding.) Jump across the small pillar next to the wall and continue along the scaffolding until you reach a large stone platform. Continue on the narrow ledge to your left and jump across the small dirt-covered protrusion onto the dirt-covered ledge. Walk along and climb the ledges until you reach a wide gap. Jump across it and follow the ledge to Green Bauble #3. (From there, you can jump across along the wall, and continue the path to Checkpoint 1.)
- (Optional) Path to Green Bauble #4.
- After grabbing Green Bauble #1 you follow the easy jumps with reduced gravity across the underwater section to the mushroom with a yellow Bauble on top (the hitbox detection on this one is wonky, but if you jump back down from above, you can usually get it), make sure to not bump your head as it will drop you down fast. On dry land follow the path upwards along the scaffolding pathways up. At the top is Hidden Shop 1 (A). Follow the beam on your left all the way to the end, then jump on your right. Drop down to the wooden scaffolding and follow left. Jump from the wooden beam to Green Bauble #4 in front of you. If you missed Green Bauble #1 you can jump down and try to hit it from here. Otherwise Jump left into the waterfall to get Red Bauble #1 or follow the beam and up the ledges for the next campfire.
- (Optional) Path to Secret Cave #1.
- Make sure to purchase a
 key from Hidden Shop 1. Follow the path to Green Bauble #3 until you reach the final wide gap. Instead of jumping across, jump down the ledges on the right. (Alternatively, use the lower path along the scaffolding, past the Potion Cart Merchant.) Follow the ledge along the wall towards the water until you reach a cave entrance blocked by rocks (B). Bomb the rocks and use your purchased key to open the chest inside for some Choya Seeds (Quality Testing: Seed Generation, Under 3: Unlock a chest in a secret cave!).
- Make sure to purchase a
Hidden Shop 1 items (Shopkeeper)[edit]
| Item | Cost | Description |
|---|---|---|
| Choya Language Guide | 3 Choya Seeds | Allows you to understand the choya! |
| 25 |
Used for opening chests. | |
| 5 |
Restores one heart. | |
| 300 |
Health refills restore two hearts. | |
| Green Ooze | 25 |
Not particularly tame. |
(A) Hidden Shop 1
(B) Secret Cave #1


Checkpoint 1 to Checkpoint 2[edit]
- (Optional) Path to Green Bauble #5.
- Start at the island with the red crystal. As the platform to your right appears from the water hit the crystal which will make another platform appear, jump across both to the ledges on the wall. Climb up and then take the sloped beam down to Green Bauble #5, then go back up and across the long beam to continue on the main path.
- (Optional) Path to Green Bauble #6.
- When you crossed the highest beam across the rapids, instead of continuing past them jump from the highest beam or the floor after down to the left onto the pillar that pops up, jump onto main land. Green Bauble #6 is on the ledge to your left.
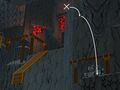
- (Optional) Take the path to Red Bauble #2.
- Activate Checkpoint 2 then come back for this step.
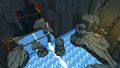
- Shop #3 (A) is just before Red Bauble #2. For the second and third crystals, stand near the third crystal whilst facing backwards to shoot the second, then hit the third in melee. The last two crystals need to be shot because they are out of reach (shoot the fourth before jumping onto the timed disappearing rock, and shoot the fifth whilst standing on the rock summoned by the fourth). Following the path up getting by some snakes and spider you will find a crossroads. The path right will spawn oozes, and at the top of this path you will find a shop staffed by an owl. The path left will lead you to a river. Following this river on the right side will lead you to the chest.
Shop #3 items (Owl)[edit]
| Item | Cost | Description |
|---|---|---|
| A Sold Out sign written in New Krytan. | ||
| Bauble Backpack | 750 |
This backpack will allow you to hold up to 1000 baubles. |
| Special Pot | 25 |
Just an ordinary pot. |
Entrance Location.
First Crystal Location.
Second and Third Crystal Locations.
Fourth and Fifth Crystal Locations.
(A) Jump into the waterfall from the indicated ledge to begin the journey to Shop #3


Checkpoint 2 to Checkpoint 3[edit]
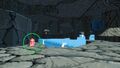
- (Optional) Path to Secret Cave #2.
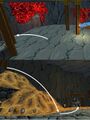
- Before crossing the first bridge, follow the left hand wall towards the cliff edge to find the entrance to Secret Cave #2 (A). Bomb the entrance and defeat all the oozes within to unlock a chest containing some Choya Seeds (Quality Testing: Seed Generation, Under 3: Defeat the oozes in a different secret cave!).
- (Optional) Path to Green Bauble #7.
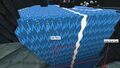
- Cross the second bridge (the highest in the waterfall cavern) to the rock platform with a fallen bridge on the end. Look toward the waterfall and jump down to the nearest stalagmite pillar in the river. Hop across the chain of pillars in the river to an elevated dirt patch on the far side. Now use the pillars in and near the waterfall to jump up and collect Green Bauble #7. From the bauble, step into the waterfall for Red Bauble #3 as well as Gourdon the Racing Choya and the coin adventure.
- (Optional) Path to Green Bauble #8.
- Cross the second bridge (the highest in the waterfall cavern) to the rock platform with a fallen bridge on the end (the same platform that leads to Green Bauble #7). This time, follow along the right side of the platform where there is a fairly difficult corner jump to make, then just go up to Green Bauble #8.
(A) Secret Cave #2

Checkpoint 3 to Boss (Final area)[edit]
- (Optional) Visit Shop #4
- Enter the doorway to the right of the campfire for the final shop in the zone. Speak to the Choya Miner running the shop once you've purchased the Choya Language Guide, and he will let you take a bow (Quality Testing: Super Bow) for free!
- Run along until you reach the Cage atop the pillar.
- Destroy the Cage.
- Note that the Oozes spawn regularly at the boss (max 5 at once), and the platform is a bit larger providing room to fight them.
Shop #4 items (Choya Miner)[edit]
| Item | Cost | Description |
|---|---|---|
| Shoots multiple arrows; requires ammo. The choya shopkeeper says you can have it! | ||
| 100 |
Dig anywhere for a 10% chance to find buried treasures. | |
| 5 |
Restores one heart. | |
| Piranha | 25 |
Just an ordinary piranha. |
| A Sold Out sign written in New Krytan. |
Achievements[edit]
- For related achievements see: Super Adventure Box: Quality Testing
Digging spots[edit]
- None.
Rewards[edit]
- 50
 Baubles
 - Glorious Chest (once per day per zone) containing:
- 2
 Bauble Bubbles
 - 1
 Continue Coin
 - A chance to get a Super Weapon Box
- 2
NPCs[edit]
Allies[edit]
Foes[edit]
Objects[edit]
Notes[edit]
- Foes have more hit points than in World 1 and 2.
- Previously, you could jump over the wooden walls before Checkpoint 3 to drop down to the elevated platform for Green Bauble #7 and Red Bauble #3. However, an invisible wall was added to block this. Now, you can get there by jumping down from one of the stalactites in the room with the rope bridges over the waterfall.
Trivia[edit]
- Added with the March 28th, 2023 game update.
- The April 16, 2024 game update added new further updates to the zone: shops, blue oozes, secret caves, an adventure.
Bauble (1 ![]() • 5
• 5 ![]() • 10
• 10 ![]() • 20
• 20 ![]() • 50
• 50 ![]() ) •
) • ![]() Bauble Bubble
Bauble Bubble
Continue Coin • Infinite Continue Coin • ![]() Fancy Furniture Coin
Fancy Furniture Coin
| Skills and Upgrades |
• Purse
|
|---|---|
| Hub | World 1 House • World 2 House • World 3 House • World 4 House |
| World 1 | Z1: Sunny Glade (TM) • Z2: Dark Woods (TM) • Z3: Kingdom of Fungus (TM) • B: Cart |
| World 2 | Z1: Rapids (TM) • Z2: Pain Cliffs (TM) • Z3: Storm Top (TM) • B: Robbers |
| World 3 | Z0: Test Zone • Historical: Sparkling Pools |
| Adventures | Super Adventure Hub Super Adventure 1-1 • Super Adventure 1-2 • Super Adventure 1-3 Super Adventure 2-1 • Super Adventure 2-2 • Super Adventure 2-3 Super Adventure Test Zone |
| Achievements |