Kingdom of Fungus/Tribulation Mode
Kingdom of Fungus
Tribulation Mode

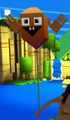
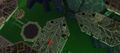
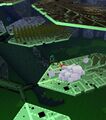
Map of Kingdom of Fungus
Tribulation Mode
- Tier
- World 1 Zone 3 Tribulation Mode
- Type
- Area
- Dungeon
- Super Adventure Box
- Connects to
- World 1 House, Dark Woods, Cart, Hub
| Image(s) |
|
Click to enlarge. |

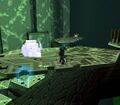
Kingdom of Fungus, or World 1 Zone 3, is the third level of Super Adventure Box. There are 6 Hidden Rooms, 2 Furniture shops and 63 baubles to collect.
Objectives[edit]
 Super Adventure Box
- Team Score: X (refers to the number of foes killed)
- Finished!
- Warping in: 0:15
Tribulation Mechanics[edit]
A high-level overview of the hazards in this zone:
Additionally, there are a few non-lethal mechanics:
- Balloon Pump: can be interacted with to acquire a Balloon.
- Cloud Flag: using a Balloon's Unlock skill next to it will turn it into a checkpoint. Unlocking the cloud flags is not required to complete the zone.

Balloon Pump
Balloon

Cloud Flag


Walkthrough[edit]
- For Exploration and Normal Mode, see: Kingdom of Fungus
| Search YouTube for videos related to World 1 Zone 3 Tribulation Mode. |
This walkthrough details the path through the zone in tribulation mode in addition to the locations of all shops and the honeycomb for the following achievements:
 Super Adventure Box: Tribulation Mode: Tough Customer, World 1 — Visit every shop in World 1 in Tribulation Mode. (25
 )
)- Super Adventure Box: Tribulation Mode: Forbidden Honey — Destroy all honeycombs found in World 1 Tribulation Mode. (30)
Start to Cloud save 1[edit]
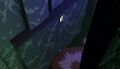
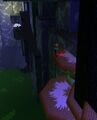
Upon entering the level the balloon pump is located right behind you. However, before getting it, head to the opening of the hollow tree and burn the sticky plants; this will make it easier to ascend the tree. Get the balloon and enter the hollow tree, avoiding the spikes by jumping onto the mushroom on the left wall.
Jump onto the bouncy mushroom and use it to jump onto the edge of the flytrap, carefully avoiding the pink center. Do not land on the branch that's sticking out of the tree, as it contains spears.
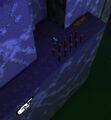
From the flytrap, enter the hollow tree log and avoid the right wall - it contains spears.1 Take a few steps forward until you're almost at the blue bauble, then cross through it to the right wall of the tree log, as there more spears now coming from your left. The way forward is blocked by even more spears, so exit through the hole on the left.
Turn right and edge along the cliffs until you can jump onto the first flytrap. There are No Clouds blocking the way across the other flytraps. To progress, continue along the cliff you just jumped off of, underneath the hollow tree log. Jump along the cliff wall and get back onto the cliff - you're now on the other side of the hollow log.
This next part contains no tribulation hazards. Climb onto the smaller log in front of you and from there onto the wall opposite the hollow log. Make your way along the edges of that wall towards the starting area and jump onto the flytrap. From there jump onto the large platform overlooking the starting area. Continue across the next three flytraps to the platform with the digging spot and from there over yet another flytrap onto the cliff. Climb up the rock and jump over one last flytrap to reach the checkpoint cloud on the big branch.
1 Spikes in the hollow log

Cloud save 1 to Checkpoint 1[edit]
Walk all the way across the branch and jump off to the right, avoiding the sticky plant.
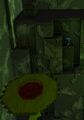
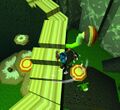
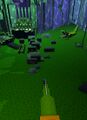
This next section contains intangible floor wherever the floor is slightly lowered. You may want to take out the frogs inside this area. Jump over the first chasm, walk around the sticky plant near the spikes and jump onto the yellow flower. Jump on the next yellow flower in front of you and from there onto the raised floor.
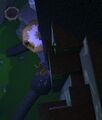
As you're approaching the checkpoint on the ledge, a Helping Hand missile will fire at you but it should get blocked by the big tree root.
To get up to the checkpoint you need to burn the sticky plants in front of it. Use the tree roots to your left to get some height and burn the left half of the sticky plants blocking the ledge. The right half of the sticky plants is out of reach, since there is intangible floor to the right of the spike-covered yellow flower, making it unsafe to burn. Instead, jump onto the big tree root, and from here you have three options:
- Uses a dodge-jump: Dodge-jump over the spikes onto the burned left half of the sticky plants.
- No dodge-jump required: Press the torch/candle skill a few milliseconds before jumping onto the "active" right half of the sticky plants, causing them to be burned while you're mid-air. This option tends to be easier for those who find dodge-jumps tricky/unreliable.
- No dodge-jump or timing required: Jump into the sticky plants, become stunned for a moment, spam your first skill until you're freed, burn the plants, and proceed as normal.
Grab the checkpoint.
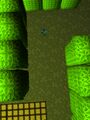
- (Optional) Super Adventure Box: Tribulation Mode: Forbidden Honey — Destroy all honeycombs found in World 1 Tribulation Mode. (30) — Before continuing on, turn around and jump back off the ledge, avoiding the spiked yellow flower and the intangible floor on your left. Immediately turn right and enter the queen bee dog's maze.
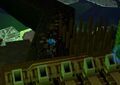
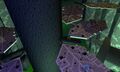
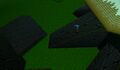
- Almost the entire maze contains intangible floor - wherever the floor is lowered, you will fall through to your death. As you enter the hedges, stick to the right side of the wall. Take an immediate turn left and jump onto the wooden platform. Kill the frog that's approaching you. Jump off the wooden platform across the lowered floor and hug the left wall as you continue on. Once you hit the stone wall, turn right and jump over the lowered floor again to land on another wooden platform.
- Go forward and stand on the very corner of the wooden platform - you'll need to jump around the corner to your right to land on a sliver of another wooden platform visible from where you stand. There are two ways of handling this:
- Uses a dodge-jump: Dodge-jump to land on that platform's outermost edge and hug the right wall as you land.2 This is very repeatable and reliable if you can reliably dodge-jump.
- No dodge-jump required: Make a jump around the corner, changing your direction midair to hug the corner. 3 This is entirely reliant on how confident you are at controlling your character, but doesn't require a dodge-jump.
- Take a left turn and jump to the next wooden platform to avoid the intangible floor. Next up is another left turn but seemingly nowhere to land safely. There is a hidden stone pillar4 dead-center in the right turn ahead (visible by angling your camera into the floor so that it's beneath it). Jump onto it. From there you can reach another wooden platform. Jump there, turn right and follow the corridor, jumping onto another wooden platform, before you take a right turn. Jump over the next two wooden platforms and keep heading forward to exit the maze. As you exit, jump onto the raised floor to your right. Climb up the tree root to find the queen bee dog and honeycomb for Forbidden Honey.
- With the queen bee dog dead, jump onto the hedges and make your way left to safely get back to the checkpoint, jump into the lava, or type "/gg" to respawn.
2 Dodge-jumping from one wooden platform to the other
3 Jumping around the corner
4 Standing on the hidden stone pillar


Checkpoint 1 to Cloud save 2[edit]
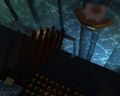
As you exit the checkpoint, head right towards the tree log and use the bouncy mushroom to jump onto the tree root emerging from the toxic water. Be careful not to walk too far along the horizontal section of the root, as there are spears inside, roughly on top of the helping hand on its side. Jump onto the biggest root of the tree stump to your right.5
You have two options to proceed from here:
- Walk up the slope. Avoid the Helping Hand missile by dodge-rolling into the tree stump. The tree stump contains more spears, so jump onto its edge and move carefully around it anti-clockwise. Use the brown mushroom to get on the bouncy mushroom and land on the leaf above.
- Head along the branch of this leaf, taking care not to walk too far once the branch merges with the one adjacent, as there are spikes. Jump onto the leaf or the branch to your left, and then jump across to the main branch again, avoiding the previously mentioned spikes.
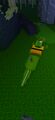
- Jump across the toxic water to the split-root nearby. Head toward where there's a root across the toxic water from you with a toad on it.6 Aim for where the slope meets the flat section, and make a somewhat tight jump to get across, taking care not to be eaten by the toad.
- Jump across to the bouncy mushroom, and use it to reach the branch above you. From here, jump across to the branch directly next to you, and head right a bit toward the sticky plant.7
- Make a jump from here toward the sloped part of the branch above you, turn around and walk up, and then jump across to where the save cloud is.
The balloon pump is on the leaf to your far-right. Be wary as there are spikes in the close-right leaf's base. The branches are safe to walk on, though. Grab the balloon, and follow the branches to the save cloud.8
5 Spikes in the tree branch
6 The root with the toad to jump to
7 The branch to jump to
8 The save cloud and balloon pump


Cloud save 2 to Checkpoint 2[edit]
Head forward along the branches, across the small fork onto the big fork. At the center of the big fork are spears,9 so jump across to its other arm and further ahead onto the left leaf.
Jump onto the conical mushrooms; landing on the lowest one will trigger a Helping Hand missile - dodge into the stalks of the other mushrooms to avoid it.10 By using a dodge-jump you can land on a higher mushroom and the missile won't be triggered. Jump onto the tree roots below.
Go around the tree anti-clockwise. As you're about to jump onto the shallowest bit of tree root near the submerged mushroom, make sure to land on its very edge to avoid the spears along the tree trunk.11 The way to the next bit of tree root is blocked by more spears, so you need to jump onto the submerged mushroom and jump onto the next root from there. Then jump onto the big brown mushroom.
Use the bouncy mushroom to reach the platforms above and jump over to the cliff to your right.12 Continue along the cliff and hug the left wall to avoid more spears from the ground.13 Jump over the three flytraps and scale the wall of the platform with the chest on top - don't jump into the left hand corner, as it contains more ground spears.14
Continue along the cliff, across the leaf and the branches to reach the checkpoint. You may want to take out the frog beforehand via bomb or slingshot.
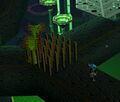
9 Spears in the big fork
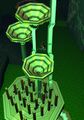
10 Dodge spot to avoid being hit by the helping hand missile
11 Spears along the tree trunk
12 Jumping across to the cliff
13 Spikes along the cliff, hug the left
14 Spikes on the left corner


Checkpoint 2 to Cloud save 3[edit]
Avoid the right wall as you're walking through the checkpoint, as there are spears coming from the ground.15
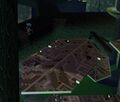
- (Optional) Super Adventure Box: Tribulation Mode: Tough Customer, World 1 — Visit every shop in World 1 in Tribulation Mode. (25) — To reach the shop behind the "short waterfall" you can safely jump down the branches and onto the lily pad.16 Inside the shop, burn the rug and place a minibomb to reveal the shop "inside the room".17 Jump into the water or type "/gg" to return to checkpoint 2.
Past the checkpoint immediately turn right and jump onto the lower small brown mushroom to reach the branch in front of you. From there, jump onto the big fork and continue forward onto the left hand leaf. Jump over the next two leaves and climb up the crossing branches.18 Take care of any monkeys in your path to reduce pressure.
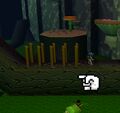
Turn right and walk towards the hollow tree trunk with the barrel inside. Walk along its left edge until you can reach the brown mushroom coming from the tree trunk's side.19
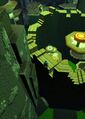
Jump over the flytrap and follow the platforms to your left.20 You will find the balloon pump inside a flytrap, past a sticky plant on the cliff.21 Grab it and continue following the mushroom-platforms upward. Move along the cliff edges until you reach the cloud.22
15 Spears in the floor by the checkpoint

16 Location of the shop
17 Bomb the floor to reveal the secret shop
18 Climb the branches
19 Avoid the exploding barrel and continue around the stump
20 Balloon pump in the fly trap
21 Checkpoint cloud


Cloud Save 3 to Checkpoint 3[edit]
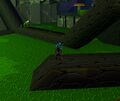
Turn left and jump onto the decaying leaf and immediately onto the one with a chest on top. Follow the leaves and you will reach a point where you can go 1 of 3 ways22:
- (Optional) Super Adventure Box: Tribulation Mode: Tough Customer, World 1 — Visit every shop in World 1 in Tribulation Mode. (25) Make a right turn towards the wall.23 Scale the cliffs and jump onto the flytrap to reach the shop "overlooking the swamp". From there you can safely return to the cloud checkpoint to your left as you exit the shop.
- Uses a dodge-jump: Jump off near the large conical mushrooms to land safely below. Jump onto the tree roots to your right24 and move along the tree clockwise. Use a dodge-jump to reach the third tree root.25 From there, just jump straight towards the next checkpoint.
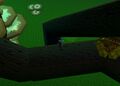
- No dodge-jump required: Jump across onto a leaf whose middle section is covered in (hidden) spears.26 Follow around the edge of the leaf to reach the other side27, and jump across onto the large hollow diagonal log. Run to the top, turn to your right, and jump across onto the nearby branch.28 Follow the leaves and branches toward the checkpoint.
22 Where the paths branch out
23 Jumping along the cliffs to reach the shop
24 Down to the dodge-jump route
25 Dodge-jump across the toxic water
26 The spiky leaf
27 Around the spikes
28 The top of the hollow log


Checkpoint 3 to Cloud save 4[edit]
If you are at the lower checkpoint, near water-level: Jump into the water or type "/gg" to respawn at the upper checkpoint.
For the entirety of the leaf-walking section, you're going to be pelted by monkeys, take care. Walk over the decaying leaves, staying on the right-most leaves. Jump over to the decaying leaves of the tree to your right and seek safety on the branch.29 From the branch, jump up to the elevated leaf and quickly onto the small branch it's hanging from to your right, or onto the big branch to your left directly.30
Walk along the big branch past the ooze farmer and jump onto the bark of the big hollow tree. Hit the bouncy mushroom pod to create a bouncy mushroom on the tree roots.31 From here:
- (Optional) Super Adventure Box: Tribulation Mode: Tough Customer, World 1 — Visit every shop in World 1 in Tribulation Mode. (25) — Continue along the tree bark anti-clockwise until you pass the cliff to your right, then jump down onto the tree roots in the corner between tree and cliff to reach the shop "behind a tree stump".32
- Upon exiting the shop use the tree roots to wrap around the tree anti-clockwise until you reach the bouncy mushroom you made earlier. Use it to get back up.
- Drop into the hollow tree to get the balloon.33 Use the bouncy mushroom to jump back out, walk clockwise along the tree bark and jump into the big hollow tree trunk. Optionally kill the monkeys inside.
Hug up the left wall of the hollow log and use the brown mushrooms to exit through the hole.34 Ascend to the top of the hollow log and activate the cloud save.
29 The safety branch
30 The large branch you can jump up to on your left
31 The mushroom pod to hit to create a way back up
32 The shop "behind a tree stump"

33 The location of the balloon pump
34 The hole in the hollow log to make your exit toward the cloud save


Cloud save 4 to Checkpoint 4[edit]
- (Optional) Super Adventure Box: Tribulation Mode: Tough Customer, World 1 — Visit every shop in World 1 in Tribulation Mode. (25) — This shop - "many mushroom bounces" - can either be reached from this cloud save (easy) or from the next checkpoint (slightly harder). If going from here:
- Head left around the spikes and drop to the ground below. Eliminate the monkey(s) and jump across to the slanted branch in front of you. Equip your bomb or sling-shot and nudge to the right edge of this branch, near water level.
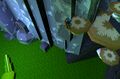
- Locate the alligator in the cave entrance. Throw a bomb/sling-shot at its head from where you stand and use the lily pads to climb onto it and head into the cave. Seek safety on top of a nearby conical mushroom.35
- Jump over the mushrooms until you hit a tree root hanging from the top. Climb up the slope as far as you can and jump onto the broad tree root to your left. Climb up that slope as far as you can again, then turn right and jump across the gap to the next tree root. Ascend further by jumping off the slope's highest point onto the tree root above you.36 From there you can reach a bouncy mushroom.
- Use the bouncy mushrooms to ascend the hollow tree.37 Once you reach the second big brown mushroom platform, use the next two bouncy mushrooms to reach the small brown mushroom platform above it. Don't idly bounce on the bouncy mushrooms too long or you will get knocked all the way down by the No Clouds at the very top of the hollow tree.
- From the small brown mushroom platform, use the next two bouncy mushrooms to land on leftmost part of the tree bark. Jump out of the tree and turn around to find the glitch stone, which you can optionally do for extra continue coins at the end. Facing away from the hollow tree, head right and down the cliffs until you can jump on a brown mushroom platform38 with a sticky plant on it to reach the shop requiring "many mushroom bounces".39
- Upon exiting the shop, jump into the water or type "/gg" to respawn at the cloud save.
Head right around the spikes and use one of two methods to proceed.40
- Uses a dodge-jump: Dodge-jump onto the brown mushroom hanging from the wall across.41 Jump down onto the cliff below.
- No dodge-jump required: Jump directly down to the cliff below, narrowly avoiding the diagonal spears on your left.42
Jump onto the tree roots ahead. There are once again two paths forward43:
- (Optional) Super Adventure Box: Tribulation Mode: Tough Customer, World 1 — Visit every shop in World 1 in Tribulation Mode. (25) — Go around the tree clockwise and ascend the brown mushrooms. Turn left and jump onto the small brown mushroom on the corner of the cliff.44 Jump down on the small rock in the toxic water and from there to the shop "right, before the king".
- Exit the shop and jump back over the rock you came from to reach the tree roots - the alligator contains spears.
- Go around the roots of the adjacent hollow tree stump anti-clockwise until you reach the alligator there. Hit it from the slope of the tree root and climb onto it, facing the checkpoint ahead.45 Dispose of the frog with a minibomb.
The nearest rock is a Jumping Rock, so be quick to jump past it. Do not head straight for the checkpoint as there are ground spikes ahead. Instead, jump onto the single rectangular rock to your right. The toxic water in front of the alligator to your right also has ground spikes. Aim for the rectangular rock slab that's nestled between the three cubical rocks diagonally to your left and jump there. Jump over the cubical rocks to reach the checkpoint and be careful not to get too close to the big Jumping Rock in the toxic water to your right. Activate the checkpoint.
35 Route to the shop jumping puzzle
36 Route to the first bouncy mushroom
37 Route up the bouncy mushrooms
38 Looking down at the "many mushroom bounces" shop

39 The "many mushroom bounces" shop
40 Point from which to jump to either brown mushroom or cliff
41 Dodge-jump method

42 Normal jump method
43 The root from where the path splits
44 The shop "right, before the king"
45 The way to the checkpoint


Checkpoint 4 to Boss[edit]
- (Optional) Super Adventure Box: Tribulation Mode: Tough Customer, World 1 — Visit every shop in World 1 in Tribulation Mode. (25) — If you did not get the "many mushroom bounces" shop using the method from the previous cloud save:
- Before you continue to the boss, turn around and head back the same way you came from. Bomb the alligator from afar and bait the small Jumping Rock's attack before jumping on the alligator and onto the tree roots near its head.46
- Wrap around the tree anti-clockwise until you reach another alligator. Hit it and climb onto the big tree root. Head up the slope, go past the sticky plants by burning them and head down the other big root in front of you. Turn around and locate the alligator in the cave entrance.
- The remaining steps are detailed in the previous section.
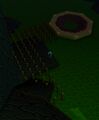
The Toad King boss fight works the same way it does in classic mode. However, the big lily pads to the left and right contain spears,47 so dodge every shockwave attack by hopping across the small lily pads.
46 The path backward to the "many mushroom bounces" shop
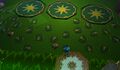
47 The left and right lily-pads have spikes in them


Achievements[edit]
- For Normal Mode achievements, see: Kingdom of Fungus#Achievements
| Forbidden Honey | Super Adventure Box: Tribulation Mode | 30 |
|---|---|---|
| Destroy all honeycombs found in World 1 Tribulation Mode.Sweet, delicious honey. |
1 Honeycomb Destroyed in World 1 Tribulation Mode | 10 |
| 2 Honeycombs Destroyed in World 1 Tribulation Mode | 10 | |
| 3 Honeycombs Destroyed in World 1 Tribulation Mode | 10 |
| Glutton for Punishment | Super Adventure Box: Tribulation Mode | 75 |
|---|---|---|
| Complete Zone 1, Zone 2, and Zone 3 in World 1 in Tribulation Mode.Serious fun amidst serious pain. |
1 Zone Completed in World 1 in Tribulation Mode | 25 |
| 2 Zones Completed in World 1 in Tribulation Mode | 25 | |
| 3 Zones Completed in World 1 in Tribulation Mode | 25 |
| Tough Customer, World 1 | Super Adventure Box: Tribulation Mode | 25 | |||||||||||||||
|---|---|---|---|---|---|---|---|---|---|---|---|---|---|---|---|---|---|
| Visit every shop in World 1 in Tribulation Mode.Hunting for adventure...and bargains. |
1 Shop Visited in World 1 Tribulation Mode | 2 | |||||||||||||||
| 2 Shops Visited in World 1 Tribulation Mode | 2 | ||||||||||||||||
| 3 Shops Visited in World 1 Tribulation Mode | 2 | ||||||||||||||||
| 4 Shops Visited in World 1 Tribulation Mode | 2 | ||||||||||||||||
| |||||||||||||||||
Bauble (1 ![]() • 5
• 5 ![]() • 10
• 10 ![]() • 20
• 20 ![]() • 50
• 50 ![]() ) •
) • ![]() Bauble Bubble
Bauble Bubble
Continue Coin • Infinite Continue Coin • ![]() Fancy Furniture Coin
Fancy Furniture Coin
| Skills and Upgrades |
• Purse
|
|---|---|
| Hub | World 1 House • World 2 House • World 3 House • World 4 House |
| World 1 | Z1: Sunny Glade (TM) • Z2: Dark Woods (TM) • Z3: Kingdom of Fungus (TM) • B: Cart |
| World 2 | Z1: Rapids (TM) • Z2: Pain Cliffs (TM) • Z3: Storm Top (TM) • B: Robbers |
| World 3 | Z0: Test Zone • Historical: Sparkling Pools |
| Adventures | Super Adventure Hub Super Adventure 1-1 • Super Adventure 1-2 • Super Adventure 1-3 Super Adventure 2-1 • Super Adventure 2-2 • Super Adventure 2-3 Super Adventure Test Zone |
| Achievements |