Dark Woods/Tribulation Mode
Dark Woods
Tribulation Mode
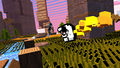
![]()
Map of Dark Woods
Tribulation Mode
- Tier
- World 1 Zone 2 Tribulation Mode
- Type
- Area
- Dungeon
- Super Adventure Box
- Connects to
- World 1 House, Sunny Glade, Kingdom of Fungus, Hub
| Image(s) |
|
Click to enlarge. |

Dark Woods, or World 1 Zone 2, is the second level of Super Adventure Box. It contains 6 Hidden Rooms, 4 Shops, 2 Furniture Shops, 2 locked chests, 15 dig spots, and 73 baubles to collect.
Objectives[edit]
 Super Adventure Box
- Team Score: X (refers to the number of foes killed)
- Finished!
- Warping in: 0:15
Tribulation Mechanics[edit]
A high-level overview of the hazards in this zone:
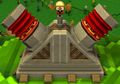
- Helping Hand: some will turn into Hand Missiles that will fire at players, resulting in instant death.
- Jumping Rock: some boulders will jump into the air and knock back players, but there is a short delay between attacks during which they can be used as a platform.
- No Cloud: these clouds will electrify themselves after a few seconds.
- Tribulation Cloud: these clouds will follow a player shooting electricity and creating large AOE fields if you get too close.
- Spikes: touching these will result in instant death.
- Spears: like Spikes, but invisible until players get close. They can sprout from walls as well as the ground. Spears stay visible after first activation.
- Intangible Floors: sometimes the ground may not be stood upon (often indicated by changes in texture or elevated) and players will fall through onto spikes or lava.
- Checkpoint: if there are multiple players in the instance, then any player standing on a locked checkpoint will be attacked by the pipe - resulting in instant death.
Additionally, there are a few non-lethal mechanics:
- Balloon Pump: can be interacted with to acquire a Balloon.
- Cloud Flag: using a Balloon's Unlock skill next to it will turn it into a checkpoint. Unlocking the cloud flags is not required to complete the zone.
Helping Hand Missile
Jumping Rock

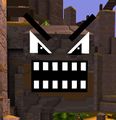
No Cloud
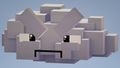
Tribulation Cloud
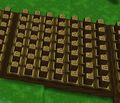
Spikes (World 1)
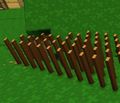
Spears (World 1)


Balloon Pump
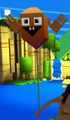
Balloon

Cloud Flag


Walkthrough[edit]
- For Exploration and Normal Mode, see: Dark Woods
| Search YouTube for videos related to World 1 Zone 2 Tribulation Mode. |
This walkthrough details the path through the zone in tribulation mode in addition to the locations of all shops and the honeycomb.
Start to Cloud save 1[edit]
Use the bounce pads to get to the tree directly ahead of you when you load in. The floor surrounding the bounce pads is intangible and disguises a pit of lava, so try not to miss the pads! From the last bounce pad, turn and jump onto the slope and pick up the Balloon. From the Balloon Pump head to the rocks next to the waterfall, and jump from the near side rocks to the platform on the other side, then into the tree to attain the first Cloud Flag.
Cloud save 1 to Checkpoint 1[edit]
This section requires jumping on top of No Clouds and avoiding a Tribulation Cloud to progress quickly, or take a longer route through the lava/tree maze to gain the first checkpoint.
Fast Route:
From the cloud flag, jump down to the next tree closer to the woods entrance, then head right and make a series of 3 blind jumps onto the top of No Clouds that appear when you land on them. From the third set of No Clouds, jump down and to the left onto a wide platform, head left around one tree, then straight towards checkpoint 1. Just before reaching CP1, make sure you use the tree roots on the left side to avoid a Spears at ground level.
Slower Route:
From the cloud flag, jump to the tree next to the woods entrance, then jump left into to maze. Hug the left wall, staying on the tree roots around the edge of the maze until you reach CP1. Make sure you avoid the spear trap just before the checkpoint by using the roots on the left side.
Checkpoint 1 to Cloud save 2[edit]
From the checkpoint, take an immediate left and use the tree roots and ferns to avoid hidden spear traps at ground level. Optionally kill the spider ahead of you to clear the way and reduce pressure as you set up for the next section. When you reach the lava, progress across the rocks by baiting the Jumping Rock's attack and retreating, then getting past it before it resets and can attack again. Land on the ferns on the far side, then head clockwise around the tree. Jump across the next set of rocks quickly without pausing and you can avoid the rock's attacks here. Again, if you want to reduce pressure, you can kill the spider before heading across the lava. At the next tree, the Helping Hand missile should fire harmlessly into the tree in front of you. Stay on the roots and head around the tree counter-clockwise, killing the monkey that can aggro at this point. Jump towards the next tree and the Balloon Pump is hidden in the corner to the left. Once you have the balloon, jump across the roots by the hollow stump and run across the bottom of the slope to avoid spear traps higher up. Once level with the Cloud Flag, run up the slope, jump onto the ferns, and activate it using the Balloon.
Cloud save 2 to Checkpoint 2[edit]
Jump over to the root then climb up it. Jump down hugging the tree on the fern near the lava. Jump across the lily pads. From here you can run to the shop but there are spikes near the door so you will need to enter from the left side carefully. If you don't need the shop, run straight across from the pond up the second root from the wall. Turn completely around and run in a straight line to the ramp that is now to the left of the pond with the lily pads. From here hug the right wall and jump down, avoiding the spider, and continue following this wall up to the checkpoint.
Checkpoint 2 to Cloud save 3[edit]
Careful as the left wall has spears, go right and jump down, this water is not toxic. Use the final lilypad to jump up over a spear trap to the fern. Jump from the fern to the root and continue up to the left in the tree. There is a balloon on the far back base of the tree on the small area without lava, grab it before continuing up, but be careful of the snake in the lava. You can jump as normal to the top of the tree and over to the platform where there is a save cloud.
To get to shop 4 is relatively straight forward, after jumping to the fern from the water, continue right, evading the jumping rock. Continue around to the right following the lava and avoiding the monkey. When you turn right at the corner, go left by the tree to jump to the dirt path. From here jump to the log then follow the dirt to the shop.
To get the honey, continue to the hive as normal but there are spikes just at the top of the ramp above the queen bee dog. Jump to the left and drop down. There are additional spikes on the side of the honeycomb where the ramp is.
The shortcut worm is still a viable option and will skip you to the final check point (checkpoint 4). It is however filled with additional green blocks and spikes all of which will instantly kill you. You can get there by hugging the edge after jumping out of the water, avoiding the bouncing rock, and jumping to the root. Careful as you approach the worm, use the branch to the right and jump as far as you can as there are spears on the ramp.
Cloud save 3 to Cloud Save 4[edit]
Go around to the right of the lava. Bait the rock to attack by walking to the end of the ledge, and dodge immediately backwards. Make quick jumps over the rocks and ferns onto the leaf before the rock can jump again. Run along the leaves to the left. The second tree you pass has a spear trap on its trunk, so jump carefully using the left edges of the leaves. Go past a monkey, and take the bouncing mushroom up. Right against the tree past another monkey is the balloon. Turn around and run back toward the mushroom and you should see a second mushroom with the cloud right beside it. There is a spear trap in the middle of the "Y" shape formed by the thick branches before the cloud.
Cloud Save 4 to Checkpoint 3[edit]
Use the bouncing mushroom to jump on the fern on the three, then enter the tree and go up using the fern inside. Jump out of the tree and continue forward using leaves and branches, then jump to the left to another branch between trees. Drop to a lower branch, and continue towards the exit. The fully exposed leaves in the middle have spears that can be bypassed by jumping around them or walking along a thin branch edge. Reach the last tree before checkpoint and drop to the edge of the large mushroom, as the center contains a spear trap. Jump to the next branch and follow it to the end, where a Hand Missile shoots at you. From here you can jump to the checkpoint safely.
Checkpoint 3 to Cloud save 5[edit]
Drop down to ground level and head toward the poison water. Shop 5 will be on your right and can be safely entered, but there is a spear trap in the shop itself if you walk in too far. The poison water will instantly kill you and there are spears right in front of the first lily pad, so you will have to edge around the side of the safe ground. Jump across the right path of lily pads to get the next balloon, then follow the lily pads towards the spikes. Use the ferns and roots to jump around the base of the tree, then take the bouncing mushrooms up. There are spears in the trunk of both trees on this layer, so bounce outward a bit and carefully walk up to the cloud.
Cloud save 5 to Checkpoint 4[edit]
Jump onto the branch on the right and continue towards the last checkpoint. Leaves that have monkeys on them have also spear traps, so drop down onto a lower leaf before you reach them. Jump down to the ground level and continue normally. There is a small jumping stone right beside the checkpoint. Jump over the spikes and dodge forward to avoid the stone's attack.
Checkpoint 4 to Boss[edit]
The bouncy mushroom inside the tree trunk cannot be used because it is overlaid with a spear trap. Note also that touching the toxic water kills you instantly. Go around the toxic water pool counter-clockwise, jumping on stones and ledges along the wall, towards Betty Bauble. The last gray stone is a Jumping Stone, but it won't knock you back if you jump off it quickly. The tree trunk around the Cage has limited space to walk on because of spear traps on the branch stubs and at the bent shortcut mushroom. Try to dodge the Cage's laser attacks.
Achievements[edit]
- For Normal Mode achievements, see: Dark Woods#Achievements
| Forbidden Honey | Super Adventure Box: Tribulation Mode | 30 |
|---|---|---|
| Destroy all honeycombs found in World 1 Tribulation Mode.Sweet, delicious honey. |
1 Honeycomb Destroyed in World 1 Tribulation Mode | 10 |
| 2 Honeycombs Destroyed in World 1 Tribulation Mode | 10 | |
| 3 Honeycombs Destroyed in World 1 Tribulation Mode | 10 |
| Glutton for Punishment | Super Adventure Box: Tribulation Mode | 75 |
|---|---|---|
| Complete Zone 1, Zone 2, and Zone 3 in World 1 in Tribulation Mode.Serious fun amidst serious pain. |
1 Zone Completed in World 1 in Tribulation Mode | 25 |
| 2 Zones Completed in World 1 in Tribulation Mode | 25 | |
| 3 Zones Completed in World 1 in Tribulation Mode | 25 |
| Tough Customer, World 1 | Super Adventure Box: Tribulation Mode | 25 | |||||||||||||||
|---|---|---|---|---|---|---|---|---|---|---|---|---|---|---|---|---|---|
| Visit every shop in World 1 in Tribulation Mode.Hunting for adventure...and bargains. |
1 Shop Visited in World 1 Tribulation Mode | 2 | |||||||||||||||
| 2 Shops Visited in World 1 Tribulation Mode | 2 | ||||||||||||||||
| 3 Shops Visited in World 1 Tribulation Mode | 2 | ||||||||||||||||
| 4 Shops Visited in World 1 Tribulation Mode | 2 | ||||||||||||||||
| |||||||||||||||||
Bauble (1 ![]() • 5
• 5 ![]() • 10
• 10 ![]() • 20
• 20 ![]() • 50
• 50 ![]() ) •
) • ![]() Bauble Bubble
Bauble Bubble
Continue Coin • Infinite Continue Coin • ![]() Fancy Furniture Coin
Fancy Furniture Coin
| Skills and Upgrades |
• Purse
|
|---|---|
| Hub | World 1 House • World 2 House • World 3 House • World 4 House |
| World 1 | Z1: Sunny Glade (TM) • Z2: Dark Woods (TM) • Z3: Kingdom of Fungus (TM) • B: Cart |
| World 2 | Z1: Rapids (TM) • Z2: Pain Cliffs (TM) • Z3: Storm Top (TM) • B: Robbers |
| World 3 | Z0: Test Zone • Historical: Sparkling Pools |
| Adventures | Super Adventure Hub Super Adventure 1-1 • Super Adventure 1-2 • Super Adventure 1-3 Super Adventure 2-1 • Super Adventure 2-2 • Super Adventure 2-3 Super Adventure Test Zone |
| Achievements |