Proxemics Lab (guild puzzle)
Proxemics Lab
- Type
- Guild Puzzle
- Area
- Proxemics Lab
(Brisban Wildlands)
| Image(s) |
|
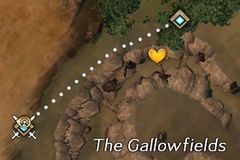
Path from Gallowfields |
Proxemics Lab is a Guild Puzzle located in Brisban Wildlands. Guild members must coordinate to get through the abandoned lab within the time limit, overcoming obstacles and puzzles to reach the end. Players have 20 minutes to complete the puzzle. A guild needs a minimum of 4 players to complete the mission, although it will be significantly harder without more. It is a good idea to bring a Mesmer or two who are confident with small jumping puzzles along to a Puzzle so they can portal up any guild members who may fall during jumping sections, or who may accidentally get left behind in a previous room.
Getting there[edit]
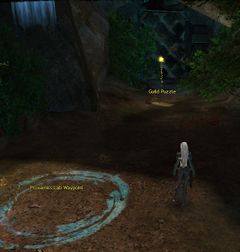
The Proxemics Lab Waypoint is closest, but will be contested until the puzzle has begun. In that case, use Gallowfields Waypoint and go South-west (see map). If Proxemics Lab Waypoint is contested then you will be redirected to Gallowfields Waypoint when porting from outside Brisban Wildlands.
Objectives[edit]
- [Group Event] Can you puzzle out the mystery of Proxemics Lab? (23)
- Time limit: 20:00
- Former skritt research subjects survived testing to take up residence in long-abandoned Proxemics Lab. Are you as clever as the one-time lab rats?
- [Group Event] Find a way to open the door and access the next room.
- Time limit: 2:00
- Search for batteries to power open the door.: 0/6
- [Group Event] Find a way to access the next room. (23)
- Ground floor: Logic Evaluation: 0/6
- Second floor: Stamina Evaluation: 0/6
- Third floor: Navigational Aptitude Evaluation: 0/6
- Time remaining: 0:45
- [Group Event] Find a way to open the exit door. (23)
- Time remaining: 10:00
- Puzzle a way through the maze
Walkthrough[edit]
There are 3 main sections of the puzzle: Entryway, Elevator, and Maze. Each section requires multiple players to complete the challenges within, and each section is separated by a jumping section.
Entryway[edit]
Guild members enter through the main door and proceed down the passageway until they reach the first room. This room is laid out in a star-burst pattern, with a central circular room and six alcoves with the exit to the west. Down the steps from the exit, there is a button there that will activate the first event. The guild has two minutes to find six batteries that have been stolen by the skritt and return them to the Door Battery Case in the center of the room. The batteries are located within junk piles in each alcove. Searching the junk piles can result in a battery or a Shiny. If you do not get a battery, keep searching until you find one.
While carrying a battery all your weapon skills are gone, you walk slower, and you cannot dodge. The skritt are not happy you're taking their battery shinies either, so they will attack you as you bring them back. If you get hit, you'll drop the battery and have to find another one. Since the skritt are friendly, you cannot clear them away. Guild members can use the shinies also found in junk piles to distract skritt while you retrieve the battery.
Once you gather all six batteries, the main door opens, leading to a collapsed and jumbled hallway.
- Collapsed Hallway
Guild members will need to jump across the various fallen columns, platforms, hanging nets, and even a lamppost to make it through this hallway. If someone falls, or cannot do the jumping section, they can run along the floor below to get near the door where a mesmer can use Portal to bring them up to the door (provided they succeeded in the jumping section).
Elevator[edit]
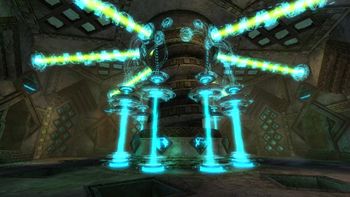
This circular room is actually an elevator that tests the intelligence of the occupants in order to continue. In the middle of the room is a device with ten images of creatures, each with a vertical beam of light in front of it. Around the wall are six small alcoves, with a button on the wall at the east exit. Pressing the button begins the elevator event, although you want to make sure all your guild members are inside as anyone following after can get stuck.
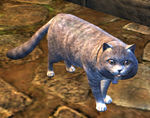
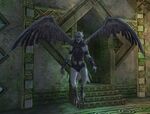
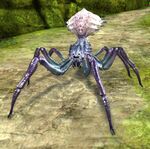
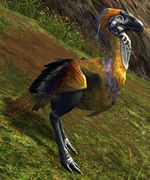
In the event, a random animal image appears above each alcove. Guild members have 45 seconds to find the matching animal on the center device, interact with the image's beam of light to be transformed into that animal, and run into the alcove with the image. There are six animals that need to be matched each round within 45 seconds, and three rounds of this event (once per floor).
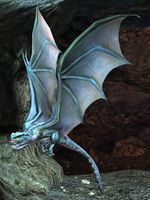
| Creature | Creature image | Transformation screenshot |
|---|---|---|
| Bat |  |
|
| Cat |  |
|
| Ettin |  |

|
| Ghost |  |

|
| Harpy |  |
|
| Jungle Spider |  |
|
| Moa |  |
|
| Pig |  |

|
| Stag |  |

|
| Wasp |  |

|
- Timed Platforms
After the elevator there is an open hallway with floating holographic platforms. These platforms only exist for 20 seconds at a time, so if they're already up it may be safer to wait. The path splits halfway through, but both paths are identical and end up in the same place. At the end, four guild members must stand on four buttons on top of pillars (equal level with the platform you end up on) at the same time to open the doorway to the next section.
It is a good idea to have those four guild members remain standing on the buttons to hold the door open while a mesmer uses Portal from well within the doorway to help bring up anyone who may have fallen through a platform.
Maze[edit]
After crossing the hallway, guild members will find themselves in the maze. The entrance has two paths: one to a vantage point and another to the maze itself. The vantage point can see over the entire maze and has the start button, but players are blocked from entering the maze directly due to energy walls. (You must go back and down the other path to enter the maze.) Within the maze there are four stone stairs that are always in the same location and lead up to smaller vantage points at the top of the walls that are also blocked with energy walls to prevent players from running along the top of the maze.
When the event starts, six orbs of energy appear in random locations in the maze, marked with a beacon of light. Guild members must find the six orbs and bring them to the tanks next to the exit in the northwest corner of the maze to complete the Puzzle. Within the maze are enemy skritt, golems, and a legendary golem named TOM-9 to avoid or defeat. The maze also has breakable walls that the orbs are often hidden behind, and traps on the eastern side which can be disabled by accessing the smaller vantage points. Carrying an orb blocks out your skills, but unlike the battery, you do run at normal speed and you retain it if you get knocked down.
A good strategy here is to go to the main vantage point, start the event, and then note where the orbs are on your map by using personal waypoints (one per member of the group). This will give you up to five visible waypoints, leaving only the sixth one unmarked and needing to be tracked down. If the group is in a Squad, the Commander or their Lieutenant(s) can use their object markers to make all the locations more visible for the squad.
Once all six orbs are brought to the tanks, the final door opens and the puzzle is completed. Players can accept credit, and will receive their rewards via a bouncy chest above their mini-map. Players can then exit by using the nearby stone button, the "Leave Instance" button over their mini-map, or by simply waypointing out of the instance.
NPCs[edit]
Allies[edit]
Foes[edit]
- Emancipated Skritt (during maze section only)
- Veteran Skritt Pistolier
- Veteran Skritt Sentry
Objects[edit]
Dialogue[edit]
- Starting the puzzle
- Guild Initiative Representative:Are you ready to take on the puzzle?
- Yes. Bring on the puzzle!
- What is the objective of this puzzle?
- Former skritt research subjects survived testing to take up residence in the long-abandoned Proxemics Lab. Are you as clever as the one-time lab rats?
- Yes. Bring on the puzzle!
- We're not ready just yet.
- We're not ready yet.
- After batteries have been collected
- There is a loud hum and the door opens, though the hum is already beginning to fade.
- Leave.
- Completing elevator first floor
- CTS-PAW: First–floor. Logic–execution–bzzt–evaluation. Warning! Elevator–power–levels–currently–inadequate–to–proceed.
- Wait, what did you just say about execution?
- Scanning. Transcript–not–found.
- Could have sworn you said something ominous.
- Understood, I think.
- Completing elevator second floor
- CTS-PAW: Second–floor. Euthanasia–bzzt–stamina–evaluation. Warning! Elevator–power–levels–currently–inadequate–to–proceed.
- Understood, I hope.
- Completing elevator third floor
- CTS-PAW: Third–floor. Navigational–aptitude. Please–exit–existence–bzzt–elevator.
- Um, okay.
- If elevator event fails
- CTS-PAW: Error. Please–await–termination–bzzt–recalibration.
- After orbs have been delivered
- A loud hum can be heard from the northwest corner of the maze.
- Leave.
Trivia[edit]
- The grand chest at the end of the puzzle is shaped like a wedge of cheese. It was removed when Guild Puzzles became instanced with the launch of Heart of Thorns, and reintroduced with the December 12, 2017 Update.

