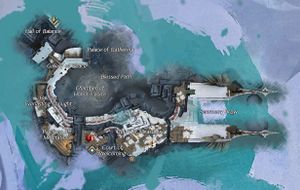
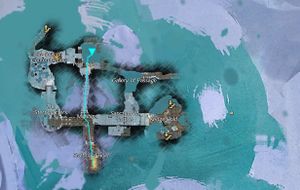
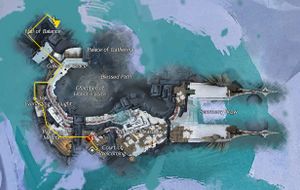
Honor of the Waves (explorable)
“The Sons of Svanir have invaded the damaged Kodan's sanctuary ship in order to earn Jormag's favor.
— Description at the dungeon's entrance after completing story mode
The Sons of Svanir continue to infest the Honor of the Waves, and the Honor's Claw is seeking to be rid of their leaders.
Dungeon information[edit]
Your Herald Eir has fled north to the Honor of the Waves Hail, mighty hero! I don't know how to tell you this, but I am afraid that Eir Stegalkin has been in a dark mood of late. Apparently her recent meeting with Zojja has affected her badly, and I (and others) are afraid that she plans to do something rash, to "go out as a hero". I have heard this from Caithe, who has been following the norn northwards into Frostgorge Sound. There, a great sanctuary ship of the kodan, the Honor of the Waves, is floundering, as a result of the attacks of Jormag's minions. Both Caithe and I fear that Eir is looking for a battle too big for herself, and I said that you would catch up with them to help Eir. Please attend to this at your earliest convenience, |
Objectives[edit]
- All paths
- Talk to Honor's Claw.
- Speak with the Claw from Honor of the Waves.
- Choose which Svanir you want to fight.
- Decide which threat to face.
- Butcher path
- Begin the search for Ginva the butcher.
- Find Ginva the Butcher.
- Defeat the Ice Dragon minion to continue.
- Corrupted Troll

- Kill Ginva's champion.
- Defeat Ginva's War Shaman, Aldus Stormbringer.
- Aldus Stormbringer

- Find Ginva the Butcher.
- Use the broken floor to keep exploring.
- Find Ginva the Butcher.
- Defeat Ginva the butcher.
- Kill Ginva the Butcher.
- Ginva the Butcher

- Well done. This sanctuary is safer now.
- Plunderer path
- Find the Son of Svanir looter Wollam.
- Locate Wollam the Plunderer.
- Stop the Svanir vandals.
- Slay Torn Fur.

- Defeat the corrupted Son of Svanir.
- Jaddeor Icefist

- Defeat the corrupted Son of Svanir.
- Corrupted Son of Svanir

- Defeat Andal to continue your search.
- Locate Wollam the Plunderer.
- Defeat Andal and his minions.
- Andal

- Oolon

- Poroo

- Enter the flooded region through the hole in the floor.
- Locate Wollam the Plunderer.
- Continue the hunt for Wollam.
- Locate Wollam the Plunderer.
- Defeat Wollam.
- Defeat Wollam the Plunderer.
- Wollam

- Well done. This sanctuary is safer now.
- Zealot path
- Begin the hunt for Sorge the zealot.
- Locate Sorge the Zealot.
- Defeat the fallen kodan.
- Locate Sorge the Zealot.
- Defeat Sorge's disciple, Svánigandr.
- Svánigandr

- Explore the sanctuary to find the zealot.
- Locate Sorge the Zealot.
- Defeat Sorge's champion.
- Locate Sorge the Zealot.
- Defeat Fimbul and his crew.
- Fimbul

- Continue the search for Sorge.
- Locate Sorge the Zealot.
- Defeat the zealot Sorge.
- Locate Sorge the Zealot.
- Kill Sorge the Zealot.
- Sorge

- Well done. This sanctuary is safer now.
Rewards[edit]
- 70% experience towards the next character level
- 26

- Bonus Gold (first time each day per account)
- 20
 Tales of Dungeon Delving for the successful completion of a path
Unique Loot[edit]
- Arctic Ring
- Carving of Jormag
- Svanir Talisman (Rare)
- Svanir Talisman (Masterwork)
- Ring of Blood (path 1)
- Recipe: Koda's Gift (path 2)
- Recipe: The Zealot's Amulet (path 3)
Walkthrough[edit]
- General Tips
- Skills that can group enemies together, such as a mesmer's Temporal Curtain or a guardian's Binding Blade, will allow you to kill enemies quicker.
- Skills that can apply blinded will allow you to kill most enemies safely.
- Powerful Potion of Sons of Svanir Slaying (and its lesser variants) will help kill enemies faster and take reduced damage from their attacks.
- Sigil of Wrath will allow you to do more damage to Svanir.
- To a lesser extent, Sigil of Icebrood Slaying will affect some enemies.
Path 1: Butcher path[edit]
Crossing the threshold of the door to the first room will cause a group of elite svanir to approach. The remaining two svanir stand at the two Corrupted Ice Turrets at the back. The door will open once the two turrets have been destroyed.
- Optional event: Kill the Dragon Totem
Through the gate will be a group of Svanir and a Dragon Totem in the center. Destroying the totem offers no benefit and can safely be skipped if desired.
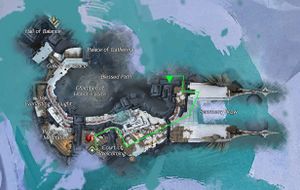
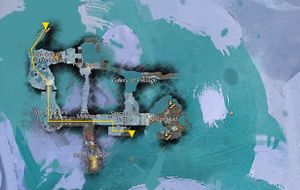
Once past the totem, there are two different paths to take: Up the stairs to the left (elite wolves which knockdown - consider using stability) (shown in map, right), or straight forward (svanir with a bolt turret). Most groups will head up the stairs, as it is possible for the wolves above to aggro onto the path below.
The first major fight in this path will be an Icebrood Troll. Its main attack will have it jump up into the air and land shortly after and then releasing ground projectiles towards each player. Getting hit by this projectile will do a large amount of damage and cause you to be knocked down. This attack can be jumped over or dodged, but cannot be reflected. It will also throw a fast moving projectile that will bounce to every player and daze everyone it hits, which also cannot be reflected.
It is recommended to bring stability and stun breaks for this fight. Breaking its defiance bar will cause it to be stunned for a few seconds and take extra damage during that time.
After killing the troll, the door behind it will open to a large room. There will be a group of non-hostile Svanir in the center, with Aldus Stormbringer standing on the stairs. After a short speech, they will turn hostile.
His most dangerous skill applies 40 stacks of Shield of Jormag on him; whilst active this effect reflects projectiles and absorbs one attack per stack. He will also occasionally put down a field of ice near him, dealing damage and applying chilled.
Use area of effect skills to take out the other svanir, and then focus on Aldus. During the fight he will summon a further six Svanir as backup. They are very weak and easy to cleave down.
After defeating Aldus, a hole will open up in the floor. Looking down into the hole you will see two wooden beams with red markings on them - jump down to a beam, and then to the ground. Jumping directly onto the ground will likely kill you. After jumping through, you will see 2 ballistas that are guarded by some Svanir. In the room to the right is another optional Dragon Totem event.
Once the ballistas have been destroyed, you can proceed down the trap filled hallway. In this hallway, if you get hit by one of the red circles on the floor, you will be pushed all the way back to the beginning. Its recommended to stick to the left, and wait for the circles to dissipate before walking forwards out of the various safe waiting spots. To clear the hallway, one person will need to reach the end and kill the Elite Icebrood Hunter waiting at the end and pull the chains to the right of the door. This will disable the traps, allowing the rest of the party to regroup.
After getting past the hallway, you will enter a room with two Elite Icebrood Kodan standing guard at a set of doors. When they are killed, the door to the final boss will open.
Ginva will be standing in the middle of a room surrounded by three totems: Regeneration Totem, Protection Totem and Resolution Totem. When they are up, they grant Regeneration, Protection and Resolution respectively.
Ginva himself behaves like a ranger double-wielding axes. His Whirling Defense (when he spins around with his axes) deals insane amounts of damage and reflects projectiles, very likely downing and killing players that stand on it for its full duration. He can also cast Path of Scars to pull players, and place long-lasting ice AoEs that inflict Chilled.
It is recommended to destroy the protection totem, pull the boss to it, then kill him there. The other 2 totems have minor impact and it's better to ignore them. Totems regenerate shortly after being killed, pulling Ginva to the protection totem ensures it can be cleaved down every time it regenerates for a smooth fight.
Path 2: Plunderer path[edit]
- Slay Torn Fur
The door to the right will open revealing a large courtyard with small groups of Svanir around the area. Most can be ignored, so just clear enough so that your party has enough room to move around safely.
Torn Fur is a very easy fight. He will occasionally use an attack that knocks back enemies, indicated by the swirling wind around him.
Once Torn Fur has been defeated, the doors at the back will open to the bow of the ship. Running back and forth on both will be two giant icebrood behemoths.
- Legendary Jaddeor Icefist / Legendary Balgren Creedbreaker
Jaddeor Icefist is the one running on the nearest bow. It will sometimes rushes forward, leaving an area of ice and knocking back the group. He can be ignored completely if the groups wants.
Balgren Creedbreaker is the one running on the other bow. During this fight, it will occasionally spawn Icebrood Elementals. Since it can fear players, it is recommended to fight Balgren with your back close to the exit door such that you don't get feared over the edge of the ship. Use stability and stun breaks as appropriate.
After defeating Balgren, the door will open revealing a ramp that goes downwards. After swimming across the pool of water, you will reach the next boss.
- Defeat Andal and his minions
Andal is accompanied by two champion quaggans. The quaggans can be pulled away from Andal and killed separately.
Andal will breathe a cone of cold air towards one player. It does a lot of damage very quickly. He is rooted in place while using this attack, so it is possible to get out of its range.
His second major attack will cause several ice spikes to fall within a small area. This is very easily avoided since it takes about a second for it to fall, however this becomes more difficult if the player is chilled.
Andal will run towards players if they are too far away. Breaking his defiance bar will keep him in one place for a short while, and allow your team to do more damage to him during that time.
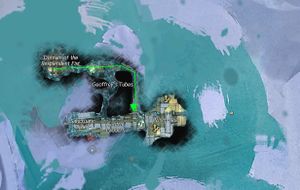
After killing Andal, a hole in the floor will open up plunging you into a hallway filed with water. The remaining fights will be fought entirely underwater.
Upon plunging into the water you will immediately be charged by an Icebrood Fish, which inflicts knockback and deals moderate damage. The hallway beyond has yet more fish with some svanir. At the end of the hallway will be a small room, with the final boss in the center.
Wollam the Plunderer's most devastating attack is his charge. He will point his spear forwards and slowly move in a straight line in whatever direction he is facing. It does a large amount of damage very quickly and it is very difficult to see when he is doing it.
His second major attack is where he throws out several slow moving mines that spread out as they travel. Each mine individually does not do much damage, but be careful if you are near him as you can get hit by multiple mines.
Path 3: Zealot path[edit]
This path shares the same beginning as path 1, deviating at the champion icebrood troll where you instead face a champion icebrood goliath on the higher path. The Goliath is sturdy but not much of a threat, the nearby frost totem will occasionally fire 4 icy bolts that knock players down.
In the room after the Champion Icebrood Goliath, there is a big Icebrood Wolf surrounded by a pack of wolves. When players enter the room, the wolves disappear and the Icebrood Wolf shapeshifts into the norn wolf form. The boss shares the exact same attacks norn players get when using the racial elite skill Become the Wolf, meaning all the boss' attacks are melee range. The boss has one additional attack in which it summons a few projectiles from the sky to hit players, an attack shared with the Mistfire Wolf. Occasionally, the boss will howl, afflicting nearby players with an uncleansable immobilization and forcing them to cower (/cower), this attack bypasses stability but players can use skills that stun break after being hit.
Fimbul uses a hammer, having various AoE attacks that launch and chill foes, and starts the fight with 2 Icebrood Kodan by his side. Fimbul will sometimes encase itself in an Ice Shard, turning invulnerable and gaining a powerful regeneration. Players can destroy the Ice Shard by attacking it, stopping the regeneration. He jumps at players with the hammer dealing moderate damage and bleeding, and attacks by creating 3 small AoEs in a line that knock players down.
Sorge is an underwater boss that spawns Giant Arctic Jellyfish (elite) and barracuda (non-elite). The jellyfish attack with their tentacles, and are dangerous because of their ability to detonate themselves for high damage , while the barracuda are just a minor annoyance that die to aoe damage.
There is a part of the room that is above water, however, Sorge will deal massive aoe damage if lured out of the water, one-shotting players, so players are advised to fight underwater. Other than that, it is an easy final boss.
NPCs[edit]
Allies[edit]
Foes[edit]
- Aldus Stormbringer
- Champion Icebrood Goliath
- Champion Icebrood Troll
- Champion Oolon
- Champion Poroo
- Corrupted Fish (summoned)
- Elite Corrupted Fish
- Elite Icebrood Berserker
- Elite Icebrood Claymore
- Elite Icebrood Elemental
- Elite Icebrood Goliath
- Elite Icebrood Hunter
- Elite Icebrood Kodan
- Elite Icebrood Mauler
- Elite Icebrood Quaggan
- Elite Icebrood Seer
- Elite Icebrood Wolf
- Fimbul
- Ginva the Butcher
- Icebrood Berserker
- Icebrood Claymore
- Icebrood Elemental
- Icebrood Hunter
- Icebrood Mauler
- Icebrood Seer
- Icebrood Troll
- Icebrood Wolf (summoned)
- Legendary Balgren Creedbreaker
- Legendary Jaddeor Icefist
- Sorge the Zealot
- Torn Fur
- Wollam the Plunderer
Objects[edit]
- Corrupted Ice Turret
- Frozen Passage
- Kodan Artifacts
- Ice Dragon Totem
- Protection Totem
- Regeneration Totem
- Retaliation Totem
- Svanir Ballista
- Svanir Ice Bomb
Dialogue[edit]
Talking to Honor's Claw:
- Honor's Claw: You have come at a dangerous time. Jormag's animals roam freely on this Sanctuary, threatening all of us.
- Let's get rid of your animal problem.
- What happened?
- We endured a terrible tragedy here. Our sanctuary has crashed and is sinking. My kin are trying to keep our home afloat, but three of Jormag's dogs are plaguing us.
- Dogs? Wait, I think I need to know more. (Same as "Tell me about these animals")
- Sounds terrible.
- We endured a terrible tragedy here. Our sanctuary has crashed and is sinking. My kin are trying to keep our home afloat, but three of Jormag's dogs are plaguing us.
- Tell me about these animals.
- Three Sons of Svanir, each cruel and destructive. Each seeking favor with their dark idol. One is a butcher, another is a zealot, and the last is a vandal and a plunderer.
- Tell me about the butcher.
- Ginva. He kills with abandon, thinking each kill will bring him closer to Jormag's favor. He is a madman who speaks with weapons, and will not rest until we are corpses at his feet.
- How do we defeat him?
- He is arrogant enough to think he can march on us without resistance. We will strike at this arrogance and cut his heart out before his forces come this way.
- Then let's strike while he's foolish enough to think we won't be a threat!
- Tell me about the zealot.
- Tell me about the plunderer.
- Tell me about this place. (Same as "What happened?")
- I need more time
- I need more time before I decide.
- Tell me about the zealot.
- Sorge. He drives his followers into a frenzy and sends them to us. His is a holy way made of blood and hatred. We will either be converted or die.
- Converted to serve who?
- To[sic] their icy master, Jormag. Yet I heard Sorge revels in gathering minions to his side. If we break Sorge, we end the threat from his cult.
- The we strike now and end his movement.
- Tell me about the butcher.
- Tell me about the plunderer.
- Tell me about this place.
- Good-bye.
- I need to think about this.
- Tell me about the plunderer.
- Wollam. A shadow that swallows our culture. He is stealing our relics, our history. What he can't take, he breaks, or sends his minions to destroy.
- Why?
- To take our history to Jormag. For what foul purpose, I don't know. We must stop him, or our footsteps on the world will be erased.
- Your history will remain intact. We'll fight Wollam together.
- Tell me about the butcher.
- Tell me about the zealot.
- Tell me about this place.
- Good-bye.
- Sounds dangerous. I need some time.
- I'll pass.
- Not interested.
Initial cinematic:
- Honor's Claw: We thought the Huntsman's death would bring balance to our home, but it is not so.
- Honor's Claw: Instead, three of his prized animals have been unchained and roam free on this sanctuary.
- Honor's Claw: There is a zealot for Jormag, who believes every kill is a prize that brings him closer to his evil master.
- Honor's Claw: Somewhere lurks a plunderer who will erase all of our culture and history if he is not stopped.
- Honor's Claw: And last is a fiend who readies an army to march through our home, bathing us all in blood.
- Honor's Claw: Consider these threads, then say which one you will help me vanquish.
Talking to the Claw after the cinematic:
- Honor's Claw: Tell me, which dog of Jormag will we hunt?
- The butcher. He must be stopped before he launches his attack.
- The plunderer. Your culture will not be erased so casually.
- The zealot. Jormag's madness will not take over this Sanctuary.
- I need more time.
Butcher path[edit]
Starting this path:
- Honor's Claw: The scent of blood is unmistakable. The frozen-handed butcher is this way.
- Honor's Claw: He must be stopped or we will all drown in our own blood.
Talking to the Honor's Claw:
- Honor's Claw: We must destroy the corruption that's engulfed this Sanctuary.
- Let's go.
When encountering Aldus Stormbringer:
- Aldus Stormbringer: I see you with bloody weapon. But I don't feel your rage. I don't see your hunger for more battle.
- Son of Svanir: I have killed ten kodan! And I'm not even tired.
- Son of Svanir: Weakling! A dozen screamed as I pulled out their hearts. I could kill a dozen more.
- Son of Svanir: That's nothing. I killed fathers and mothers. Now, I hunt their children!
- Aldus Stormbringer: Ha! Yes! That's the spirit!
- Aldus Stormbringer: Now, be ready, you dogs! We will march through this boat and kill them all!
After defeating Aldus:
- Honor's Claw: Let this blood be the first step in cleansing this sanctuary.
- Honor's Claw: There. We journey on through his opening. Beyond here, the Koda-killer awaits.
Fighting the corrupted Kodan before the final boss room:
- Honor's Claw: What is this? What have they done to you? My sons. My own flesh.
- Honor's Claw: My sons! What has become of you? You are consumed by sickness!
Encountering the Butcher (cinematic):
- Honor's Claw: Ginva! You have turned my den into an atrocity. Your rampage end here.
- Ginva the Butcher: And how was killing your own children? Come, and tell me of the slaughter.
- Ginva the Butcher: They died for me as loyal servants to Dragon. Their faith was weak, easily broken with violent hand.
- Honor's Claw: If you want to know violence, I will teach you!
After deafeating Ginva the Butcher (cinematic):
- Honor's Claw: My kin, my children. The air of violence hangs over them. It will take time to restore what has been lost.
- Honor's Claw: We shall recover. We will restore balance. Their legacy will be assured its proper place.
- Honor's Claw: But a shadow still hangs over us. It looms from the north, threatening to cover us all.
- Honor's Claw: We shall mourn. We shall remember. But we must walk with vigilance. Be well and be ready, traveler.
Plunderer path[edit]
Talking to the Honor's Claw:
- Honor's Claw: Come. There are fewer things worth protecting more than history. This vandal must not win.
- Let's go.
First room:
- Torn Fur: There's nothing else here worth taking.
- Torn Fur: Break everything you see. This trash is unworthy of Jormag.
Approaching Andal the Thug (cinematic):
- Andal the Thug: Keep it moving. Wollam wants this floating junk pile cleaned out before we sink it.
- Honor's Claw: You won't stop at bringing your corruption here. You want to take our pride, our knowledge, our wisdom.
- Andal the Thug: Your wisdom fails against Jormag's might. We take from you and you only talk soft words.
- Andal the Thug: Your weakness make me sick. I'd spit in your face, but I won't waste the effort.
- Honor's Claw: It's a cruel totem you worship, all the while laughing and stealing.
- Honor's Claw: You walk the path of death, and death has come for you today.
Approaching Wollam (cinematic):
- Honor's Claw: Wollam! You will not smash one more relic. You will not take one more piece of kodan culture.
- Honor's Claw: Return what you have stolen. Restore this imbalance or it will be restored for you.
- Wollam the Plunderer: Jormag has no need for your soft words. Balance means nothing compared to his power.
- Wollam the Plunderer: I will make him more powerful with your relics, and earn his favor with your head.
After defeating Wollam (cinematic):
- Honor's Claw: He begged for the love of something that does not love and obtained his treasure through theft and murder.
- Honor's Claw: Our culture remains. We shall heal ourselves, just as we shall heal this sanctuary.
- Honor's Claw: Yet, there is a coldness here. A long shadow looms from the north, one that could envelop us all.
- Honor's Claw: Be watchful and prepare. The battle you waged today will have echoes in the time to come.
Zealot path[edit]
Talking to the Honor's Claw:
- Honor's Claw: Come. This zealot will speak words of violence and madness until he is silenced. Let us do the honors.
- Lead the way.
Approaching Sorge (cinematic):
- Sorge the Zealot: You have killed the strongest of my flock. You have torn a bloody path to find me. Impressive.
- Honor's Claw: This bloodlust brings me no joy. We have only done what we needed to end your madness.
- Sorge the Zealot: You fail to see. Jormag has deemed you worthy of death by my hand.
- Honor's Claw: Your frozen demon will consume you, but we will not be murdered for your cause.
- Sorge the Zealot: Maybe some broken bones and torn skin will change your mind. My time for glory is now!
After defeating Sorge (cinematic):
- Honor's Claw: See this child. Dead. Broken. Lost two times. The first when he followed Jormag, the second now.
- Honor's Claw: His twisted faith left him no room for solace or contemplation. Only hunger. Only rage.
- Honor's Claw: Too many of his kind have fallen into lies and corruption. So much potential fed into a maw of frozen cruelty.
- Honor's Claw: And their master in the north laughs. Listen to my words. Jormag threatens us all. And we must be ready for him.
Notes[edit]
- Across all dungeons, Sorge the Zealot and Wollam the Plunderer are the only bosses that are fought underwater.
- Historical description:
“Jormag's servants have infested the kodan sanctuary ship, Honor of the Waves. They must be eliminated before they corrupt all the secrets of the kodan. The Sons of Svanir are looting and pillaging the sinking ship, and the heroes must save what they can from the worshippers of Jormag.
— Description at the dungeon's entrance after completing story mode
