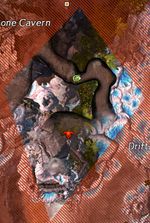
Canach's Lair (explorable)
Objectives[edit]
- Defeat Subdirector NULL.
- Defeat Subdirector NULL.

Rewards[edit]
- Event reward
- experience
- coin
- karma
- Daily chest (per account)
- 50

- Swig of Liquid Karma
- 1 random weapon or armor of rare quality.
- Spawned chest
- Karka Shell
- 2 random weapons or armor.
Walkthrough[edit]
The same mines used in story mode are used here but with a different use. As you fight NULL, he will occasionally put up his shield, protecting him from damage. At which point, you must lure him over a mine on which you have used the corresponding Mine Detector skill. Into the fight, two Sparks will begin to circle the room. They cannot be harmed and pulse AoE damage to any players in range. Even further into the fight, players start gaining stacks of Electrolyze, causing damage over time until either the player is killed or Subdirector NULL is defeated. NULL will frequently use pulling attacks to disrupt players' actions. Additionally, Subdirector NULL is healed by Subdirector NULL Repair Turrets, which can be destroyed but occasionally respawn.
The simplest strategy to use against NULL is to minimize your party's footprint, which reduces the damage taken from patrolling sparks and unsafe mines, and makes it much easier for the party to take down his shield since you only need to manage a single mine. Staying at close range also renders his pulling attacks mostly ineffective. NULL is not particularly dangerous on his own and the party can dps him down before the electrolyze stacks and spark patrols become a big problem.
NPCs[edit]
Allies[edit]
Foes[edit]
Dialogue[edit]
- Talking to Inspector Kiel at entrance
- Inspector Ellen Kiel: This place should have been sealed up. Canach left behind a golem that observed and learned from the trouncing of its boss. Take Canach's golem out before it can cave in his former lair around you.
- What do you know about that golem?
- It seems to be well-shielded. The key is to find a way around the golem's complex shielding.
- Any idea how I might do that?
- Levvi theorizes that the three types of mines can be used to counteract the golem's shielding, and that is can only use one type of shield at a time. Use her mine detector to take advantage of that flaw.
- How do I use one of these mine detector devices? (same as below)
- Here's hoping she's right about the golem's flaw.
- Got it, I think.
- How do I use one of these mine detector devices?
- Use the scanning mode to locate mines, then disarm them with a choice of Canach's three arming frequencies, one for each type of trap. Using the wrong frequency will detonate a mine, so be careful.
- Got it, I think.
- I've got this. Let me at him.

