Magellan's Memento
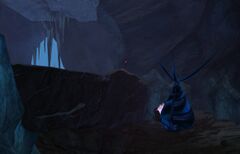
Magellan's Memento is an Explorer achievement and mini-dungeon that is located in Arundon Vale in Frostgorge Sound.
Achievement[edit]
| Magellan's Memento | Explorer | 10 |
|---|---|---|
| Uncover the riches that doomed Francis Magellan.Some prayers go unanswered. | Exploration Achievement | 10 |
Getting there[edit]
From Arundon Waypoint — , proceed north and then east, until you're halfway between Safewatch Vale — and Offering Stone — . The cave entrance is in the mountainside directly south of you.
Walkthrough[edit]
Intended path[edit]
- Entrance
The entrance to the mini-dungeon is guarded by a group of Dragon tribe grawl. Kill them or just run past, into the first large chamber.
- First chamber
The first chamber is guarded by more grawl, as well as several traps. Ice stalactites will fall from the ceiling dealing minor damage and inflicting Chilled. The choke points on the west and east paths through the chamber hide spike traps that deal minor damage and inflict Crippled. They can be avoided by walking between the three ice pillars in the centre of the room.
- Second chamber
Further inside, players will find the first Tattered Journal and a slope. When climbing the slope, rocks will fall from the ceiling, dealing massive damage and launching players. The best way to proceed is to walk up the slope hugging the wall, as there are safe gaps between the rockfalls. More Dragon tribe grawl will be found patrolling after the slope, where players will also find Tattered Journal Vol. 2, and a Makeshift Gate they will have to destroy.
- Third chamber
The next chamber contains three groups of three oozes each. Kill them one group at a time to avoid being overwhelmed. Continue down the tunnel and you will come across Tattered Journal Vol. 3. The final chamber, and the treasure, is just ahead.
- Fourth chamber
The last chamber contains a few more oozes, as well as the final boss of the mini-dungeon: the Giant Blue Ooze. Beware of the following things, as both the boss and the area around it are deadly:
- The area around the boss will be continuously bombarded by falling rocks, as seen in the second chamber. Just like before, they deal massive damage and launch players.
- It may be easier to fight the boss if you can lure it away from the rockfalls, but beware of its Ooze Vacuum skill, which pulls players, as this could pull you right back into the rocks.
- Careful positioning can mitigate this, as the launch from Ooze Vacuum is always in the opposite direction that it pulled you in. Keep the boss's back to a wall, and you will be launched into that wall, rather than back into the rock pit.
- Beware of its Stomp ability, signalled by a charging animation with a yellow glow - this also launches players and deals massive damage around itself.
After killing the boss, players can then carefully walk to the chest of riches that doomed Francis Magellan, and open it to collect their spoils and earn the achievement.
- Exiting the mini-dungeon
If you'd like to exit under your own steam, rather than waypoint out, you have a couple of options:
- Jump on top of the Grand Chest, and then onto the rocks behind it (aiming for the right-hand corner of the rock, which is somewhat lower). From here you can jump to the ledge behind the chest and walk north out of the cave.
- On the northwest side of the cave, at a gap between the blue ice pillars and the wall, Mounts Disabled is not in effect. Use a mount such as the Springer or Skyscale to jump over this ledge, and out into the exit area.
Shortcut path[edit]
If you're having trouble completing the mini-dungeon, or you'd like to save time, it's possible to enter through the exit, effectively skipping directly to the final chamber where the chest is.
To do so, you will need either a Springer, or a Raptor with the Bond of Faith mastery unlocked.
As in the normal path, start at Arundon Waypoint — . Instead of going past Safewatch Vale — , however, head towards the cliffs southwest of it. You'll see a tall ledge with a cave opening above it, framed by icicles.
- Springer access
The area immediately around the exit is protected by Mounts Disabled. Back away from the ledge until you are able to remain mounted on your Springer. From there, simply Rocket Jump as high as you can, holding W as you do so to maximize the distance travelled. As long as you kept moving forwards in midair, this should be enough to get you onto the ledge.
- Raptor access
Climb onto the low rock to the western side of the exit. Getting as close as you can without being dismounted, Leap and simultaneously use Bond of Faith. The momentum from the two skills combined should be enough to launch you onto the ledge.
Once on the ledge, continue a short way into the cave, sticking to the left (eastern) wall. The chest is on the left after a short drop - refer to the intended path instructions for the fourth chamber, and how to exit once you've collected your loot.
NPCs[edit]
Foes[edit]
- Dragon Tribe Grawl Berserker
- Dragon Tribe Grawl Hunter
- Veteran Dragon Tribe Grawl Berserker
- Veteran Dragon Tribe Grawl Hunter
- Blue Ooze
- Chromatic Ooze
- Giant Blue Ooze
- Red Ooze
- Translucent Ooze
- Veteran Chromatic Ooze
- Veteran Red Ooze
- Veteran Translucent Ooze
- Yellow Ooze
Objects[edit]
Notes[edit]
- Hints for soloing this mini-dungeon can be found on the discussion page.

