Angvar's Trove (guild puzzle)
“Puzzle a way through the lost caverns of Angvar's Trove in Snowden Drifts.
— In-game description
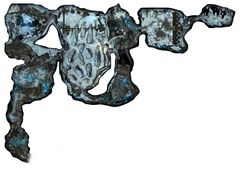
Angvar's Trove is a guild puzzle located in Snowden Drifts, Guild members must coordinate to get through the caverns within the time limit, overcoming obstacles and puzzles to reach the end. Players have 30 minutes to complete the puzzle. A guild needs a minimum of six players to complete the mission, although it will be significantly harder without more. It is a good idea to bring a Mesmer or two who are confident with small jumping puzzles along to a Puzzle so they can portal up any guild members who may fall during jumping sections, or who may accidentally get left behind in a previous room.
Getting there[edit]
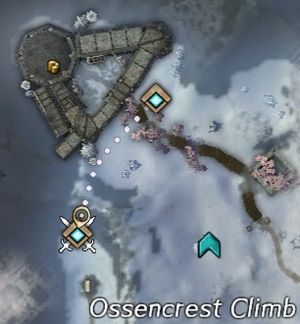
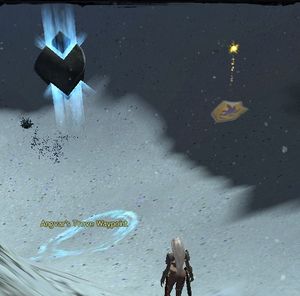
The Angvar's Trove Waypoint is closest, but will be contested until the puzzle has begun. In that case, use Scholar's Cleft Waypoint and go South-west (see map). If Angvar's Trove Waypoint is contested then you will be redirected to Scholar's Cleft Waypoint when porting from outside Snowden Drifts.
Objectives[edit]
- [Group Event] Can you puzzle your way through the lost caverns of Angvar's Trove? (25)
- Time limit: 30:00
- Find your way to the icy heart of the frozen caves to plunder Angvar's lost treasure.
- [Group Event] Find a way across the chasm. (25)
- Time limit: 5:00
- Could these abandoned magical weapons be here for a reason?
- [Group Event] Ascend the frozen slopes and force your way through the sealed gateway. (25)
- Destroy the ice walls using the cannons or powder kegs.
- Sealed Gateway

- Time limit: 4:00
- [Group Event] Light the ancient spirit totems with a sacred flame. (25)
- Time limit: 6:00
NPCs[edit]
Foes[edit]
- Barracuda
- Cave Troll
- Champion Ice Imp
- Drake Guardian Hatchling
- Frost Bat
- Ice Imp
- Legendary Drake Guardian
- Shadow Skelk
- Veteran Ice Imp
- Veteran Ice Elemental
- Veteran Shadow Skelk
Objects[edit]
- Bow
- Cannon [verification requested]
- Cooled Drake Egg
- Icicle
- Powder Keg
- Sealed Gateway
- Orb of Regression
- Torch (Angvar's Trove bundle)
- Bear Totem
- Dolyak Totem
- Minotaur Totem
- Raven Totem
- Snow Leopard Totem
- Wolf Totem
Starting Dialogue[edit]
- Without puzzle assigned
- A guild officer needs to activate this mission for you before you can take part in this puzzle.
- Leave.
- With puzzle assigned
- You'll need a party of your guild members to take on this puzzle. Are you ready?
- Yes. Bring on the puzzle!
- We're ready. Bring on the puzzle!
- We're not ready just yet.
- What's the objective of this puzzle?
- Skaalds sing of the tale of Angvar, who hid his treasure beneath Ossencrest Climb. Puzzle a way down into these caverns, and the skalds may one day sing tales of your successful plunder!
- We're ready. Bring on the puzzle!
- We're not ready just yet.
- We're not ready.
Walkthrough[edit]
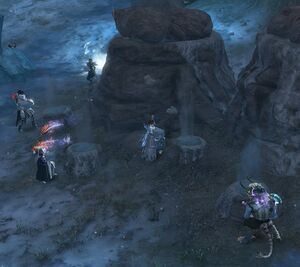
The puzzle starts in a room with a broken bridge. Players must climb through the rocks and remaining wood pieces to cross.
Icicle room[edit]
Players must find a way to cross a gap. There are magic bows available on the side of the gap they're coming from, as well as a ramp from there leading to the bottom of the gap, where a few rock-covered geysers and several small vents can be found next to either wall. There is another ramp leading to the other side, but it's blocked by a door that can only be opened if the three torches on the (inaccessible) other side of the gap are simultaneously lighted. The ceiling is covered with several small icicles and a bigger one right in the middle.
| # | Skill | Description | ||
|---|---|---|---|---|
| 1 | Fire Shot | ¾ | 3 | Shoots a blazing arrow that can melt ice. |
The strategy here is for a few players (no more than three, preferably at least one of which is a mesmer) to stay at the top shooting down icicles which the other players collect at the bottom to fill the vents with. It's better if the players hold onto their icicles and only put them in the vents simultaneously after there's at least one player/icicle per vent. This will cause the geysers to shoot their rocks up, creating a temporary bridge that allows the players at the top to cross partway through the gap. Shooting down the bigger icicle creates another temporary part of the bridge which the players at the top must stand on. The party must then repeat these actions to create the second half of the bridge and finish crossing the gap. Using swiftness as the players with bows jump across is very helpful in preventing falling and having to start over.
Once across, 3 players can interact with the torches. Lighting all 3 at the same time will open the gate for other players to progress through the puzzle.
Frozen ship[edit]
Players begin this section at the top of a large cliff, requiring them to jump across wooden platforms to descend. It is very helpful to jump frequently as players progress along the cliffs, as some of the surfaces will cause a player to slide. It is also a good idea to kill bats and skelks as players progress, as combat speed can cause players to miss their jumps.
If a player does happen to fall, it is best to try to fall towards the center of the room, so that players can be reached to be revived by others.
Once at the bottom, players must make their way through a cave passageway guarded by a Veteran Ice Imp. On the other side of the cave, players will exit on top of the ship in the center of the room and just need to cross the ship to jump off the front of it and onto the wooden platform.
Note: There is a basic Chest on the ship between the main mast and the blocked doorway.
Sealed Gateway[edit]
During this section, players need to use powder kegs and cannons to blast through the ice walls to reach the other side to destroy the Sealed Gateway with powder kegs. Carrying a powder keg too long will cause it to explode in the players hands.
Having all players pick up the furthest keg simultaneously, and 'refresh' their keg's timer by interacting with another powder keg further up the chosen lane can help prevent players from exploding unduly.
Using the nearby Cannon is a quick way to destroy 2 of the ice walls.
| # | Skill | Description | ||
|---|---|---|---|---|
| Powder Keg | ||||
| 1 | Powder Keg | 1 | 8 | Place the powder keg at your feet. Will detonate after a few seconds. |
| 2 | Throw Powder Keg | 1 | 8 | Throw the powder keg at your target. Explodes on contact. |
| Cannon | ||||
| 1 | Fire | 3 | Fire an exploding cannon ball at the target location. | |
When the Sealed Gateway is destroyed, players run through more ruins to reach a large drop with water on the bottom. In the water, there is a passage with rocks on the other side that players need to jump across.
Ancient spirit totems[edit]
In this room, players will find themselves facing an invulnerable drake surrounded by eggs, three totems on each of the walls to either side of the room, and a further six totems on the walls across the room from the players, to either side of the exit door. There are also unlit torches in the room that the players can pick up.
If a player grabs a drake egg, the drake will follow them and spit fire at them; this must be used to light the fires on each of the first six totems. Then, the other players must collect unlit torches, light them up in these fires, and go to the corresponding totems next to the exit door.
The fires have correspondences: a torch lit at the wolf totem can only light the other wolf totem, a torch lit at the bear totem can only light the other bear totem, etc. Once all six torches have players holding them, the six totems at the back must be lit simultaneously. This will open the final door and complete the puzzle.
Players can accept credit, and will receive their reward via bouncy chest above their mini-map.
Notes[edit]
- Personal credit for this puzzle can be earned in the open world version, provided you still do the spirit totem event in the final room.
Trivia[edit]
- This Guild Puzzle was introduced on May 28, 2013 in the Last Stand at Southsun release.


