Langmar Estate (guild puzzle)
Langmar Estate

Map of Langmar Estate
- Type
- Guild Puzzle
- Area
- Langmar Estate
(Plains of Ashford)
| Image(s) |
|
Path from Vir's Gate past Guardpoint Decimus |

Langmar Estate is a Guild Puzzle located in Plains of Ashford. Guild members must coordinate to get through the haunted ruins within the time limit, overcoming obstacles and puzzles to reach the end. Players have 20 minutes to complete the puzzle. A guild needs a minimum of six players to complete the mission, although it will be significantly harder without more. It is a good idea to bring a Mesmer or two who are confident with small jumping puzzles along to a Puzzle so they can portal up any guild members who may fall during jumping sections, or who may accidentally get left behind in a previous room.
Getting there[edit]

The ![]() Langmar Estate Waypoint — is closest, but will be contested until the puzzle has begun. In that case, use
Langmar Estate Waypoint — is closest, but will be contested until the puzzle has begun. In that case, use ![]() Guardpoint Decimus Waypoint — and go south (see map). If both Langmar Estate Waypoint and Guardpoint Decimus Waypoint are contested then you will be redirected to
Guardpoint Decimus Waypoint — and go south (see map). If both Langmar Estate Waypoint and Guardpoint Decimus Waypoint are contested then you will be redirected to ![]() Vir's Gate Waypoint — when porting from outside the Plains of Ashford (see map).
Vir's Gate Waypoint — when porting from outside the Plains of Ashford (see map).
Objectives[edit]
 [Group Event] Can you puzzle your way through the haunted ruins of Langmar Estate? (8)
- Time limit: 20:00
- Navigate the treacherous courtyard, spooky gallery, and deadly armory.
- [Group Event] Find a way to open the door and escape the courtyard. (8)
- These ancient statues appear to be missing their weapons.
- [Group Event] Find a way to open the door and escape the gallery. (8)
- Time remaining: 0:05
- [Group Event] Find a way to open the door and move into the next room. (8)
- Time remaining: 0:45
- The nobles in the paintings appear to be gesturing significantly.
- [Group Event] Find a way to open the door and escape the armory. (8)
- Time remaining: 10:00
- A thick, noxious gas is filling this floor. Find a way to ventilate it.
NPCs[edit]
Allies[edit]
- Byron (8)
Foes[edit]
- Ascalonian Archer (8-13)
- Ascalonian Enchanter (12)
- Ascalonian Fighter (8-13)
- Ascalonian Mage (8-13)
- Veteran Ascalonian Fighter (8-13)
- Veteran Ascalonian Archer (8-13)
- Veteran Ascalonian Mage (8-13)
- Ooze (8, 9)
Objects[edit]
Starting Dialogue[edit]
- Without puzzle assigned
- A guild officer needs to activate this mission for you before you can take part in this puzzle.
 Leave.
- With puzzle assigned
- You'll need a party of your guild members to take on this puzzle. Are you ready?
 Yes. Bring on the puzzle!
 What's the objective of this puzzle?
- There's a rumor that these decaying ruins contain treasure, but there are also tales of lethal booby traps within the estate. Puzzle a way through, and you just might walk away rich!
- We're ready. Bring on the puzzle!
- We're not ready just yet.
- We're not ready.
Walkthrough[edit]
There are three sections of the puzzle: Courtyard, Gallery, and Armory. Each section requires multiple players to complete the challenges within. Note that the gates close after each section preventing swapping characters mid-run.
The Courtyard[edit]

Players enter through the main door and proceed down the hallways of the ruins until they reach the Courtyard, a large room with two sets of 3 Charr statues and 3 human statues facing each other (one set each to north and south). In the center of the room is a platform with a book. Reading this book gives a riddle with the clue on what needs to be done. The last page has an option to begin the event if it has not been started yet. Ghostly weapons will spawn in the hands of the human statues. Guild members must search the weapon racks against the walls (3 per corner) until they find weapons for the Charr statues. Each weapon has to go on the Charr statue opposite the human statue that has the weapon it beats so that the Charr will win (according to the riddle above, see image for linked statues):
- Charr Bow beats Human Sword
- Charr Sword beats Human Staff
- Charr Staff beats Human Bow
The ghostly weapons act as bundles and do not have weapon skills, and dropping them destroys the weapon. The weapon racks take 4 seconds to search and can be searched again in a few seconds. Searching the racks can also summon Ascalonian ghosts to attack. These are relatively simple to dispatch, being the appropriate level for the zone, and are more minor annoyances than anything else. If a ghost appears from a rack, you will not receive a weapon, and should move to a different rack. Out of the twelve total racks, only three racks will give players a weapon (one sword, one staff and one bow).
This step is made somewhat easier as you cannot put the wrong weapon on the statue. Once completed, you are notified the exit door is now open and can leave.
- Opening the gate
Immediately following this room is a gate that requires four guild members to stand on four buttons on top of the pillars at the same time. Minor jumping is required for this step, and all other guild members can wait below. The gate will open when all four are pressed at once, and the guild can move on to the next section. The gate is timed once open, any guild members who do not make through within the timer, will be locked out. Therefore 3 or less guild members locked out have no way to go through.
The Gallery[edit]

- Orientation
- The gallery is split into two, the "entrance" and the main "room", with each containing six curtains.
- The lower curtains are linked to the equivalent curtain in the higher room with the same number (see the blue and yellow numbers on the map to the right).
- Pulling on a curtain rope in the lower room triggers a first event (time limit of 5 seconds) whereby all six lower curtains must be opened by pulling the six ropes. This reveals a portrait showing a noble doing an emote behind each curtain.
- The emote can be one of six options:
/sit,/point,/dance,/wave,/salute, or/bow
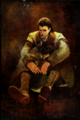
Sit

Point
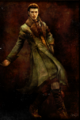
Dance

Wave

Salute
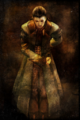
Bow
.png)
.png)
.png)
.png)
.png)
.png)
- If the first event was successful, a second event starts (time limit of 45 seconds) whereby the emote from the lower portrait needs to be repeated at the top portraits. You can either have the same player run from the bottom portrait to the top, or that player could whisper their emote to a partner standing in position at the upper curtain, who then performs that emote in front of the curtain.
- If the first event was unsuccessful, Byron will tell you your attempt was ill-timed and everything resets and the emotes change.
- Strategy
- In an uncoordinated group, it is reccomended to simply use the six different emotes. Considering there is a 50 seconds limit and no penalty for guessing wrong, players will have plenty of time to guess the correct emote.
- A good strategy, provided you have 12 players, is to form 6 pairs of players, and prepare each player to whisper their partner the correct emote, the partners then split up - one to the entrance and one in the main room. All of the entrance players then pull the curtains at the same time to complete the first event (within five seconds), and then tell their partner emote.
- Clever Mesmers can also use portals to help themselves or other players move quickly from entrance curtain to corresponding room curtain during the 45 second event.
Once completed correctly, the gate in the northwest corner of the room will open. Proceed along the pathway until you reach next room.
The Armory[edit]
The Armory is a three-level room, with the middle and bottom floors filled with a ![]() Toxic Poison. Guild members enter on the top floor where there are two buttons to the north and south of a hole in the center. The goal is to reach the bottom floor and build a battering ram to exit the armory. The yellow gas is highly lethal and will deal a significant amount of damage each second, so the guild will need to assign members to stay on the top and middle floors to keep the gas at bay while they work on the bottom floor.
Toxic Poison. Guild members enter on the top floor where there are two buttons to the north and south of a hole in the center. The goal is to reach the bottom floor and build a battering ram to exit the armory. The yellow gas is highly lethal and will deal a significant amount of damage each second, so the guild will need to assign members to stay on the top and middle floors to keep the gas at bay while they work on the bottom floor.
- Top floor
To start the event, two guild members will need to stand on the two buttons, causing water to pour into the lower level, clearing the gas. These two players will need to remain on the buttons to keep the gas clear for now. All other guild members can drop down to the second level. The ghosts on this top floor have knockback attacks, so try to keep them clear (assign bodyguards to remain up top if you have the numbers). Moving from the button for a couple seconds will not immediately kill everyone else, but is highly discouraged.
- Middle floor
The middle floor has machinery, with exposed gears, and several oozes that repeatedly spawn. Guild members need to kill the oozes to get a Ball of Ooze, which should be used on the gears to grease them and keep them running. Leave a couple guild members to continue killing oozes and greasing the gears while the rest jump down to the lower floor. Without the gears repeatedly greased, they will seize up again and the gas will return to the area.
- Bottom floor
The bottom floor has various carts strewn about. Kill the nearby ghosts and search the carts to find parts. Take them to the fallen column in front of the door on the north side of the room to begin building a Makeshift Ram. Once built, at least one player needs to keep using it to break down the door. After the door is broken, the gas dissipates permanently and all guild members can move to the bottom floor and through the door into the vault to accept credit and receive rewards via a bouncy chest above the mini-map.
To exit, players can make their way through the winding path to the top of the vault and find the well in the center. Drop into this and kill the Veteran Shadow Skelk in the water below and interact with the statue of the Ascalonian Soldier to leave. Players can also waypoint directly out of the instance or use the "Leave Instance" icon above their mini-map.