User:Floodbars/Raids/Vale Guardian
This is my attempt to organize the info found for the first boss of the Spirit Vale page.
Vale Divisions[edit]
Prior to fighting the Vale Guardian, players will first encounter 3 colored vale guardian division minibosses. The order of the guardians varies with each run.
| Punch |
| The guardian's auto-attack will cleave players in front of it for a small amount of damage. |
| Magic Aura |
Every guardian has a passive, non-removable effect which pulses percent-based damage every 3 seconds in a 1500 radius.
|
| Bullet Storm |
| When fighting against the Vale Divisions, light blue balls roam the battlefield which do a relatively small amount of damage. |
| Breakbar |
| The defiance bar of each guardian appears when their health is depleted and must be broken with control effects to defeat each guardian. |
Red Guardian[edit]
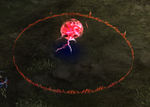
|
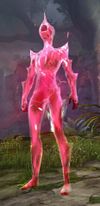
The Red Guardian has extremely high toughness, rendering damage other than condition damage ineffective to the point of dealing single-digit damage.
| ||||
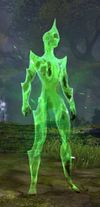
Green Guardian[edit]
Blue Guardian[edit]
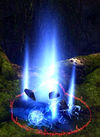
|
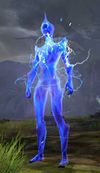
The Blue Guardian periodically gains the Blue Pylon Power that makes it immune to damage. To remove this effect, the invulnerability buff must be stripped.
| ||||
Vale Guardian[edit]
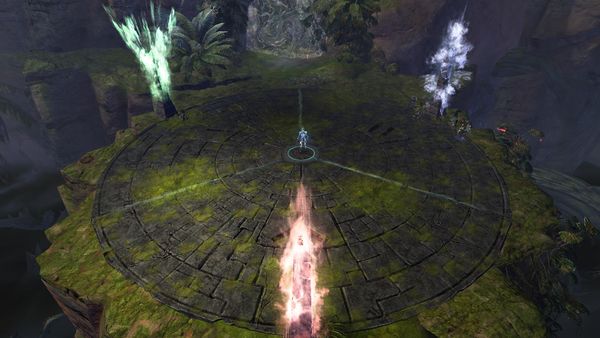
After defeating the Vale Divisions and moving forward, players will reach a circular battlefield with the Vale Guardian standing in the center.
 Enraged
- There is an enrage timer of 8 minutes, after which the Vale Guardian gains a buff that significantly increases its damage to 200%.
 Toughness-Based Aggro
- The Vale Guardian prioritizes the player with the highest toughness attribute of squad members still alive.
 Health
- The Vale Guardian has 22 million HP.
Battlefield[edit]
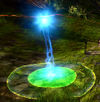
The battlefield is divided into three sections of equal size, wherein each third of the battlefield has a uniquely-colored pillar along the outside edge and a uniquely designed rune tile in the center. Once the battle begins, an impassable barrier surrounds the battlefield, making it impossible to leave or to rejoin mid-fight.
- Blazing Speed Mushrooms are placed at each pillar.
Phases[edit]
This fight has a total of five phases which alternate between dealing damage to the Vale Guardian and a split phase wherein you must defeat the vale divisions. At 66% and 33% of its health, the Vale Guardian enters the split phase and becomes invulnerable, walks towards the center of the battlefield, disappears and splits into 3 colored guardians which spawn near the pillars of their respective color. Upon defeating all 3 vale divisions, the Vale Guardian re-emerges from the center of the battlefield and can be damaged again.
Vale Guardian Phase[edit]
The Vale Guardian combines the mechanics of the three Vale Divisions, with some adjustments:
- The Red Guardian's Spawn Seeker
- Seekers now spawn every 20 seconds.
- Seekers spawn in the center of each third of the arena (for a total of 3) and give the Vale Guardian significant damage reduction if their AoE field overlaps it.
- The Green Guardian's Unstable Magic Spike
- The Blue Guardian's Distributed Magic
- Green circles appear only in the third of the battlefield occupied by the Vale Guardian. However, they will not move with the Vale Guardian if it moves to another section after they spawn.
- Vale Guardian requires 4 players instead of 3 standing in green circles for maximum damage reduction
The mechanics will become more complex with each successive phase as outlined in the progression given below..
Split Phase[edit]
When the Vale Guardian has its health reduced to approximately 66% or 33%, it will become invulnerable, stop attacking, and return to the center of the battlefield while the three pillars shoot electric bolts at it until it disappears. It then splits into the three colored guardians that spawn at the pylons of their color.
The battle mechanics of the colored guardians are much the same as before, but players will be attuned to the color of the pillar ( Pylon Attunement: Red, Pylon Attunement: Green or Pylon Attunement: Blue) to which they are closest once the guardian divisions appear; this attunement determines how much damage the player receives for each pulse of Magic Aura.
- Players in the same vicinity as their correspondingly-colored guardian (and no others) take a reduced 5%.
- Players in the same vicinity as one other off-color guardian takes 25% of their health per tick.
Progression of Mechanics[edit]
- Phase One
The timer begins when a squad member either takes damage or deals damage to the Vale Guardian.
- Phase Two (Split)
When the Vale Guardian has its health reduced to approximately 66%, it will enter the first split phase.
- Phase Three
Once all 3 Vale Divisions are defeated, the Vale Guardian reappears with its previous life total and with an additional attack (Magic Storm) and an additional mechanic (Unstable Pylon).
| Magic Storm |
The Vale Guardian will stop moving and start channelling a skill that throws a large number of lightning orbs all over the battlefield.
|
| Unstable Pylon |
| Sections of the battlefield will begin glowing and dealing constant damage to players standing in them. During phase three, only one third lights up at a time and the section that lights up rotates clockwise every 20 seconds |
- Phase Four (Split)
The fourth phase starts when the Vale Guardian reaches 33% of its life total and is exactly the same as the Phase Two.
- Phase 5
Once all 3 Vale Divisions are defeated, the Vale Guardian reappears with its previous life total (33%). In general, this final phase is very similar to Phase 3 but you'll see the following changes to mechanics:
- Unstable Pylon
- An additional section of the battlefield will light up and deal damage, for a total of 2 thirds.
- The damaging sections will continue to rotate clockwise with at a higher frequency of 15 seconds.
- The Red Guardian's Spawn Seeker
- Extra Seekers will spawn in the center of the arena, for a total of 4 Seekers active at all times.
- The Green Guardian's Unstable Magic Spike
- The blue fields will now spawn directly underneath all players in the squad, so players assigned to stand in green circles must be cautious as well.
Upon defeating the Vale Guardian, all players that have not yet received rewards (subject to the weekly reset) may do so regardless of downed state.
