User:Myjlo/Sandbox
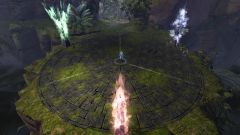
Vale Guardian[edit]
“
Composition[edit]
| Subgroup | |||||
|---|---|---|---|---|---|
| #1 | |||||
| #2 | |||||
| DPS Classes |
|---|
Alternatively, you could bring one healing Druid if you notice that people are frequently dropping below 90% health. This comes at a loss of DPS however.
Explanation[edit]
Two ![]() Chronomancers to apply and share Quickness and a plethora of other boons to players in their respective group.
Chronomancers to apply and share Quickness and a plethora of other boons to players in their respective group.
Two ![]() Druids to provide Might, Fury and keeping players topped off (Communicate who brings Frost Spirit and Sun Spirit).
Druids to provide Might, Fury and keeping players topped off (Communicate who brings Frost Spirit and Sun Spirit).
Both Druids are the main responsibility when it comes to Seeker control, coordinate the use of Entangle and Glyph of the Tides
One ![]() Berserker to provide Fury, Banner of Discipline and Banner of Strength.
Berserker to provide Fury, Banner of Discipline and Banner of Strength.
Remaining spots are filled by DPS roles, and should consist of at least one ![]() Condition Damage class, the rest should be
Condition Damage class, the rest should be ![]() Power classes, as Vale Guardian has lower
Power classes, as Vale Guardian has lower ![]() Armor than other bosses.
Armor than other bosses.
Distribute classes based on their main source of damage and potential buffs they apply to a group such as Assassin's Presence and Pinpoint Distribution.
Tips[edit]
During the 66% and 33% phases you should split as follows:
- 1
 Druid, Berserker and 1 Condi DPS take care of the Red Guardian,
 - 1
 Chronomancer pulls the Green Guardian to Blue,
 - The remainder of the group kills the Blue Guardian followed by the Green Guardian.
Try to walk out of blue AoE's rather than dodging, there usually is plenty of time to react. You can also set your Post-Processing and Shaders to "Low" so you can see these AoE's better.
 Coordinate any heavy Crowd Control skills such as Signet of Humility to prevent other players wasting valuable skills.
 Drop Entangle if a
  Soulbeast takes it, this allows for better Celestial Avatar uptime for the Druids.
 On Blue during split should focus on healing once the Green Guardian has been pulled, as the damage from those not attuned to Green hurts a lot more.
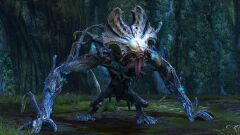
Gorseval the Multifarious[edit]
“
Composition[edit]
| Subgroup | |||||
|---|---|---|---|---|---|
| #1 | |||||
| #2 | |||||
| DPS Classes |
|---|
Explanation[edit]
- Provide and share Quickness and a plethora of other boons to players in their respective group.
- Provide and share Aegis to block Gorseval's Stomp by the clever use of Blurred Inscriptions paired with Illusionary Inspiration.
- Pull in adds with Temporal Curtain.
- Provide Might, Fury and the effects of Spirits (Communicate who brings Frost Spirit and Sun Spirit)
- Keep players topped off for the Superior Rune of the Scholar bonus.
- Hold Charged Soul's, coordinate the use of Entangle and Natural Convergence
- Provide Fury, Banner of Discipline and Banner of Strength.
Remaining spots are filled by DPS roles, preferably those which have a benefit against larger hitboxes, such as a ![]() Weaver, however this comes at a loss in Crowd Control
The classes which have access to ranged AoE, including the
Weaver, however this comes at a loss in Crowd Control
The classes which have access to ranged AoE, including the ![]() Berserker are responsible for clearing Orbs.
Berserker are responsible for clearing Orbs.
Distribute classes based on their main source of damage and potential buffs they apply to a group such as Assassin's Presence and Pinpoint Distribution.
Tips[edit]
During Gorseval's Breakbar phase, avoid the black/blue goop, as it applies 25 Vulnerability and deals heavy damage, unless Distorted by ![]() Chronomancers.
Chronomancers.
 You have a vital role during this phase, dependent on tactic (Fast CC or Slow CC).
- When your group is relying on Slow CC, you have to manage your Celestial Avatar, anticipate when people need the heals the most. As such, try to delay glyphs during this phase if needed.
- When your group is relying on Fast CC, you can usually leave Celestial Avatar early. You do however need to do your share of CC, whether it is using pet skills, Concussion Shot or Lunar Impact.
 Drop Entangle if a Soulbeast takes it, this allows for better Celestial Avatar uptime for the Druids.
 Clear Orbs with a single Lava Font and a few autoattacks.
 Clear Orbs with Scorched Earth.
Sabetha the Saboteur[edit]
“
Composition[edit]
| Subgroup | |||||
|---|---|---|---|---|---|
| #1 | |||||
| #2 | |||||
| #2 | |||||
| Subgroup | |||||
|---|---|---|---|---|---|
| #1 | |||||
| #2 | |||||
| DPS Classes |
|---|
Explanation[edit]
Two ![]() Chronomancers for pulling in adds with Temporal Curtain.
They are also responsible for applying and sharing Quickness and a plethora of other boons to players in their respective group.
Chronomancers for pulling in adds with Temporal Curtain.
They are also responsible for applying and sharing Quickness and a plethora of other boons to players in their respective group.
One ![]() Druid to provide Might, Fury, Frost Spirit, Sun Spirit and keeping players topped off.
Druid to provide Might, Fury, Frost Spirit, Sun Spirit and keeping players topped off.
Additionally a Druid usually picks up the role of kiting Sabetha's Flak shots, baiting and throwing sapper bombs.
(This is however very taxing for inexperienced druids, and can easily be handled by a ![]() Soulbeast, or a
Soulbeast, or a ![]() Scourge, each which come with its own perks).
Scourge, each which come with its own perks).
One ![]() Berserker to provide Fury, Banner of Discipline and Banner of Strength.
Berserker to provide Fury, Banner of Discipline and Banner of Strength.
Remaining spots are filled by DPS roles, of which at least 2 classes pick up the responsability for killing Sabetha's Cannons
(Preferably ![]() Soulbeasts or
Soulbeasts or ![]() Renegades).
Renegades).
Distribute classes based on their main source of damage and potential buffs they apply to a group such as Assassin's Presence and Pinpoint Distribution.
Tips[edit]
During the fights against Kernan, "Knuckles" and Karde, kick Heavy Bombs, use Crowd Control against Knuckles and cleave down Karde's Flame Turrets.
At all costs, avoid Time Bombs exploding ontop of the group.
Position yourself so you don't get hit by cannon AoE.
 Use Quick Shot to jump out before each flak shot while kiting. This allows you to get in some additional damage inbetween Flak shots.
 Cleave down Karde's Flame Turrets with Scorched Earth.
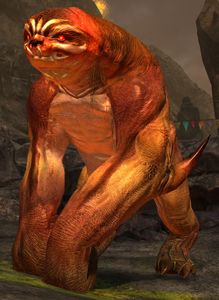
Slothasor[edit]
“
Composition[edit]
| Subgroup | |||||
|---|---|---|---|---|---|
| #1 | |||||
| #2 | |||||
| DPS Classes |
|---|
| N/A |
Alternatively, you could bring one healing Druid if you notice that people are frequently dropping below 90% health. This comes at a loss of DPS however.
Explanation[edit]
Two ![]() Chronomancers to share Distortion for Slothasor's Shake by the clever use of Blurred Inscriptions paired with Illusionary Inspiration, Pulling in adds with Temporal Curtain.
Chronomancers to share Distortion for Slothasor's Shake by the clever use of Blurred Inscriptions paired with Illusionary Inspiration, Pulling in adds with Temporal Curtain.
They are also responsible for applying and sharing Quickness and a plethora of other boons to players in their respective group.
Two ![]() Druids to provide Might, Fury and keeping players topped off (Communicate who brings Frost Spirit and Sun Spirit).
Druids to provide Might, Fury and keeping players topped off (Communicate who brings Frost Spirit and Sun Spirit).
Both Druids are responsable for stunbreaking players in their subgroup with "Protect Me!"
One ![]() Berserker to provide Fury, Banner of Discipline and Banner of Strength.
Berserker to provide Fury, Banner of Discipline and Banner of Strength.
Remaining spots are filled by DPS roles, and should mainly consist of ![]() Power classes, as conditions can easily kill the player who is eating Imbued Mushrooms.
Power classes, as conditions can easily kill the player who is eating Imbued Mushrooms.
DPS Classes with the exception of ![]() Weavers take up the responsibility of eating Imbued Mushrooms.
Weavers take up the responsibility of eating Imbued Mushrooms.
Distribute classes based on their main source of damage and potential buffs they apply to a group such as Assassin's Presence and Pinpoint Distribution.
Tips[edit]
Always drop Volatile Poison next to a wall to avoid a lot of damage to the group.
During Slothasor's Tantrum, don't move too much until the third AoE appears to prevent killing others.
 Bring an offhand Axe if you feel that you need more pulls or projectile reflection. You can also bring Healing Spring if conditions are an issue.
 Swap your healskill to Mantra of Recovery for easy condi cleanse thanks to Mender's Purity.
 Bring "Stand Your Ground!" for Stability, just before Slothasor uses his Fear, but keep in mind it can easily get corrupted by Evolved Slublings.
 Be careful when using Scorched Earth, it can easily kill the player who is eating Imbued Mushrooms.
Berg, Zane & Narella[edit]
“
Composition[edit]
| Subgroup | |||||
|---|---|---|---|---|---|
| #1 | |||||
| #2 | |||||
| DPS Classes |
|---|
Explanation[edit]
Two ![]() Chronomancers to share Distortion by the clever use of Blurred Inscriptions paired with Illusionary Inspiration, Pulling in adds with Temporal Curtain.
Chronomancers to share Distortion by the clever use of Blurred Inscriptions paired with Illusionary Inspiration, Pulling in adds with Temporal Curtain.
They are also responsible for applying and sharing Quickness and a plethora of other boons to players in their respective group.
Two ![]() Druids to provide Might, Fury and keeping players topped off (Communicate who brings Frost Spirit and Sun Spirit).
Druids to provide Might, Fury and keeping players topped off (Communicate who brings Frost Spirit and Sun Spirit).
One ![]() Berserker to provide Fury, Banner of Discipline and Banner of Strength.
Berserker to provide Fury, Banner of Discipline and Banner of Strength.
Remaining spots are filled by DPS roles, and should mainly consist of classes with high amounts of cleave.
Distribute classes based on their main source of damage and potential buffs they apply to a group such as Assassin's Presence and Pinpoint Distribution.
Tips[edit]
Assign one player with enough Crowd Control to take care of Mortars. Usually this would be the ![]() Berserker or a
Berserker or a ![]() Daredevil. You will need to be able to break 3 Breakbars each with a strength of 200.
Daredevil. You will need to be able to break 3 Breakbars each with a strength of 200.
Don't use up all Beehives on Berg, save some at the cage to use while fighting Narella, they can easily break a Bandit Saboteur's breakbar, while you're busy doing something else.
Try to stay between Zane and the outer wall to prevent him hitting the cage.
Matthias Gabrel[edit]
“
Composition[edit]
| Subgroup | |||||
|---|---|---|---|---|---|
| #1 | |||||
| #2 | |||||
| #3 | |||||
| DPS Classes |
|---|
Explanation[edit]
Two ![]() Chronomancers to share Distortion by the clever use of Blurred Inscriptions paired with Illusionary Inspiration, reflecting Blood Shards with Feedback to remove his Blood Shield.
Chronomancers to share Distortion by the clever use of Blurred Inscriptions paired with Illusionary Inspiration, reflecting Blood Shards with Feedback to remove his Blood Shield.
They are also responsible for applying and sharing Quickness and a plethora of other boons to players in their respective group.
One ![]() Druid to provide Might, Fury, Regeneration, Frost Spirit, Stone Spirit, Sun Spirit and keeping players topped off.
Druid to provide Might, Fury, Regeneration, Frost Spirit, Stone Spirit, Sun Spirit and keeping players topped off.
Druid is also responsible for absorbing every projectile from Matthias's Vault using Sublime Conversion.
One ![]() Berserker to provide Fury, Banner of Discipline and Banner of Strength.
Berserker to provide Fury, Banner of Discipline and Banner of Strength.
Remaining spots are filled by DPS roles, and should mainly consist of ![]() Condition Damage classes due to Matthias moving around a lot, and a lot of mechanics that require players to move a lot.
Keep in mind that at least a fair amount of Crowd Control is needed to prevent people from getting sacrificed.
Condition Damage classes due to Matthias moving around a lot, and a lot of mechanics that require players to move a lot.
Keep in mind that at least a fair amount of Crowd Control is needed to prevent people from getting sacrificed.
Distribute classes based on their main source of damage and potential buffs they apply to a group such as Assassin's Presence and Pinpoint Distribution.
Tips[edit]
Communicate when you are knocked down during the Downpour phase so people know that you can not move out during Timed Bombs.
 Bring Spirit of Nature for additional health regeneration and Stability during the Downpour phase.
 Bring Healing Spring to negate a lot of the incoming conditions.
 Swap out Juvenile Lynx for Juvenile Warthog for some additional Crowd Control while still maintaining roughly the same DPS
 Bring Healing Turret to negate a lot of the incoming conditions.
 Bring Signet of Humility and communicate with others for Crowd Control.
 Bring Wild Blow instead of "For Great Justice!" for more Crowd Control.
Siege the Stronghold[edit]
“
Composition[edit]
| Subgroup | |||||
|---|---|---|---|---|---|
| #1 | |||||
| #2 | |||||
| DPS Classes |
|---|
Alternatively, you could bring one healing Druid if you notice that people are frequently dropping below 90% health. This comes at a loss of DPS however.
Explanation[edit]
Two ![]() Chronomancers to share Distortion if needed by the clever use of Blurred Inscriptions paired with Illusionary Inspiration, Pulling in adds with Temporal Curtain.
Chronomancers to share Distortion if needed by the clever use of Blurred Inscriptions paired with Illusionary Inspiration, Pulling in adds with Temporal Curtain.
They are also responsible for applying and sharing Quickness and a plethora of other boons to players in their respective group.
One Chronomancer is responsible for teleporting people up to the Towers with Portal Entre → Portal Exeunt.
Two ![]() Druids to provide Might, Fury and keeping players topped off (Communicate who brings Frost Spirit and Sun Spirit).
Druids to provide Might, Fury and keeping players topped off (Communicate who brings Frost Spirit and Sun Spirit).
One Druid will be part of the group that secures the Towers.
One ![]() Berserker to provide Fury, Banner of Discipline and Banner of Strength.
Berserker to provide Fury, Banner of Discipline and Banner of Strength.
Remaining spots are filled by DPS roles, and should consist of at least one ![]() Condition Damage class to slow down Warg Bloodhounds in the back, so a certain amount of Immobile, Crippled or Chilled is needed so you can easily kill it by yourself.
Condition Damage class to slow down Warg Bloodhounds in the back, so a certain amount of Immobile, Crippled or Chilled is needed so you can easily kill it by yourself.
Distribute classes based on their main source of damage and potential buffs they apply to a group such as Assassin's Presence and Pinpoint Distribution.
Tips[edit]
Don't run too far ahead, specifically near towers which aren't secured. You can get knocked back by any Turret AoE, which in turn can knock you into mines.
 Bring an offhand Axe if you feel that you need more pulls or projectile reflection.
 Bring Glyph of the Tides if you are part of the group that secures Towers, you can easily push enemies outside of the capture circle for instant capture.
 Bring Entangle if you need additional Immobile for any Warg Bloodhounds coming from the front.
 Slow down a Warg Bloodhound using Pin Down and Flurry.
 Drop a Fiery Greatsword at the cave entrance for the Chronomancer.
 Use Darkrazor's Daring if you are part of the group that secures Towers if you want to have less issues clearing enemies.
Keep Construct[edit]
“
Composition[edit]
| Subgroup | |||||
|---|---|---|---|---|---|
| #1 | |||||
| #2 | |||||
| DPS Classes |
|---|
| N/A |
Explanation[edit]
Two ![]() Chronomancers to share Distortion if needed by the clever use of Blurred Inscriptions paired with Illusionary Inspiration, Pulling the Construct Core with Temporal Curtain.
Chronomancers to share Distortion if needed by the clever use of Blurred Inscriptions paired with Illusionary Inspiration, Pulling the Construct Core with Temporal Curtain.
They are also responsible for applying and sharing Quickness and a plethora of other boons to players in their respective group.
Two ![]() Druids to provide Might, Fury and keeping players topped off (Communicate who brings Frost Spirit and Sun Spirit).
Druids to provide Might, Fury and keeping players topped off (Communicate who brings Frost Spirit and Sun Spirit).
One Druid will be responsible for pushing the Construct Core with the help of Chronomancers.
One ![]() Berserker to provide Fury, Banner of Discipline and Banner of Strength.
Berserker to provide Fury, Banner of Discipline and Banner of Strength.
Remaining spots are filled by DPS roles, and should consist only of ![]() Power classes due to the burst phases being so short. The ideal choice would be 5
Power classes due to the burst phases being so short. The ideal choice would be 5 ![]() Weavers due to the effectiveness of Tempest Defense paired with Superior Sigil of Impact
Weavers due to the effectiveness of Tempest Defense paired with Superior Sigil of Impact
Distribute classes based on their main source of damage and potential buffs they apply to a group such as Assassin's Presence and Pinpoint Distribution.
Tips[edit]
 Keep everyone topped off while the other Druid is pushing the Construct Core.
 Cast Astral Wisp during the Bullet Hell phase for easy Celestial Avatar generation and minor healing.
 Bring a Shield with Superior Sigil of Paralyzation for increased breakbar damage.
 Use weapons with Superior Sigil of Impact over Superior Sigil of Air.
 Swap "For Great Justice!" for Wild Blow for more Crowd Control.
Xera[edit]
“
Composition[edit]
| Subgroup | |||||
|---|---|---|---|---|---|
| #1 | |||||
| #2 | |||||
| DPS Classes |
|---|
Explanation[edit]
Two ![]() Chronomancers to share Distortion if needed by the clever use of Blurred Inscriptions paired with Illusionary Inspiration, [ulling in adds with Temporal Curtain.
Chronomancers to share Distortion if needed by the clever use of Blurred Inscriptions paired with Illusionary Inspiration, [ulling in adds with Temporal Curtain.
They are also responsible for applying and sharing Quickness and a plethora of other boons to players in their respective group.
Two ![]() Druids to provide Might, Fury and keeping players topped off (Communicate who brings Frost Spirit and Sun Spirit).
Druids to provide Might, Fury and keeping players topped off (Communicate who brings Frost Spirit and Sun Spirit).
One ![]() Berserker to provide Fury, Banner of Discipline and Banner of Strength.
Berserker to provide Fury, Banner of Discipline and Banner of Strength.
Remaining spots are filled by DPS roles, and should consist only of classes with high amounts of cleave and ranged AoE such as ![]() Weavers and
Weavers and ![]() Holosmiths.
Holosmiths.
Distribute classes based on their main source of damage and potential buffs they apply to a group such as Assassin's Presence and Pinpoint Distribution.
Tips[edit]
Try to avoid applying Confusion to Xera and adds that are inside Bloodstone Shard AoE's as this will convert into Retaliation and will quickly kill any DPS classes.
Always clear 4 shards around the required area so there is enough space to move freely during bullet hell phases.
 Bring an offhand Axe if you feel that you need more pulls or projectile reflection.
 Cleave Bloodstone Shards with Scorched Earth.
