Forsaken Fortune
Forsaken Fortune
- Type
- Mini-dungeon
- Area
- Forsaken Halls
(Dredgehaunt Cliffs)
| Image(s) |
|
Click to enlarge. |
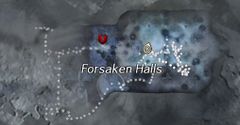
Forsaken Fortune is an Explorer achievement and mini-dungeon in Dredgehaunt Cliffs.
Achievement[edit]
| Forsaken Fortune | Explorer | 10 |
|---|---|---|
| Discover the hidden riches of Forsaken Halls.Delving into darkness. | Exploration Achievement | 10 |
Getting there[edit]
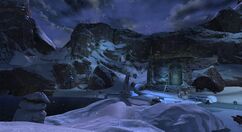
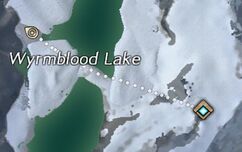
To begin the mini-dungeon, go to Wyrmblood Waypoint — and travel west, crossing the Wyrmblood Lake, to inspect the Sealed Dwarven Door. If you cannot interact with the door, it has not yet finished its 20-minute reset from the last event. A note on the door directs you to Travelen's Steading to the northeast. There, speak to Gerrvid who tells you to read the 3 books in front of him (Working with Deldrimor Steel, Dwarven Defensive Strategies, and Lost Treasures of the Dwarven World). After you do, speak with Gerrvid again to tell him you solved the riddle. This triggers the event Escort Gerrvid to the dwarven ruins to lead Gerrvid back to the door, which he will then open so you can enter the Forsaken Halls. This mini-dungeon consists of 3 sections.
Walkthrough[edit]
- Entering the tombs
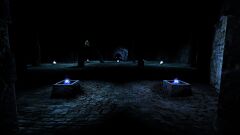
The first room teaches you the basic mechanic used throughout the entire dungeon: light management. The room is pitch black with a number of spike traps and invulnerable enemies. The torch skills light the room and keep foes away from you, so learn how to keep them going. Use the third skill (Bonfire) to light the area near you and the second (Throw Torch) to light an area ahead of you. Avoid the raised sections of the floor (the traps) and dodge cave-ins (big red circles), since the first can do considerable damage and the second will put out your torch.
As you escort Gerrvid across the room, you'll come to another locked door. To make it through, you must scavenge for door pieces located in lootable piles of "Rubble". Turn in the needed pieces to advance to the next room.
- Jumping
The next section is a jumping puzzle in the darkness. There are two main routes: follow Gerrvid or go around. The first method should be easy enough for experienced puzzle jumpers, but the second is a lot easier. If you fall, you will die, but be transported back to the beginning, even if you are in combat. Here, as in the first area, use the torches to light your way and scare foes away. Throw Torch is good at lighting up your target location for the end of your jump.
Gerrvid makes three quick jumps that are relatively simple, but his fourth can be tricky; be cautious of the shadow from the swinging object above which can mislead you as to the length of the jump. Alternatively, instead of following the NPC, continue along the crossbeam from which he starts his first jump. At the end is a shorter jump (with more room to run over). From there, jump to the bottom of a wide set of stairs and make your way to the top of the first flight. There will be a number of bats and they are easier to defeat using your regular skills; there is also a place to grab some more torches around the corner.
From the top of the first flight, there is a ruined wall with a pole. Stand just below the pole (on the wall) and jump to the ledge below to join up with Gervvid again.
Once you manage to make it across the room, Gerrvid will ask you to help once again in opening the doors by pulling levers throughout the room. Once you get close to the place, torches will light and bats will attack you.
- When coming in to the second room keep walking and where Gerrvid makes his first jump(to the left) You go straight. Then walk further and go to second right. The distance between the jump and the cliff is a big gap and swiftness might help (but is not strictly necessary). The levers are at the left side of the platform (hidden from view).
- Near Gerrvid's third jump.
- Top of the stairs in the alternate route.
- Just to the left of Gerrvid's new position; you must jump down to it. (or instead of climbing the stairs walk along the lower area)
- Boss room
Once the levers are triggered, speak to Gerrvid to open the sealed doors and take a few steps in to an overlook. Pull the chain on the wall to right to drop a set of braziers, which will illuminate the room and scare away the Skelk and Grubs. However, it also causes the boss, a Veteran Fleshgrazer, to spawn and knock out Gerrvid. Fight the boss using your normal skills. The boss can teleport you or self-teleport and extinguish a brazier, which causes the invulnerable skelk to reappear. If that happens, immediately grab a torch from another brazier and light any dark ones. Avoid traps and you should have no trouble defeating the boss.
Alternatively, you can pull the boss over to the original entrance of Forsaken Fortune and fight around the two original braziers, which cannot be extinguished. This will keep all the invulnerable skelk and grubs out of the fight, making it a little bit easier.
However, if you die at this point, you don't auto res at the entrance to the room like you do the others. You have to res at a waypoint outside the mini dungeon and have to start all over again.
The boss' death triggers the spawning of the Dwarven Treasure and provides an achievement. Players will only be able to see and interact with the chest if they got credit for the event to defeat the boss.
Five minutes after the boss is killed the inner door shuts and about 1 minute later the anyone inside either room is transported to the now-locked outside door.
NPCs[edit]
Allies[edit]
Foes[edit]
Objects[edit]
Notes[edit]
- Forsaken Fortune and Griffonrook Run are the two areas of the Shiverpeak Mountains which are often missed by players due to them being hard to reach and the fact that neither has any map-tagged hint of their location (no Waypoint, Point of Interest, Renown Heart, Hero point or Vista).
- The Box of Captured Light needed to craft Mawdrey is found in the second room.
- There are no restrictions on Mounts in this area. The jumping puzzle can be navigated through using a Griffon or Skyscale, but you do not gain the benefits of the torch.
Related achievements[edit]
 Legendary Weapons: Twilight III: Dusk — It is always darkest before the dawn, and within that gloom lies great potential and power. Use your crafted Gloominator to pull the gloom from the land in your journey to create the legendary precursor Dusk. (3
 )
) Legendary Weapons: HOPE IV: The Catalyst — Let magical energy and alchemical potions combine as you bring the energies of asura and hylek together to create and charge a more perfect weapon, gaining the Gift of the Catalyst, the penultimate step in your journey to gain HOPE, the legendary pistol. (3
 )
) Visions of the Past: Steel and Fire: Ranoah Grindsteel's Footsteps — Collect items related to Ranoah Grindsteel's history to earn her signature Steel Warband pistol. (10
 )
)


